NotificationX Pro lets you add ‘Evergreen Timer’ option for your Notification Bar. This option uses cookies as trackers so the timer will start as soon as the user visits the site for the first time. By applying this amazing technique, you can make your promotional offers exclusive and create urgency among your site visitors. Check out this below guideline to see how to configure the ‘Evergreen Timer’ option with NotificationX:
Note: If you enable ‘Evergreen Timer’ option, it will use the browser ‘Cookies’ to function. When a visitor clears browser cookies, a new time will be shown.
Step 1: Create a Notification Bar #
First of all, Go to your WordPress Dashboard and navigate to wp-admin -> NotificationX -> All NotificationX. Then right from the top, click on ‘Add New’.

After you are done, you will be redirected to the ‘Source’ Tab page of your NotificationX. You can give your notification alert a custom name. Select ‘Notification Bar’ as your notification type and your notification source will automatically be chosen to be ‘Press Bar’. Then click on the ‘Next’ button.

Step 2: Configure Evergreen Timer #
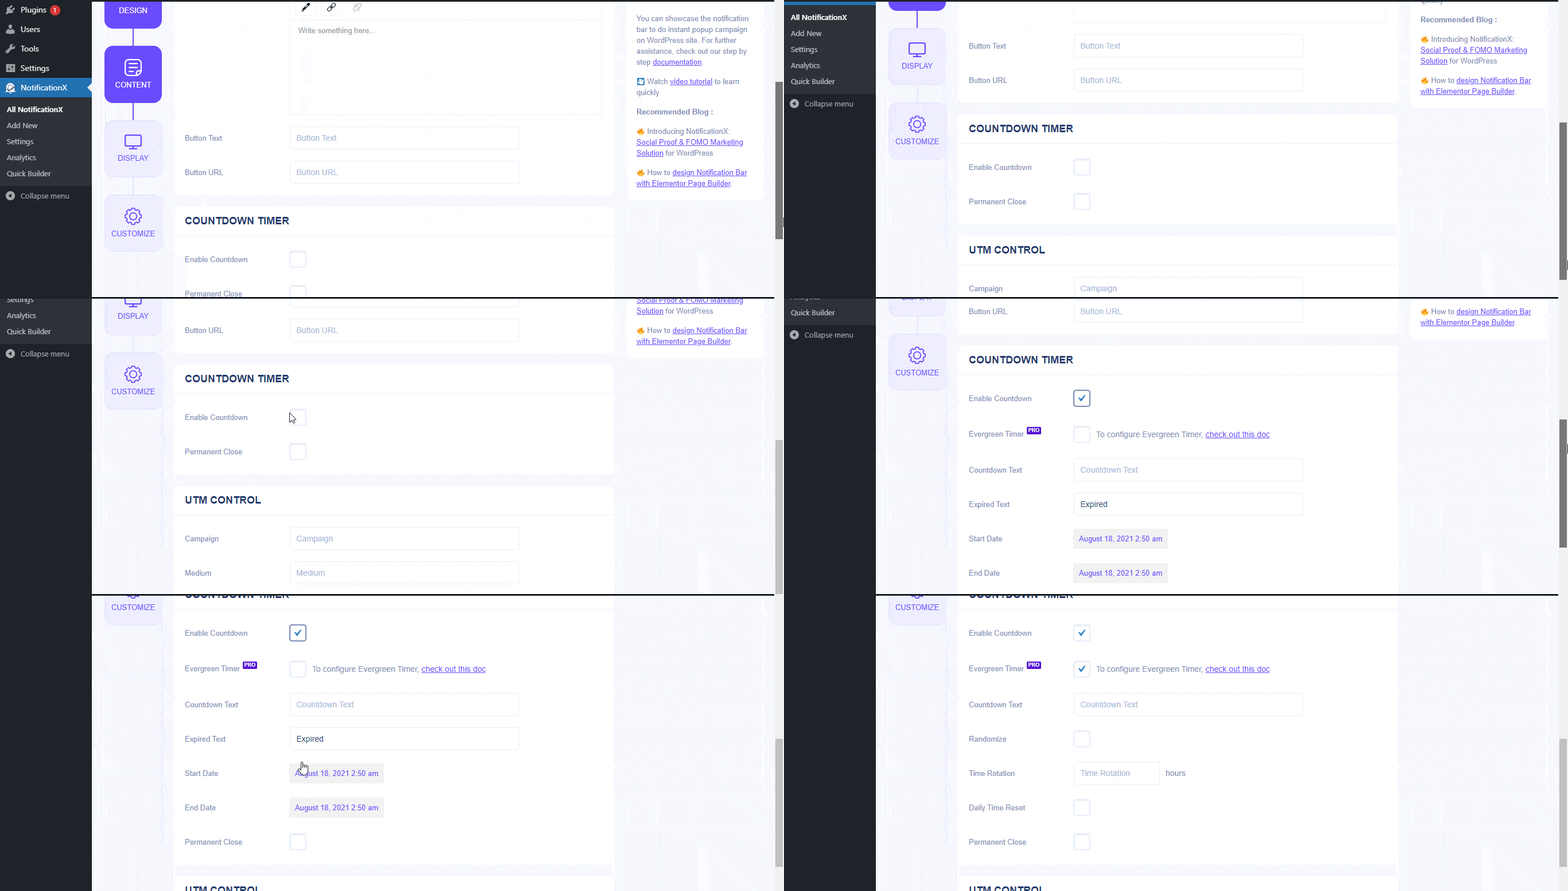
From ‘Content’ tab, simply just go ahead and enable the ‘Countdown’ option. You will then find the ‘Evergreen Timer‘ option. Turn on the ‘Evergreen Timer’ feature and you will find all the related settings.

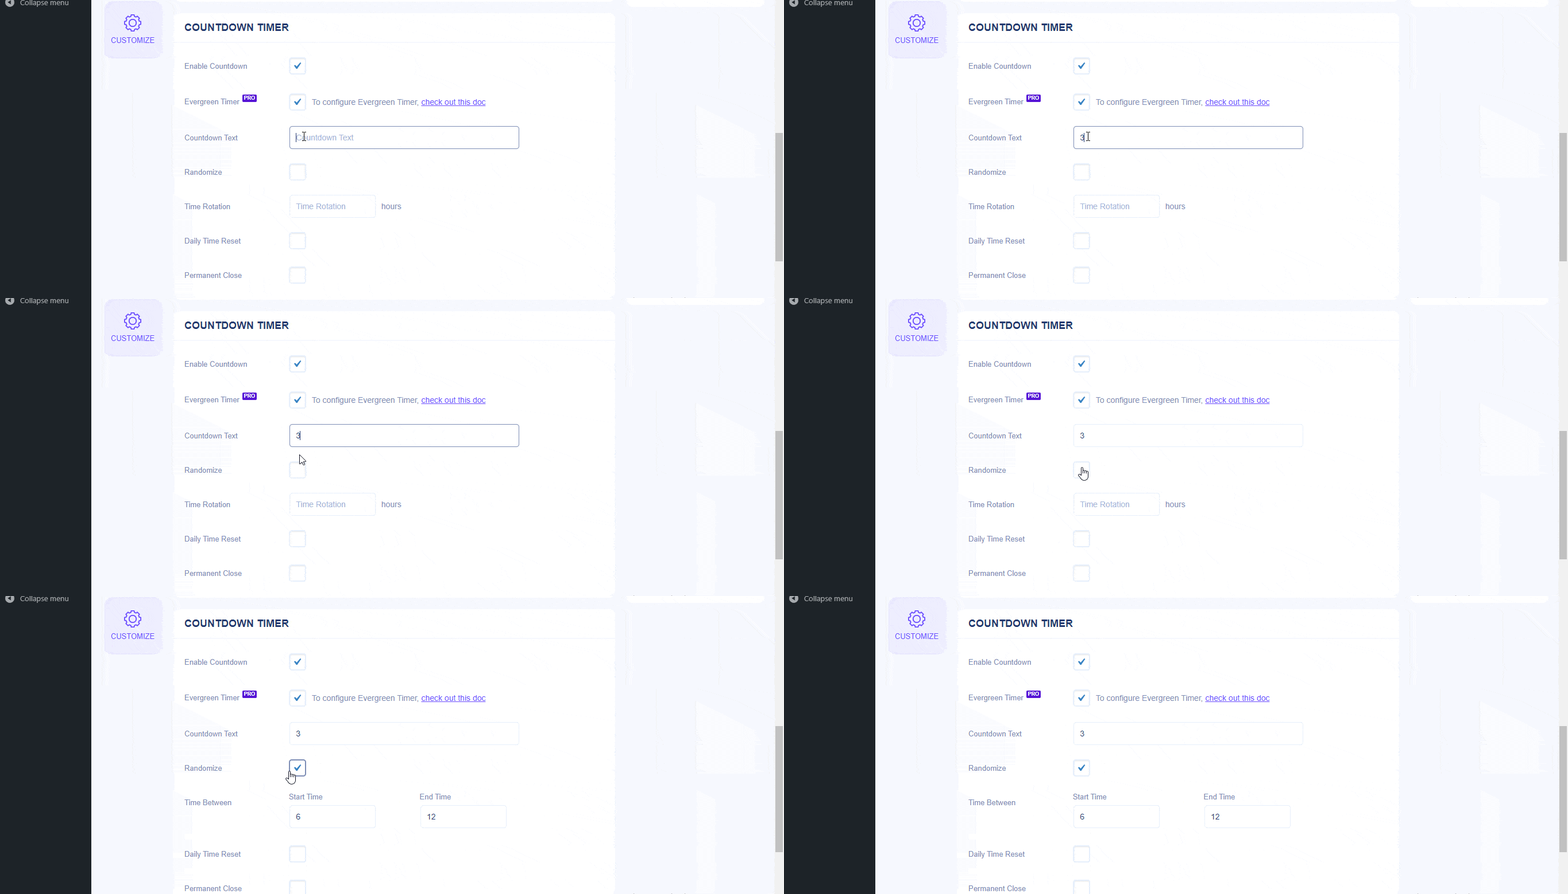
You can add your own Countdown text if you want. From the ‘Time Rotation’ option, you can set the time duration of your countdown. It will determine how many hours the notification bar will appear on the site. After that selected time period, the notification bar will automatically disappear.
Moreover, you can set up random times for your countdown using the ‘Randomize’ option. To do that, turn on this option and it will come up with the ‘Time Between’ section. Afterward, you can simply just define the time intervals. For instance, if your time interval is set to 6 to 12 Hours. Your time will be randomized based on those certain hours so your site visitors will notice coming up like “9:00:00 Hours remaining”.

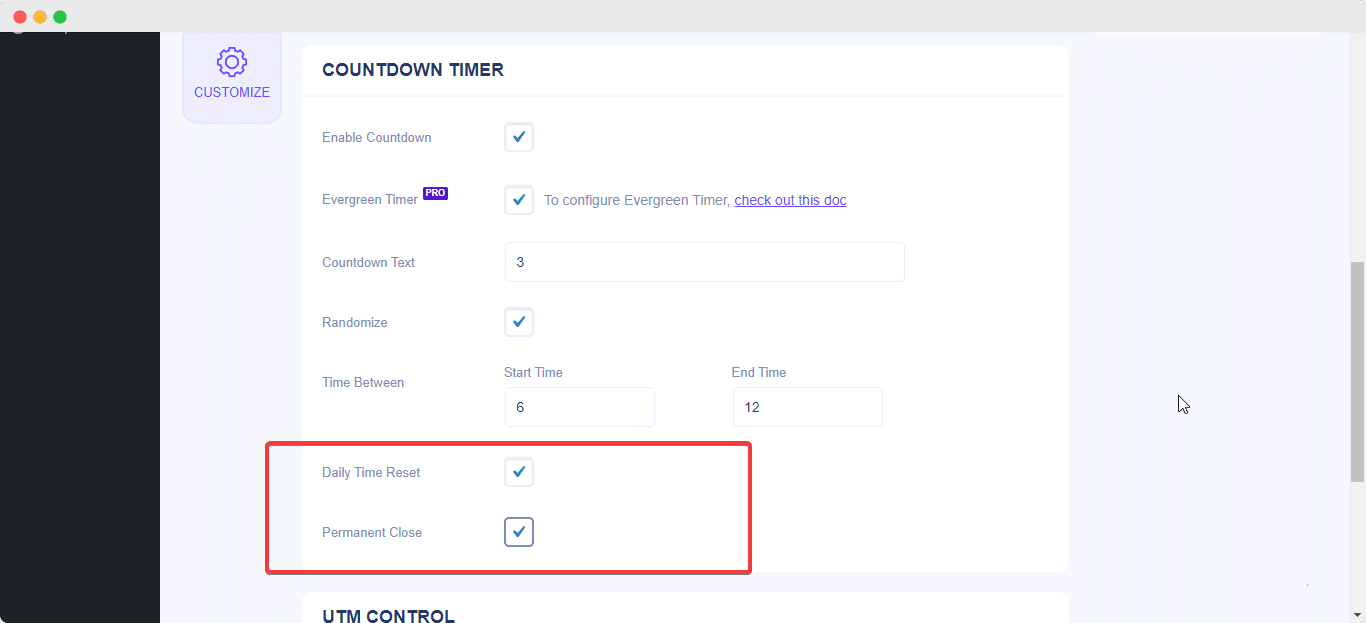
By enabling the ‘Daily Time Reset’ option, your notification will automatically be reset each day following the Evergreen Countdown you have set above. If you want you can close the countdown forever using the ‘Permanent Close’ option.

Final Outcome #
To learn more steps on how to configure the notification bar, you can check out the detailed documentation here. By following these mentioned steps and a bit more modifying, this is how your Notification Bar with Evergreen Timer will appear on your WordPress website:
This is how you can easily configure Evergreen Countdown with Notification Bar for your WordPress website using NotificationX and boost your sales in the process.
If you face any issues, you can contact our Support Team.


