NotificationX Pro offers you advanced template features to provide you full freedom to design your ready sales, download counts, e-learning notification templates, page analytics, or others as per your requirement. Check out the guideline to see how to configure NotificationX Advanced Template option and make your live notifications standout below:
Step 1: Go To ‘All NotificationX’ Dashboard #
Make sure you have installed & activated NotificationX Pro plugin on your WordPress website. If you have already done it, you are then all ready to configure this NotificationX Advanced Template design option.
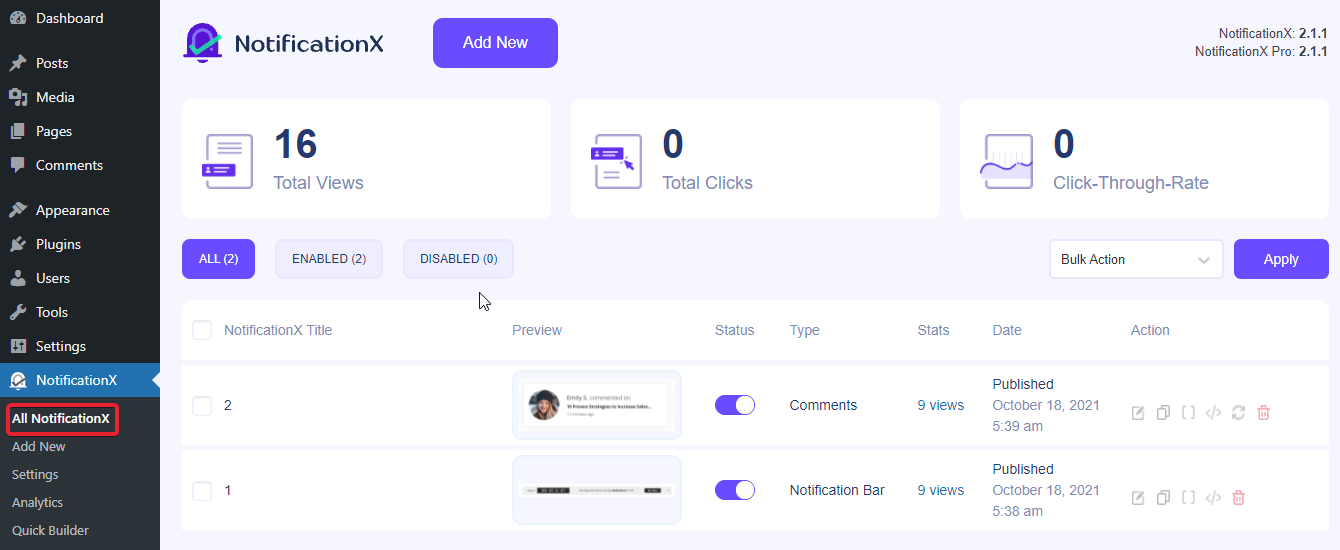
First, navigate to NotificationX → All NotificationX dashboard. From there choose any of your live notification popups or create a new one.
Note: If you have newly installed & activated NotificationX from your website, you can then follow one of these detailed documentation steps to create multiple live notification popups.

Step 2: Configure Source & Design Tab #
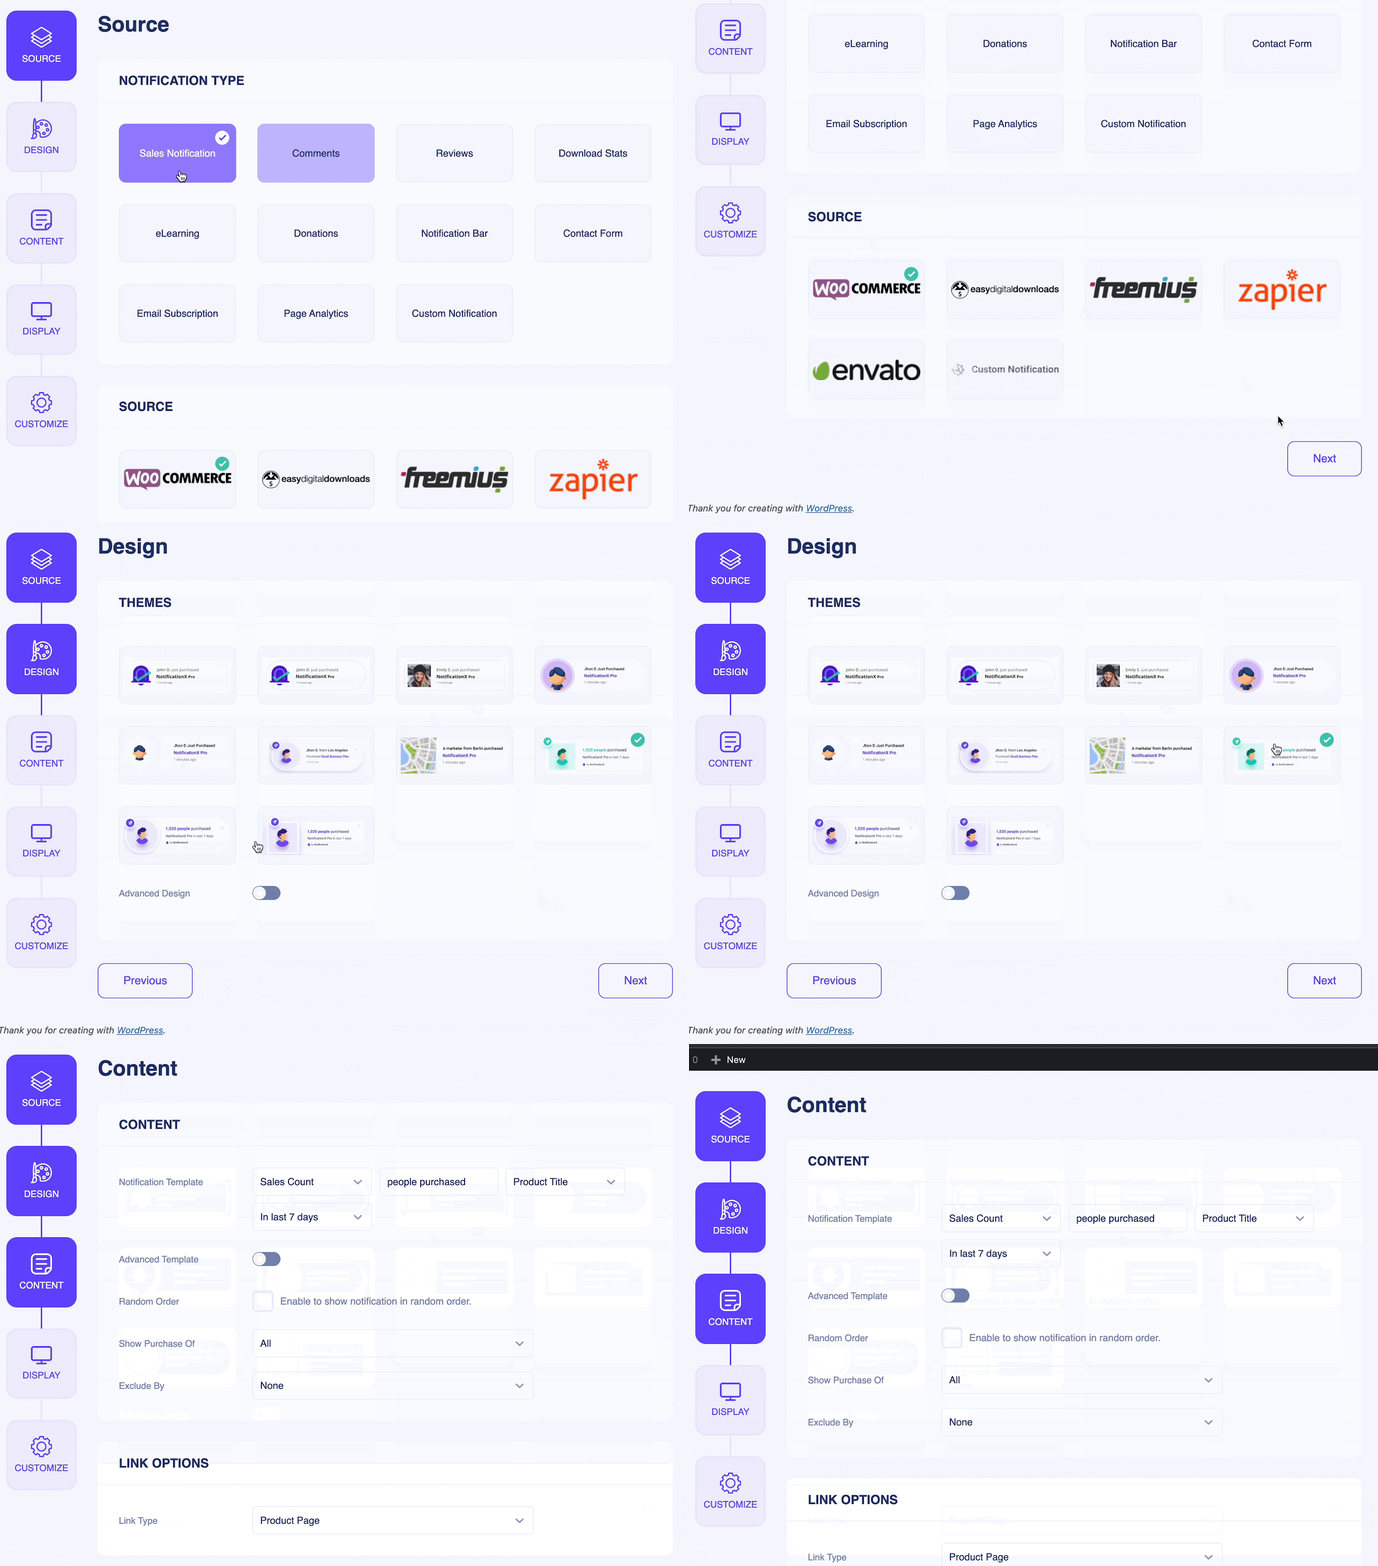
Afterward, configure your NotificationX live notification ‘Source’ and ‘Design’ tab. Here we will pick Source → Sales. And from the Design tab, choose any of the ready three ‘Sales Count’ templates.
Moreover, for any live notifications, you can customize your default template content to any as per your preference.

Step 3: Enable Advanced Template Option From Content #
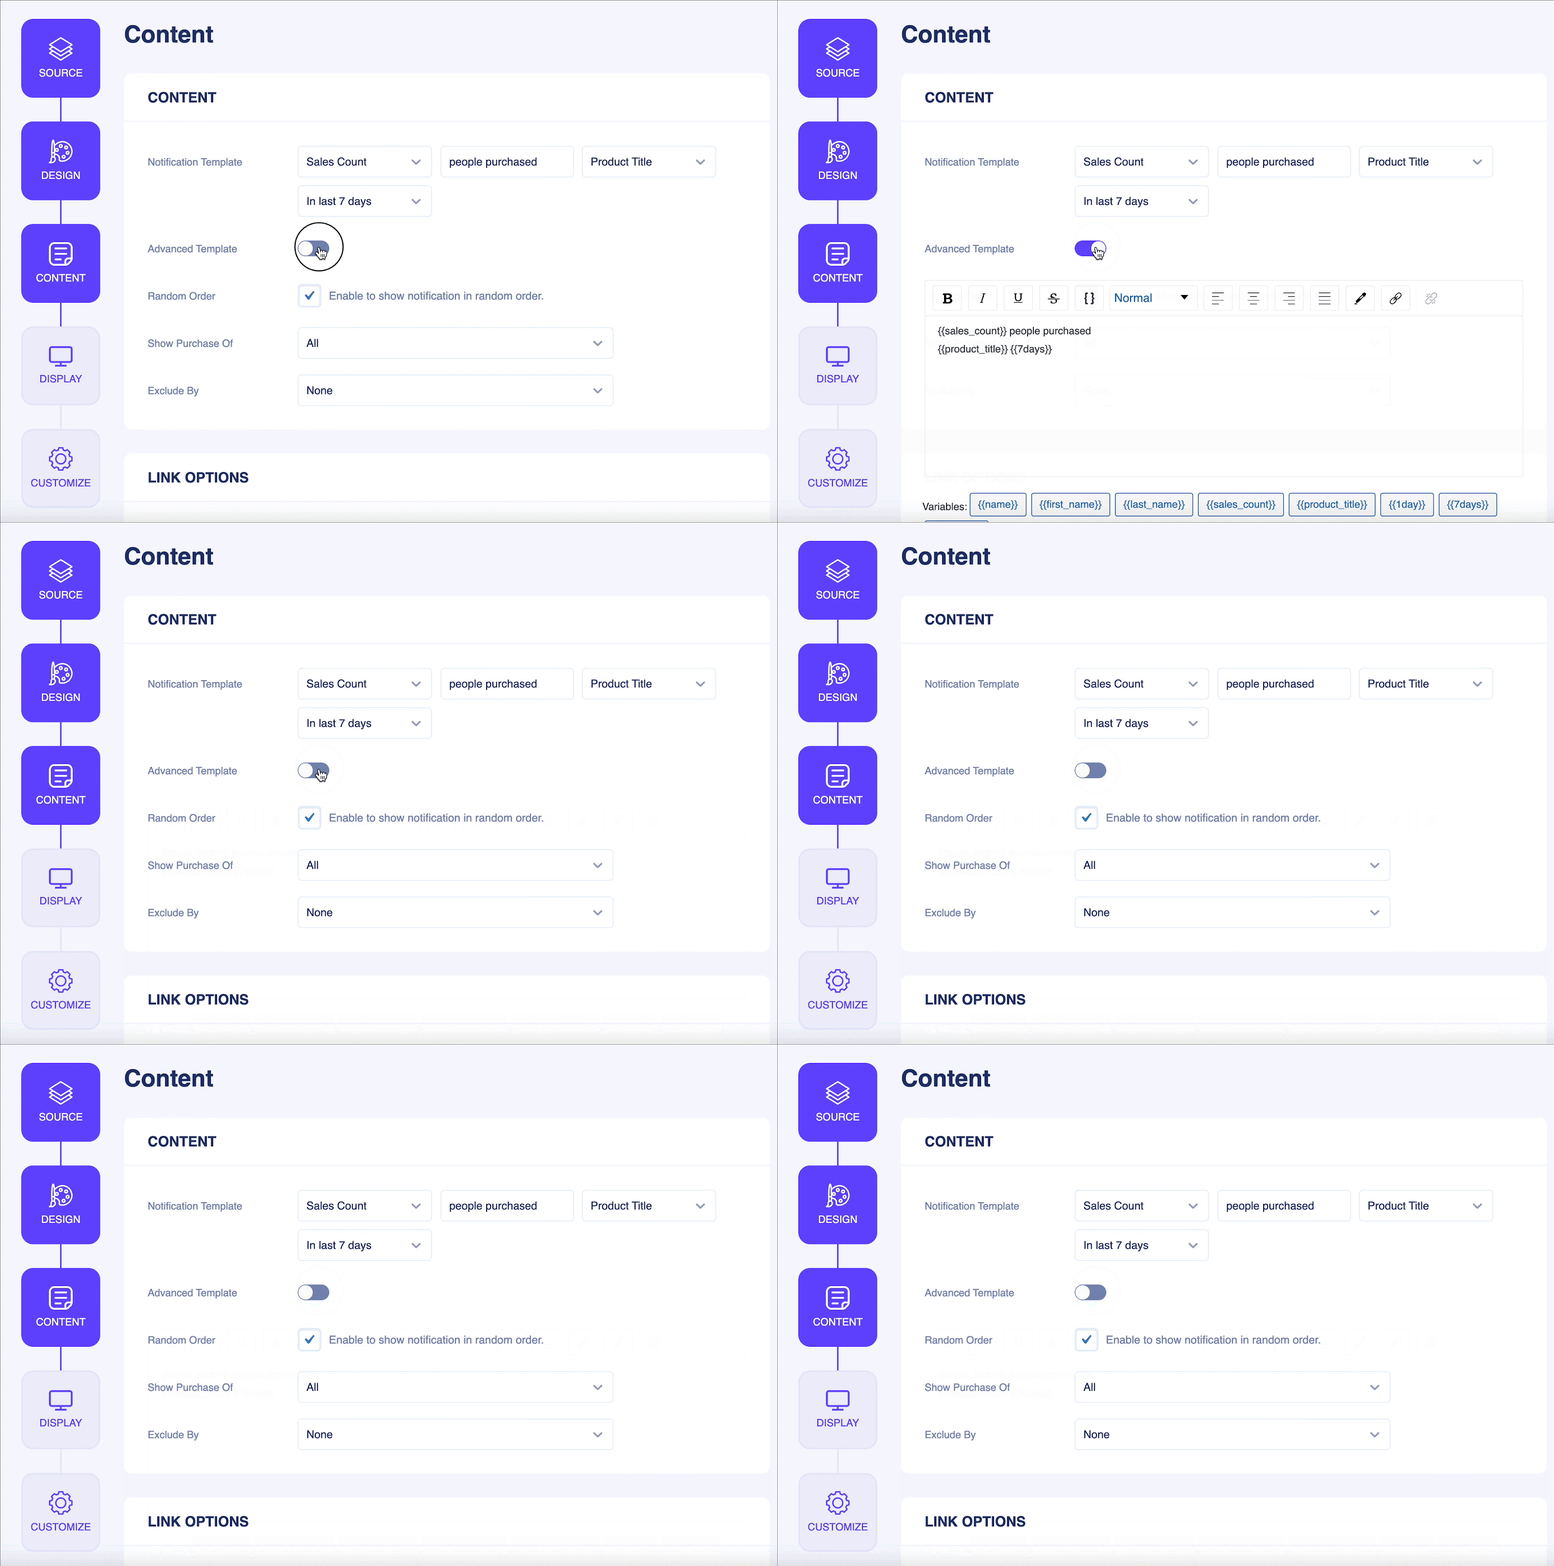
Afterward, navigate and enable toggle to the Content → Advanced Template option. As here sales count notification is being configured.
You can easily set the time with {{7days}} tag or others to let visitors know these purchases are ‘in the last 7 days. Similarly, if you set {{day:7}}, you are able to display ‘7 days’ sales in your sales count notifications.
Note: You are only able to display these days count tags only to your Sales, Donation, e-Learning, or Page Analytics notification alerts where counts matter.

Besides, you can change any of your live notification colors, add target links, direct variables, and more by configuring this NotificationX Advanced Template option.

Final Outcome #
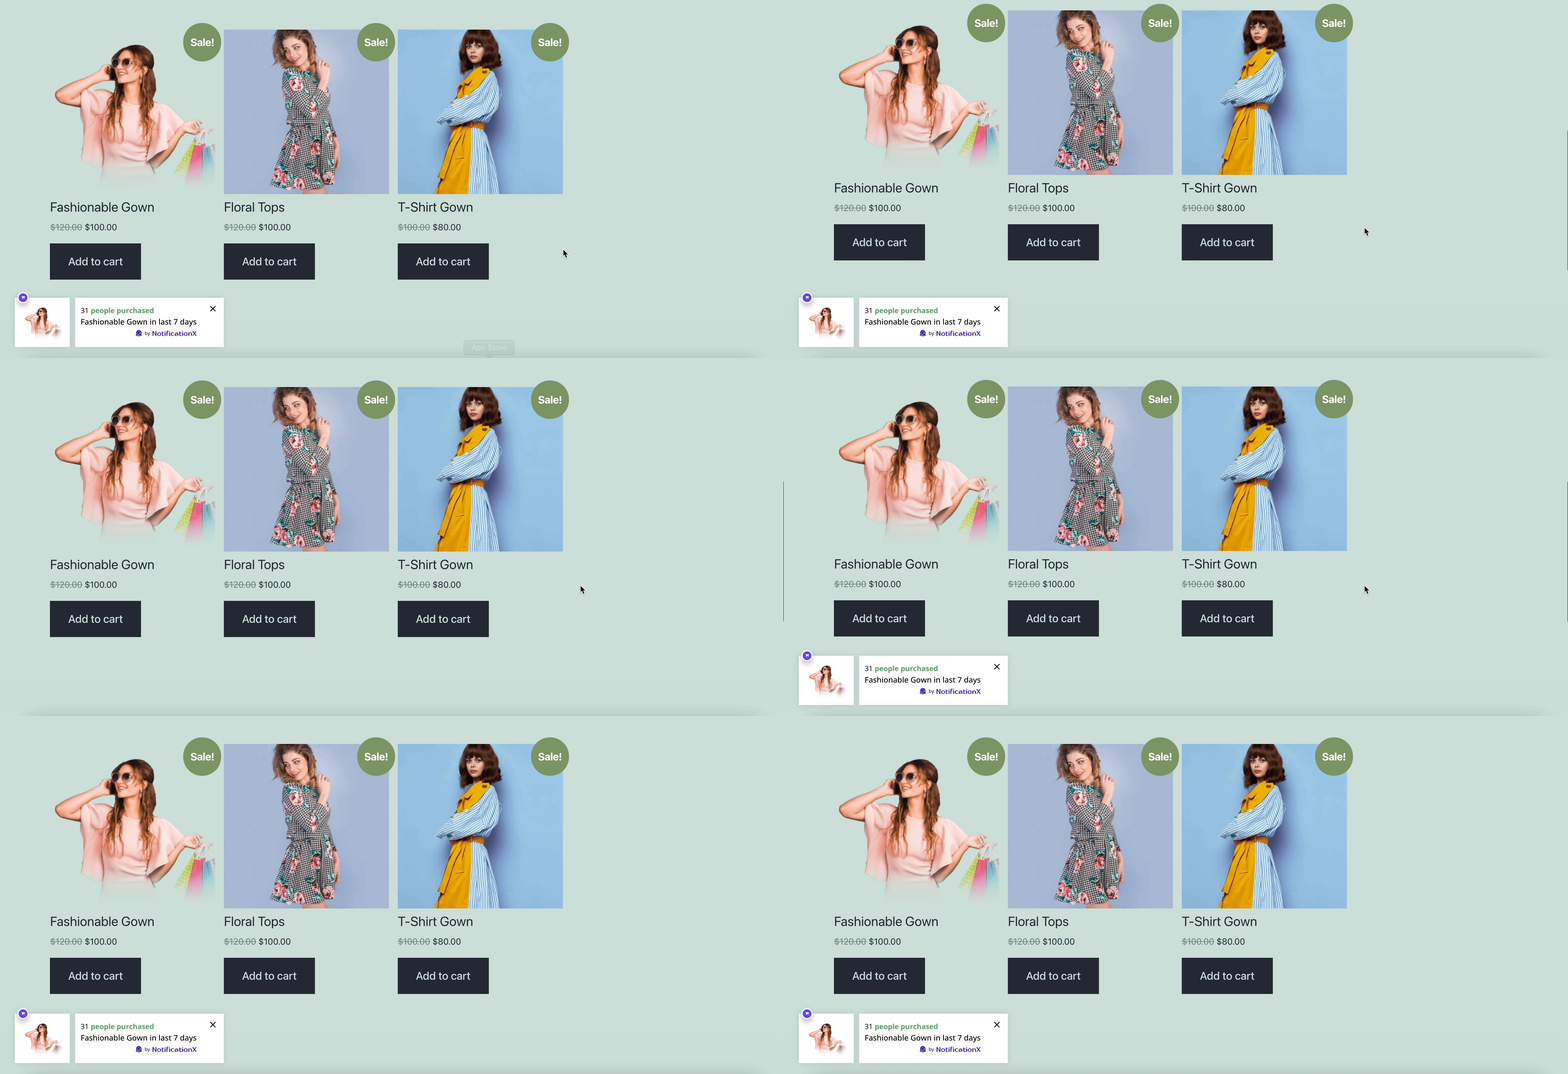
By following these mentioned steps and a bit more modifying, this is how you can configure NotificationX Advanced Template options using NotificationX Pro.

That’s it! This is how easily you can configure the NotificationX Advanced Template option to design your live notifications more interactively.
Getting Stuck? If you face any issues, you can contact our Support Team.


