How to Use Notification Bar in NotificationX? #
Notification Bar lets you display an important notice or special offers on your website to immediately grab the attention of your visitors. With NotificationX, you can easily design a fascinating Notification Bar on your WordPress website to keep everyone engaged.
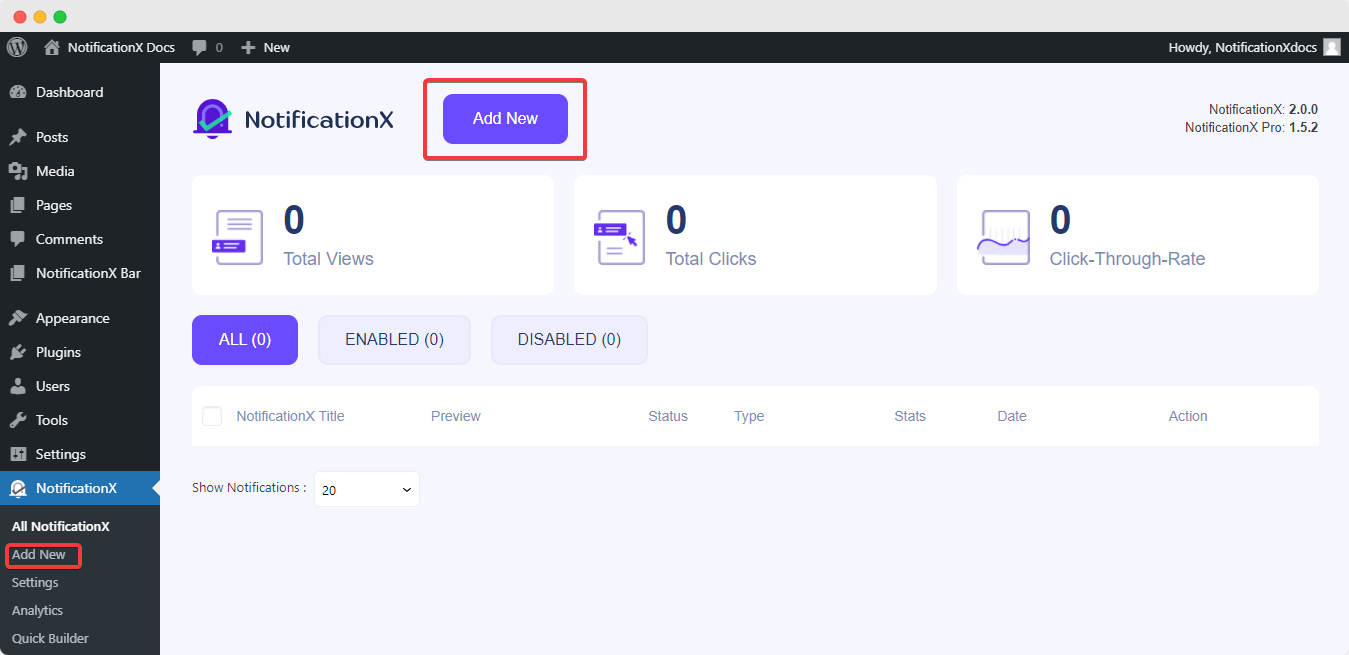
Step 1: Go to your WordPress Dashboard and navigate to wp-admin -> NotificationX -> All NotificationX. Then right at the top, click on ‘Add New’. Or you can also simply go to the ‘Add New’ tab from the sidebar.
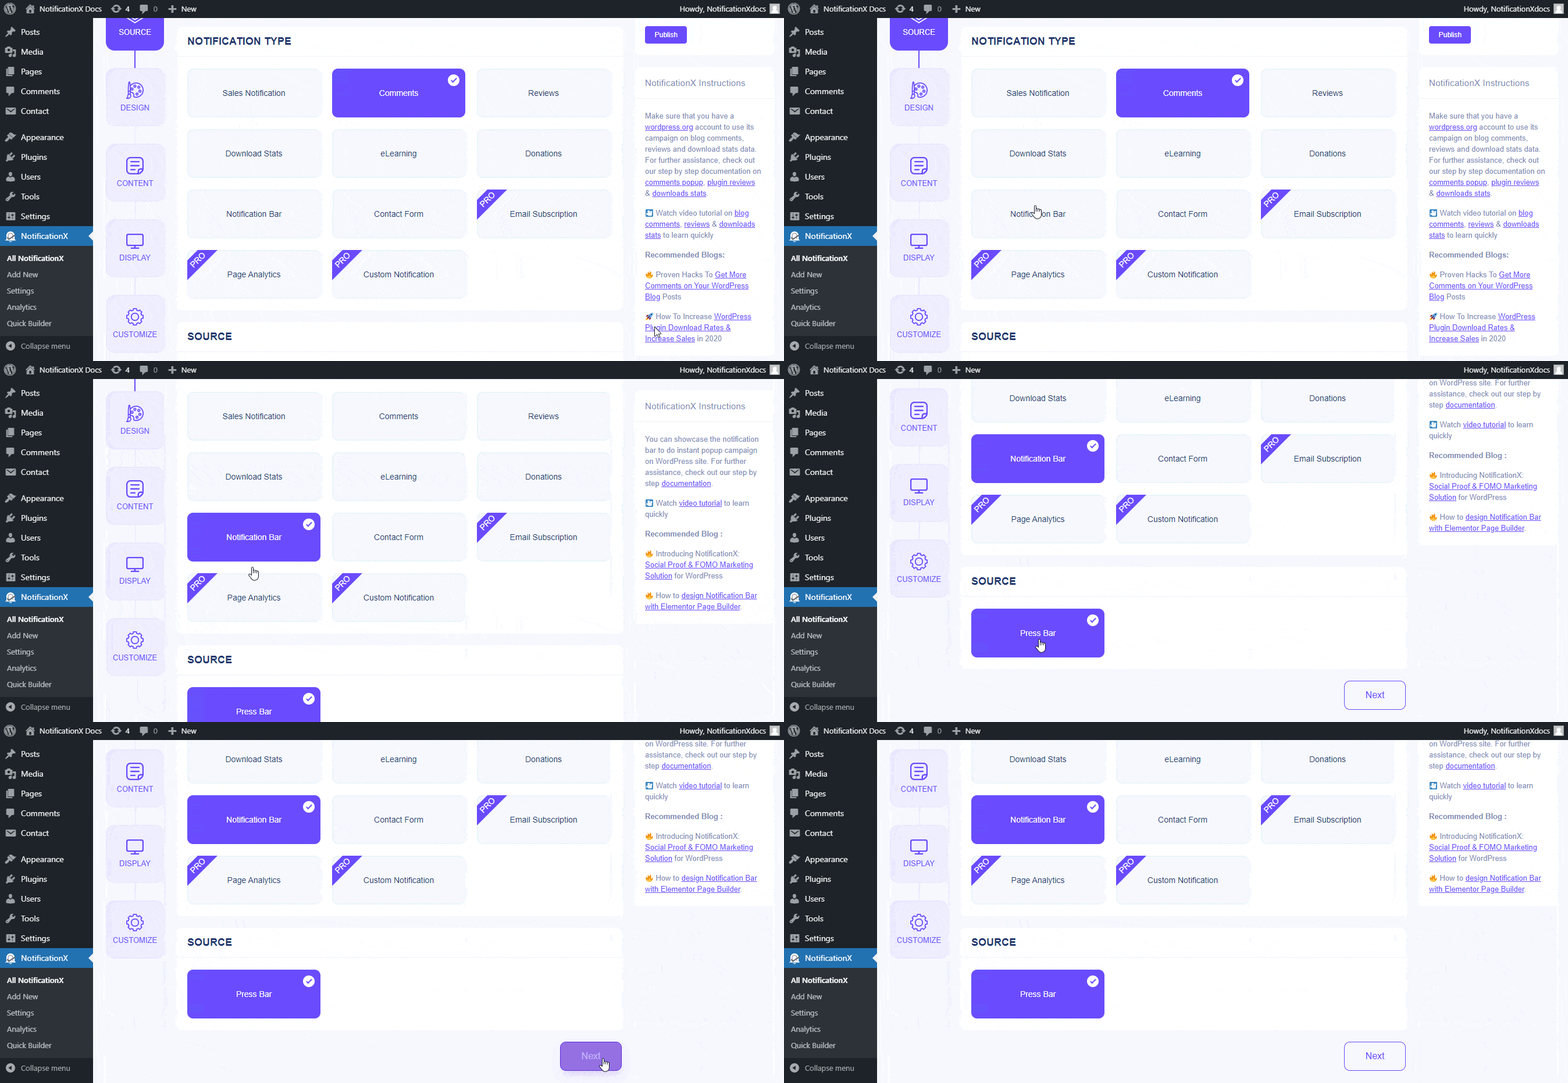
Step 2: After you are done with step 1, you will be redirected to the ‘Source’ Tab page of your NotificationX. You can also put a title. Use the drop-down menu to select ‘Press Bar’ as your Source type. Then click on the ‘Next’ button.
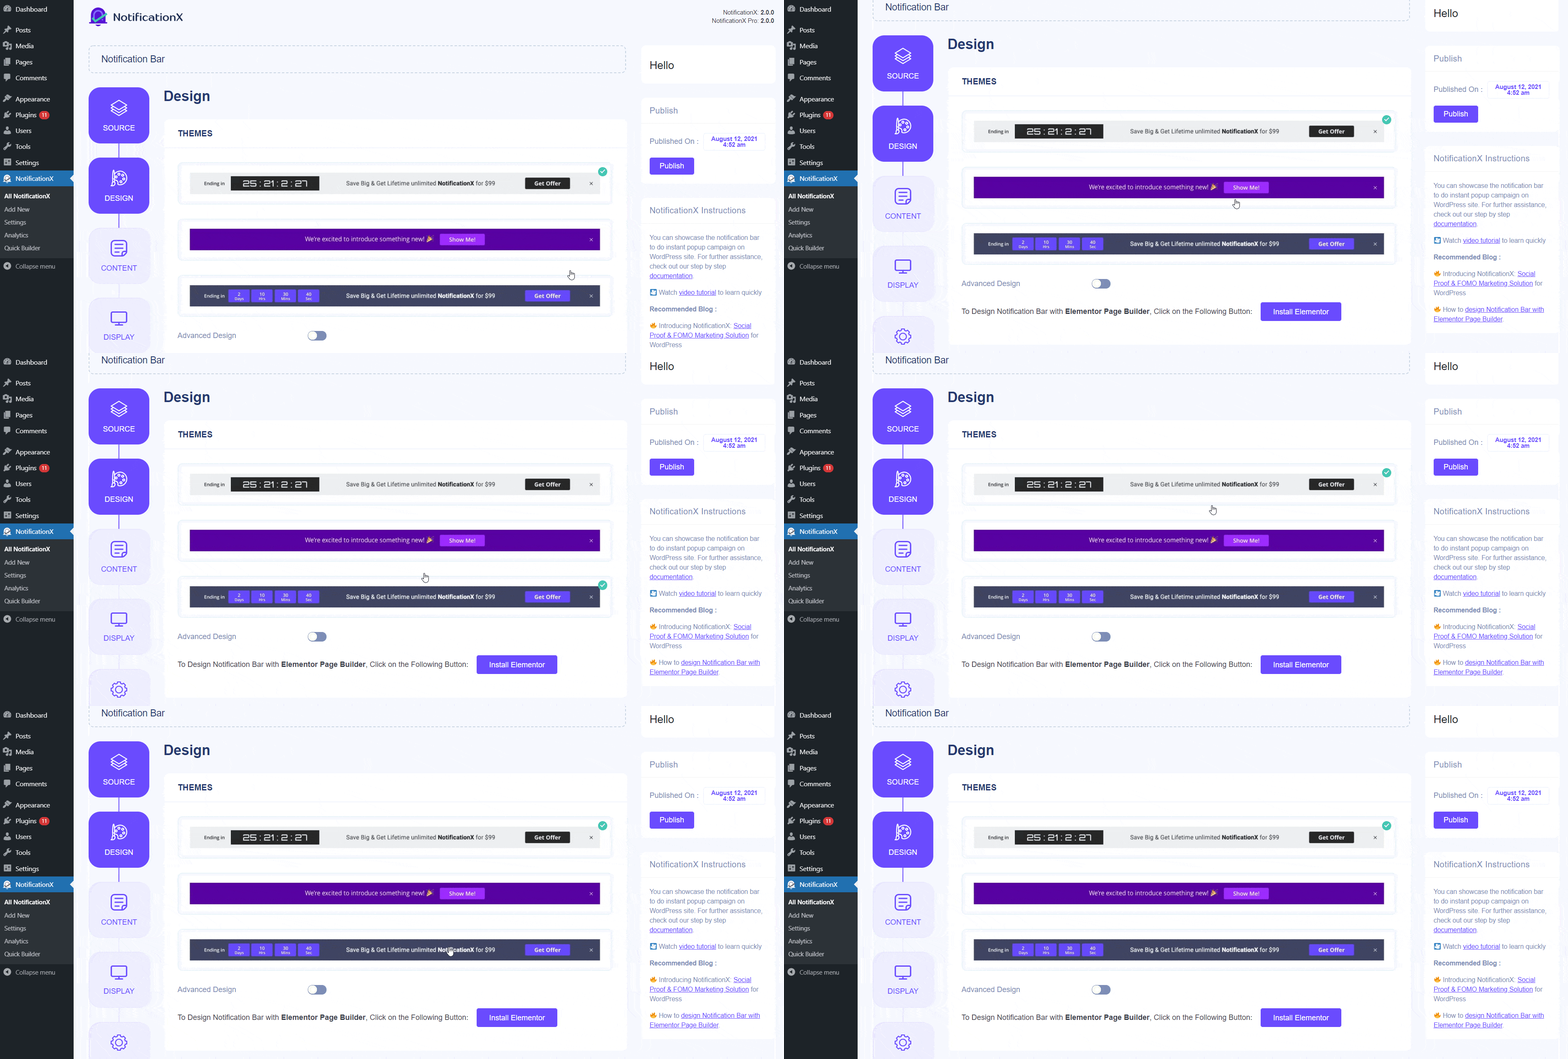
Step 3: From the ‘Design’ tab, you can choose a layout and also have the flexibility to use the ‘Advanced Design’ option to customize it as per your preference. NotificationX offers three awesome Premade layouts which you can pick from and get started. The chosen layout is how the ‘Notification Bar’ will be displayed on your website.
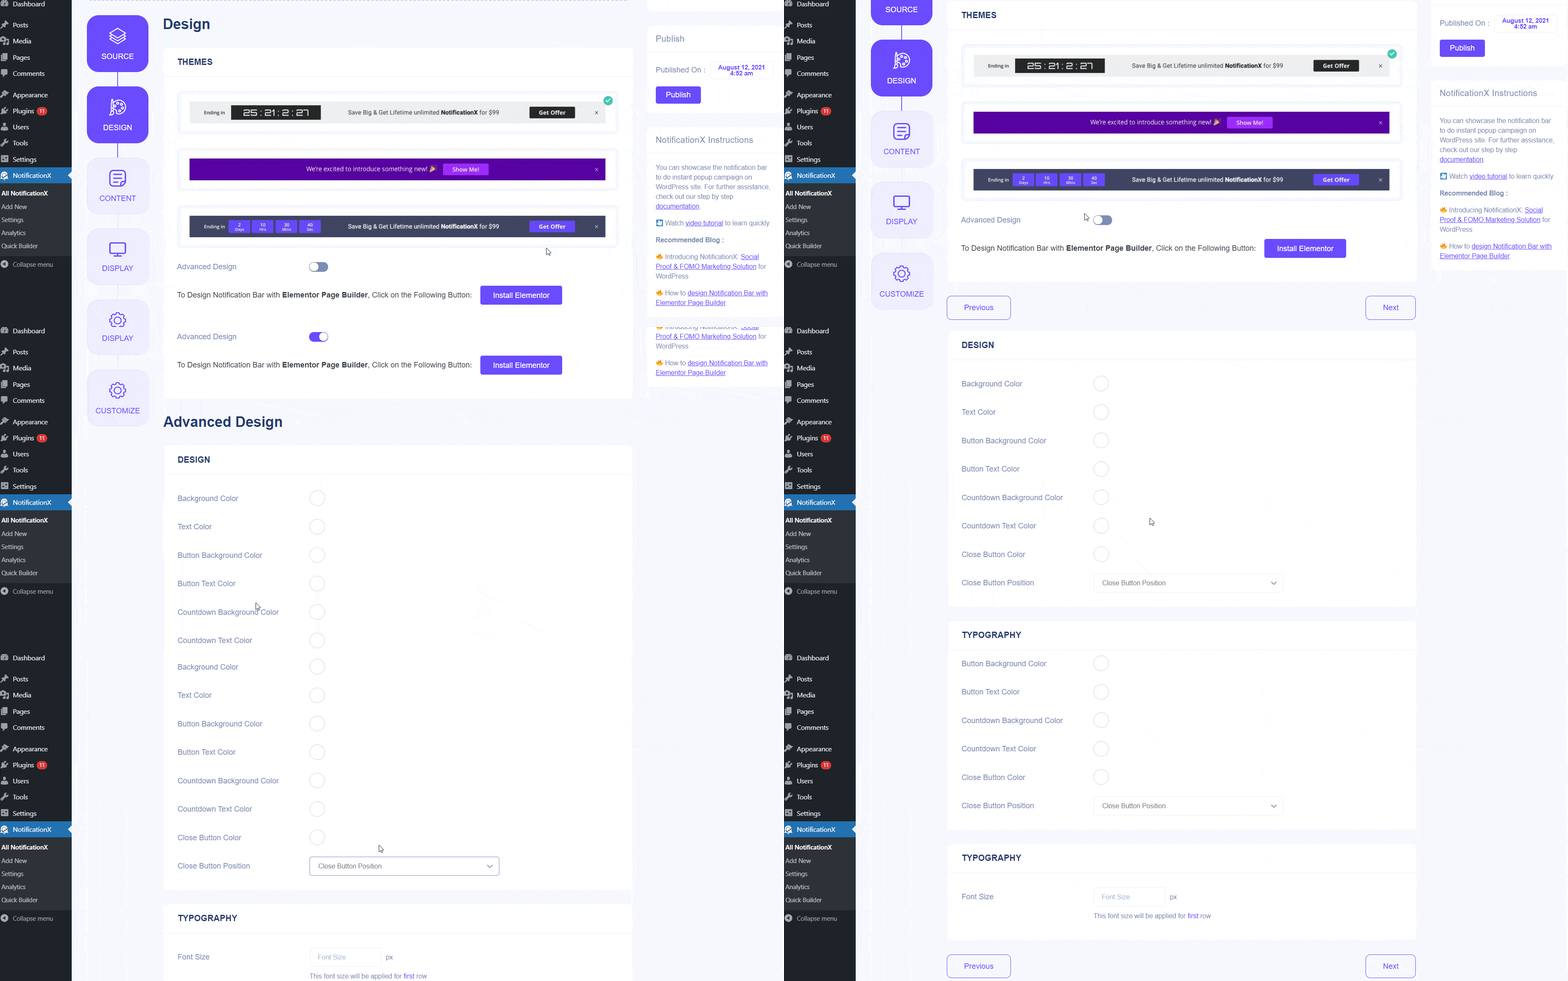
From the ‘Advanced Design’ section, you can play around with the Background & Text colors. As per your preference, you can even decrease or increase the font size as well. After you are done designing the Notification Bar, click on ‘Next’ to continue.
Step 4: You will then be redirected to the ‘Content’ tab from where you can insert your own Content, Button Text & Button URL. The Content can be of an ‘Important Announcement’ or a ‘Special Offer’ going around in your website. You can also use a ‘Button’ to redirect your visitors to a certain page of your website.
Besides, you can use the checkbox to enable/disable ‘Countdown’ option. If it’s enabled, then you can add a ‘Countdown Text’ and ‘Countdown Time’ of your preference. The ‘Countdown’ feature will give your visitors a sense of urgency to grab the offer currently going around before it’s expired. You also have a checkbox to use a ‘Permanent Close’ button. So, if users hit the close button, it will no longer be displayed on the website. You can also choose to enable ‘Evergreen Countdown Timer’ if you want. To learn more about it, check this documentation.
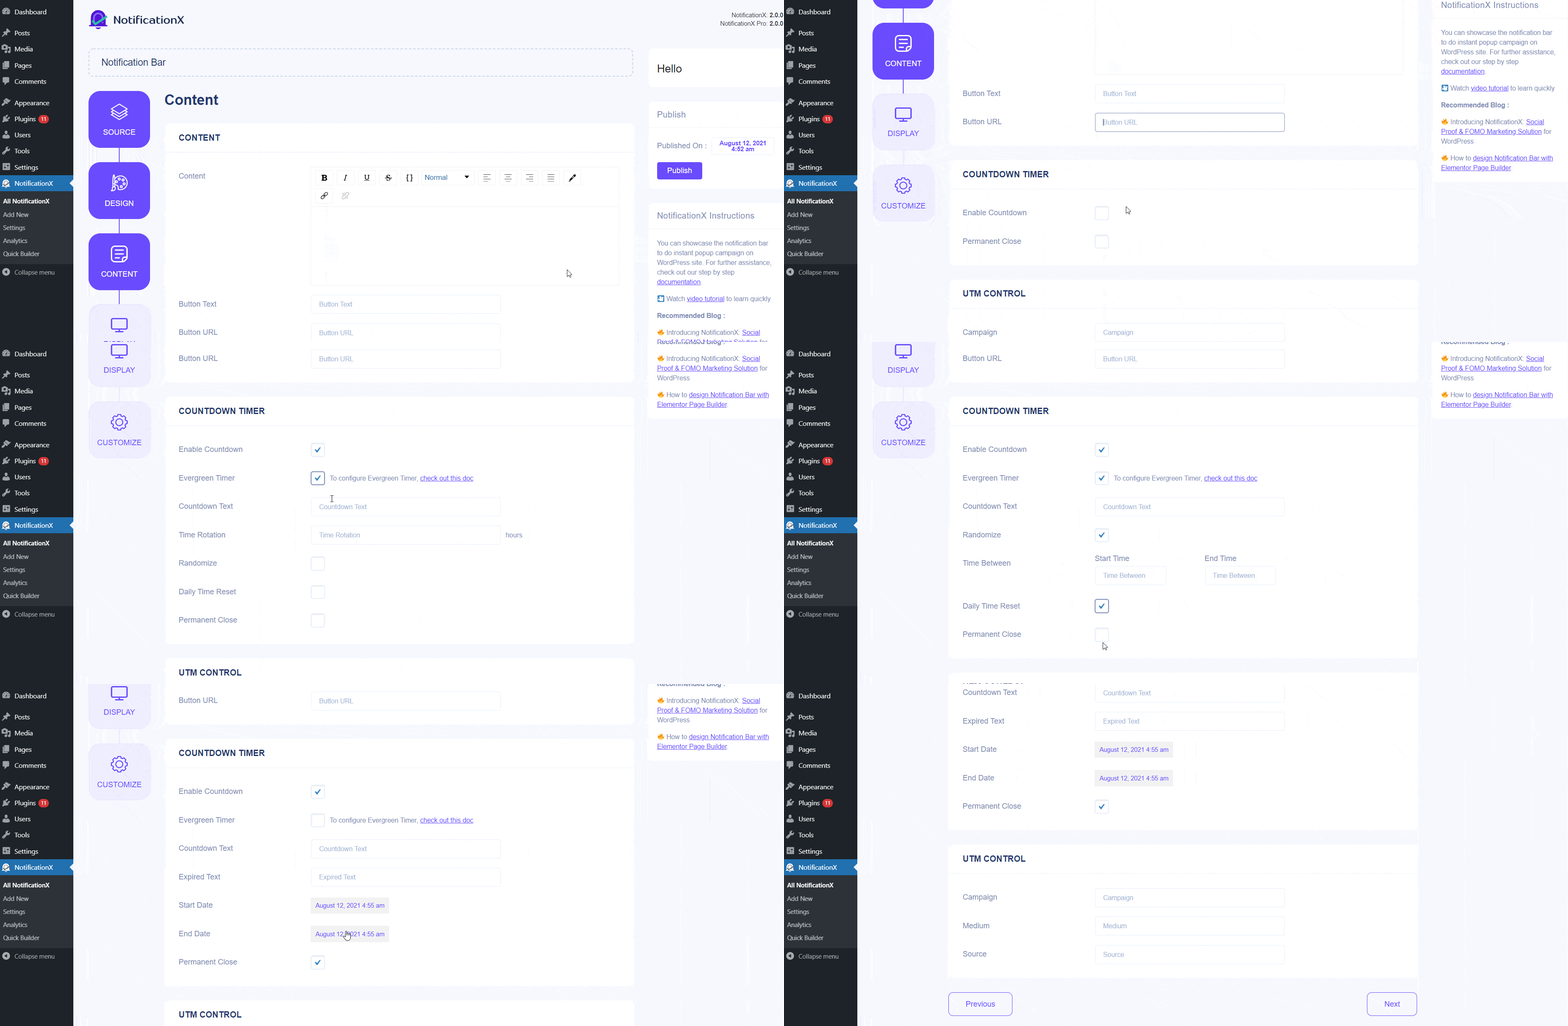
After you are done with the configuration, simply click on the ‘Next’ button to continue.
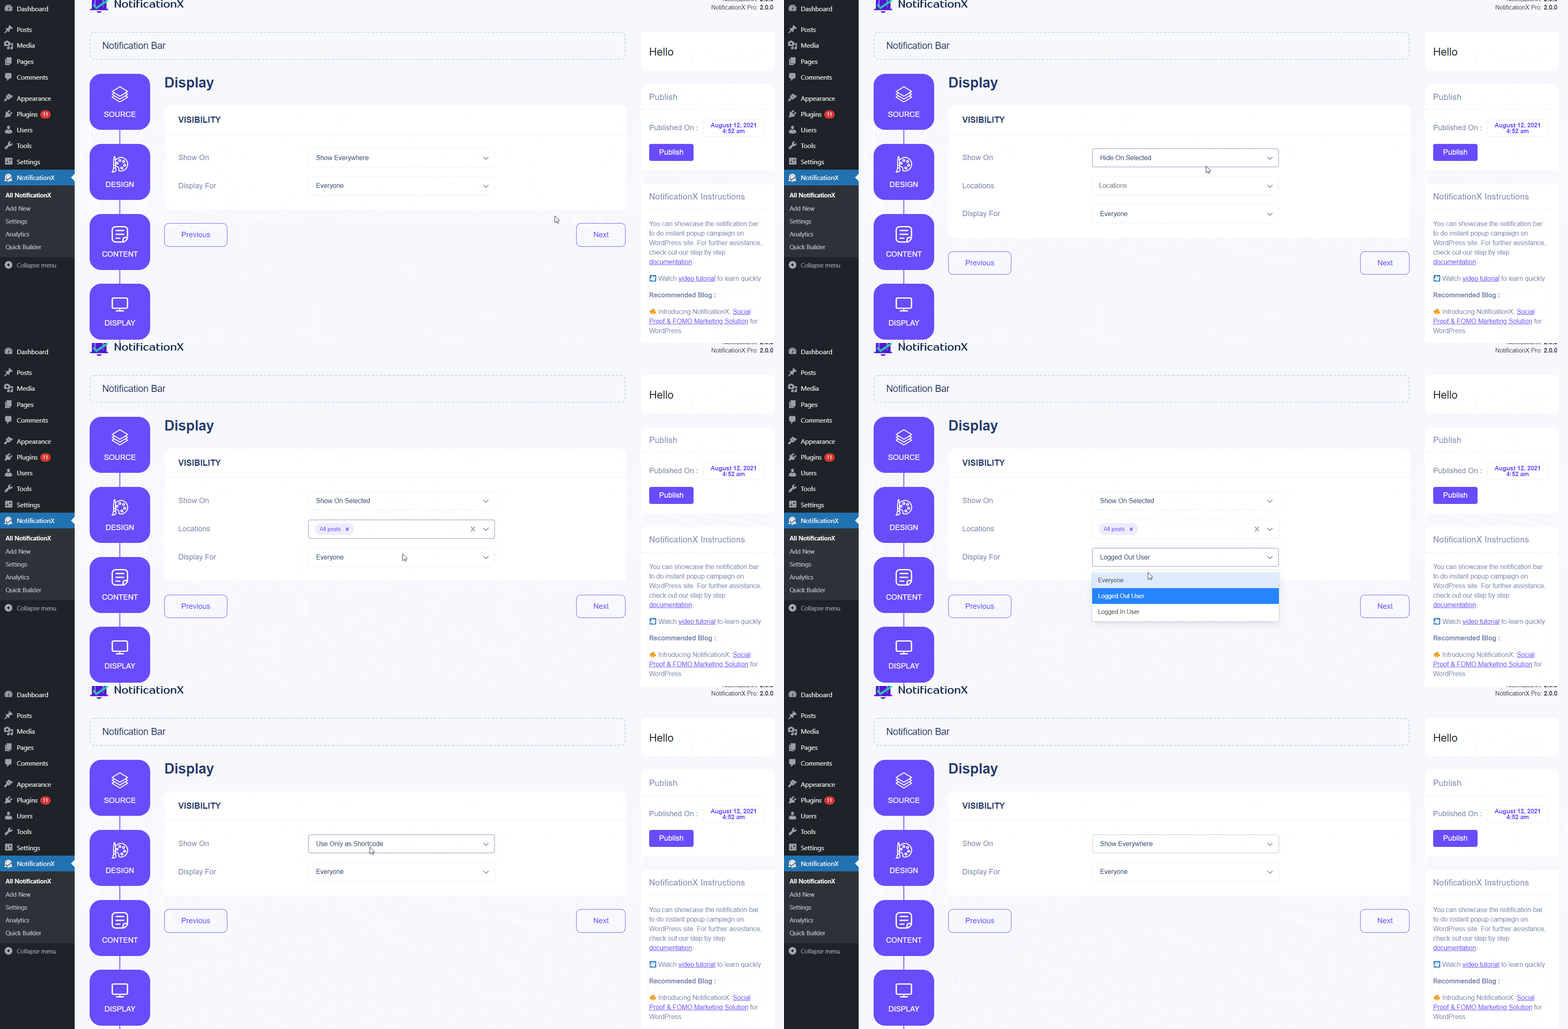
Step 5: From the ‘Display’ tab, you can set the pages where you want to display the Notification Bar. You also have the option to restrict the Notification for only certain user roles. By default, ‘Show On’ is set to ‘Show Everywhere’ as a result the Notification Bar will be displayed in every single page of your website.
On the other hand, you can also specify the pages where you want to display or hide the ‘Notification bar’. After you click on the ‘Next’ button, you will be redirected to the ‘Customize’ tab.
Step 6: Under the ‘Customize’ tab, you will find three separate sections: Appearance, Timing & Behavior. From the ‘Appearance’ section, you can set the position where you want to display the Notification Bar and use the checkbox to disable/enable ‘Sticky Bar’, ‘Close Button’ & ‘Hide on Mobile’ options.
You can set the position for Notification Bar to either at the top or bottom of your website. If Sticky Bar is chosen, then the ‘Notification Bar’ will be in a fixed position. As a result, no matter where you try to navigate on your page, it will always show up.
You can also show a ‘Close Button’ which can be clicked to close the Notification Bar. Furthermore, you have the flexibility to hide the ‘Notification Bar’ for mobile devices if you want to as well. Besides, you also have the freedom to set ‘Initial Delay’, ‘Auto Hide’ & ‘Hide After’ options as per your preference from the ‘Timing’ section.
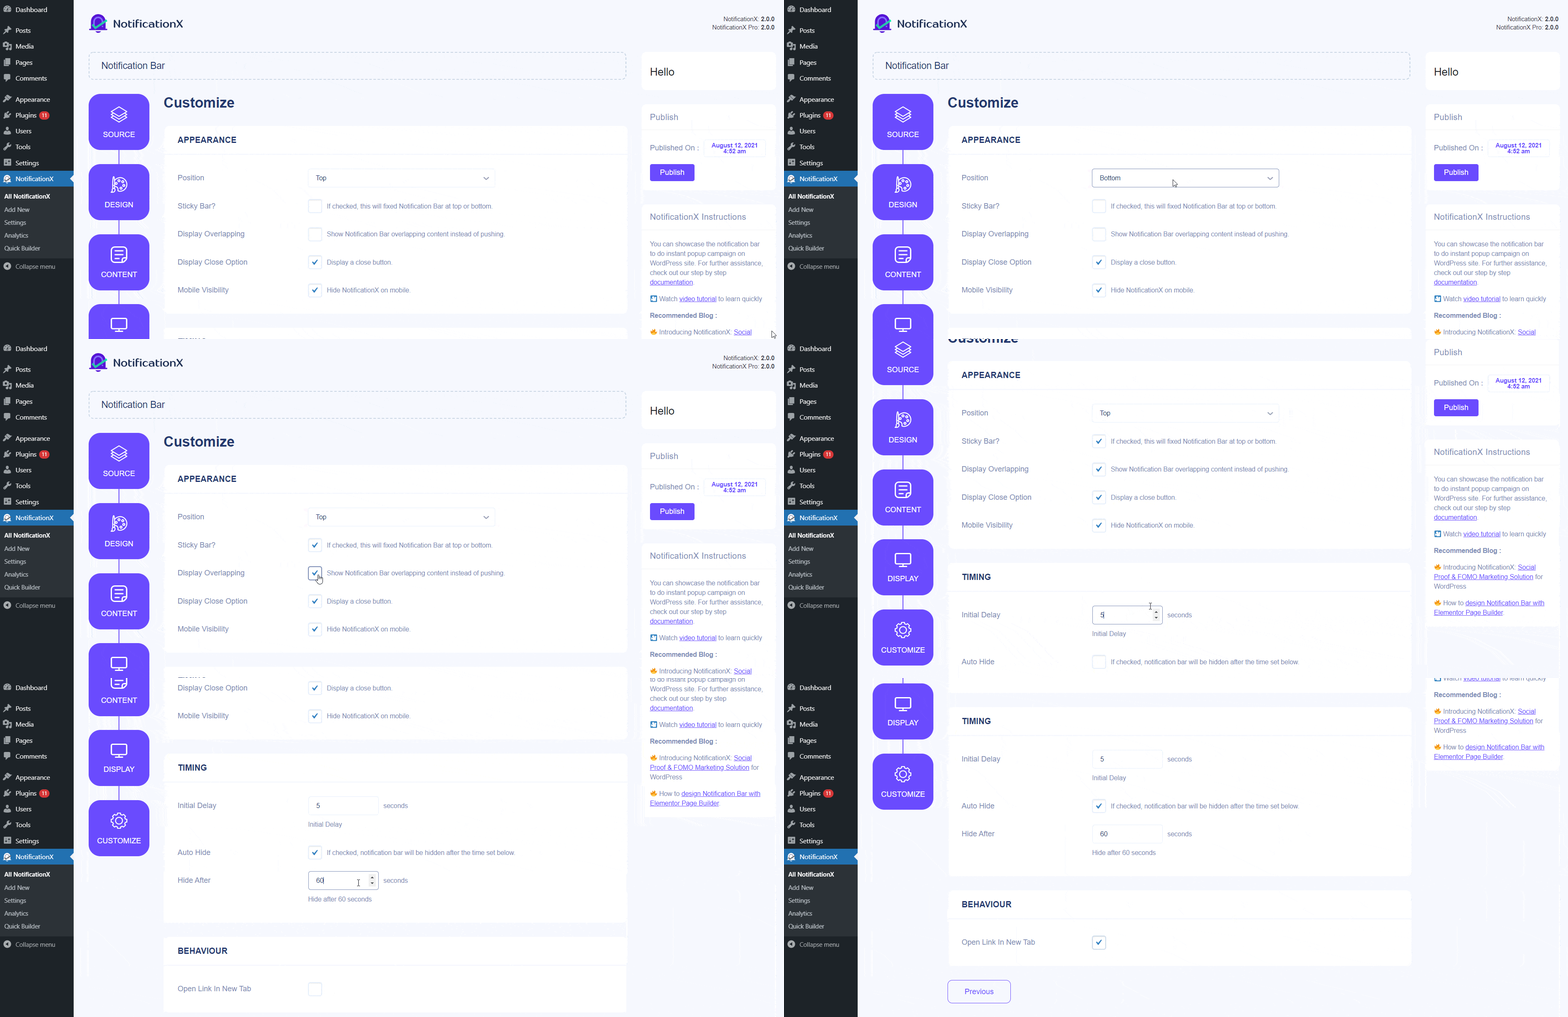
You can set an ‘Initial Delay’ time after which your ‘Notification Bar’ will be popped up. By default, it is set to 5 seconds. You can also hide the ‘Notification Bar’ after a certain amount of time by checking the box ‘Auto Hide’ and setting a time in the ‘Hide After’ field.
You can use the checkbox to whether to open your set link to open in a new window or a new tab as well. If you have previously set a URL in your Button, when your visitors will click on it the new page will be displayed in either a new window or a new tab depending on your settings.
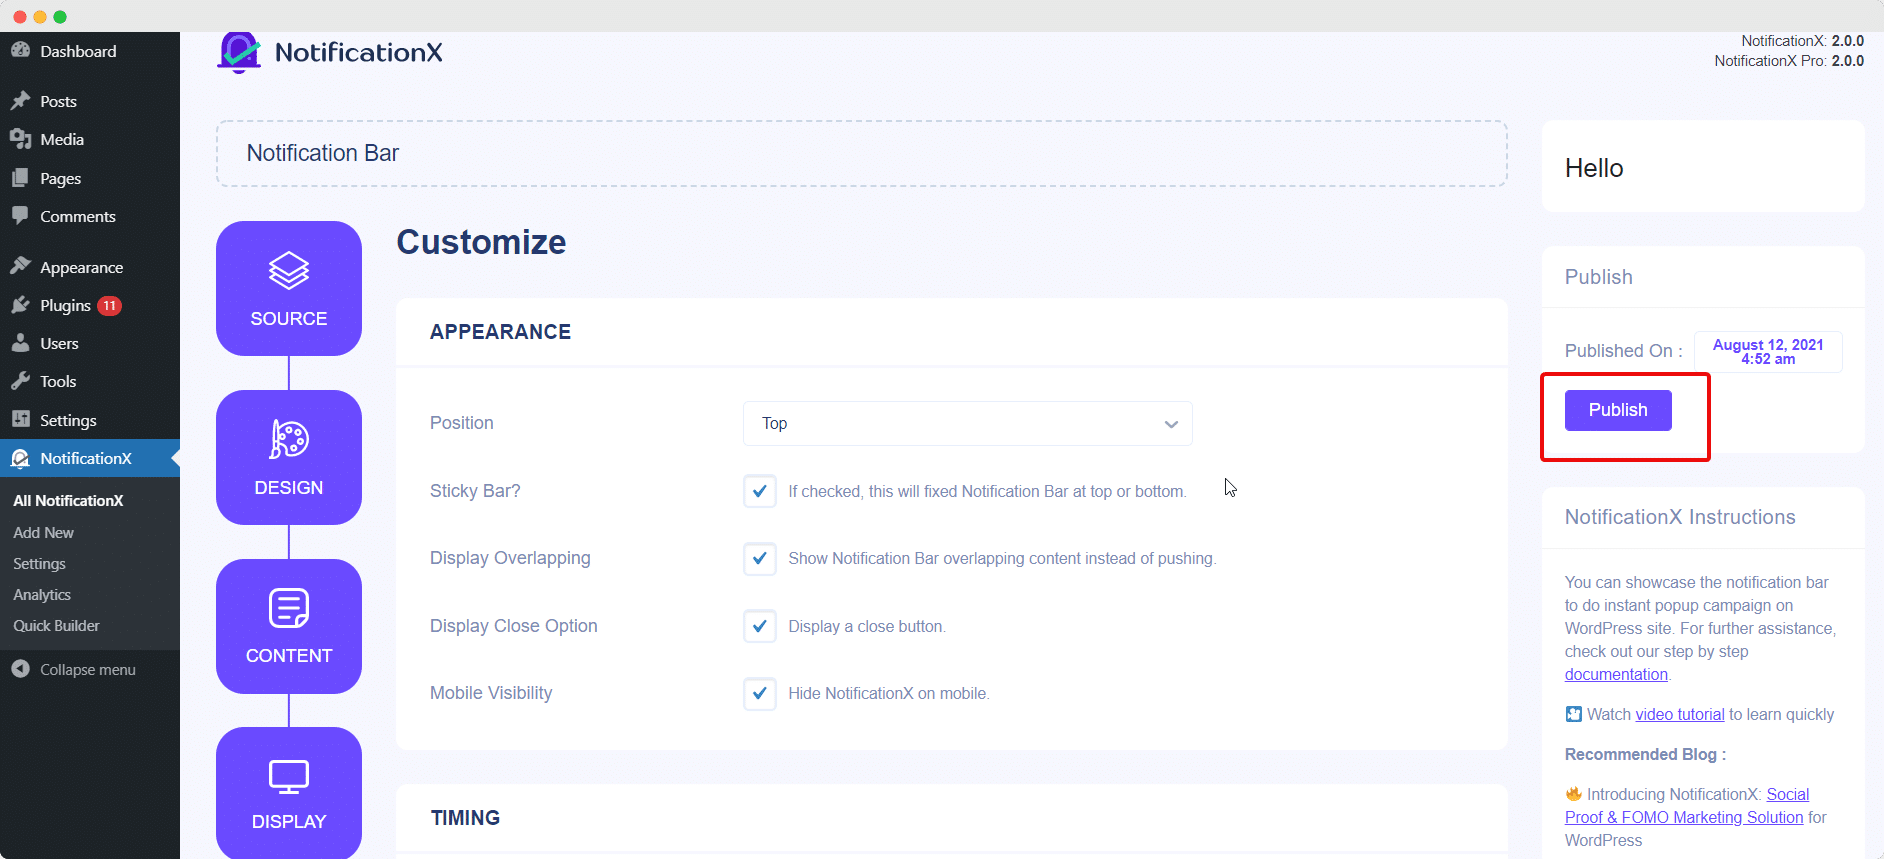
Step 7: After you have completed step 6, click on the ‘Publish’ button. As a result, the ‘Notification Bar’ will be successfully created.
By following these mentioned steps and a bit more modifying & styling, your final outcome would look like something like this.
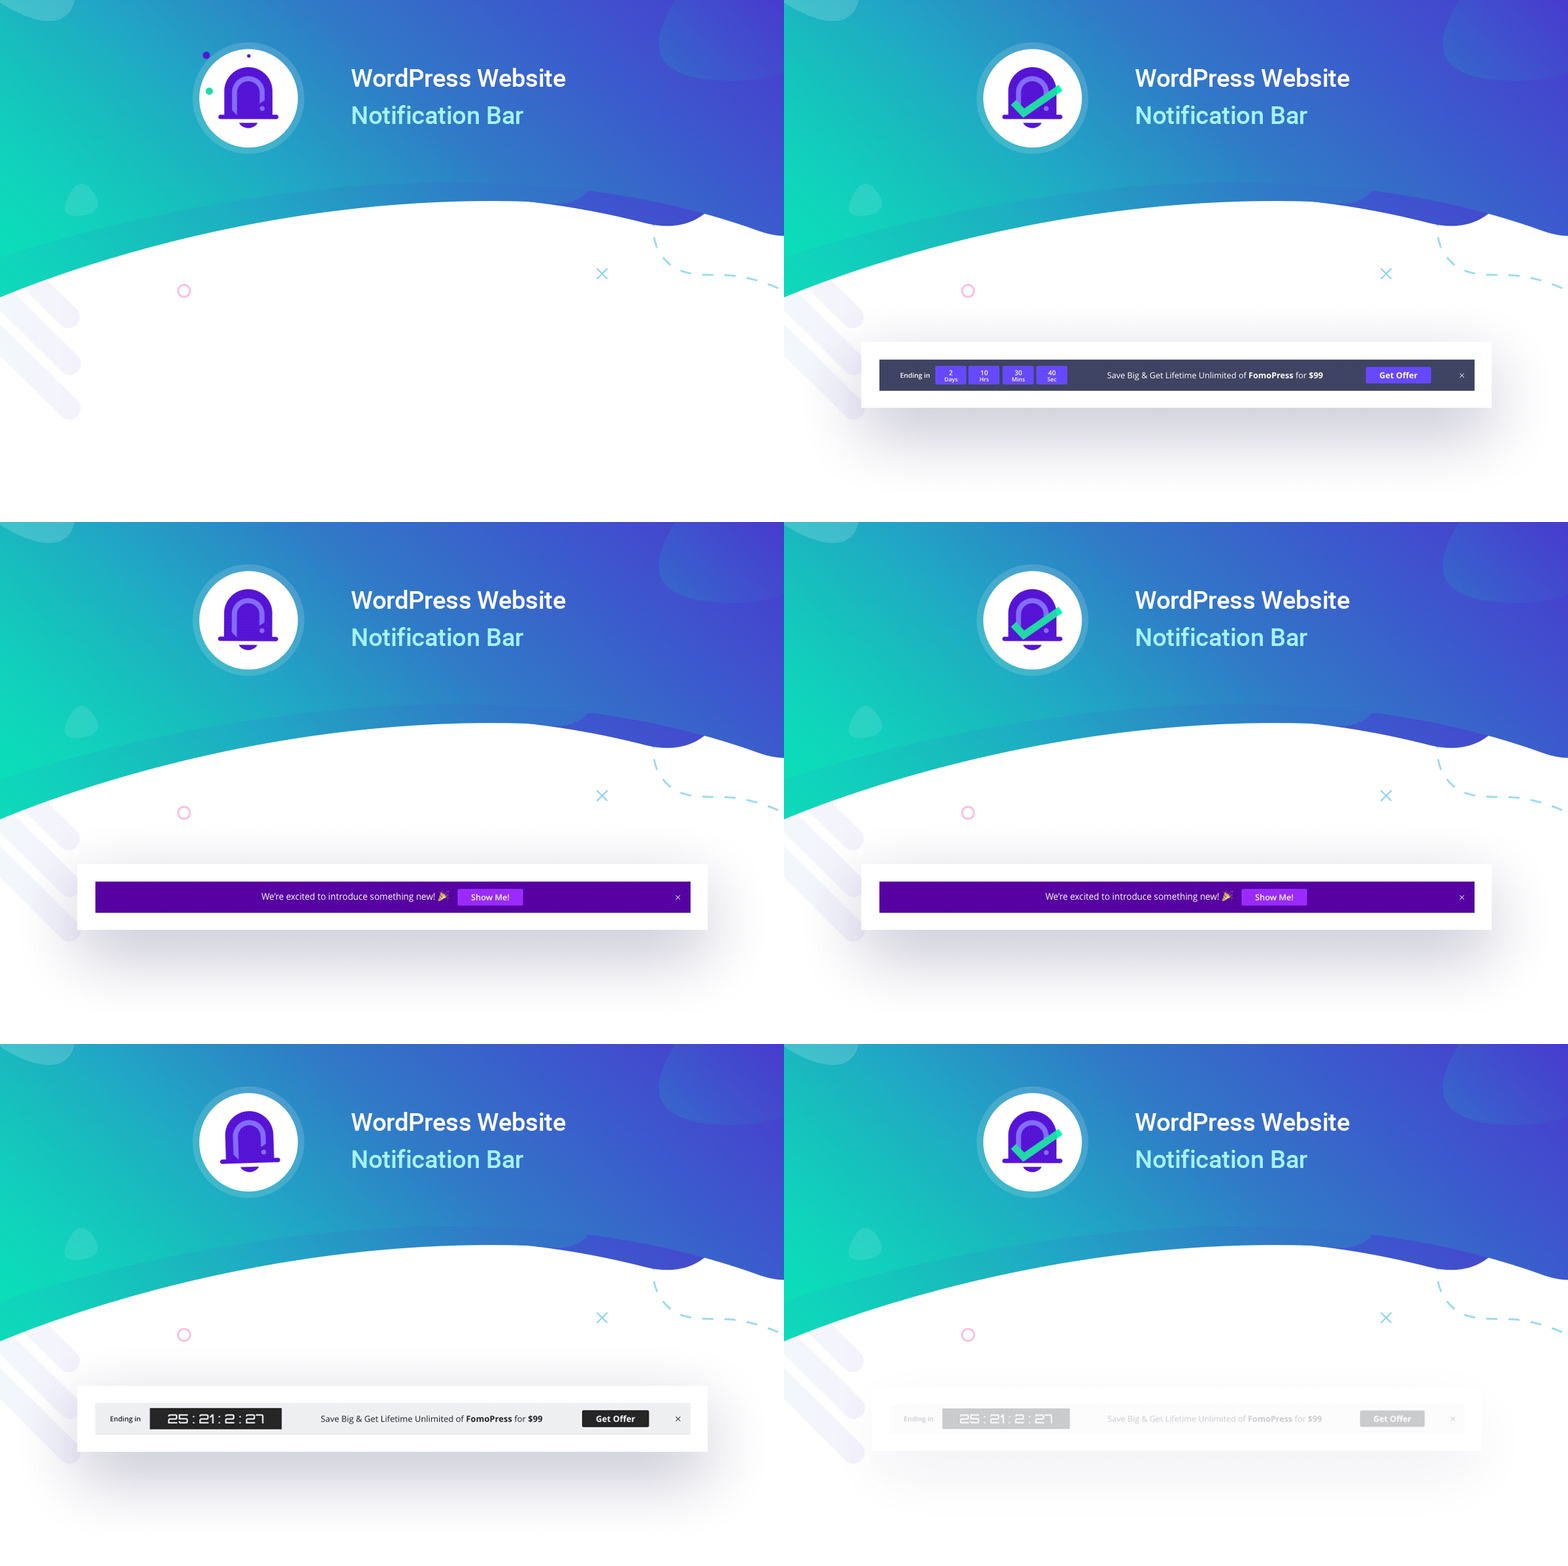
This is how you can easily design and display an appealing Notification Bar on your WordPress website using NotificationX.
If you face any issues, you can contact our Support Team here.


