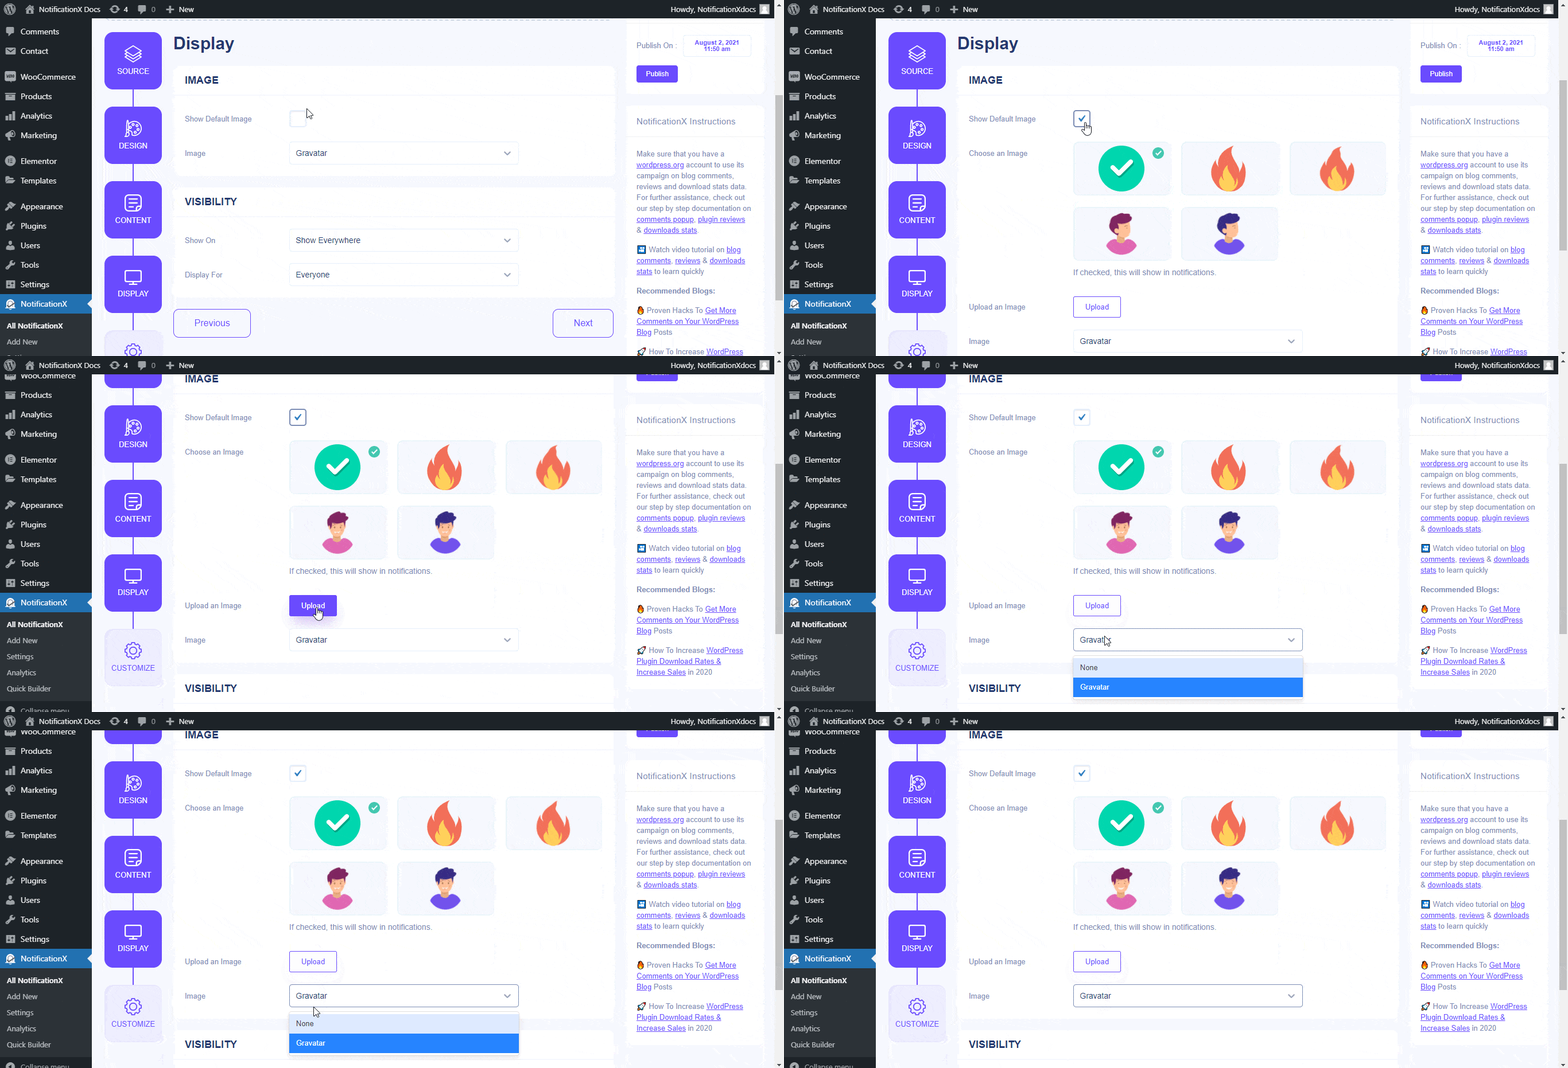
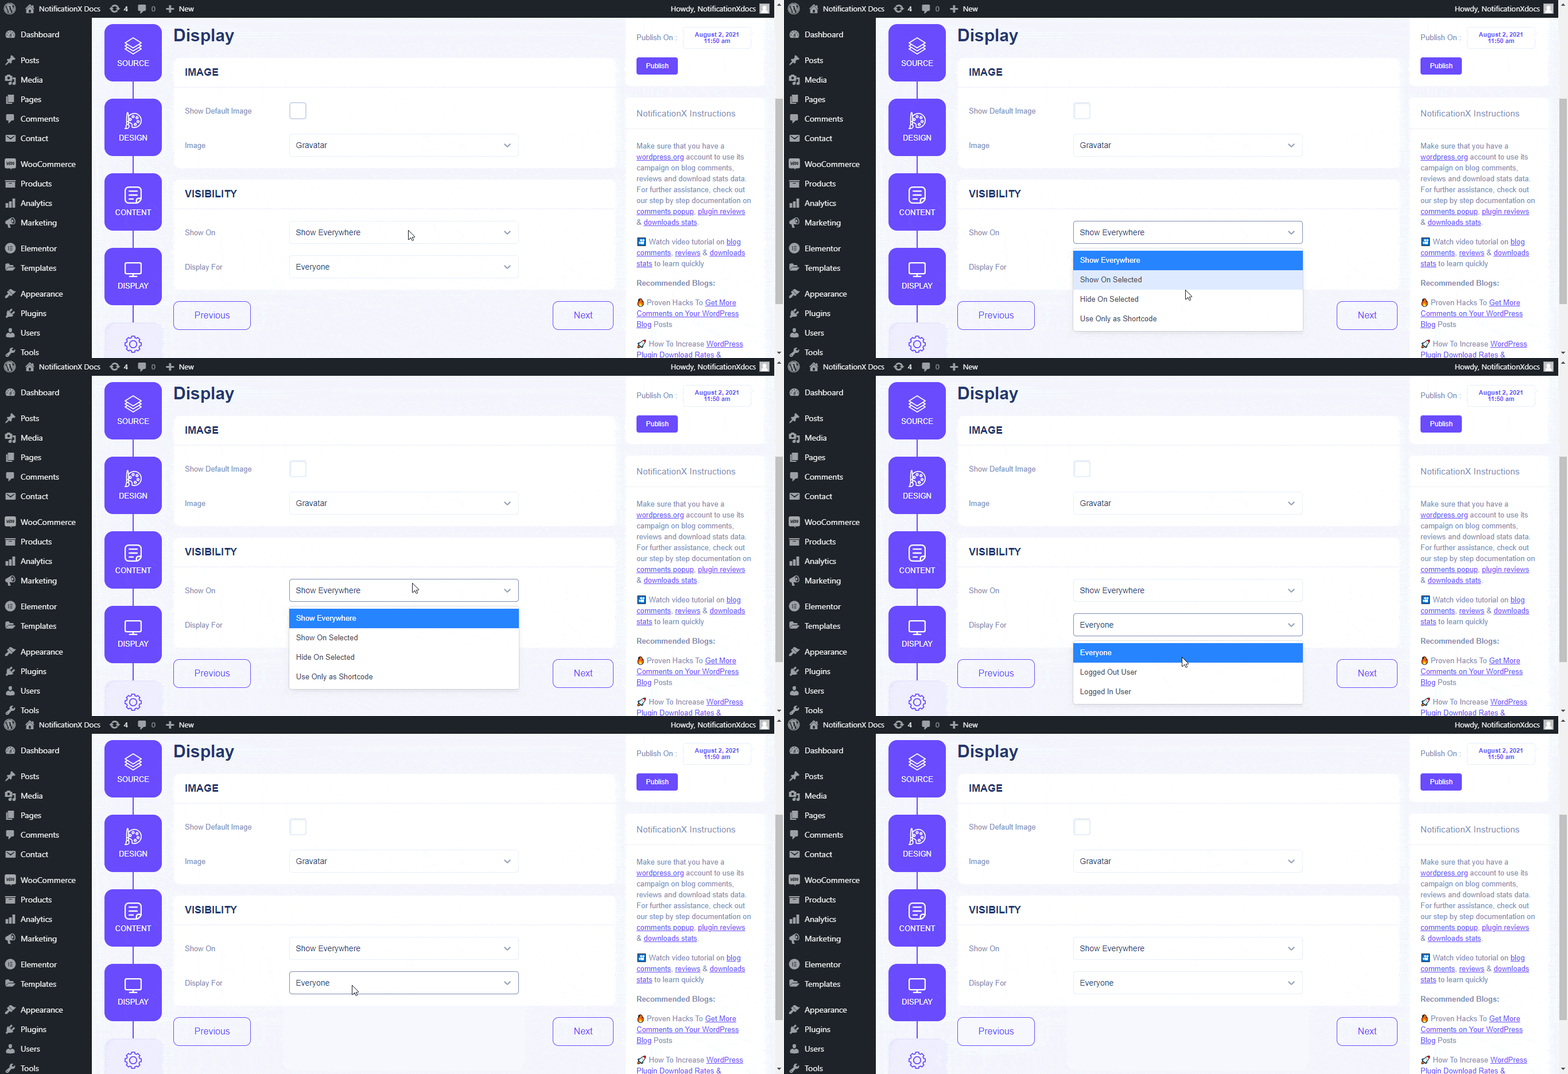
NotificationX builder gives you complete control over how you want your Notification Alert to appear over the site. Let’s follow the guideline below to learn how to use ‘Display’ tab to create stunning popup notification alerts:
Step 1: Choose A Notification Alert #
First of all, go to your WordPress dashboard and navigate to wp-admin -> NotificationX -> NotificationX Builder.
Pick your preferred ‘Notification Type’ from the ‘Source’ tab and make all necessary configurations from the ‘Design’ and ‘Content’ tabs. Afterward, you will be redirected to the ‘Display’ tab. Or you can simply click on the ‘Display’ tab to navigate to it directly.

Step 2: Configure The Display Settings #
You will find two separate sections in the ‘Display’ tab: Image & Visibility. If you want, you can show a default image for users. In the meantime, enable the ‘Show Gravatar’ option, if you want to display the user gravatar in your notification alerts.

Moreover, you can control where you want the notification alert to be shown. You can even specify the pages where you want it to display or even hide from. Besides, you are able to display notification popups based on user roles as well.
You will be able to choose among all those controls –
1. Front Page
2. Blog Page
3. All Posts, Pages & Custom Post Type
4. All Posts
5. All Pages
6. All Attachments
7. Search Pages
8. 404 Error Pages
9. All Archives
10. All Category Archives
11. All Tag Archives
12. Custom Post or Page IDs

This is how you can have control over your notification popup by setting up when, where, and for whom to show it using the ‘Display’ tab in NotificationX.
Getting Stuck? Feel free to contact our dedicated Support Team for further assistance and queries.


