How to Use Sales Notification in NotificationX? #
Sales Notification lets you display the recent purchase of your products made by the customers as a notification popup on your website to immediately grab the attention of your visitors. With NotificationX, you can easily design a fascinating Sales Notification on your WordPress website to keep everyone engaged.
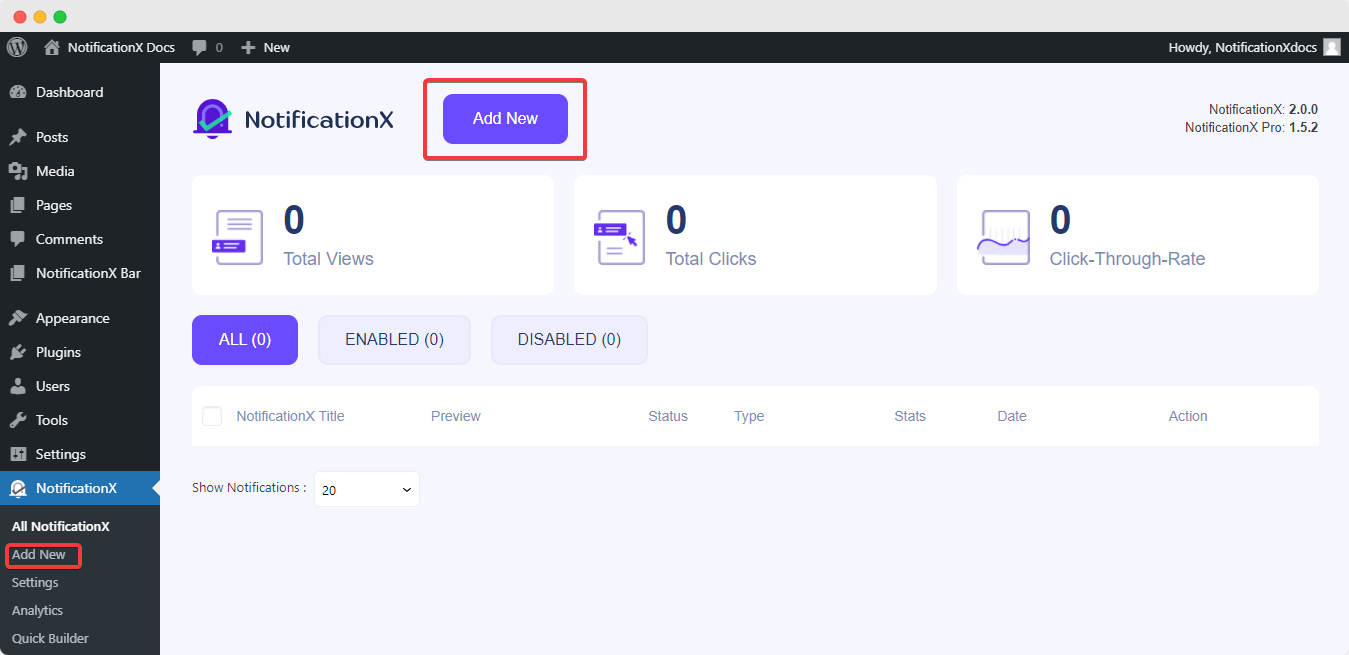
Step 1: Go to your WordPress Dashboard and navigate to wp-admin -> NotificationX -> NotificationX. Then right at the top, click on ‘Add New’.
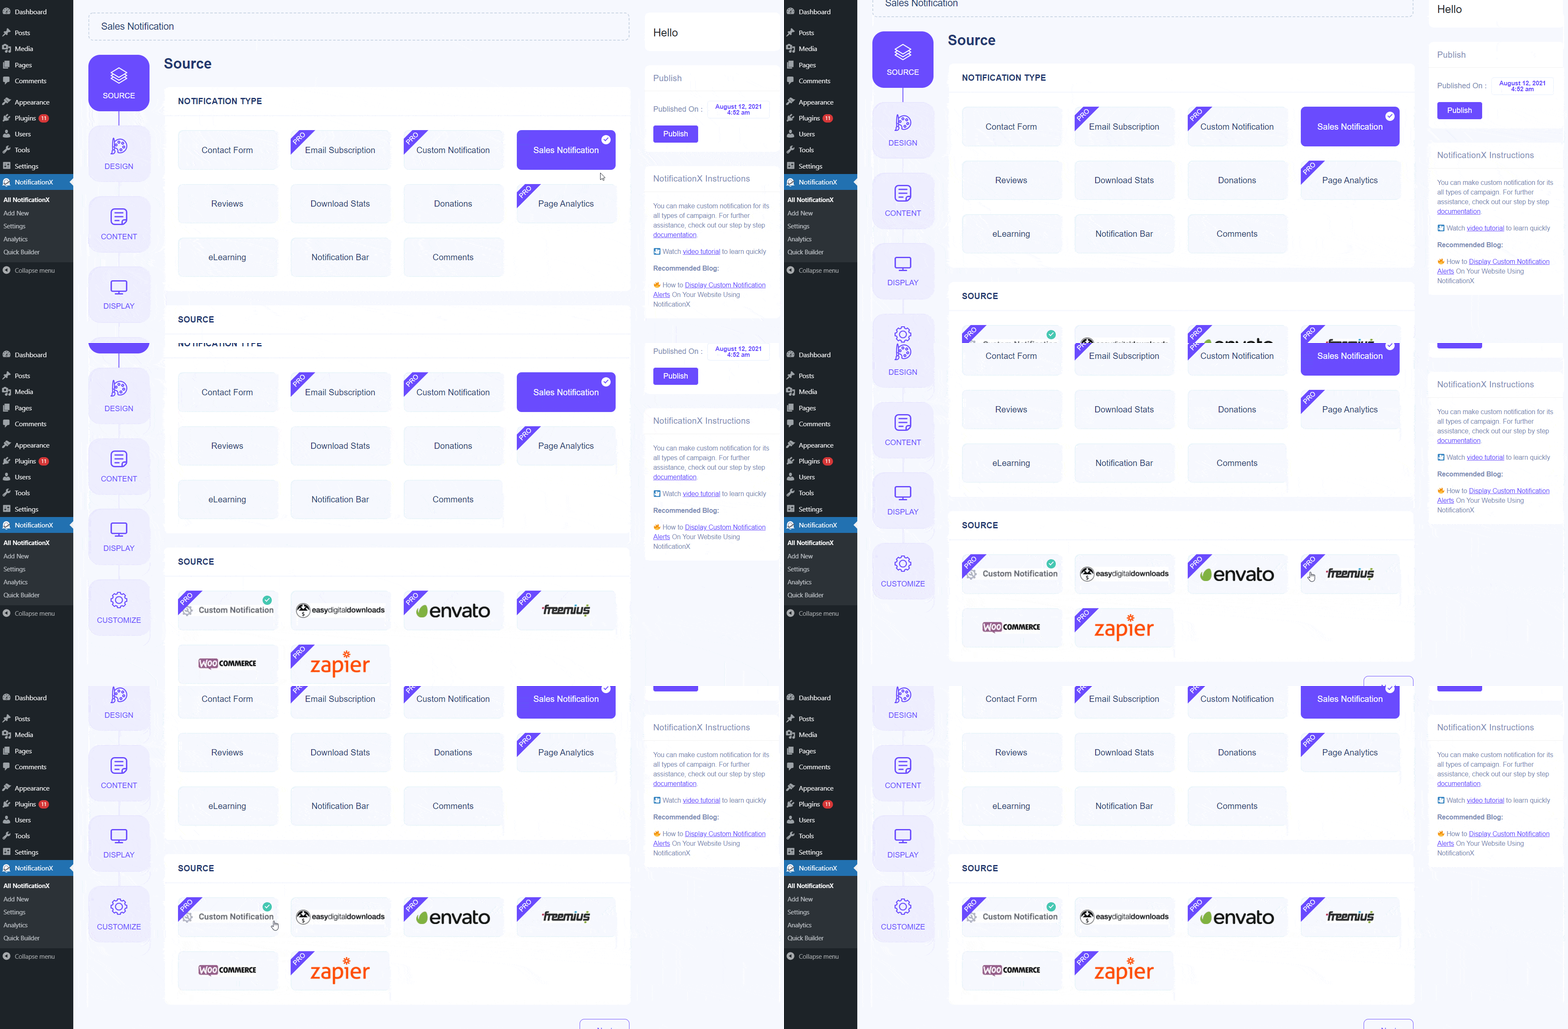
Step 2: After you are done with step 1, you will be redirected to the ‘Source’ Tab page of your NotificationX. You can also put a title. Use the drop-down menu to select ‘Sales Notification’ as your Source type.
If you have WooCommerce or Easy Digital Downloads, you can use the drop-down menu ‘From’ to choose your preferred Sales Notification type. If you have NotificationX PRO, You can also create custom user information through ‘Custom Notifications’ type of Sales Notification & showcase Sales Notification from your Freemius Account as well. Afterward, go ahead & click on the ‘Next’ Button.
Step 3: From the ‘Design’ tab, you can choose a layout and also have the flexibility to use the ‘Advanced Design’ option to customize it as per your preference. From the ‘Themes’ section, the chosen layout is how the ‘Sales Notification’ will be displayed on your website.
You can modify your chosen Theme by customizing it through ‘Advanced Design’ option. From this section, you will be able to easily add styling to your design, image appearance and typography. You can add Background or Text color for notification popup. Besides, you can also add a Border and add styling to it.
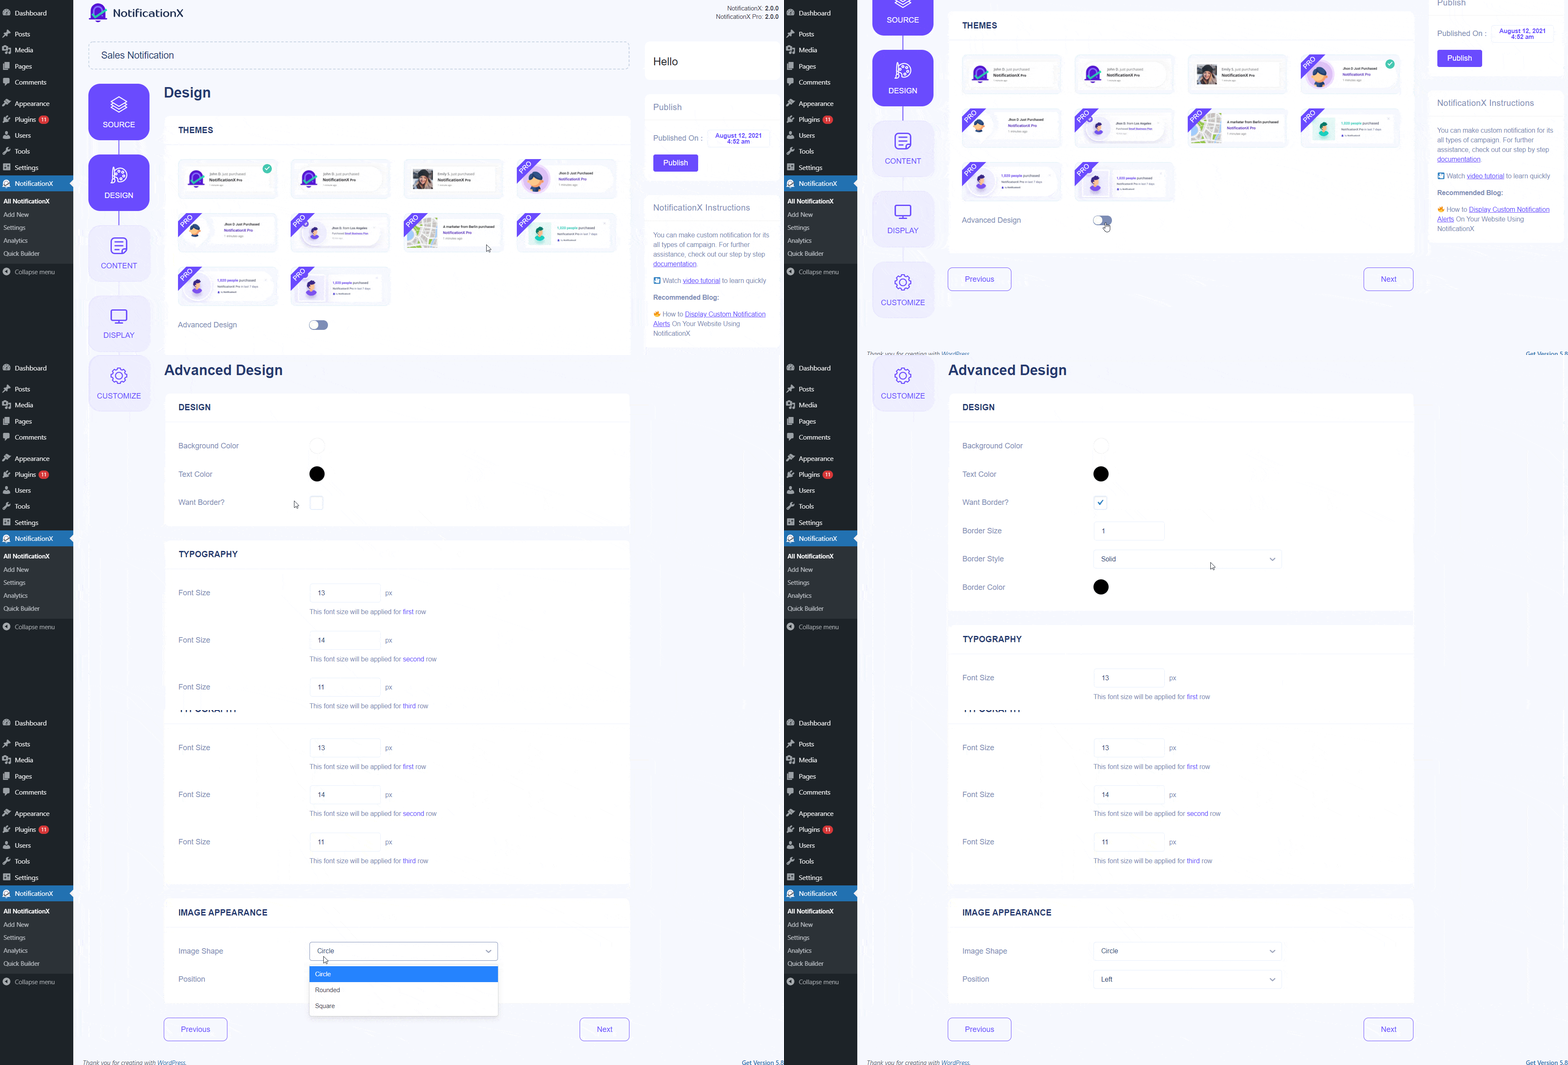
‘Image Appearance’ section lets you change the ‘Image Shape’ to out of these three: Rounded, Circle & Square. You can also use the drop-down menu ‘Position’ to change the position of the image: Left or Right. Basically, Sales Notification consists of Three rows. From ‘Typography’ section, you can change the Font Size for each row as well.
Step 4: You will then be redirected to the ‘Content’ tab from where you can modify your ‘Notification Template’ and add your preferred content text. These settings vary depending on the Sales Notification type you are working with.
If you have WooCommerce or Easy Digital Downloads on your website, you can easily show the WooCommerce or EDD Sales Notifications using NotificationX.
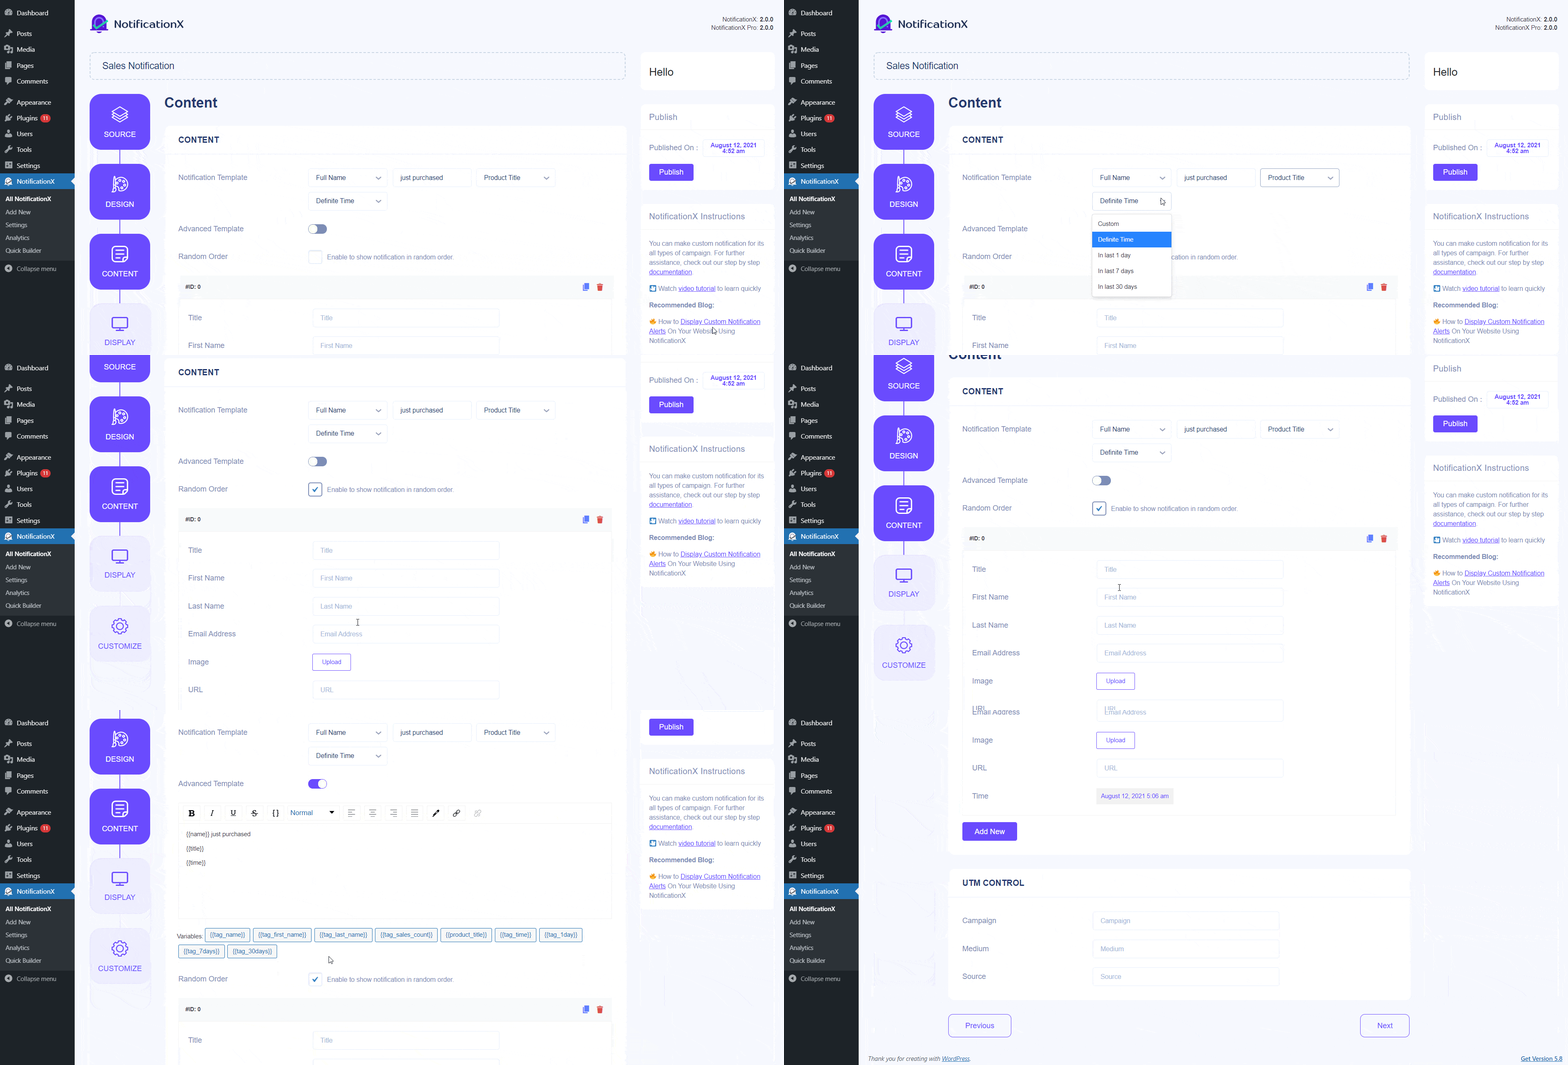
NotificationX offers ‘Notification Template’ for your Content. You can easily go ahead and choose your preferred variables. These variables help display the name of the user who has purchased a specific Product in a certain time interval. Besides, you can also add your own text which will be showed up in the notification popup.
For example, with the Content settings, your notification popup will display content such as this ‘John Doe recently purchased Example Product 1 hour ago’. Simply click on the ‘Next’ button to continue.
Step 5: In the ‘Display’ tab, there are two available sections: Image & Visibility. From the ‘Image’ section, you can use the checkbox to display default image or an avatar in the notification popup. If the users don’t have any ‘Avatar’ set in their profile, you can simply display the ‘Default’ image by selecting the ‘Default Image’ checkbox and uploading a default image.
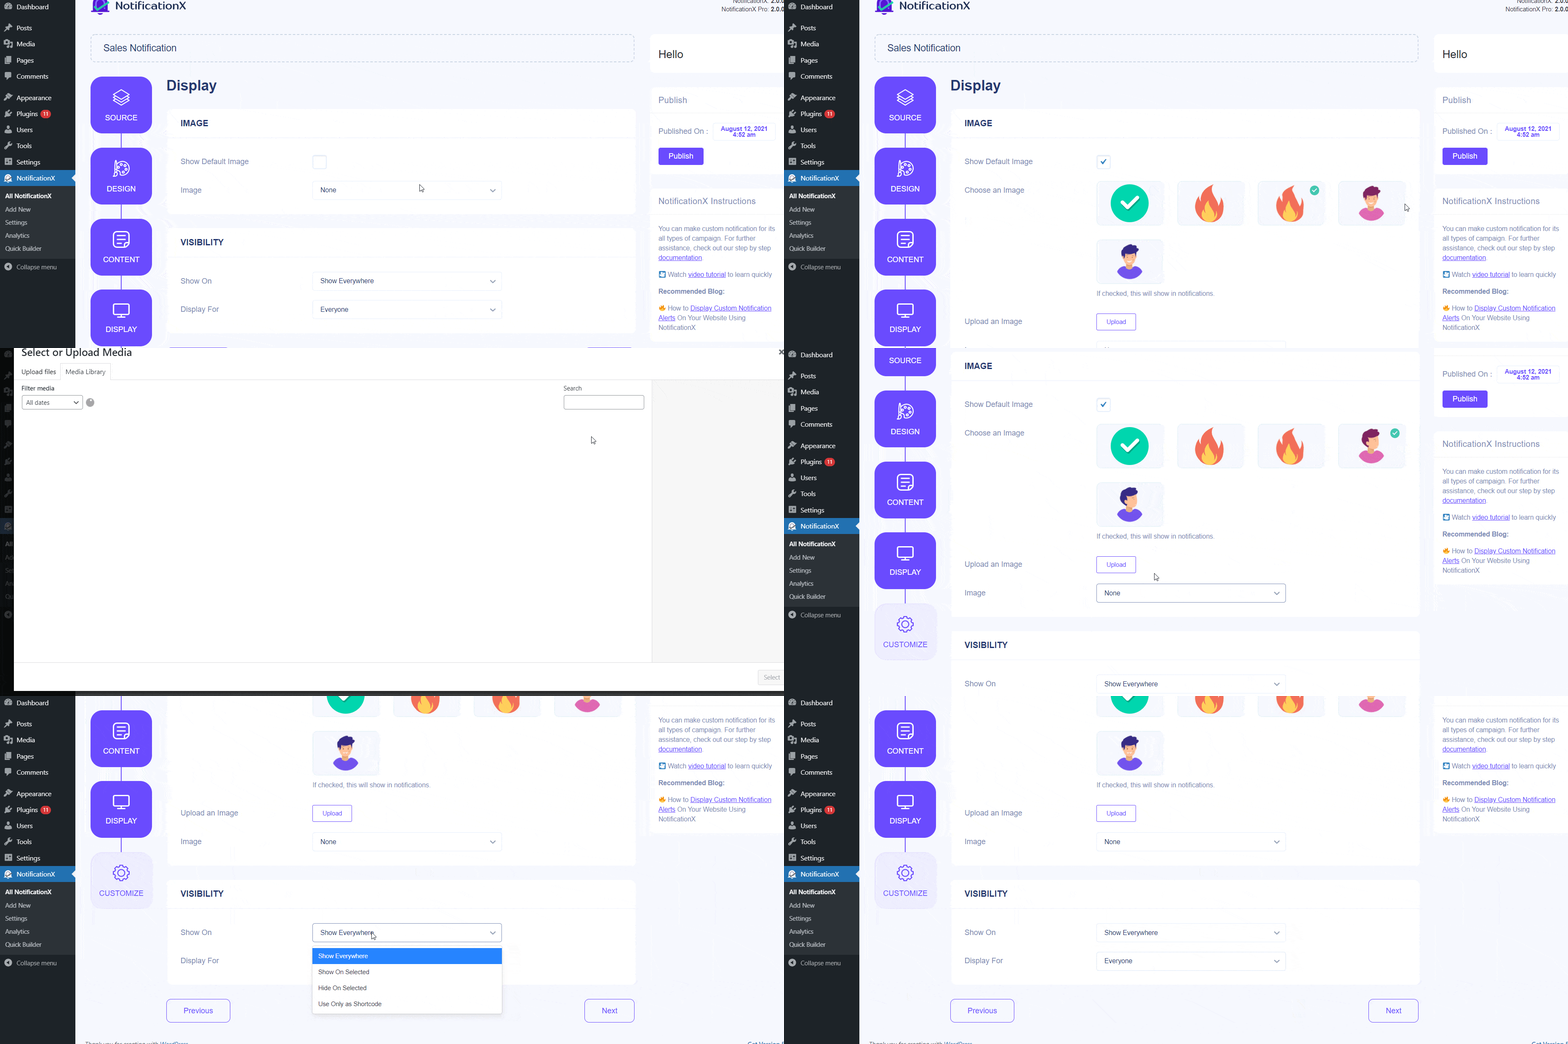
Besides, you will have the opportunity to display the product image which is purchased by the customer. This option is only available for the WooCommerce/ EDD type of Sales Notifications.
From the ‘Visibility’ section, you can set the pages where you want to display the Sales Notification. You also have the option to restrict the notification popup based on certain user roles: ‘Always’, ‘Logged In’ & ‘Logged Out’. By default, ‘Show On’ is set to ‘Show Everywhere’ as a result the Sales Notification will be displayed on every single page of your website. On the other hand, you can also specify the pages where you want to display or hide the ‘Sales Notification’.
After you click on the ‘Next’ button, you will be redirected to the ‘Customize’ Tab.
Step 6: Under the ‘Customize’ tab, you will find three separate sections: Appearance, Timing & Behavior. From the ‘Appearance’ section, you can set the position where you want to display the Sales Notification and use the checkbox to disable/enable ‘Close Button’ & ‘Hide on Mobile’ options. You can even set a max width for your Notification Popup as well.
You can set the position for Sales Notification to either at the Bottom Left or Bottom Right side of your website. You can also show a ‘Close Button’ which can be clicked to close the Sales Notification. Furthermore, you have the flexibility to hide the ‘Sales Notification’ for mobile devices if you want to as well.
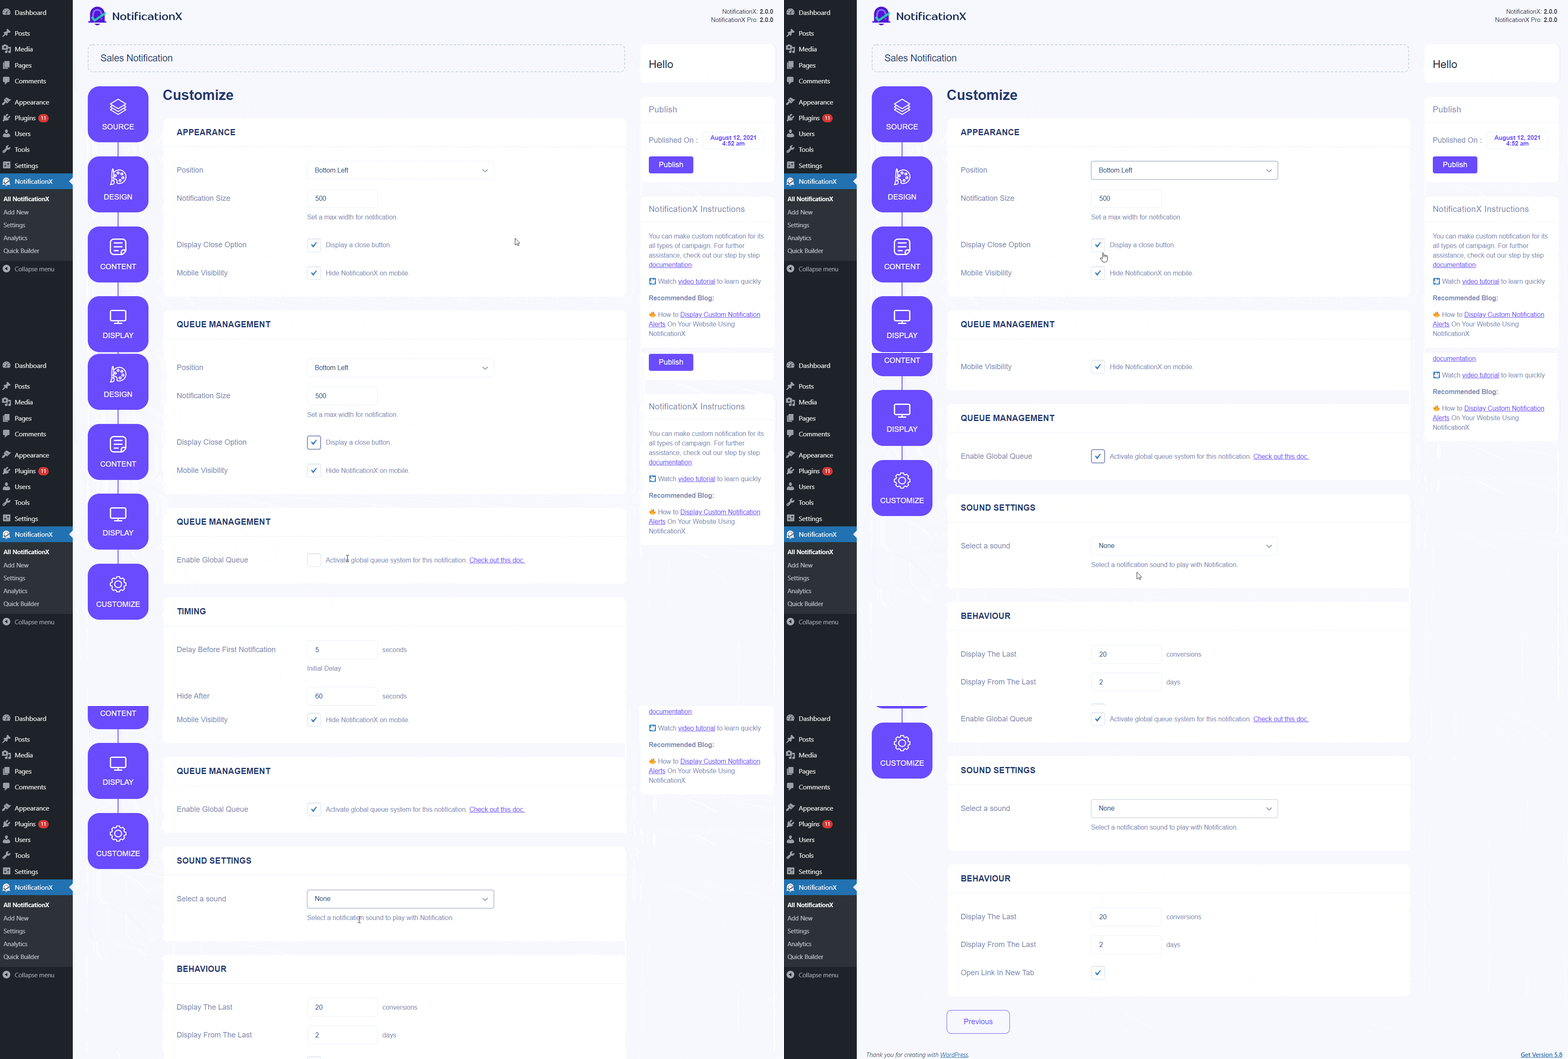
Besides, you also have the freedom to set time for ‘Initial’, ‘Display For’ & ‘Delay Between’ options as per your preference from the ‘Timing’ section. You can set an initial time after which your ‘Sales Notification’ will be popped up. By default, it is set to 5 seconds. You can also set a time limit for how long you want each notification popup to be displayed by modifying the ‘Display For’ field. To choose a time interval between two notifications of Sales Notification, simply set the time in the ‘Display Between’ field.
From the ‘Behaviour’ section, you can choose to display the number of sales made for the certain passed days. By checking the ‘Loop Notification’ box, the notification popup will keep on displaying. You can disable this as well. When a visitor clicks on the notification popup, you can control whether you want the link to open in a new window or a new tab from the ‘Open link in new tab’ checkbox.
Besides this, you can also enable global queue management for this type of sales notification. To learn more about this feature, check out this documentation.
Step 7: After you have completed step 6, click on the ‘Publish’ button.
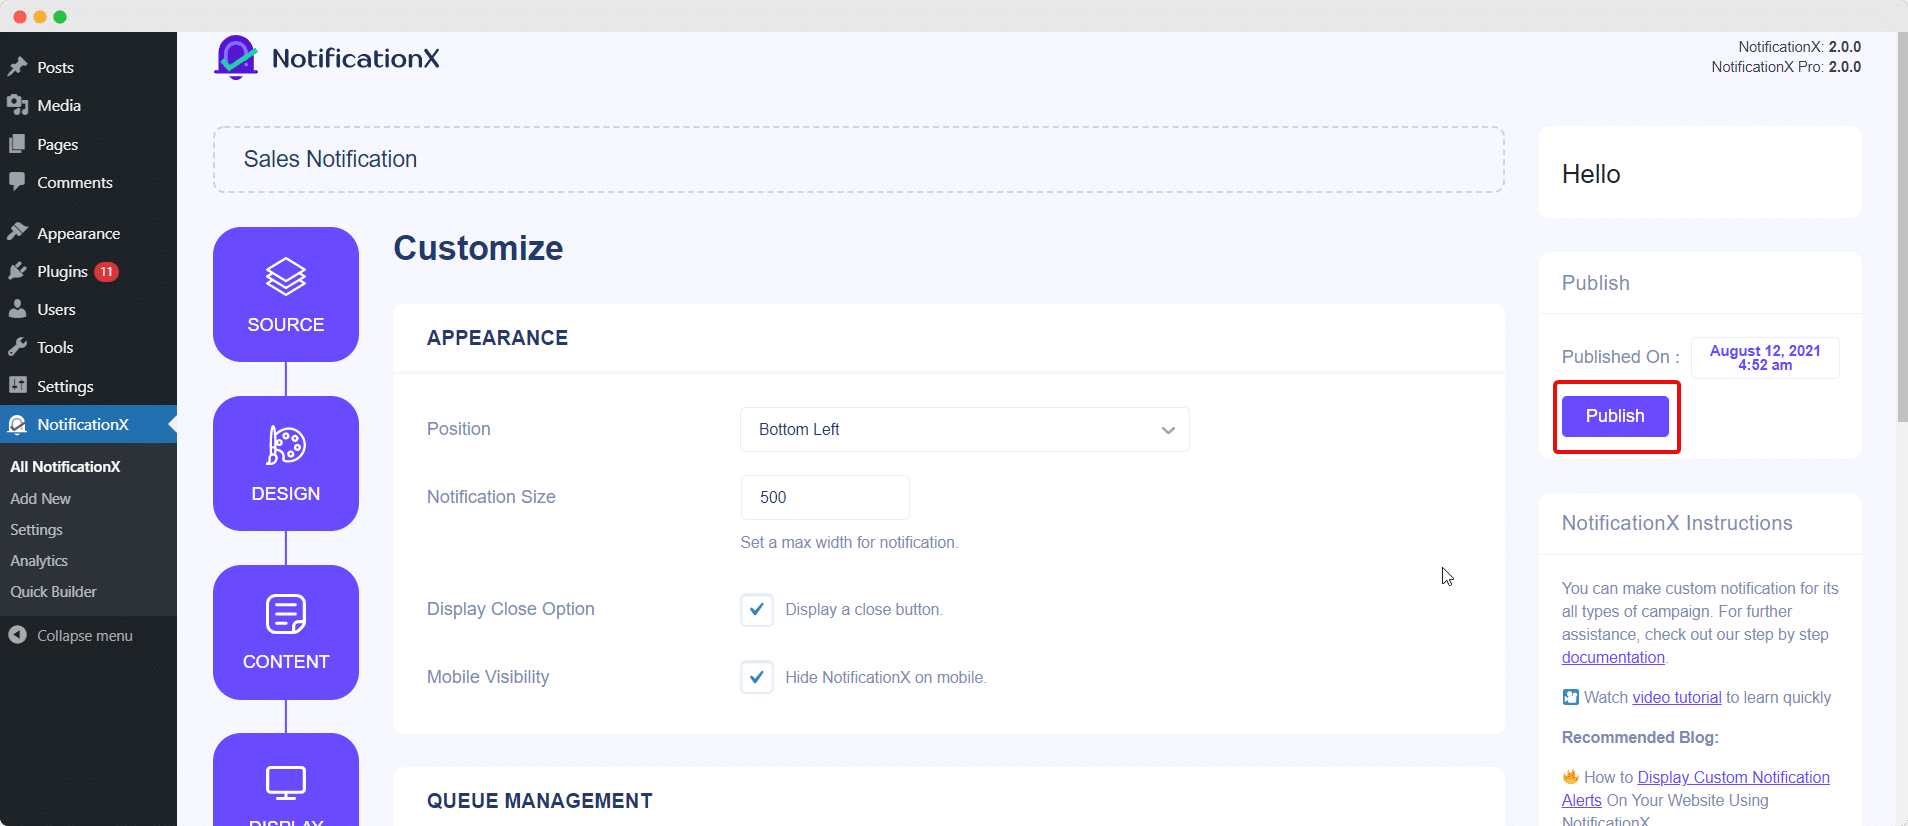
As a result, the ‘Sales Notification’ will be successfully created. By following these mentioned steps and a bit more modifying & styling, your final outcome would look something like this.
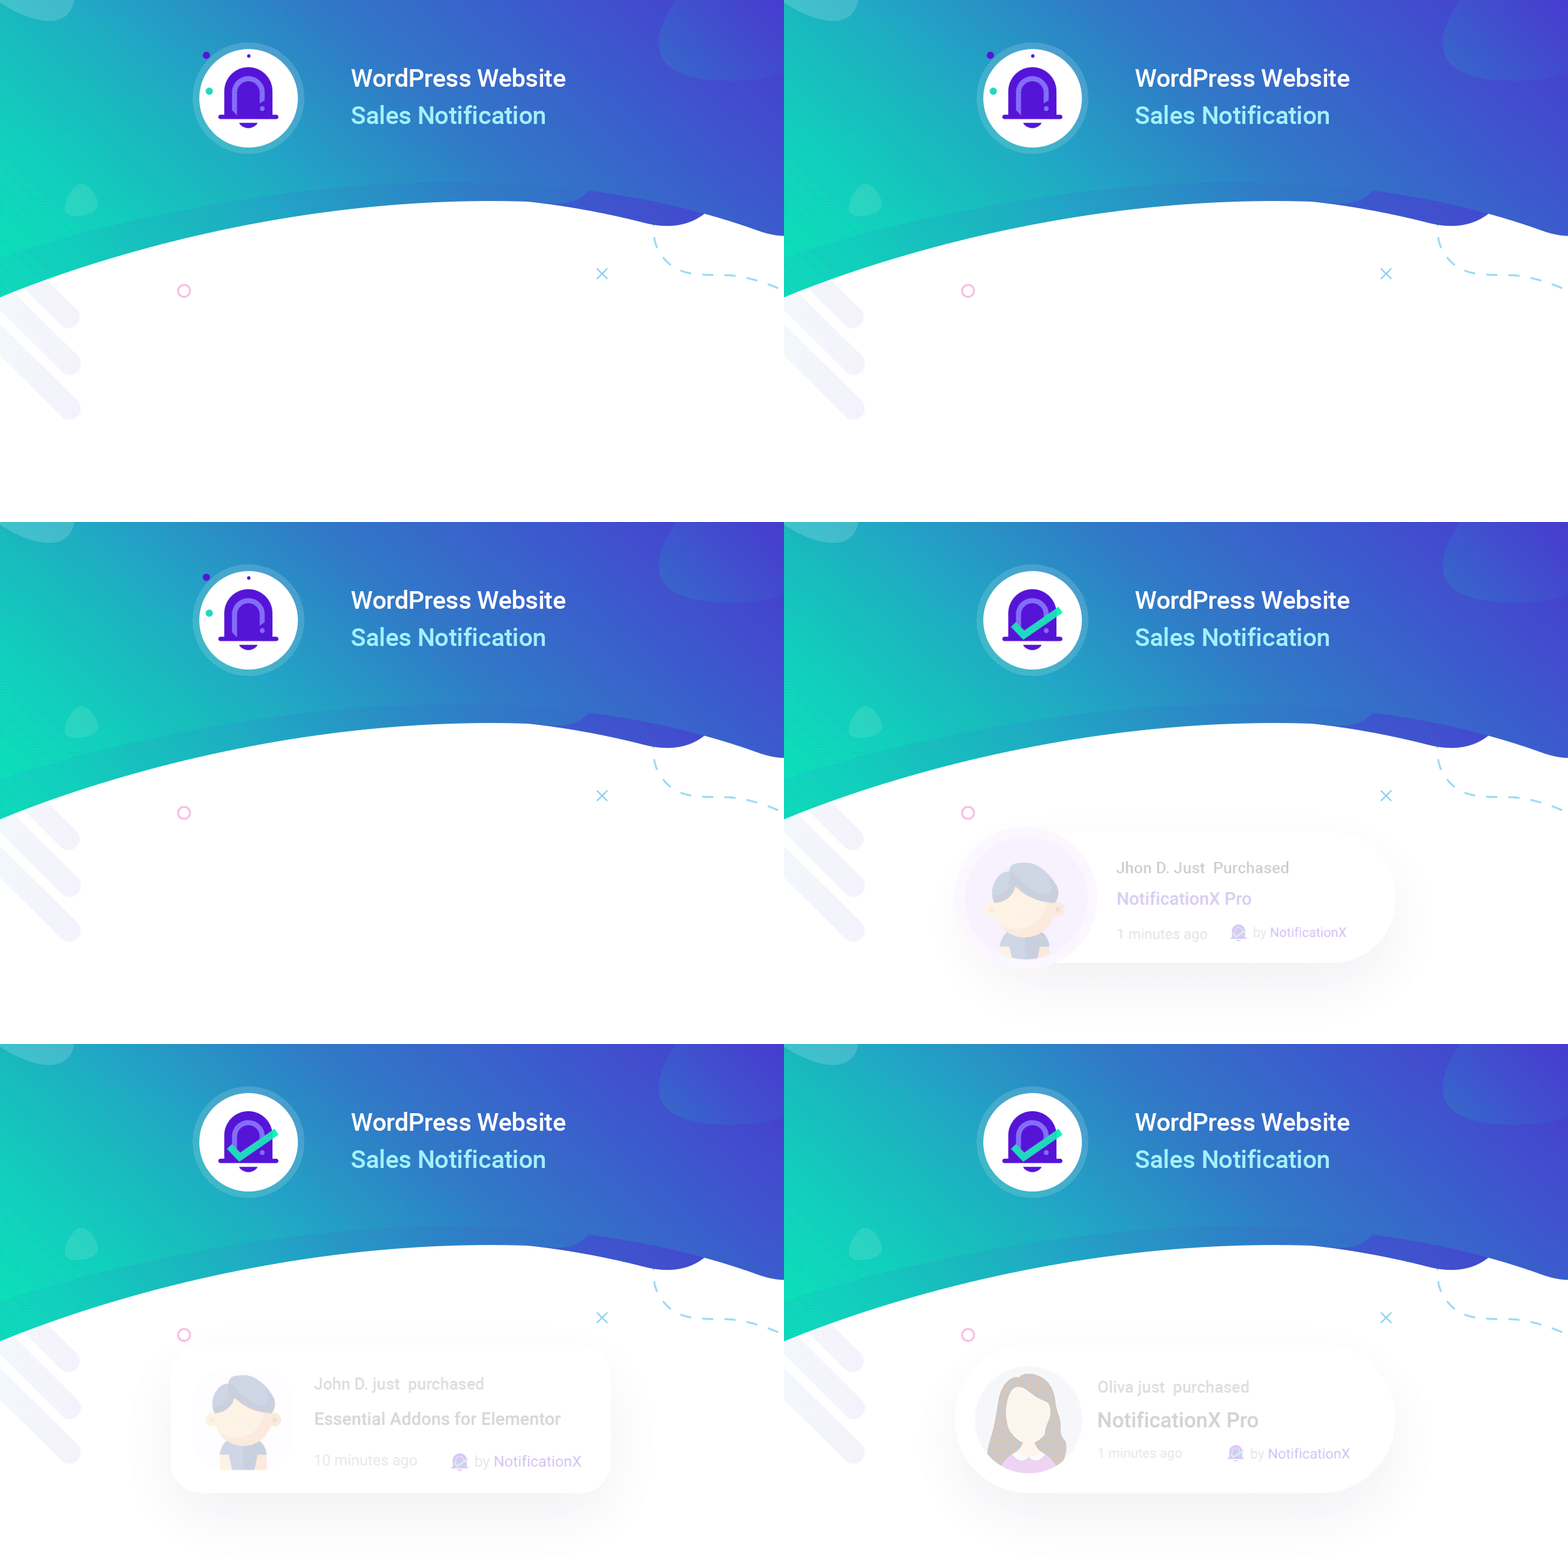
This is how you can easily design and display an appealing ‘Sales Notification’ on your WordPress website using NotificationX.
If you face any issues, you can contact our Support Team here.


