With NotificationX, you can easily showcase eye-catching pop-up alerts highlighting recent customer purchases on your online store, instantly capturing visitor attention and boosting engagement.
Follow the step-by-step guide below to learn how to configure and use the FluentCart Sales Notification feature effortlessly.
How to Configure And Use FluentCart Sales Notifications? #
Before getting started, you need to have FluentCart installed and activated and set up on your website to use this feature.
Step 1: Add a New Notification #
From your WordPress dashboard, navigate to wp-admin → NotificationX in the sidebar. Then, click on the ‘Add New’ button at the top, as shown below.

Step 2: Select Notification Type & Source #
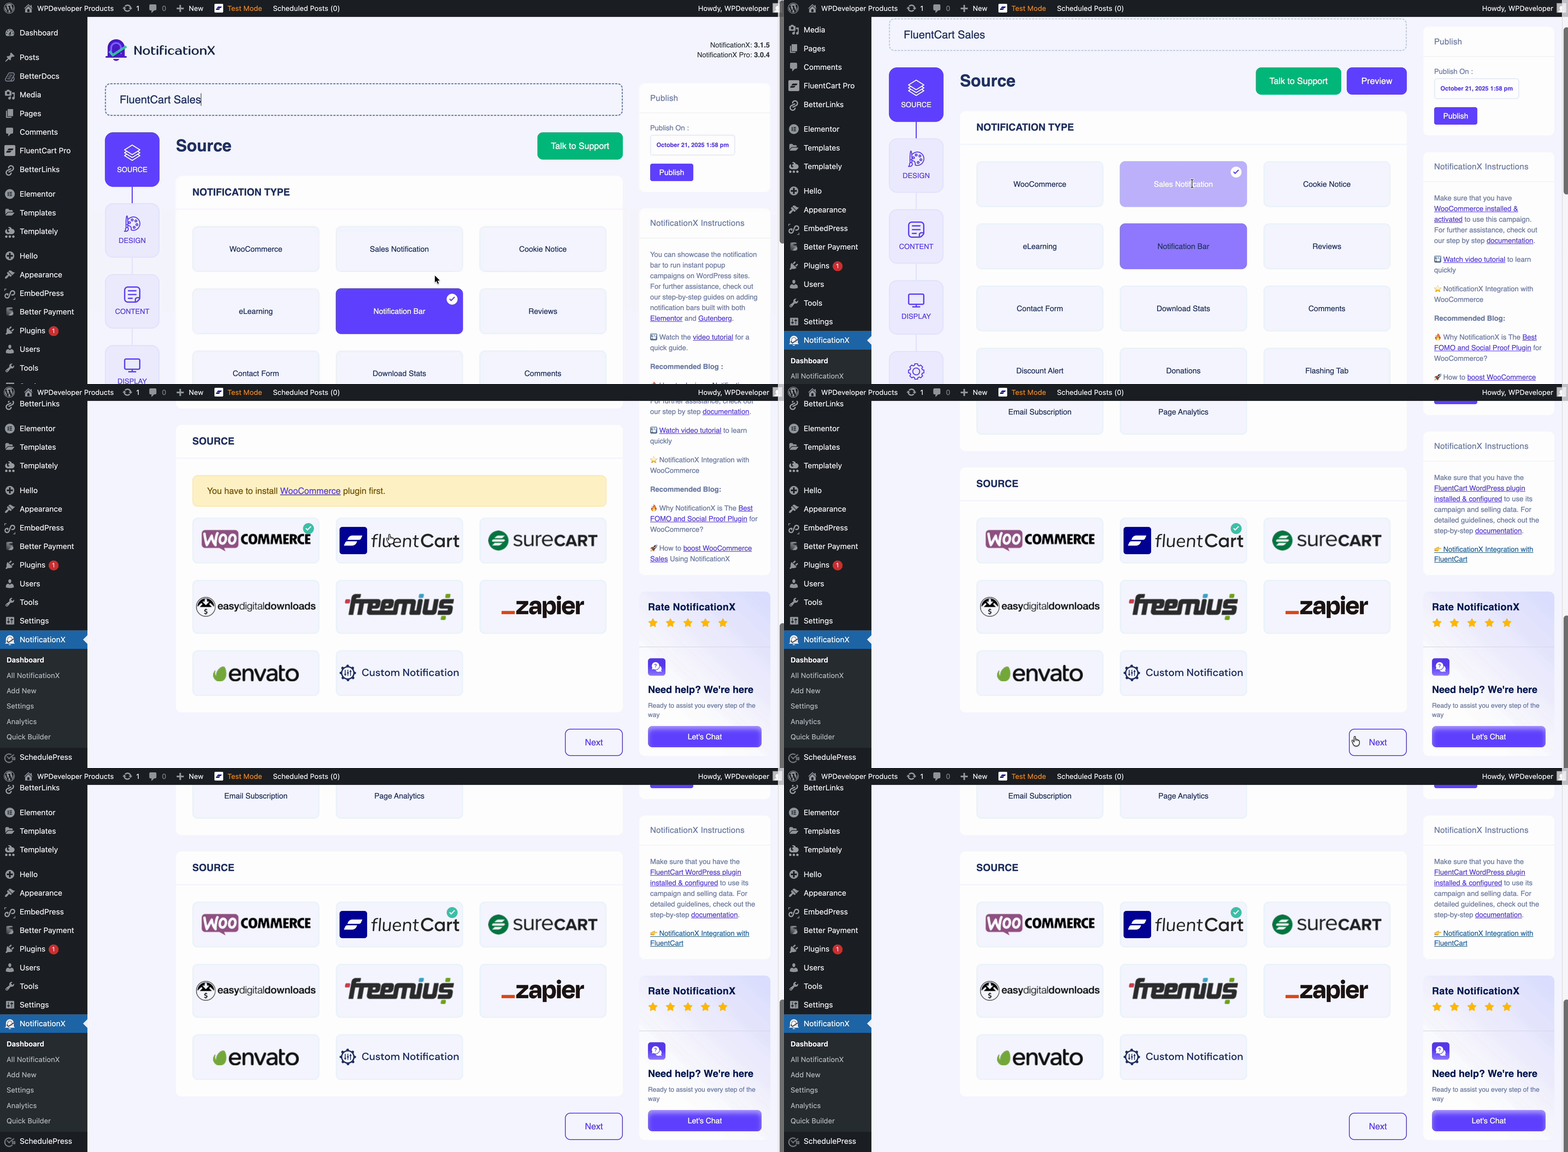
After completing step 1, you will be redirected to the ‘Source’ Tab. Here, you can add a title for your notification for better tracking afterward.
To display the FluentCart sales notifications on your site, select the ‘Sales Notification’ as the notification type. Then choose ‘FluentCart’ as your notification source. Afterward, click the ‘Next’ button to proceed to the next step.
Step 3: Customize the Design of the Notification #
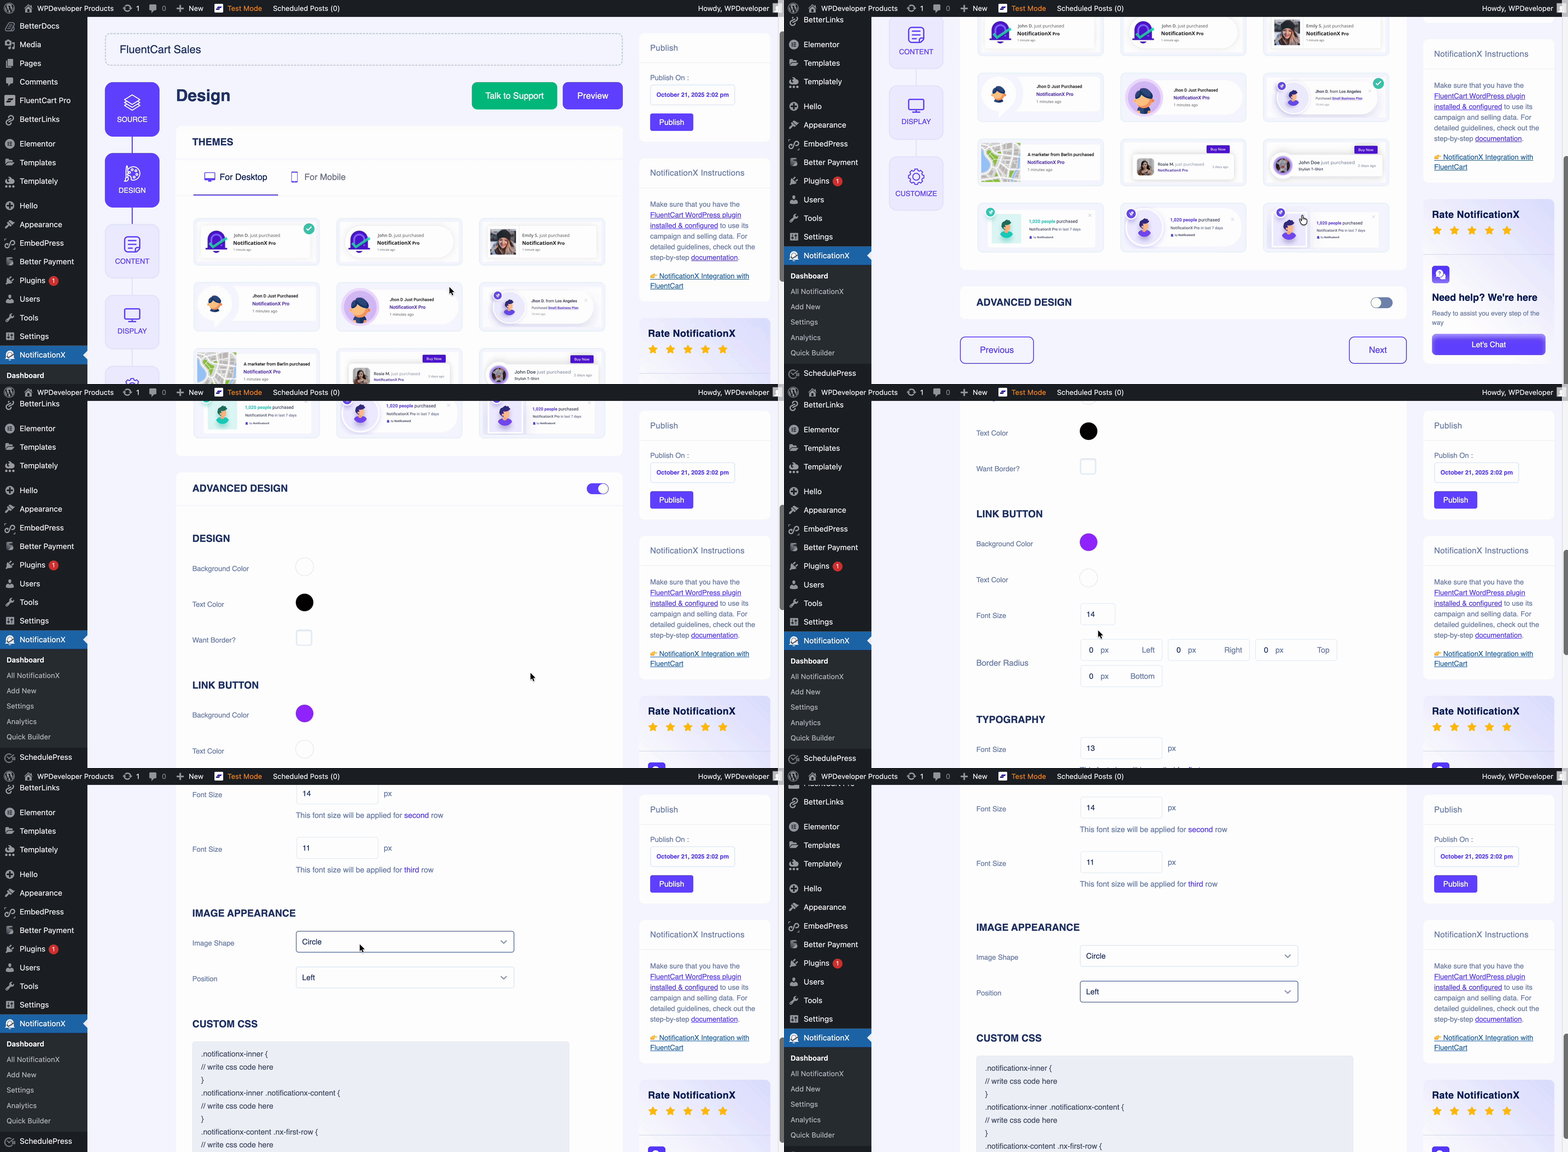
In the ‘Design’ tab, you can select a layout for your FluentCart Sales Notification and further personalize it using the ‘Advanced Design’ options. Under the ‘Themes’ section, the chosen layout determines how the notification will appear on your website, with 12 ready-made templates available to choose from.
Using the ‘Advanced Design’ settings, you can fully customize the look and feel of your notification. Adjust the styling, image appearance, and typography, and easily modify the background or text color of the pop-up. Additionally, you can add and style borders to match your site’s design perfectly.
Step 4: Modify the Content #
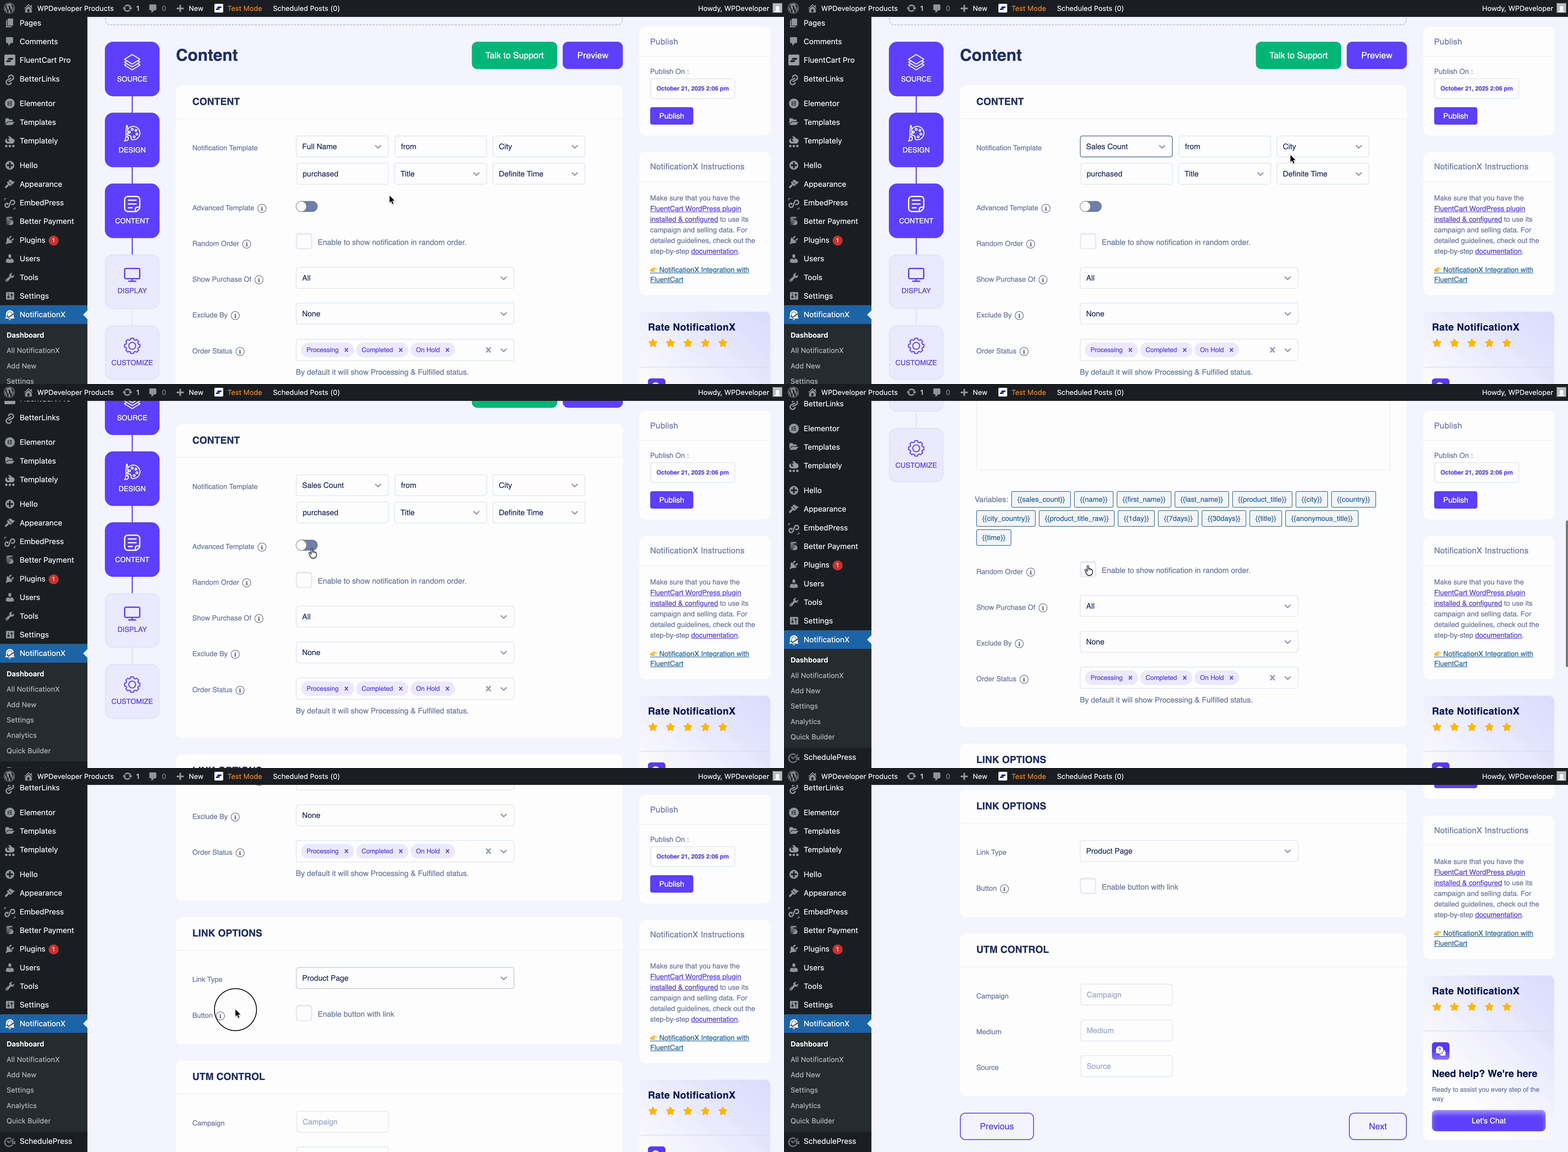
Next, you’ll be taken to the ‘Content’ tab, where you can edit your Notification Template and customize the content text as you prefer. The available options may vary based on the FluentCart Sales Notification type you’re using.
Step 5: Customize Display Settings #
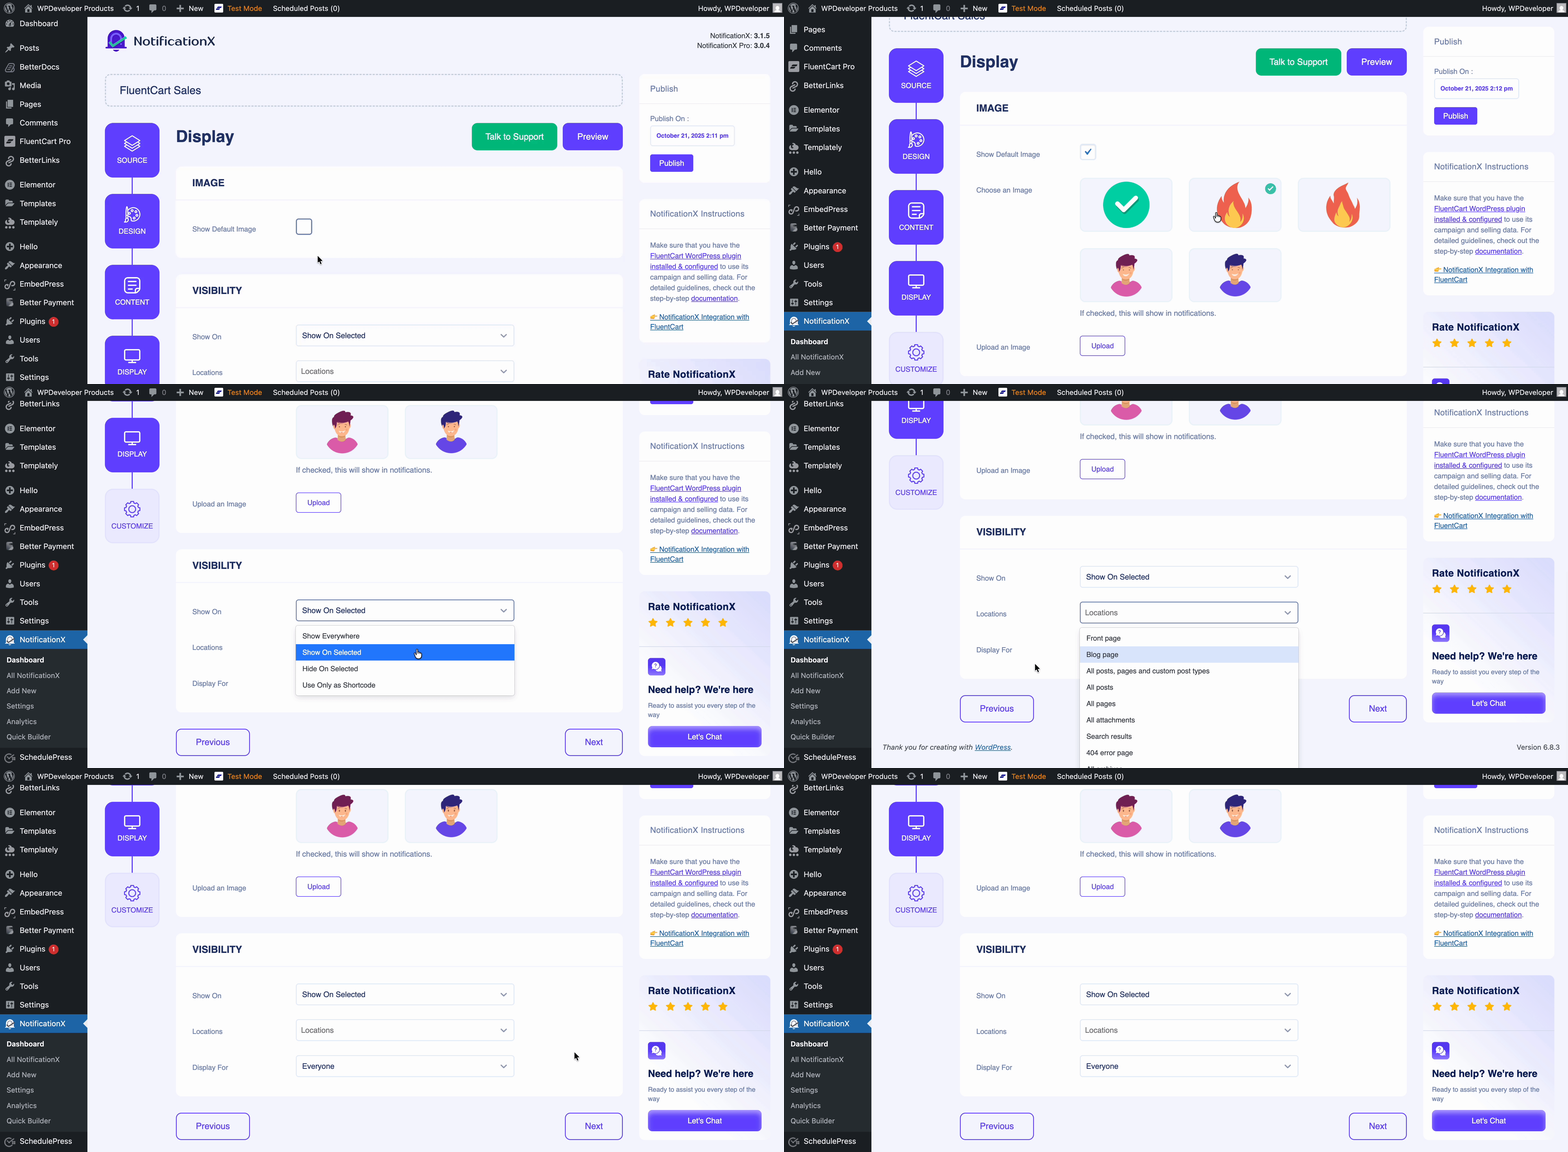
In the ‘Display’ tab, you’ll find two sections: Image and Visibility. From the Image section, you can use the checkbox to display either a default image or a user avatar in the notification popup. If a user doesn’t have an avatar set in their profile, you can enable the ‘Default Image’ option and upload an image to be shown instead.
In the ‘Visibility’ section, you can choose the pages where your Sales Notification will appear. By default, ‘Show On’ is set to ‘Show Everywhere’, meaning the notification will be displayed across all pages of your website. Alternatively, you can specify particular pages to show or hide the notification. Once you’ve made your selections, click ‘Next’ to proceed to the ‘Customize’ tab.
Step 6: Customize Appearance, Timing & More #
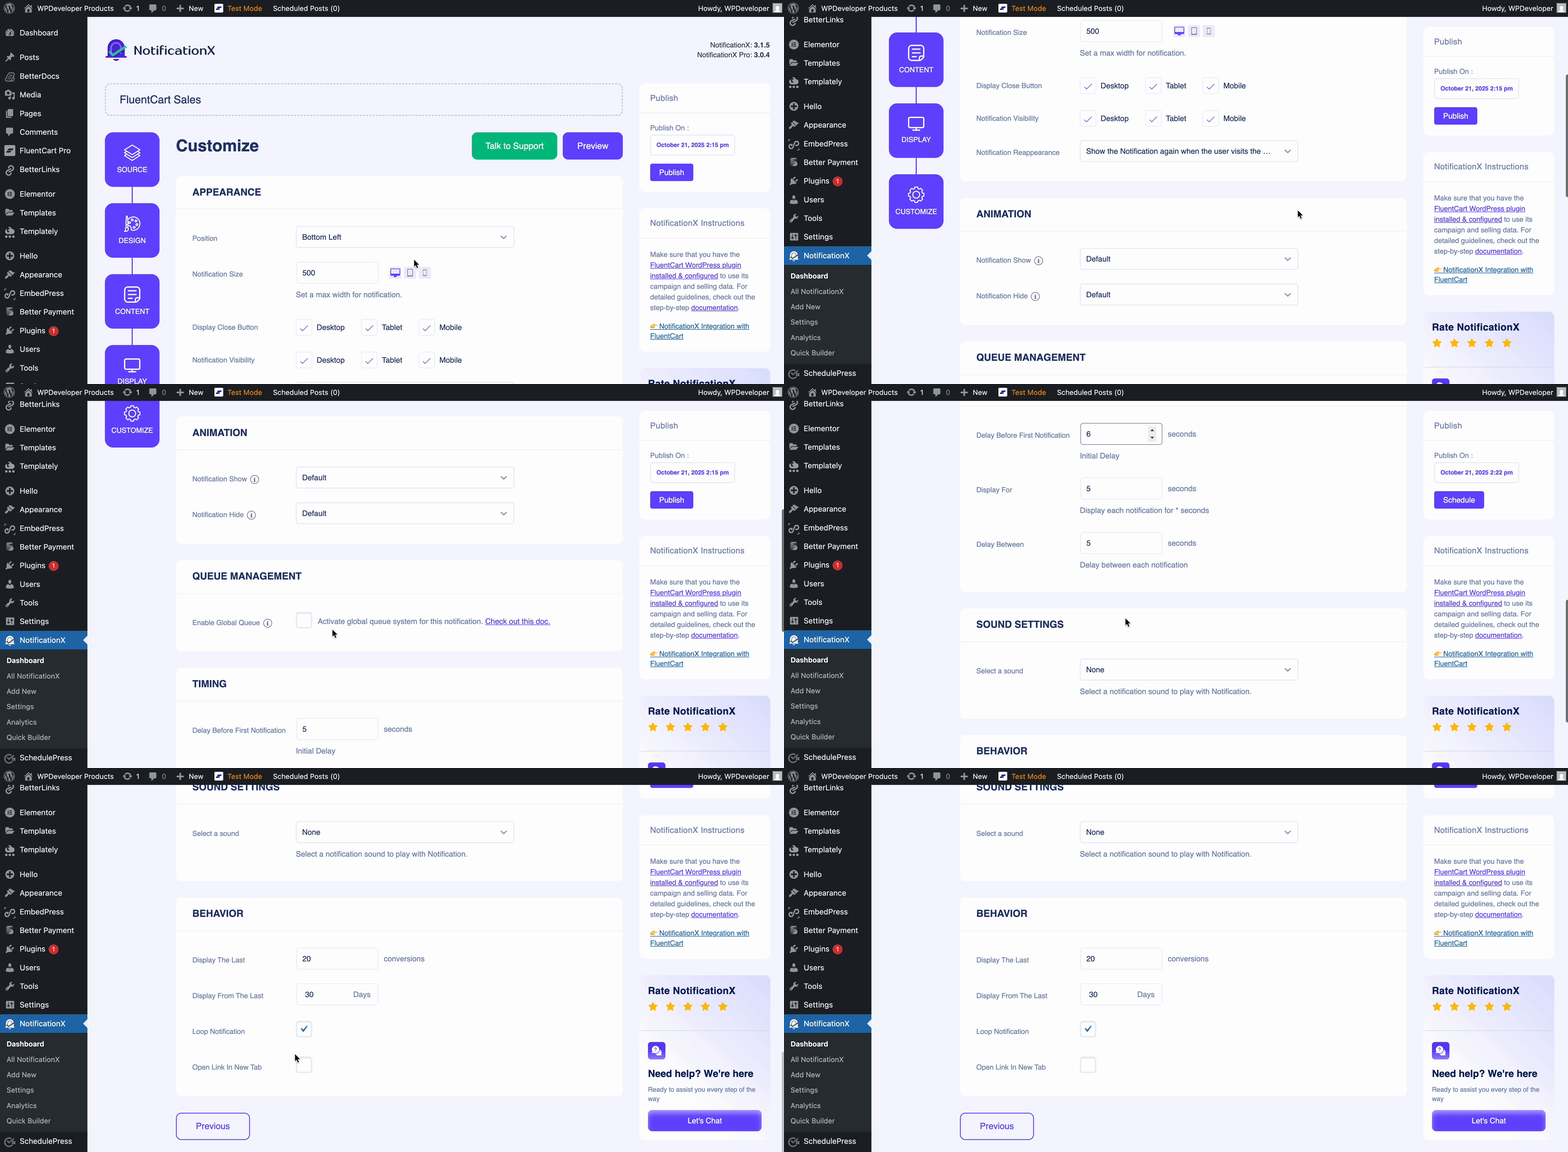
In the ‘Customize’ tab, you’ll find six sections: Appearance, Animation, Queue Management, Timing, Sound Settings, and Behavior. Within the Appearance section, you can choose the position of your Sales Notification, toggle the ‘Close Button’ and ‘Notification Visibility’ options, and even set a maximum width for the notification popup. Customize for which audiences the notification will reappear on the site. Then, from the animation, decide how you want to show or hide the animation interactively. Toggle the Queue button to manage the global queue.
Additionally, in the ‘Timing’ section, you can customize the ‘Delay before first notification’, ‘Display For’, and ‘Delay Between’ settings to suit your preferences. The ‘Delay before first notification’ option sets the delay before the first Sales Notification appears, which is 5 seconds by default. The ‘Display For’ field allows you to control how long each notification remains visible, while the ‘Delay Between’ field lets you set the interval between consecutive notifications.
Select the sound settings that you want your visitors to hear while the notification pops up. In the ‘Behavior’ section, you can choose to display the number of sales made over the past few days. Enabling the ‘Loop Notification’ option will make the popup appear continuously, though you can also disable it. Additionally, when a visitor clicks on the notification, you can control whether the link opens in a new window or tab using the ‘Open link in new tab’ checkbox.
Step 7: Publish The Notification #
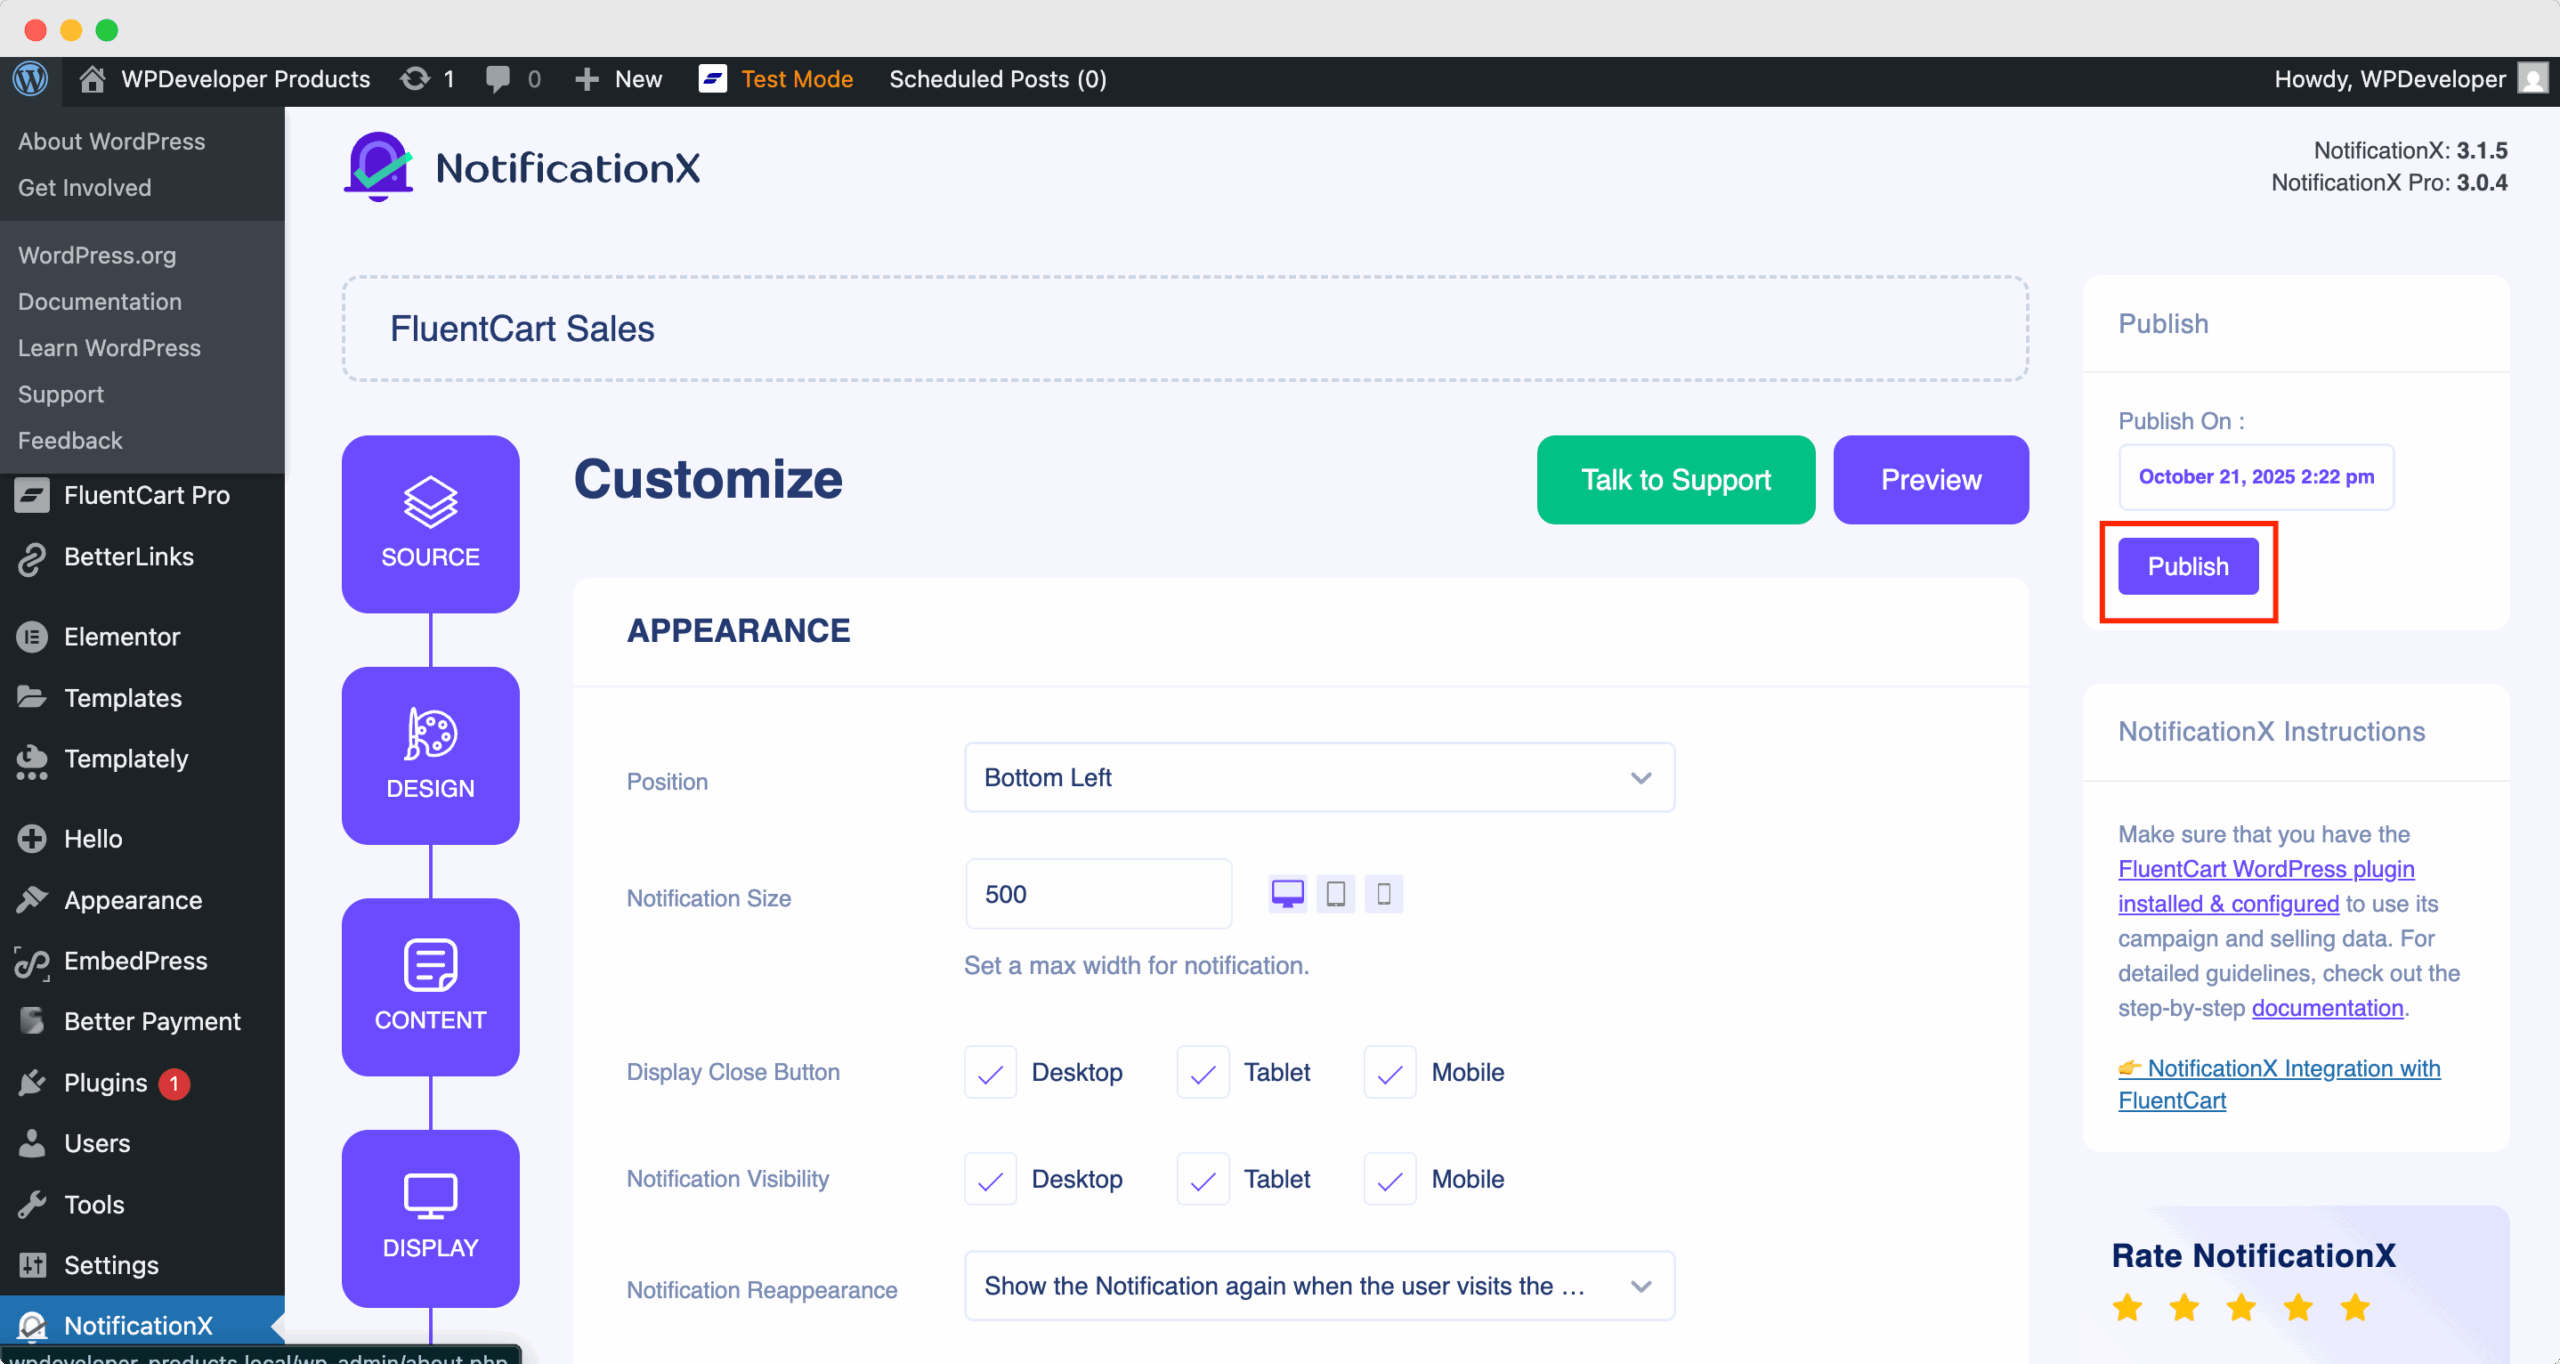
After you have completed step 6, click on the ‘Publish’ button. This is how you can easily design and display an appealing ‘FluentCart Sales Notification’ on your WordPress website using NotificationX.
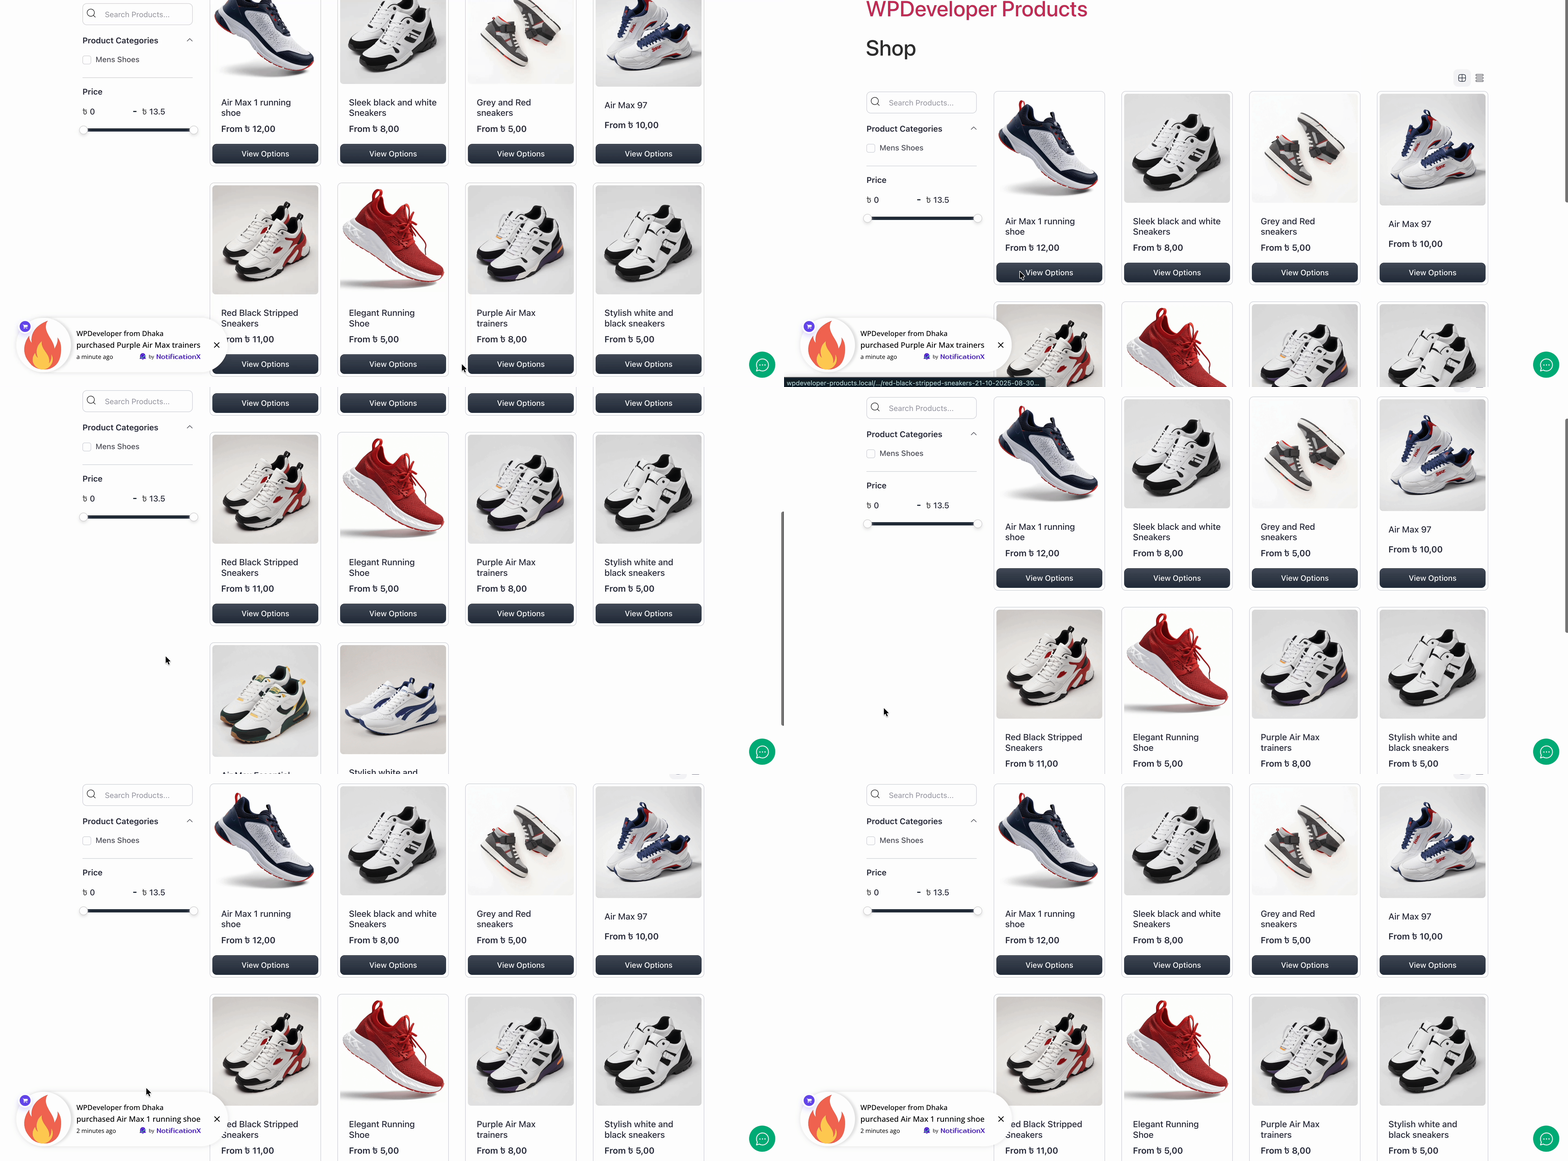
Finally, the ‘FluentCart Sales Notification’ will be successfully created. By following these steps and slightly modifying & styling, your outcome would look like this.
If you face any issues, you can contact our Support Team.


