How to Show Zapier Notification Alert using NotificationX? #
NotificationX gives you the chance to integrate with your Zapier Account. As a result, you are able to display any sorts of Zapier Notification Alerts such as Email Subscription, Review, Sales Notifications and others.
Before you connect NotificationX with your Zapier Account, you need to create a Zapier Notification Alert on your website. Follow these steps to show Zapier Notification popup with NotificationX:
How to Create & Configure Zapier Notification Alert #
Step 1 – Add New Notification #
To begin, go to your WordPress Dashboard and navigate to wp-admin -> All NotificationX -> NotificationX. Then right at the top, click on ‘Add New’.

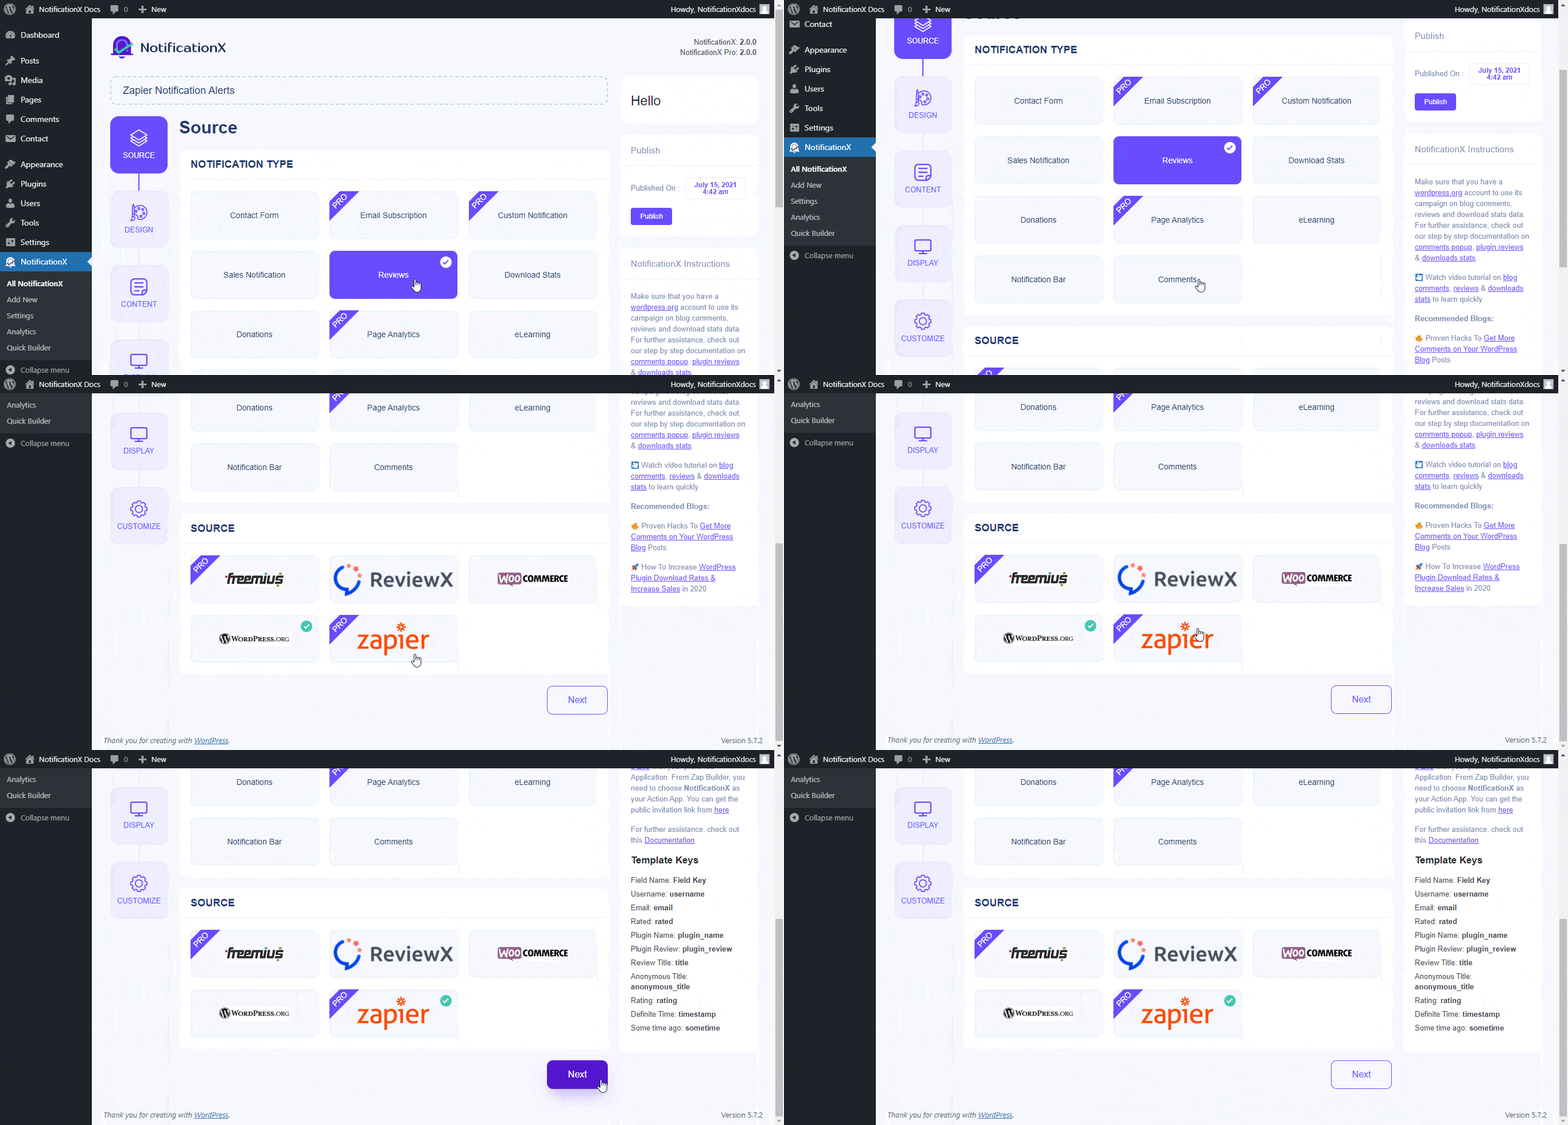
Step 2 – Pick a Source #
You will find ‘Zapier’ source inside these Notification Types: Sales Notification, Reviews and Email Subscription. For instance, If you want to display tweets from your Twitter account, you can pick the ‘Reviews’ option. After picking your preferred Notification Type, make sure to choose ‘Zapier’ as your Source and click on ‘Next’.
Step 3 – Choose a Design Theme #
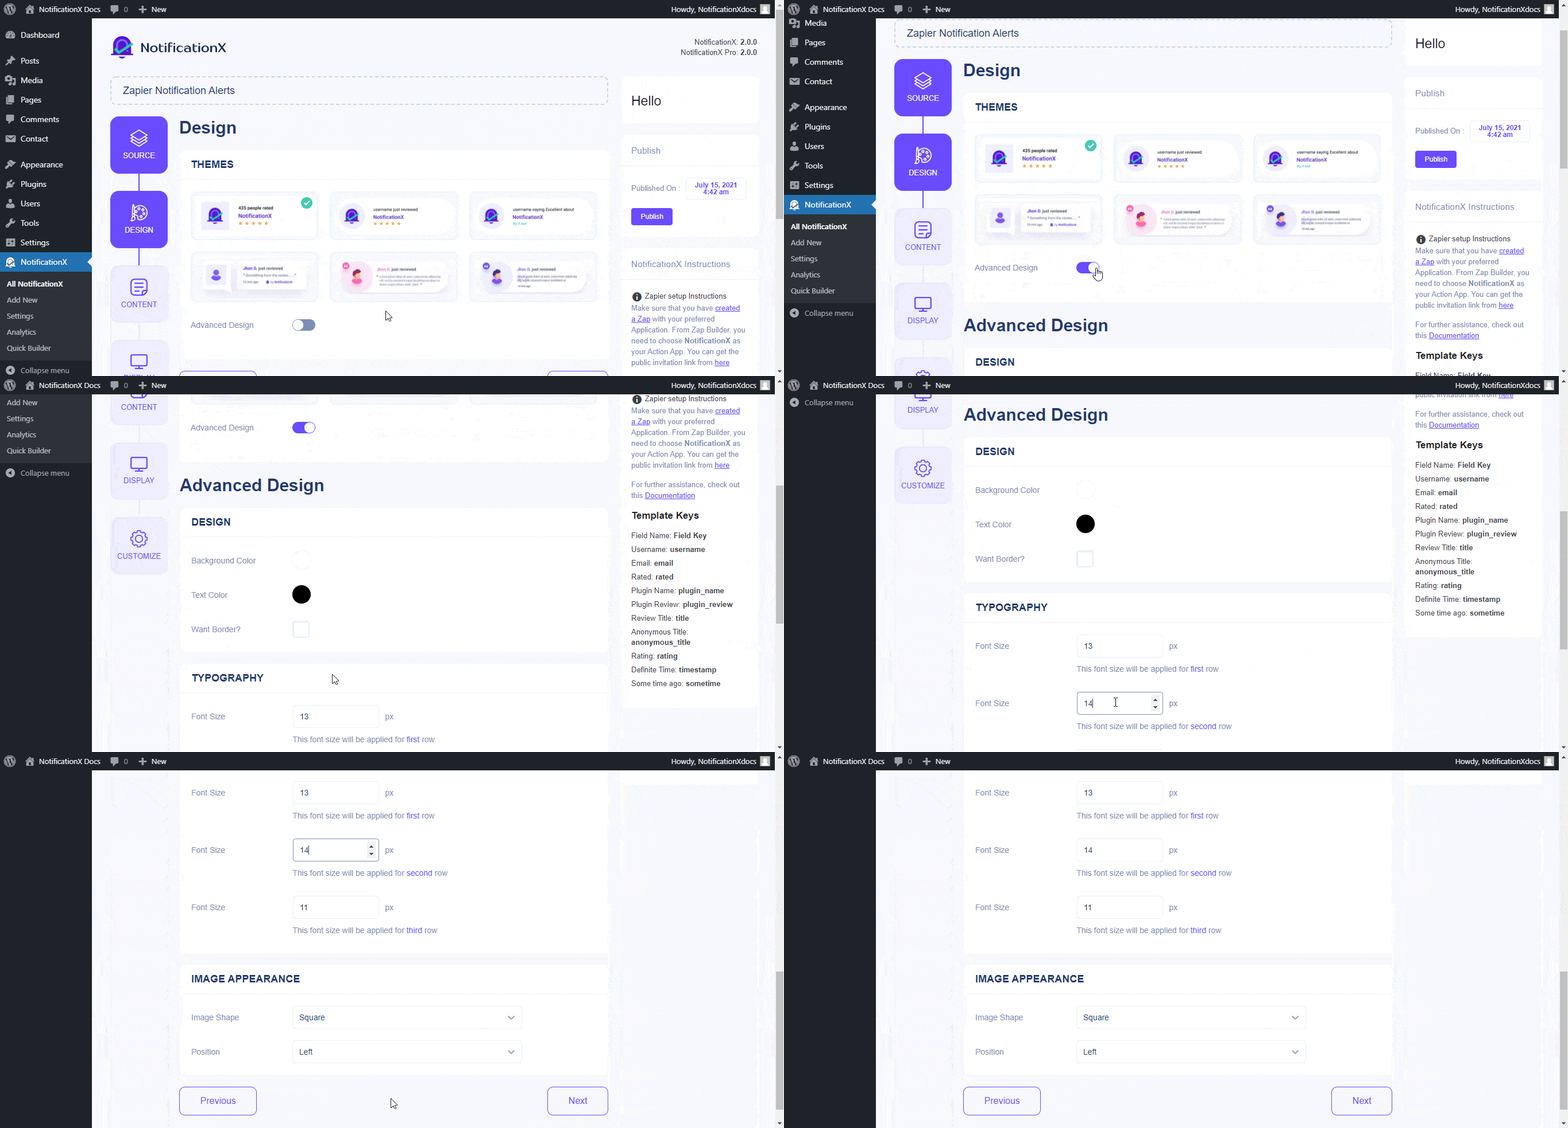
From the ‘Design’ tab, you can choose a layout and also have the flexibility to use the ‘Advanced Design’ option to customize it as per your preference. From the ‘Themes’ section, the chosen layout is how the notification alert will be displayed on your website. Besides, you can modify your chosen Theme by customizing it through ‘Advanced Design’ option. From this section, you will be able to easily add styling to your design, image appearance and typography.
Step 4 – Configure Template Content #
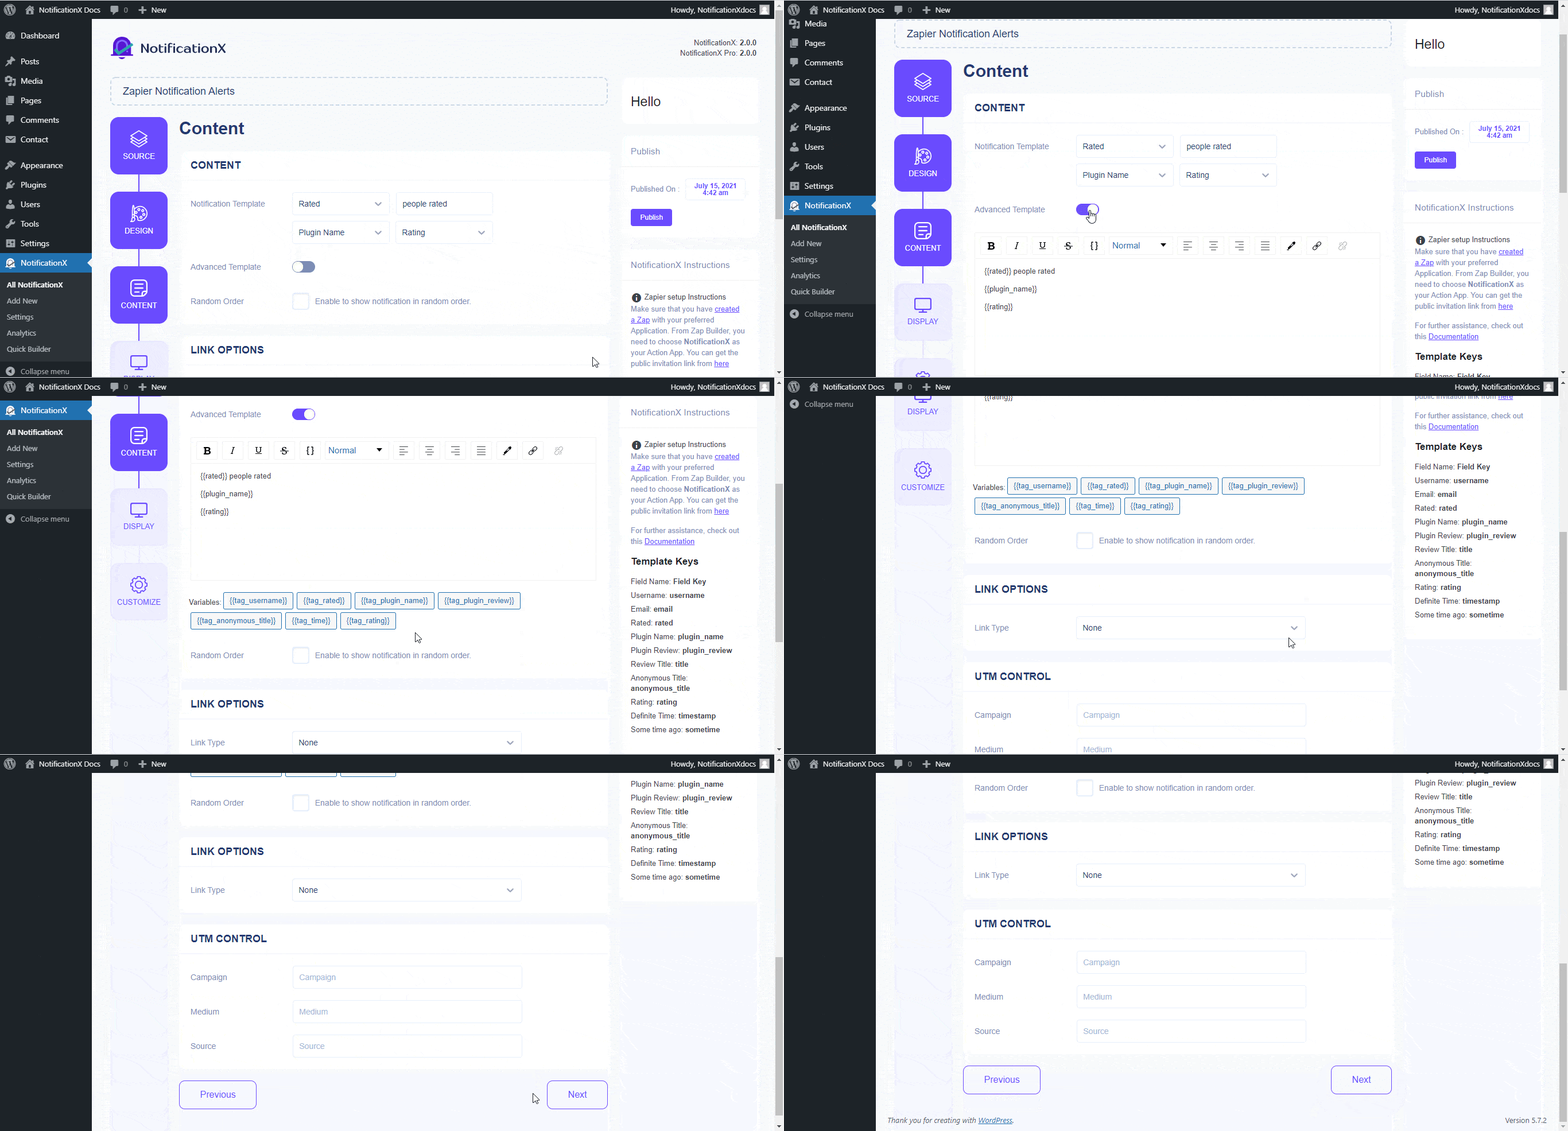
You will then be redirected to the ‘Content’ tab from where you can modify your ‘Notification Template’ and add your preferred content text. Besides, NotificationX offers ‘Notification Template’ for your Content. You can easily go ahead and choose your preferred variables. On the other hand, ‘Advanced Template’ gives you complete control over to customize the entire Content. Moreover, you can even track the various types of campaigns through NotificationX through ‘UTM Control’.
Step 5 – Adjust Display Options #
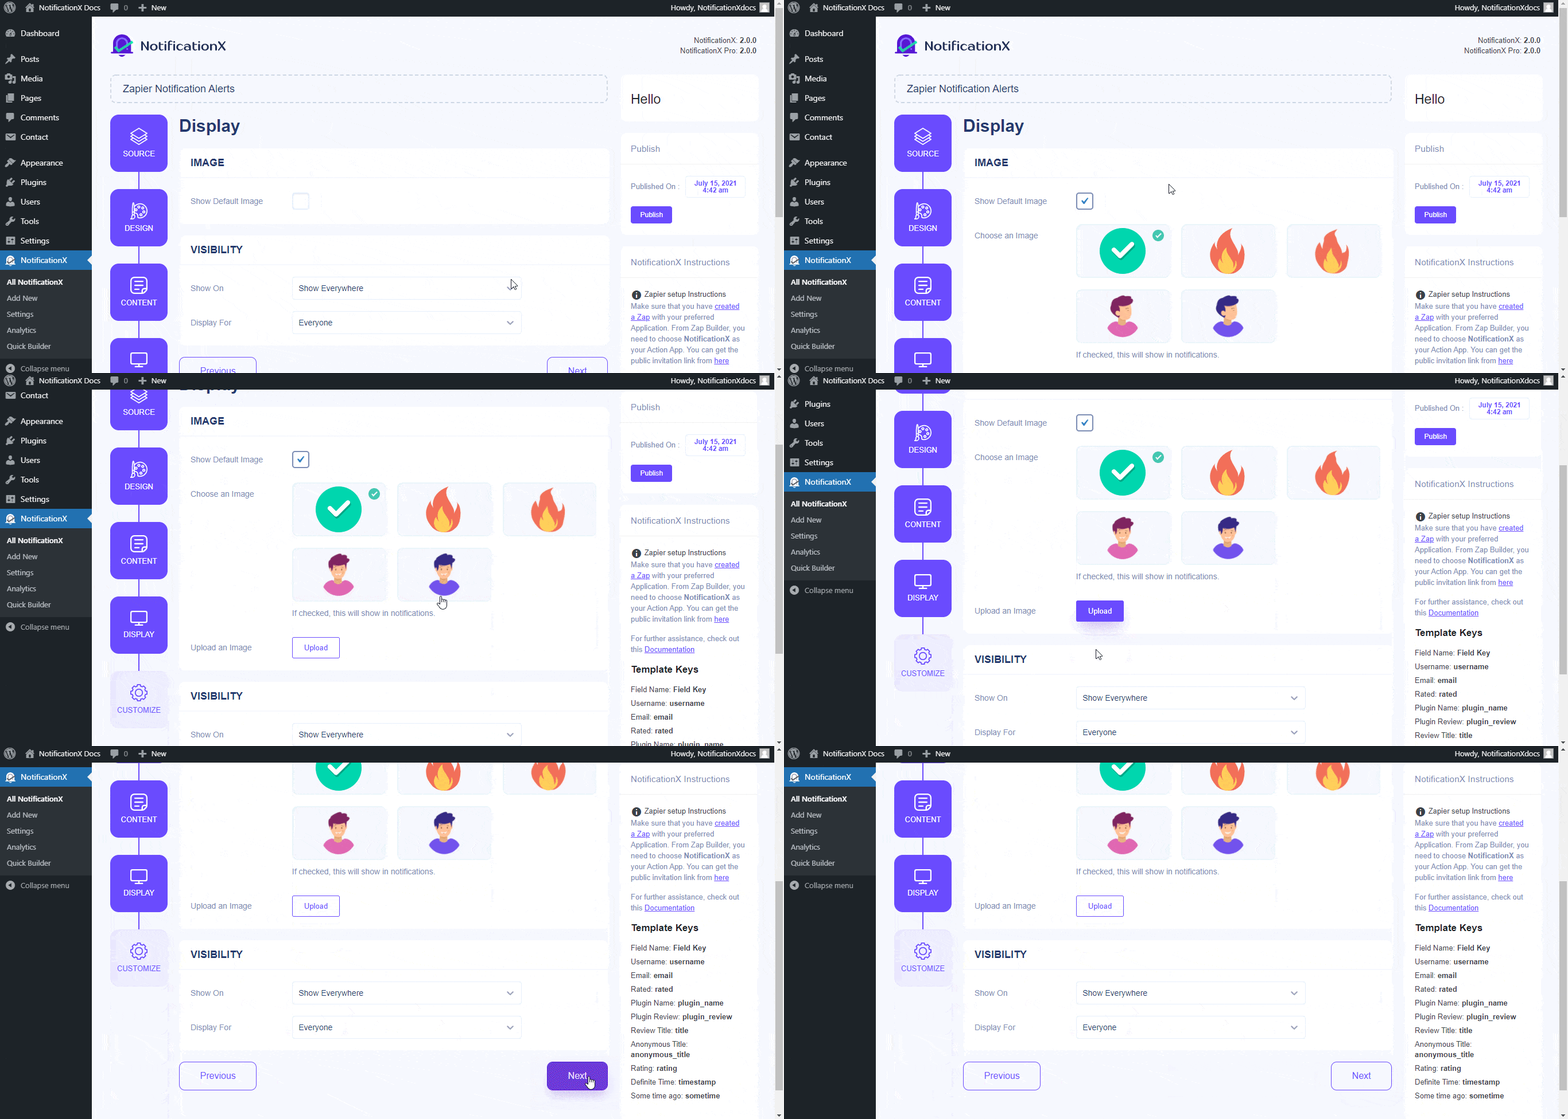
From the ‘Image’ section, you can use the checkbox to display default image or an avatar in the notification popup. Whereas, ‘Visibility’ section allows you to set the pages where you want to display the Zapier notification alert.
Step 6 – Set Up Appearance #
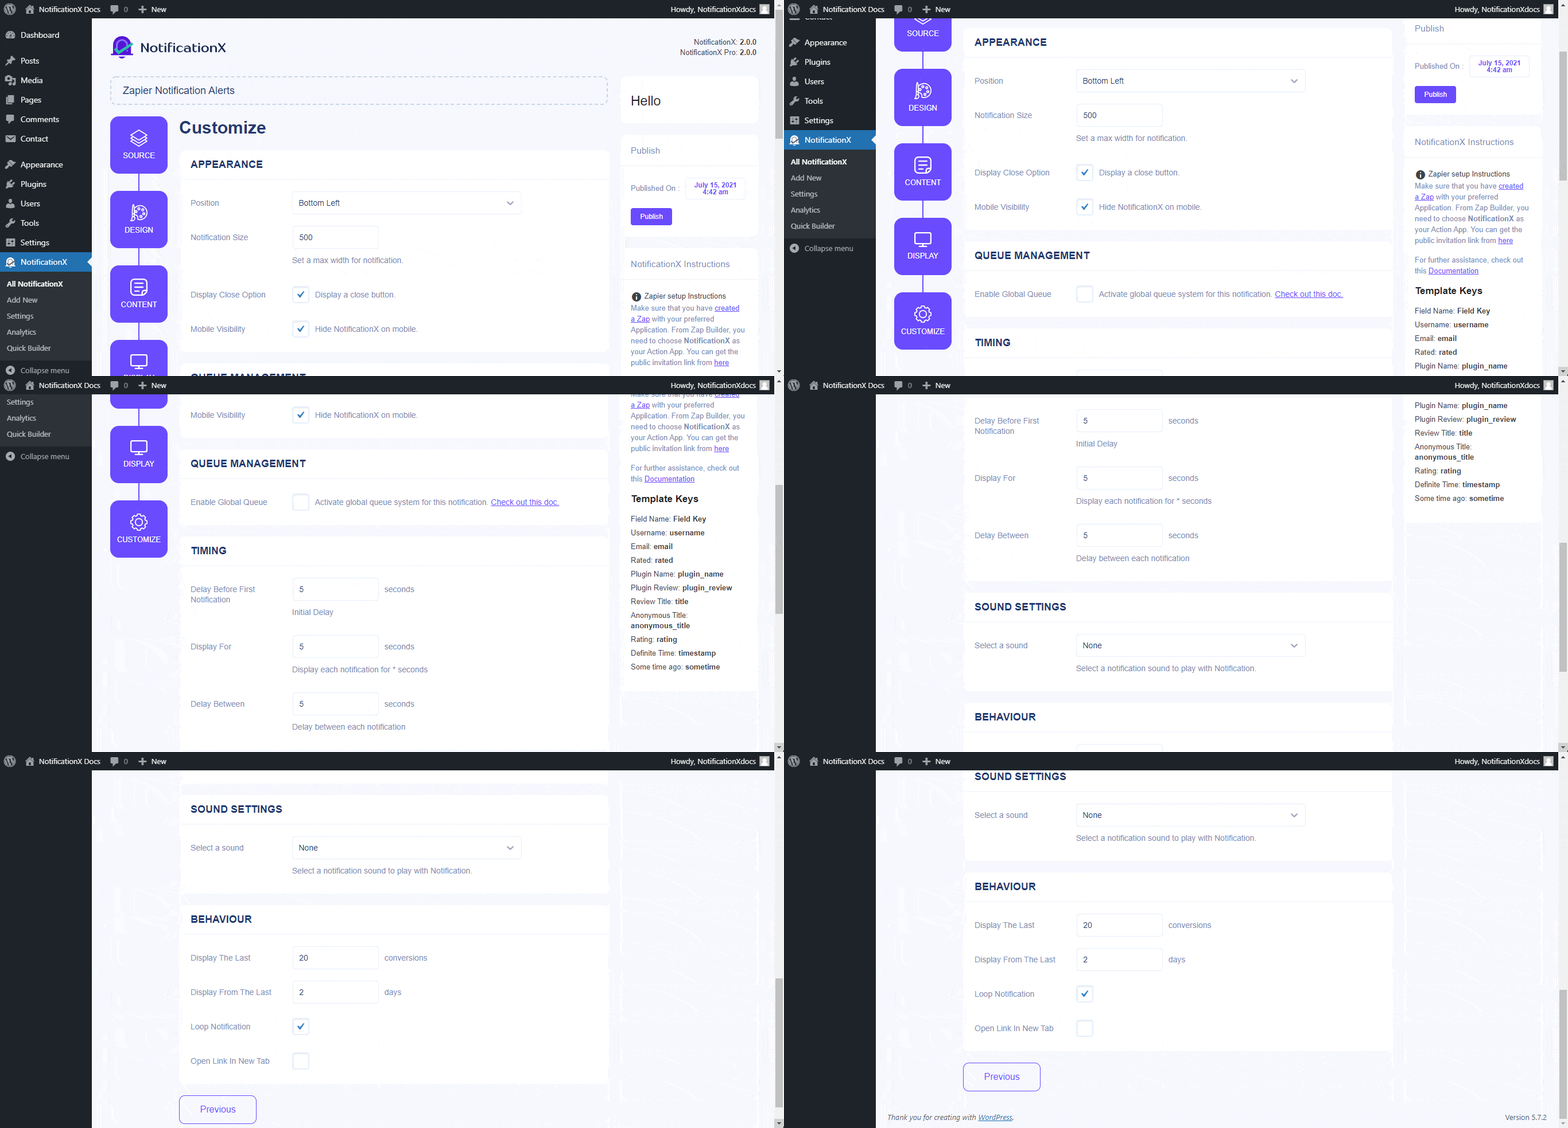
From the ‘Appearance’ section, You can set the position and width for notificiation alert. From the ‘Timing’ section, you can control the ‘Display’ time duration and set an initial time after which your ‘Zapier notification alert’ will be popped up. ‘Behaviour’ section allows you to pick a number of conversions and specify certain amount of days which will be considered for notification popup. Besides, the ‘Sound Settings’ section lets you to pick a Sound Alert for your notification popup.
Step 7: Publish Your Notification #
After you have completed step 6, click on the ‘Publish’ button. As a result, the ‘Contact Form Submission Alert’ will be successfully created.

How to Connect NotificationX with Zapier #
After you have published your Zapier Notification Alert, you will need to connect NotificationX with Zapier. To do that, first of all, you need to login to your Zapier Dashboard. To use NotificationX in Zapier, make sure to accept the public invitation link of NotificationX. Then, simply go ahead and click on the ‘Accept Invite & Build a Zap’ button.
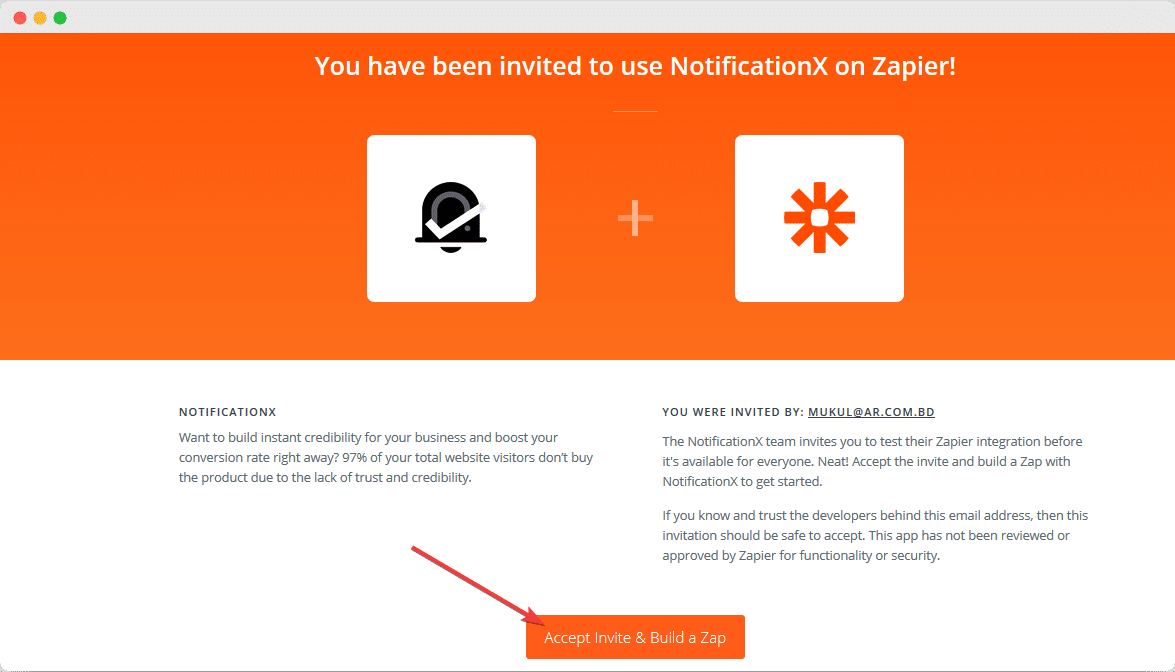
Note: This documentation is based on the latest Zapier Builder Interface as of (9th September, 2019). So, make sure that you have migrated to the new interface. Regardless, the settings would be more or less the same.
Step 1 – Create a Zap
#
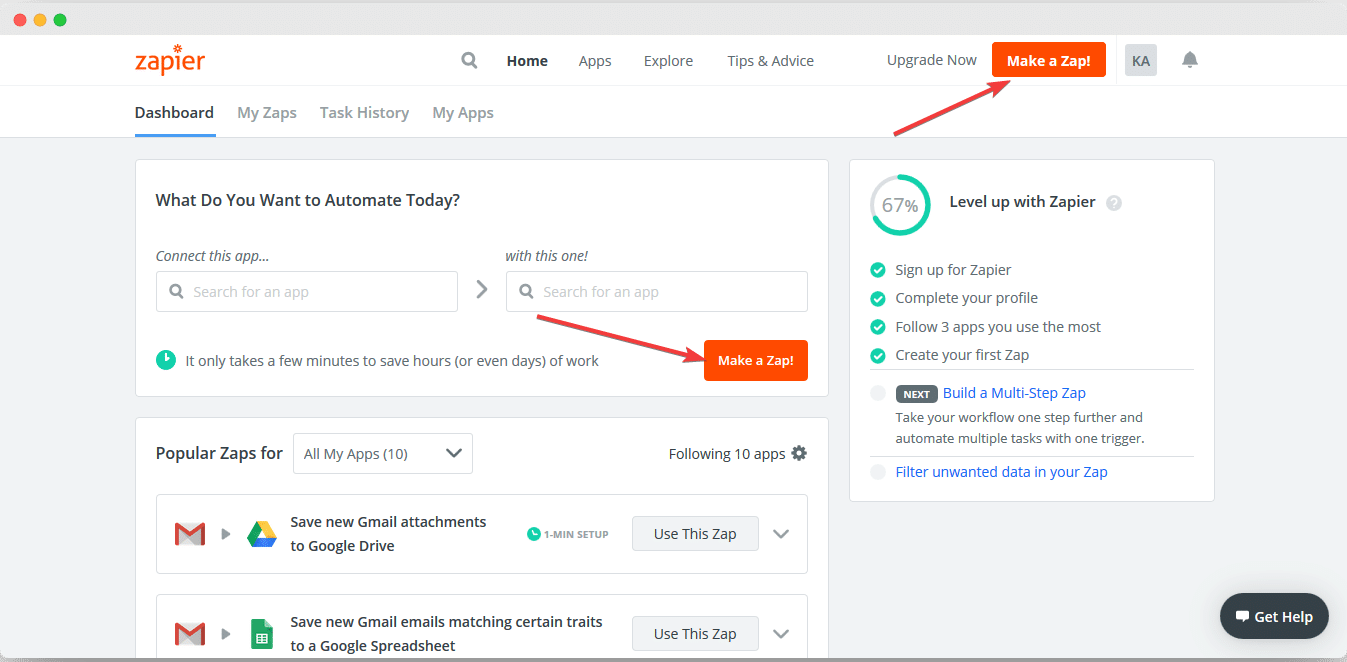
To connect NotificationX with Zapier, you need to create a Zap with your preferred Application. You will find the ‘Create a Zap’ button on your Zapier Dashboard. Simply go ahead and click on it.
Step 2 – Choose App & Event
#
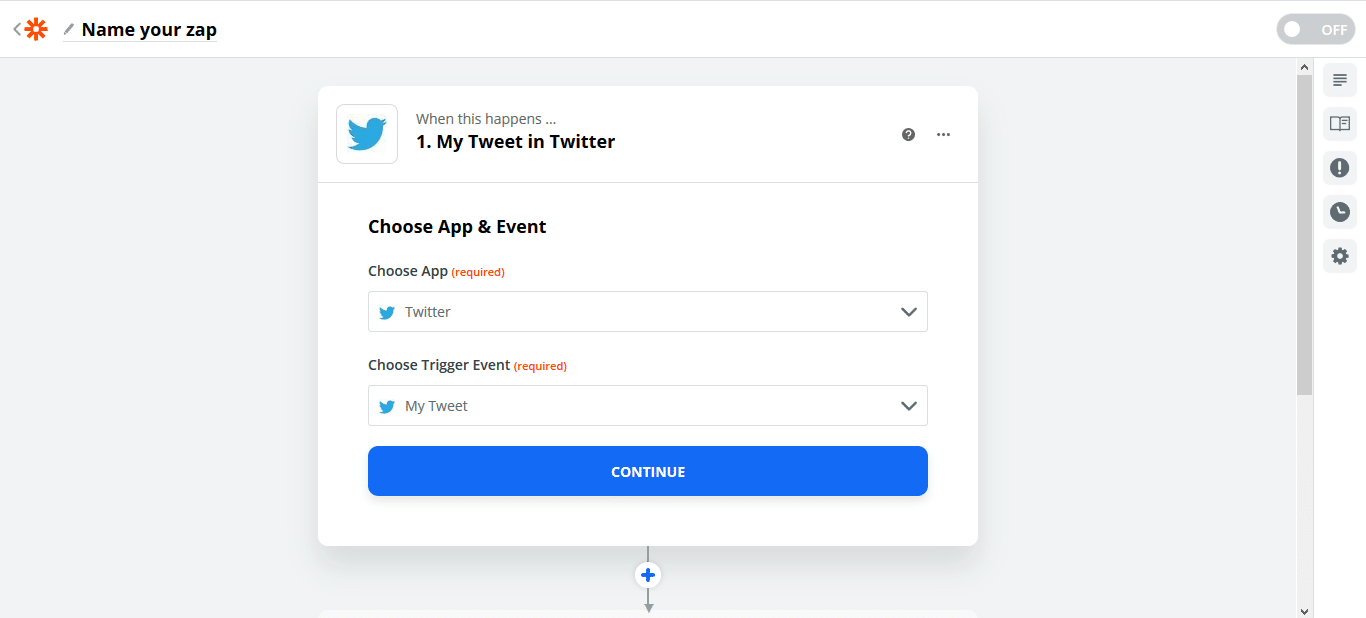
Once you are in the Zapier Editor page, you can set a Name for the Zap you are creating from the top left side of the Editor. You can name it whatever you want. Afterward, use the search bar to add your preferred application. (Example: To show notification alerts from your Twitter profile, you need to pick Twitter as your App for this case).
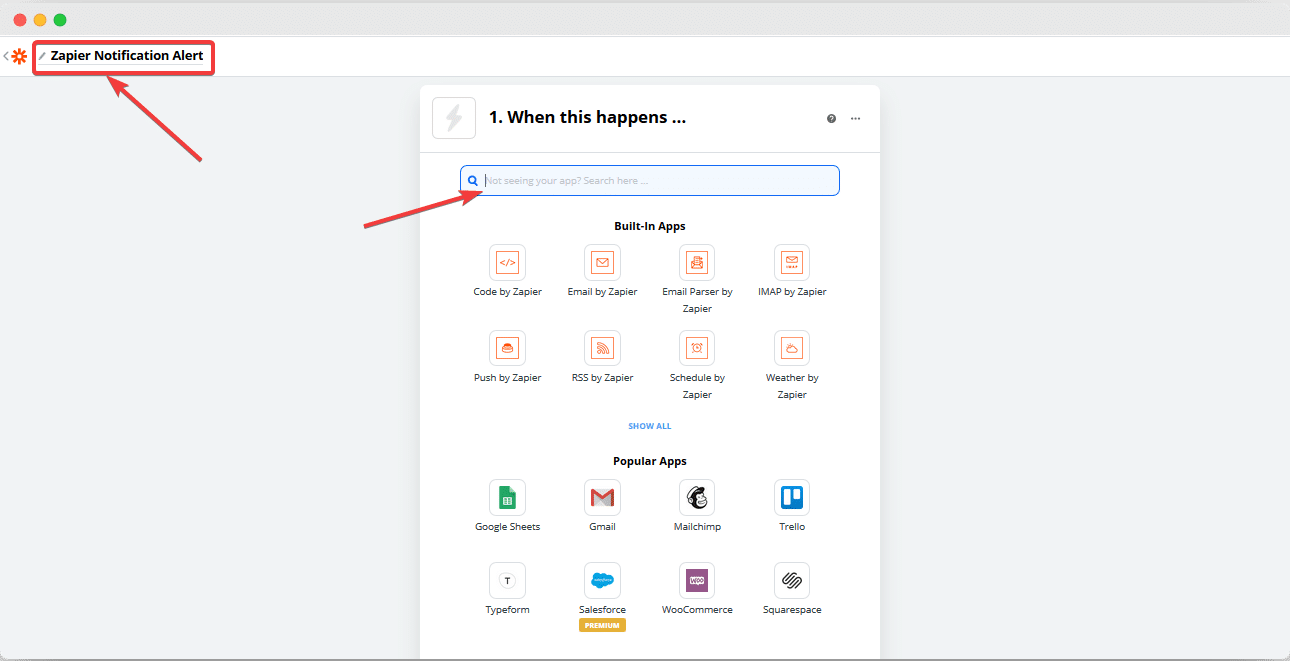
After you have picked your App, go ahead and choose a Trigger Event for it. (Example: if you want to display Tweets from your Twitter account, then pick My Tweet as your Trigger Event). Then, hit on the ‘Continue’ button.
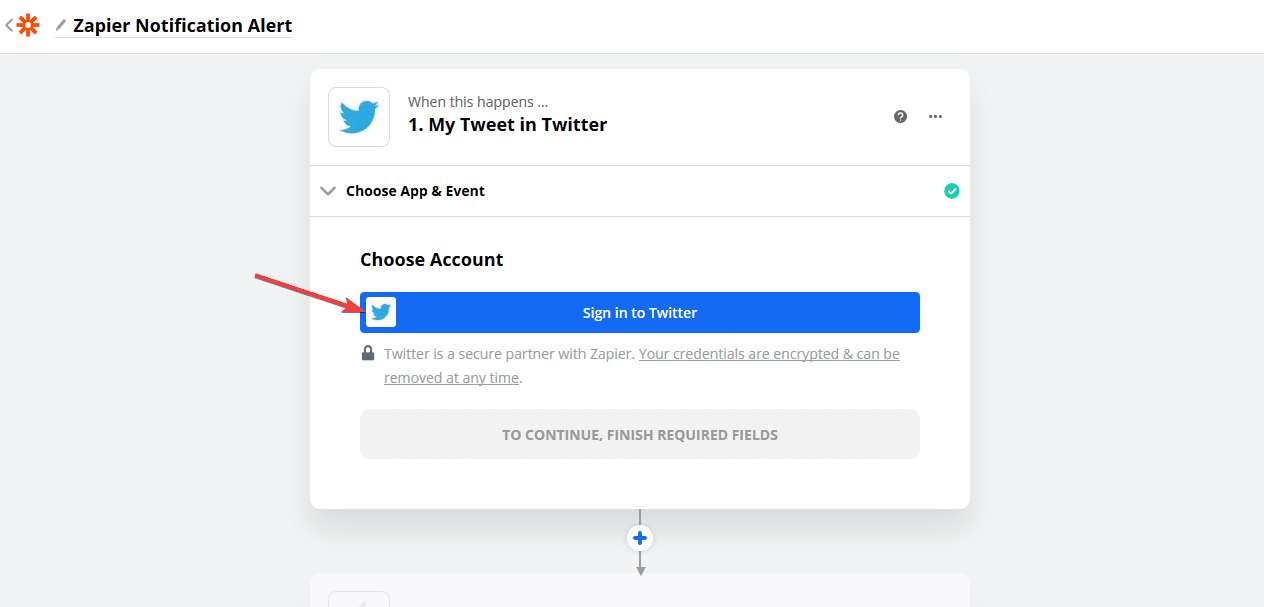
Afterward, you will be asked to connect your App account with Zapier. Once the connection is established, simply go ahead and continue.
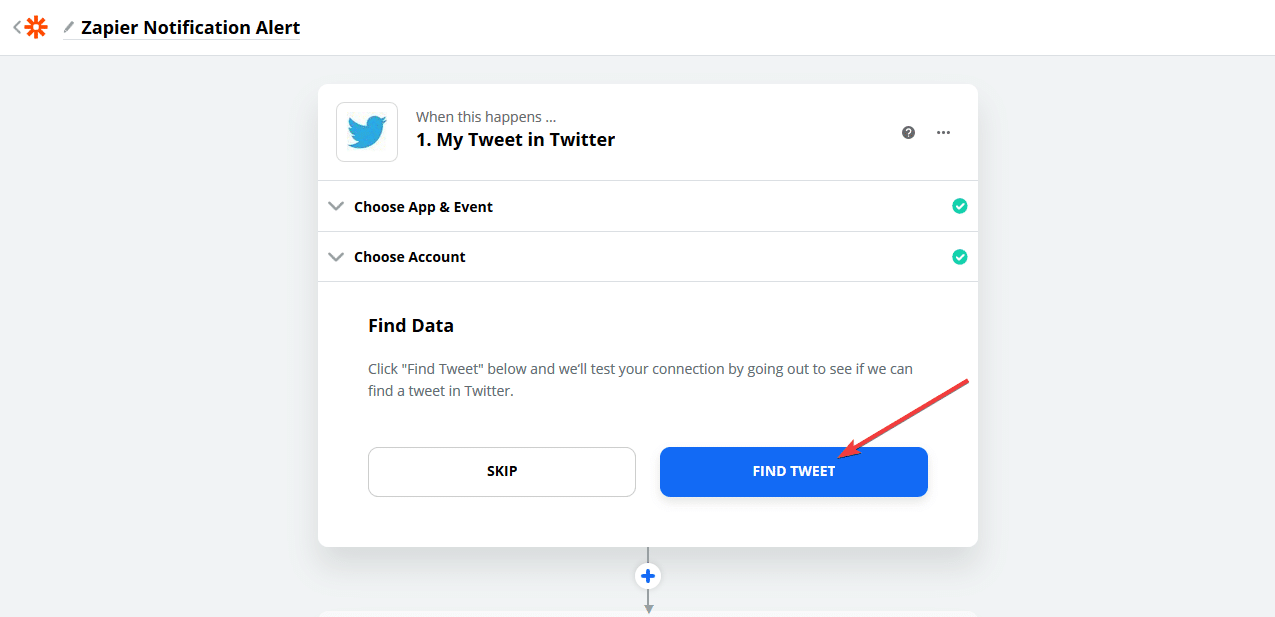
To ensure a connection has been successfully established with your App & Zapier, you will be asked to test the ‘Find Data‘ option. Note: This setting may vary depending on the App you have chosen.
Step 3 – Choose Action App & Action Event
#
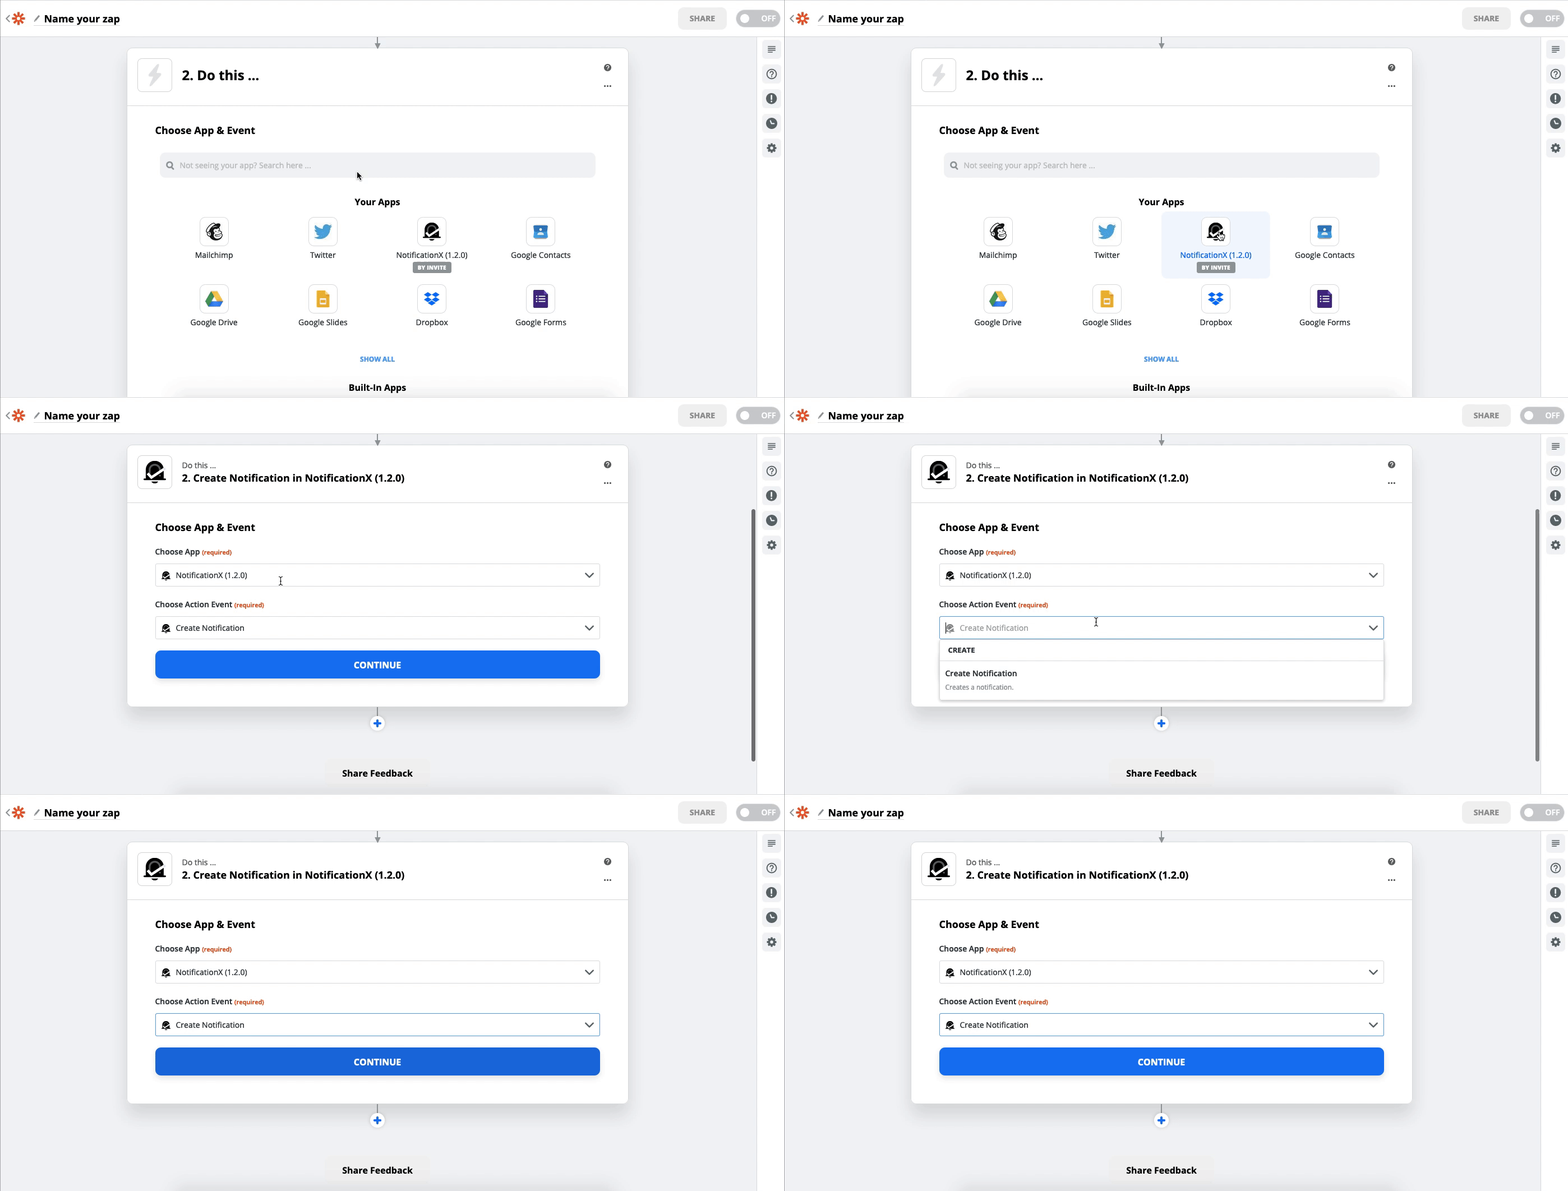
After you have sucessfully completed with the previous step, simply go ahead and pick ‘NotificationX’ as your Action App. Afterward, choose ‘Create Notifications’ as your ‘Action Event’. Then, simply click on the ‘Continue’ button.
Step 4 – Sign In to NotificationX
#
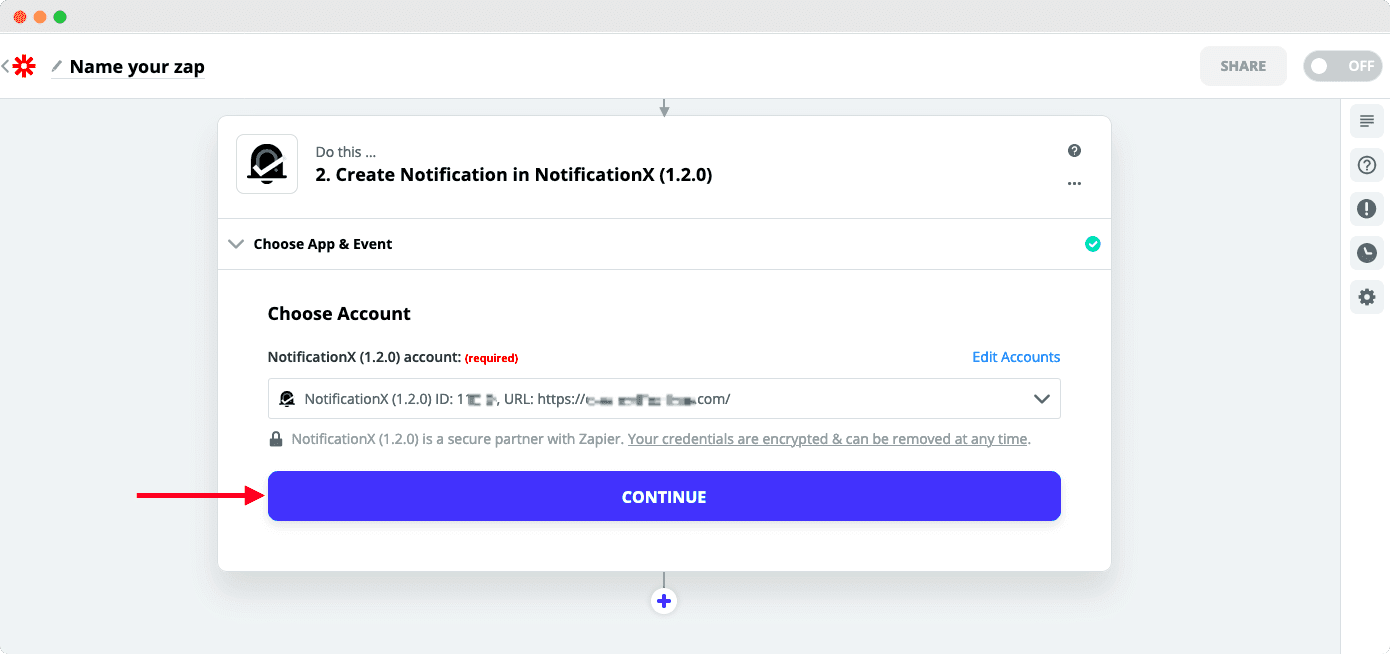
After finishing the previous step, you will be asked to ‘Choose Account’. Just go ahead and hit on ‘Sign in to NotificationX’.
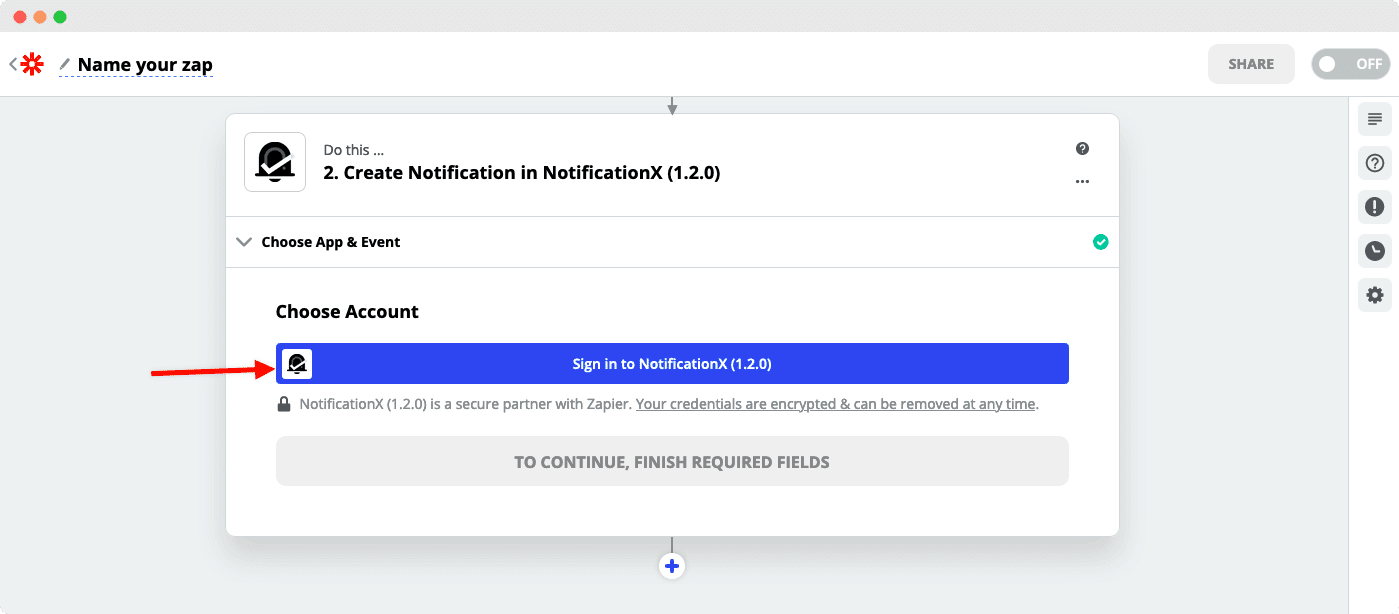
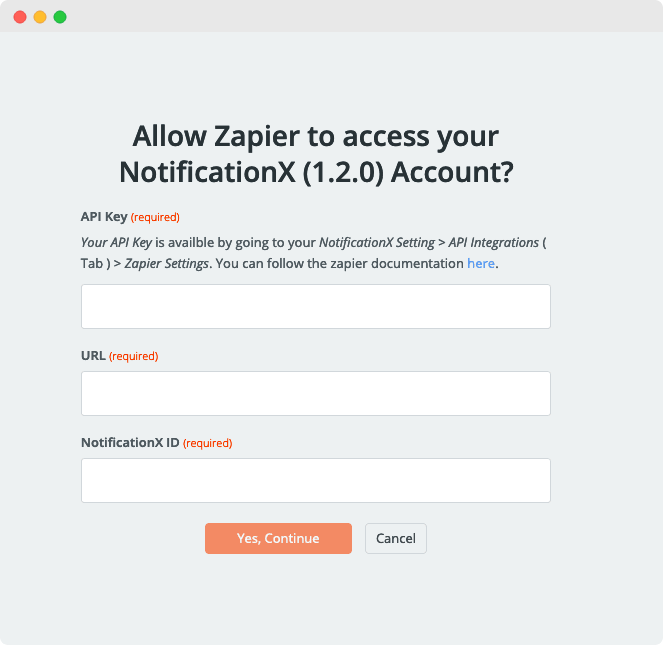
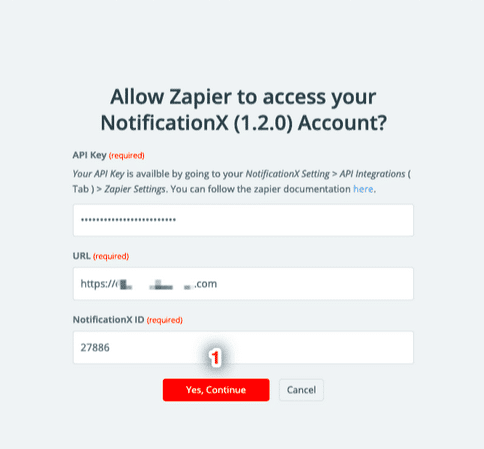
To allow Zapier to access your NotificationX Account, you need to retrieve your API Key, URL & NotificationX ID. You will find all this information from your WordPress website. Details are given below:
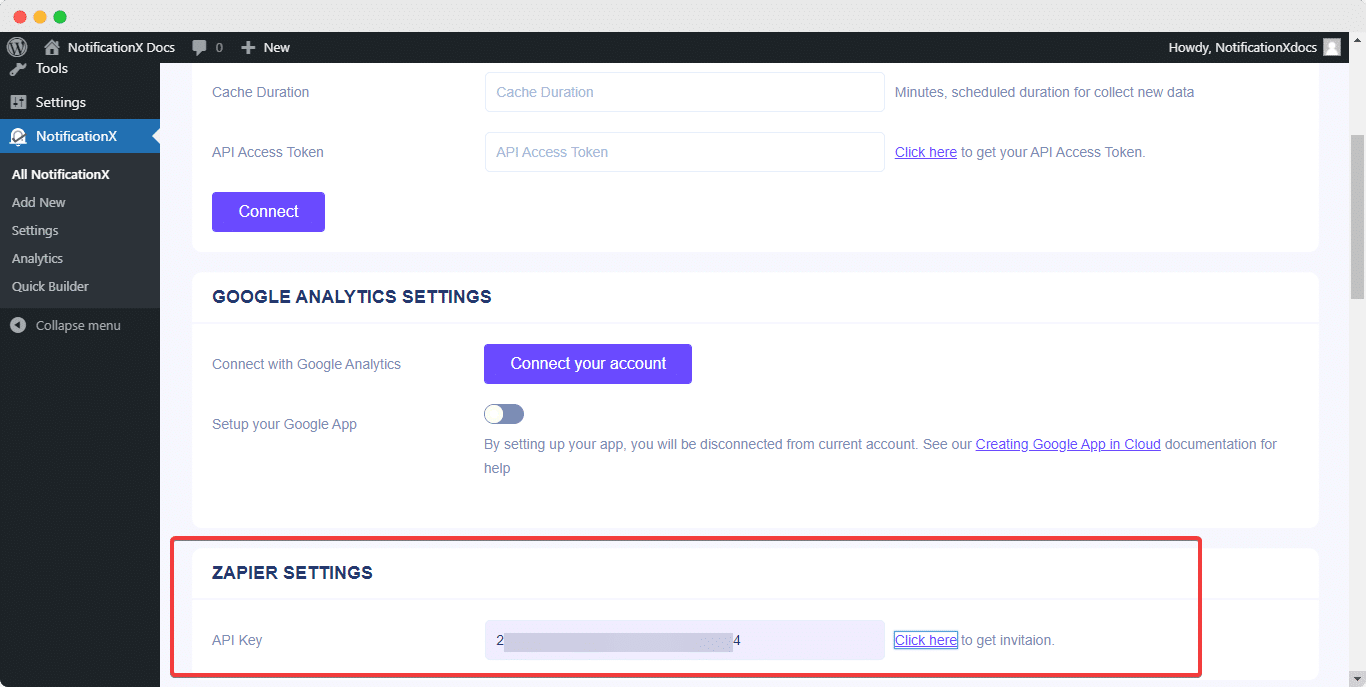
You can retrieve your API Key from your website. Simply navigate to your WordPress Dashboard -> NotificationX-> Settings -> API Integrations -> Zapier Settings.
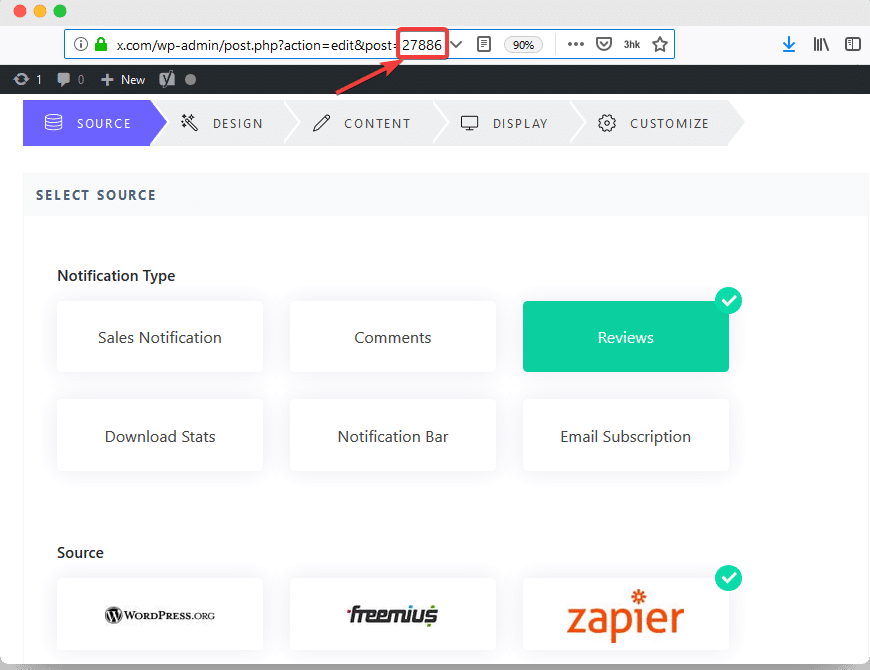
You can find your NotificiationX ID from the Zapier Notification Alert you have created earlier. To find that, go to: wp-admin ->All NotificationX -> NotificationX. Open the Zapier Notification alert and just simply check the end of the URL as you can see in the screenshot. That’s your NotificationX ID.
The URL input field is basically your website URL (e.g.: https://www.example.com). After collecting the respective information, simply fill it up by copy & pasting. Afterward, hit on the ‘Yes, Continue’ button.
After you have successfully connected Zapier with your NotificationX account, hit on the ‘Continue’ button.
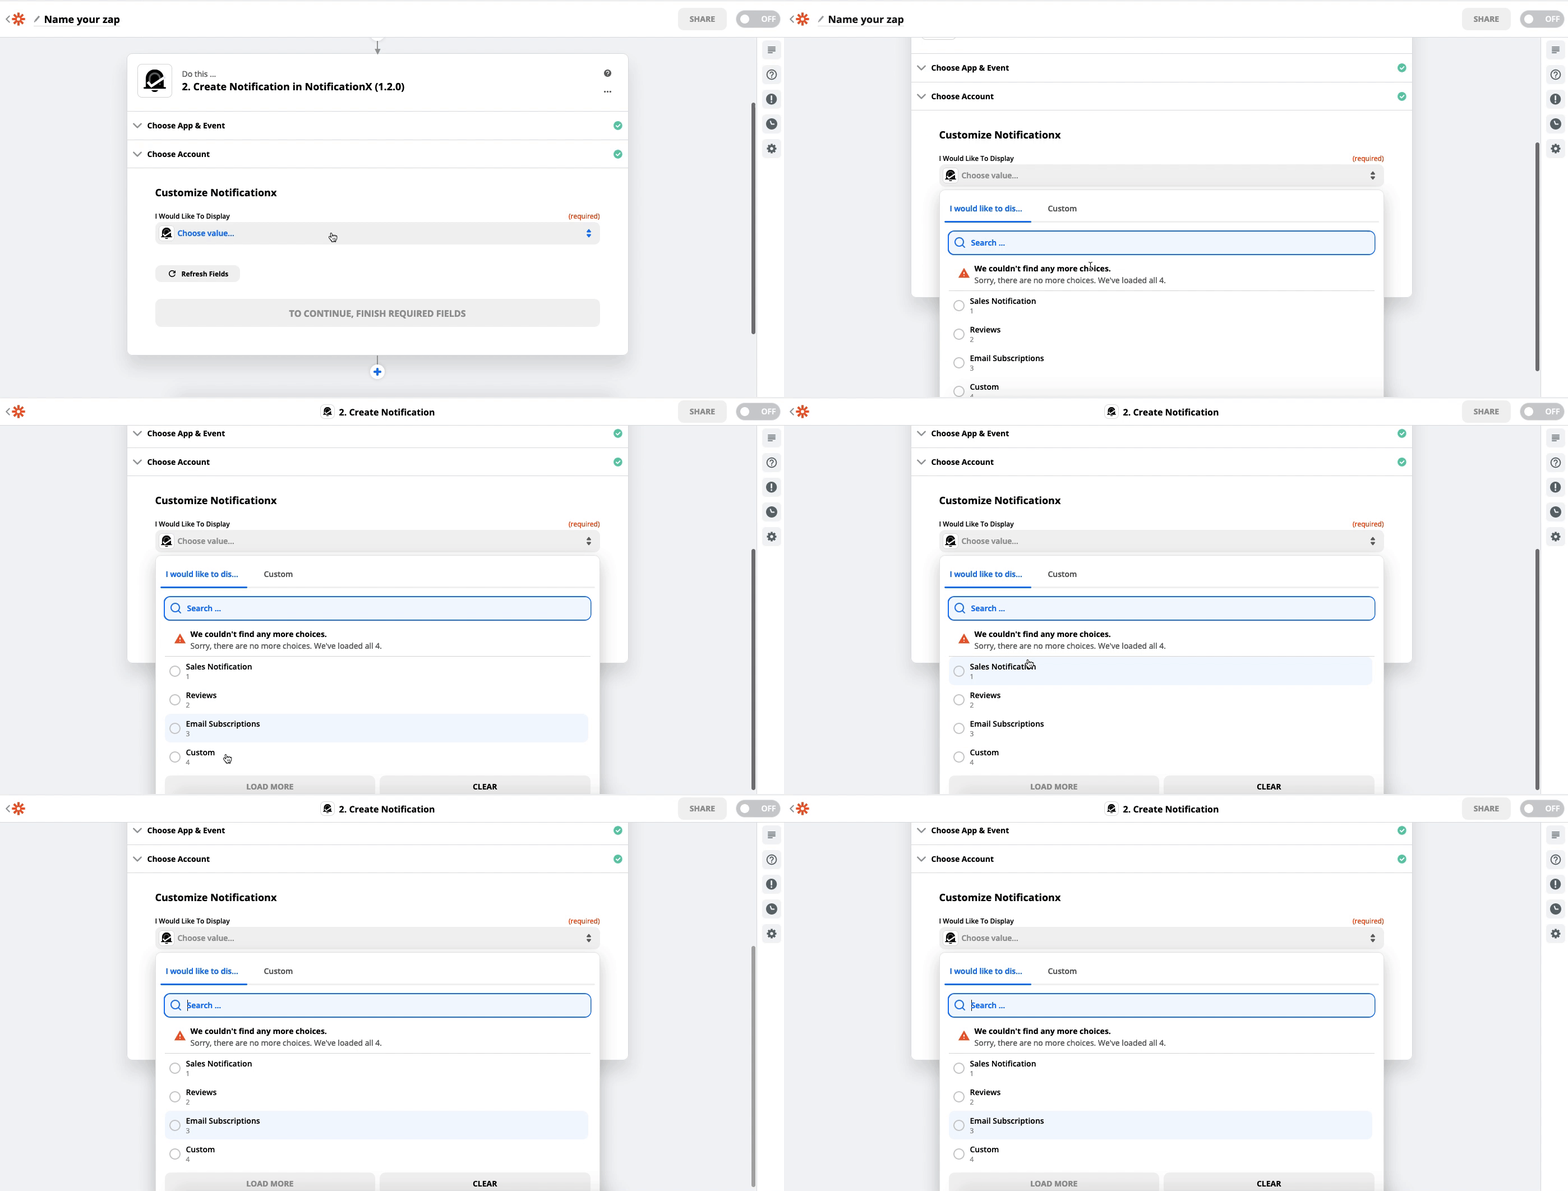
Step 5 – Customize NotificationX
#
You can then customize NotificationX template from Zapier Settings. Simply choose the ‘NotificationX Type’ which you have created in your website. There are two ways you can customize NotificationX from here. You can either customize by picking NotificationX types we are offering or you can pick the ‘Custom’ option to configure it as per your requirements.
Method 1: Choose Default NotificationX Type #
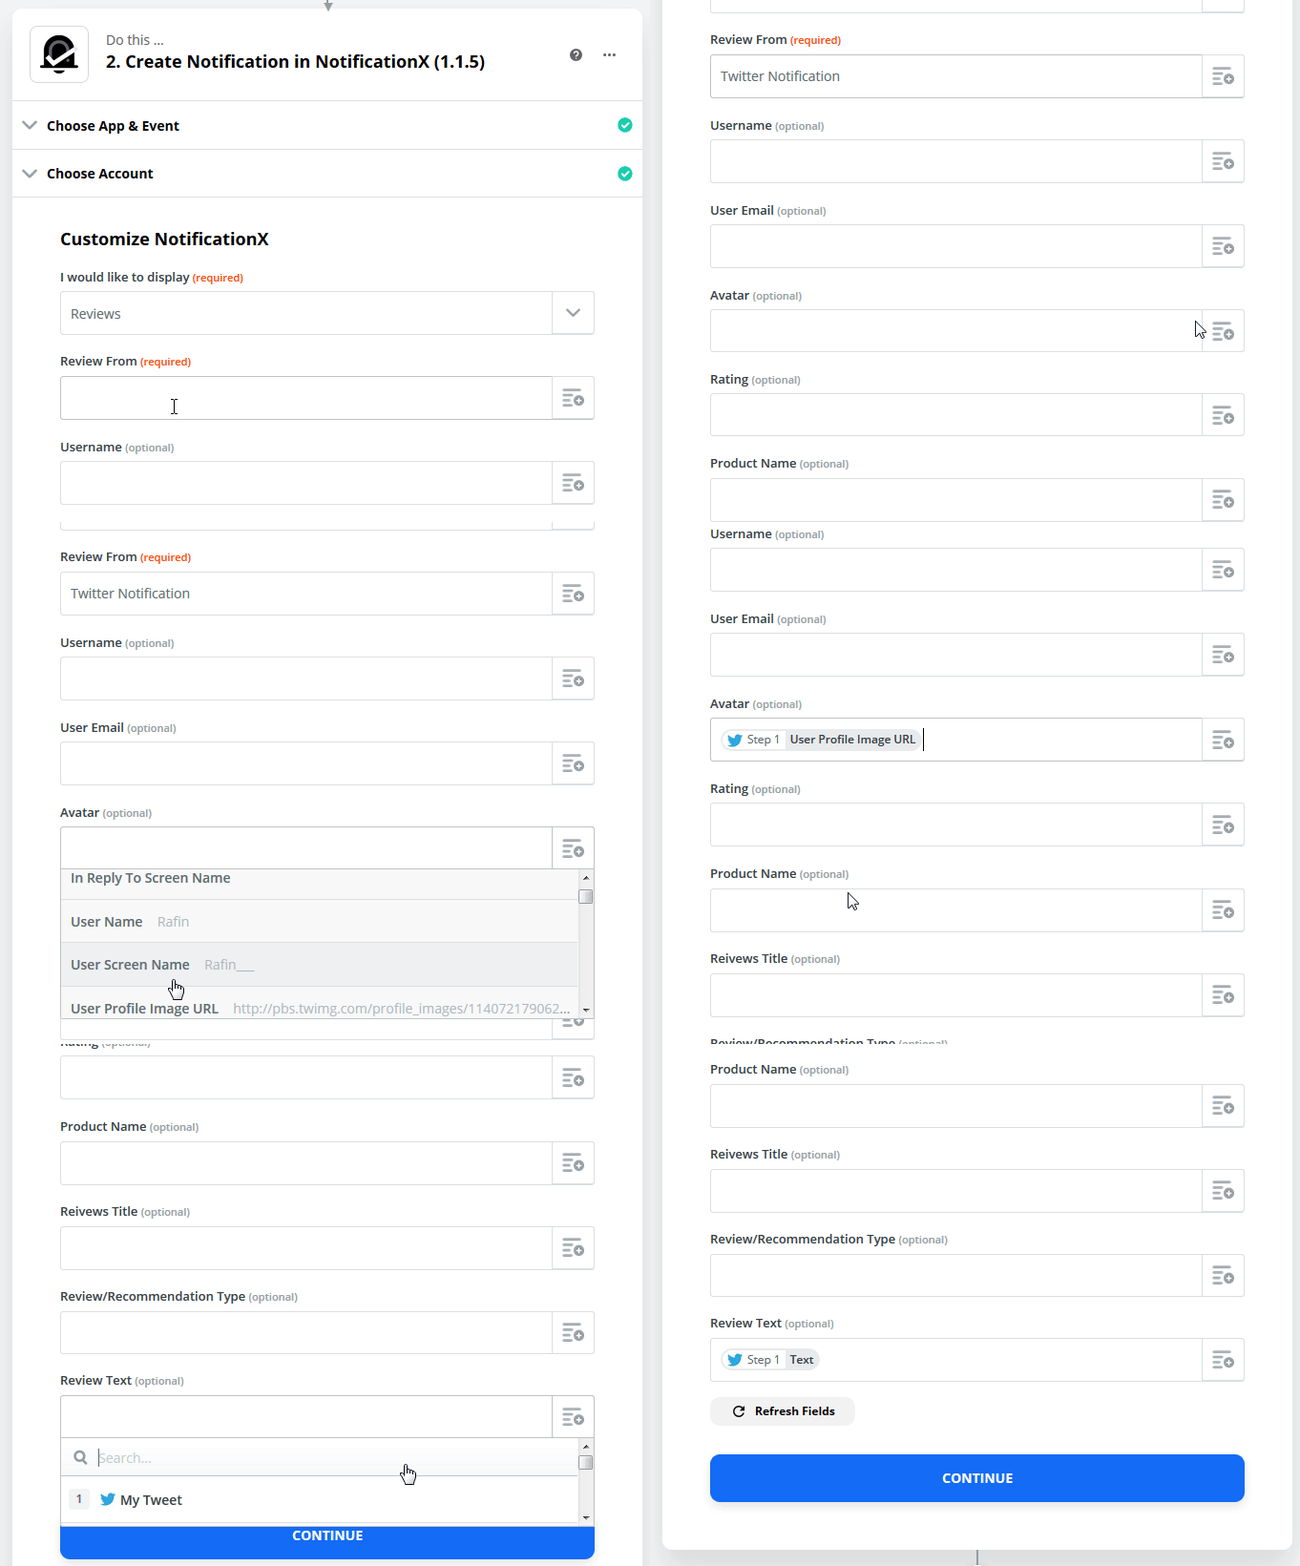
If you have created ‘Reviews notification alert’ on your site, choose ‘Reviews’ notification type for that case. After picking your NotificationX type, you can go ahead and add relevant variables for the input fields. (e.g.: To show your ‘Avatar’, you can choose a relevant option such as: ‘User Profile Image URL’). When you have finished, click on the ‘Continue’ button.
Method 2: Choose ‘Custom Fields’ Type: #
Alternatively, you can also pick the ‘Custom’ fields option to customize your NotificationX as per your requirements as well. After you pick the ‘Custom’ option, you will be asked to insert your ‘Field Key’ and its data from the ‘Data Mapping’ section.
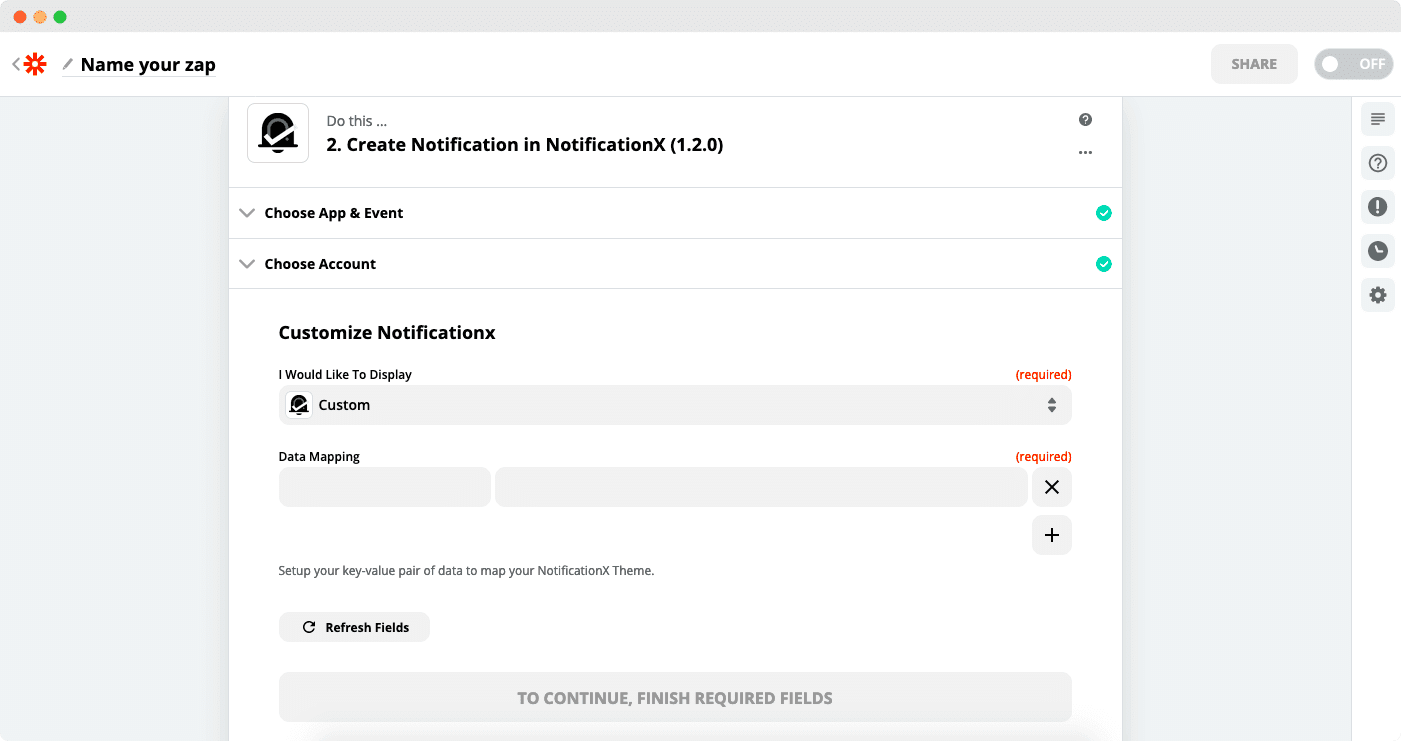
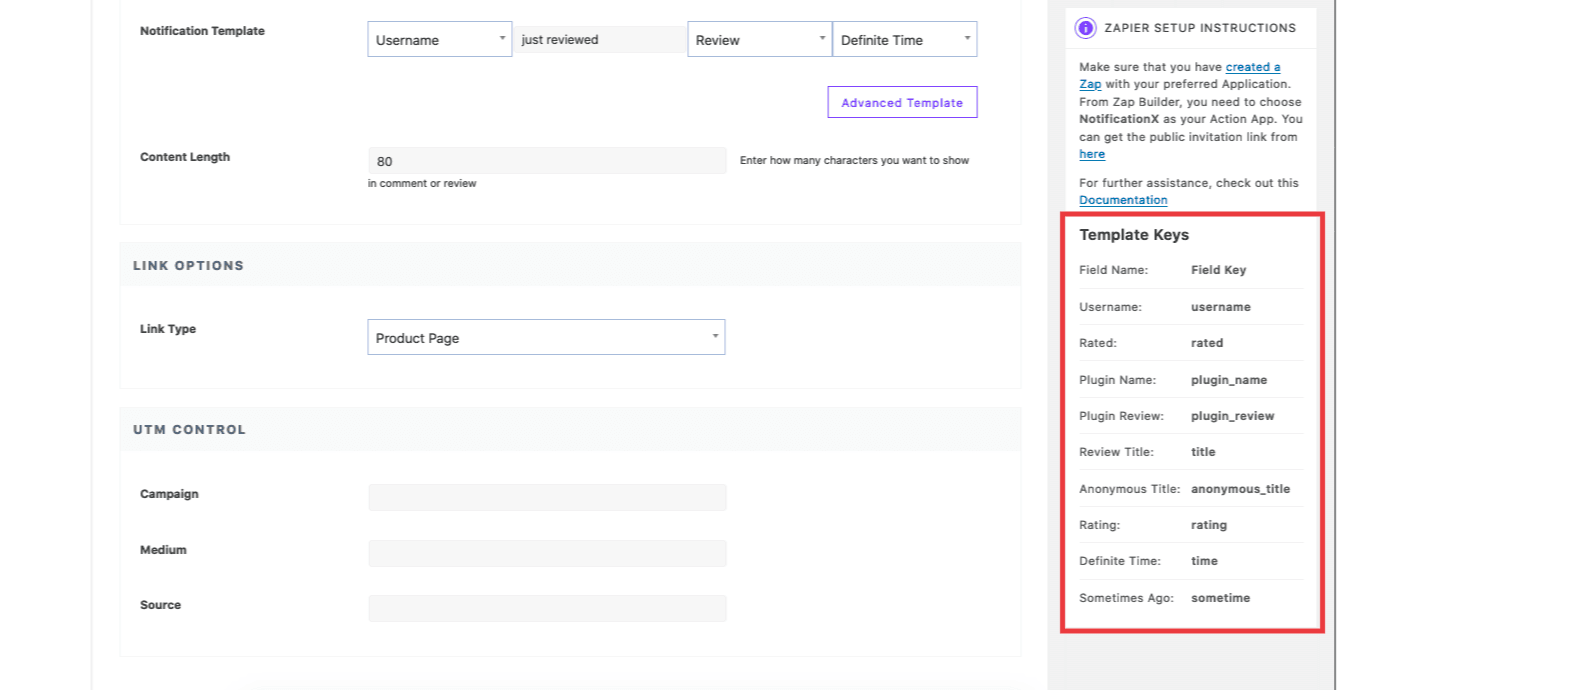
You will find your ‘Field Key’ from the ‘Content’ tab of your NotificationX popup you are trying to connect. You can simply copy the Field Key of the Field name you are using on your template and paste it inside Zapier’s Data Mapping section above. For the purpose of this documentation, we are going to be using these following ‘Field Keys’ to retrieve tweets from a user: ‘username’ and ‘plugin_review’.
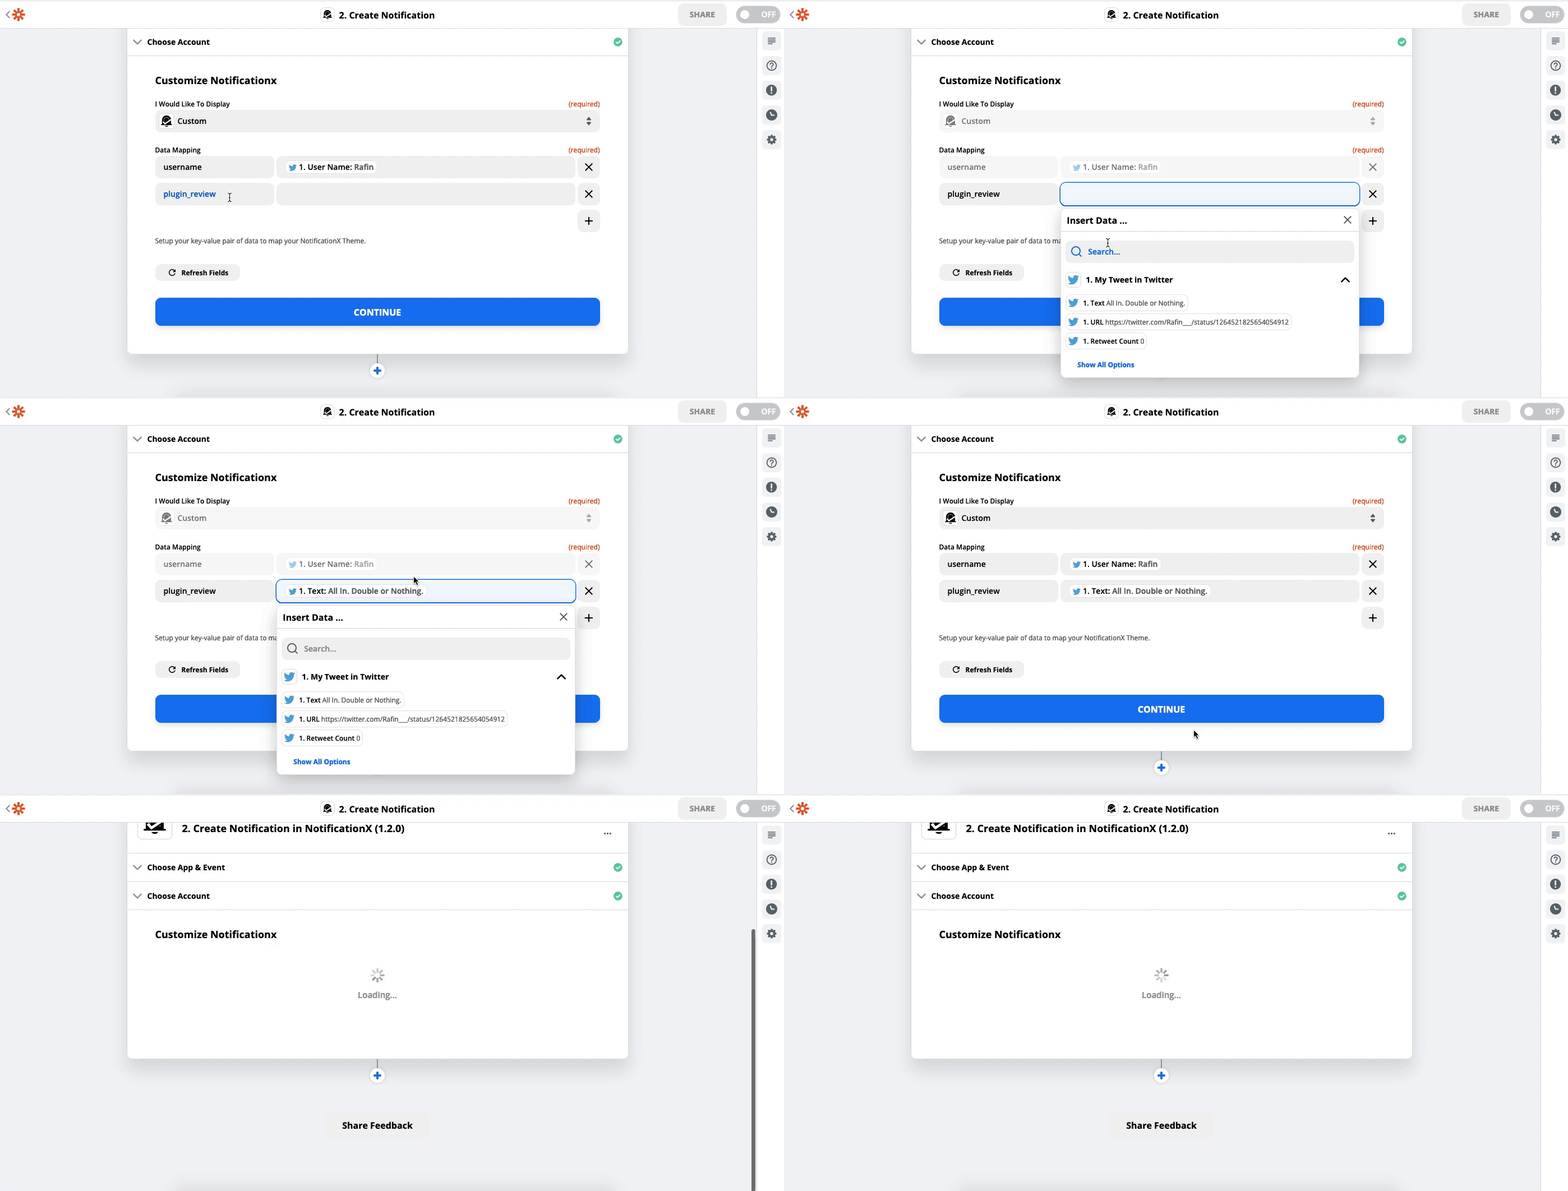
After collecting your Field Keys, simply just go ahead and insert the respective Input Data to match with your fields. Check out this below gif to see how it works:
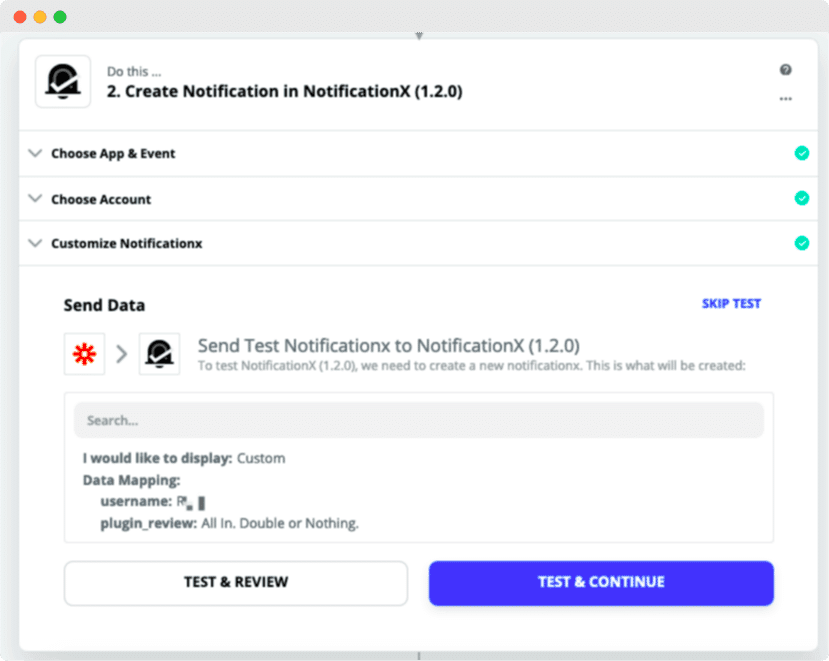
Afterward, to send your data to NotificationX, go ahead and hit on the ‘Send Test’ button.
Step 6 – Turn On Your Zap
#
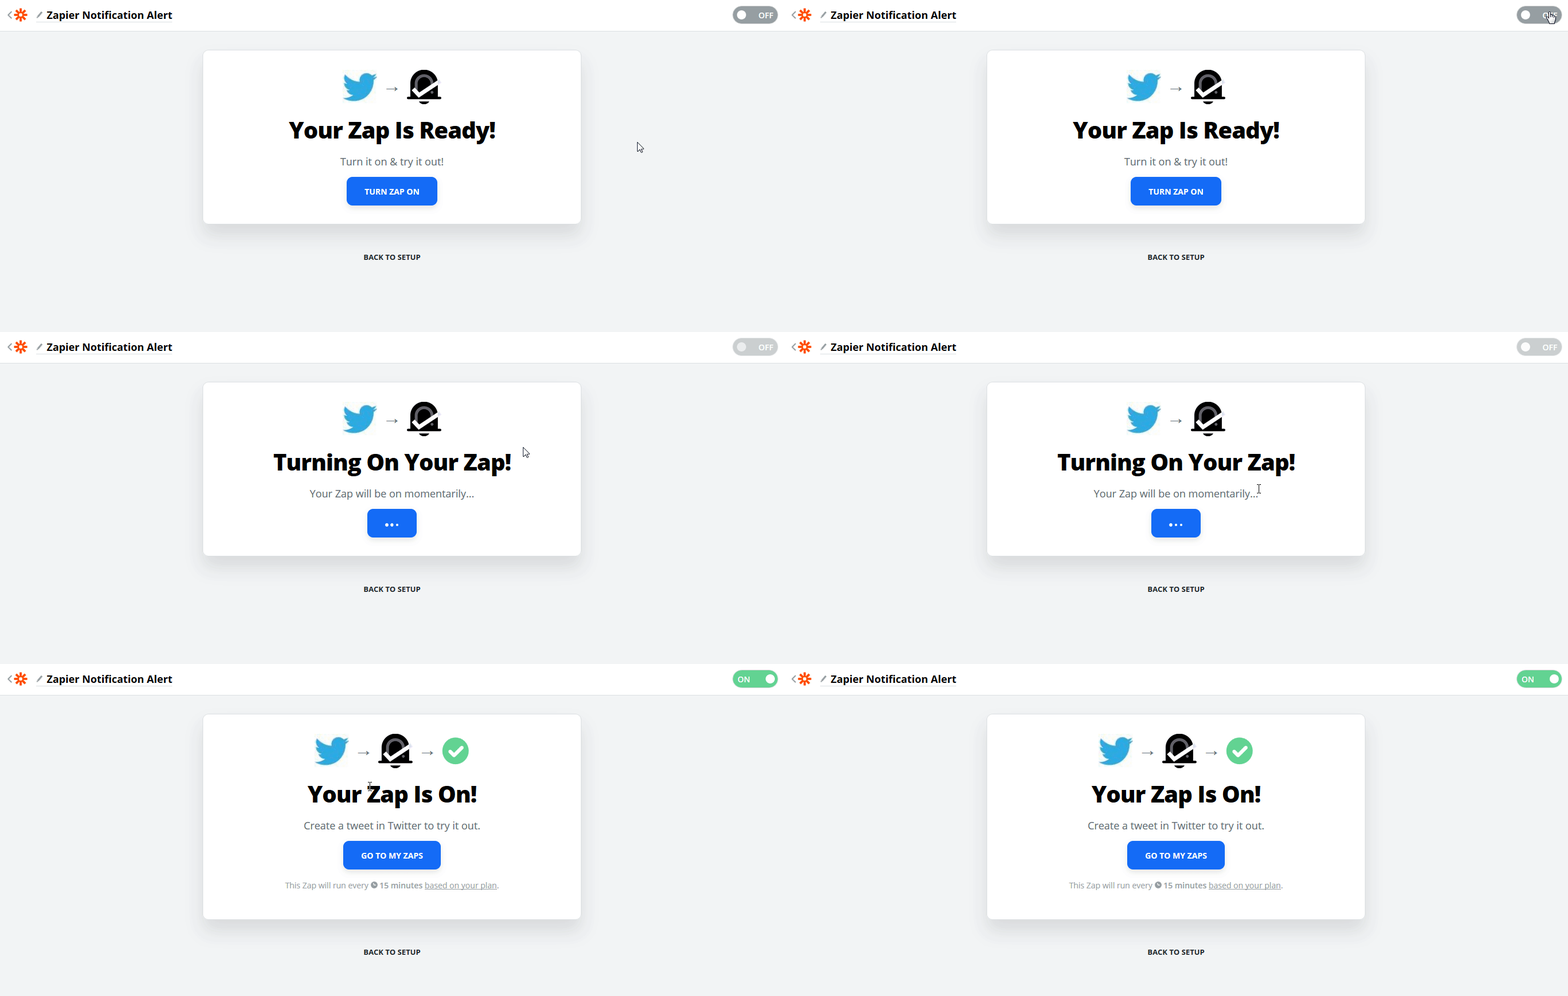
You can now go ahead and turn on Zap. Afterward, Zapier Connection will be successfully be established with your NotificationX. You will be all set to go.
 After you have successfully completed all the steps mentioned above, go to your website and you will find the Zapier Notification Alert popping up like this:
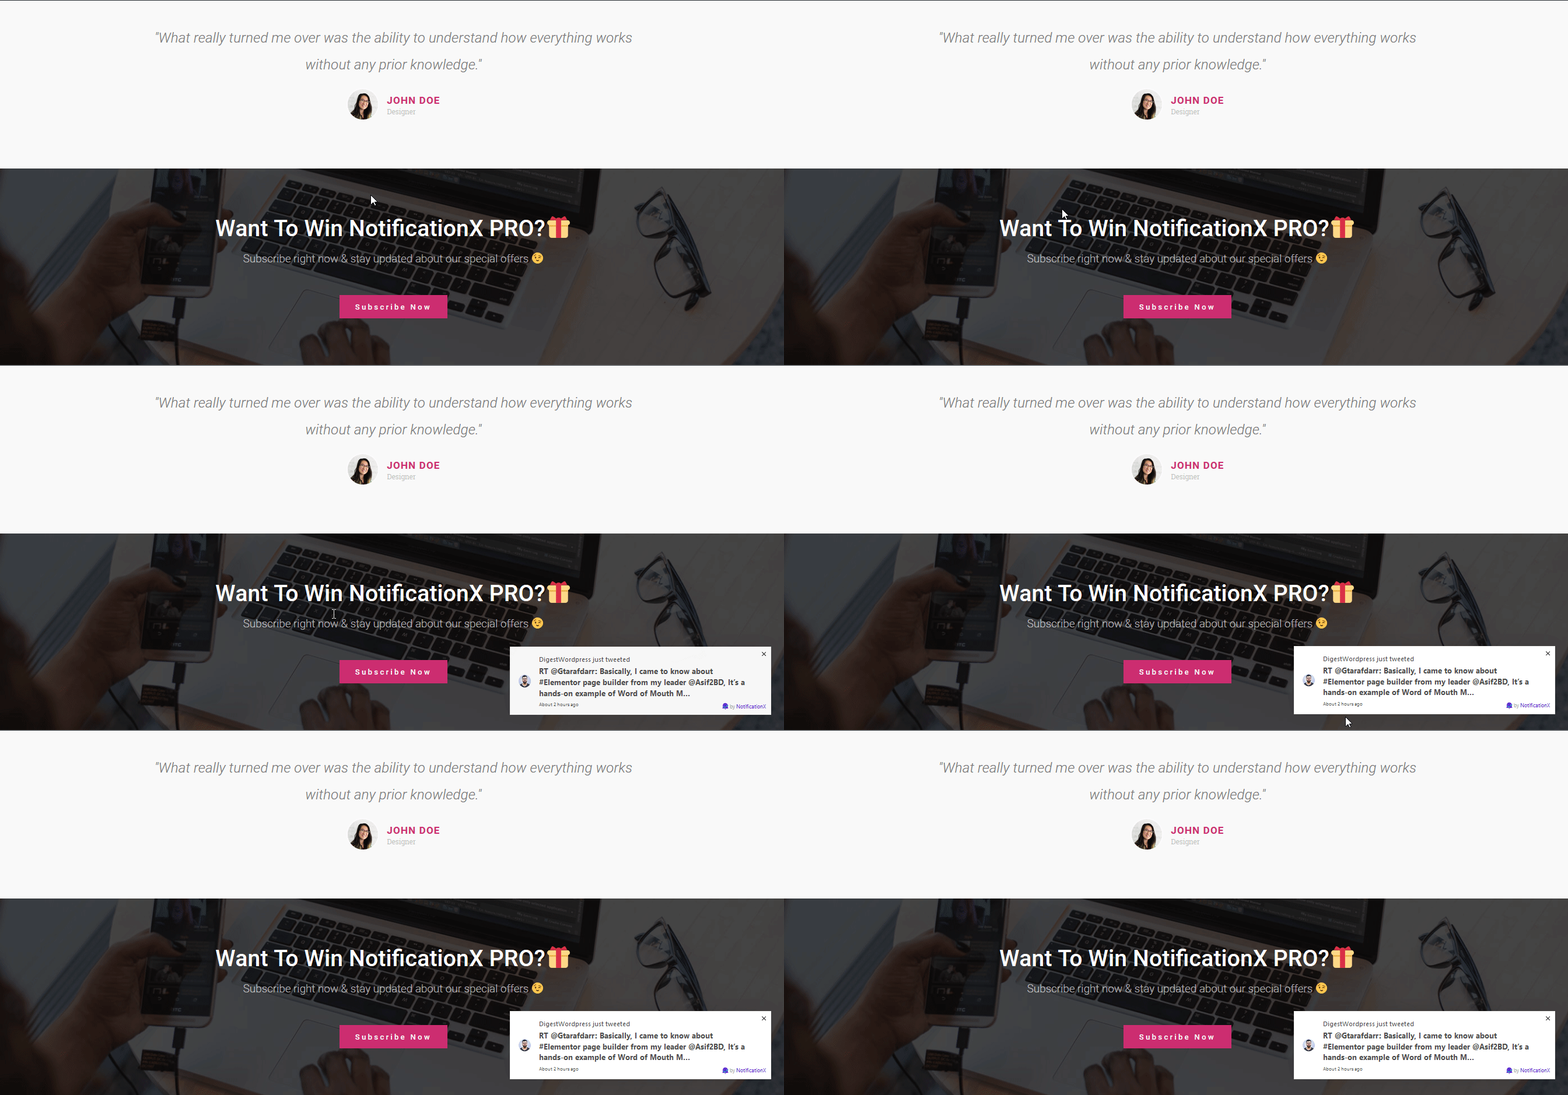
By using NotificationX, this is how you can easily design and display amazing Zapier Notification popup on your WordPress website & grow your userbase.
If you face any issues, you can contact our Support Team here.


