ReviewX lets you get instant customer ratings and multicriteria reviews to add credibility to your WooCommerce Store & skyrocket your sales. By using NotificationX, you can display ReviewX notification alerts on your WordPress website every time a customer reviews your products on WooCommerce store. You can showcase the feedback left by users on your WooCommerce store in the form of beautifully designed FOMO popups and increase conversion of your shop.
How To Show ReviewX Notification Alerts
#
To create and display alerts for your ReviewX WooCommerce product reviews using NotificationX, follow these steps below.
[Note: Before you begin, make sure that both WooCommerce and ReviewX are activated on your website and your WooCommerce shop is running.]
Step 1: Select A Source For Your Notifications #
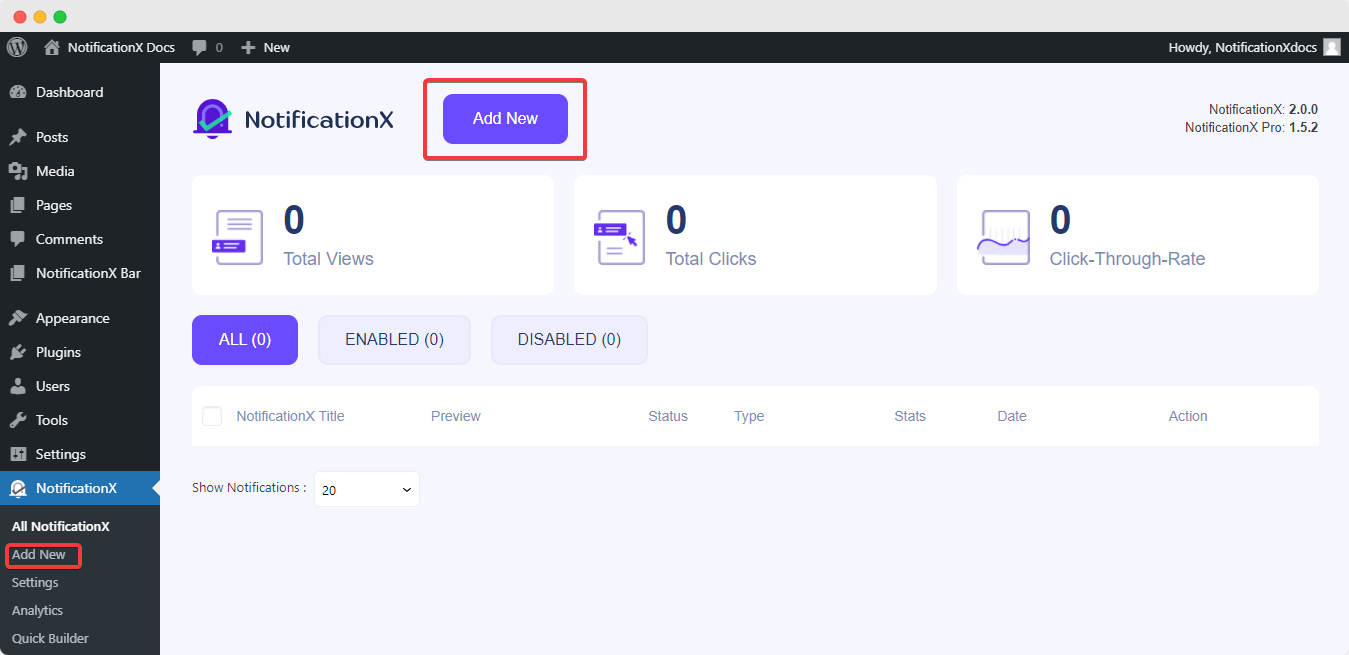
Once you have set up your WooCommerce store and configure ReviewX, go to NotificationX→ Add New to create a new notification popup alert in NotificationX.
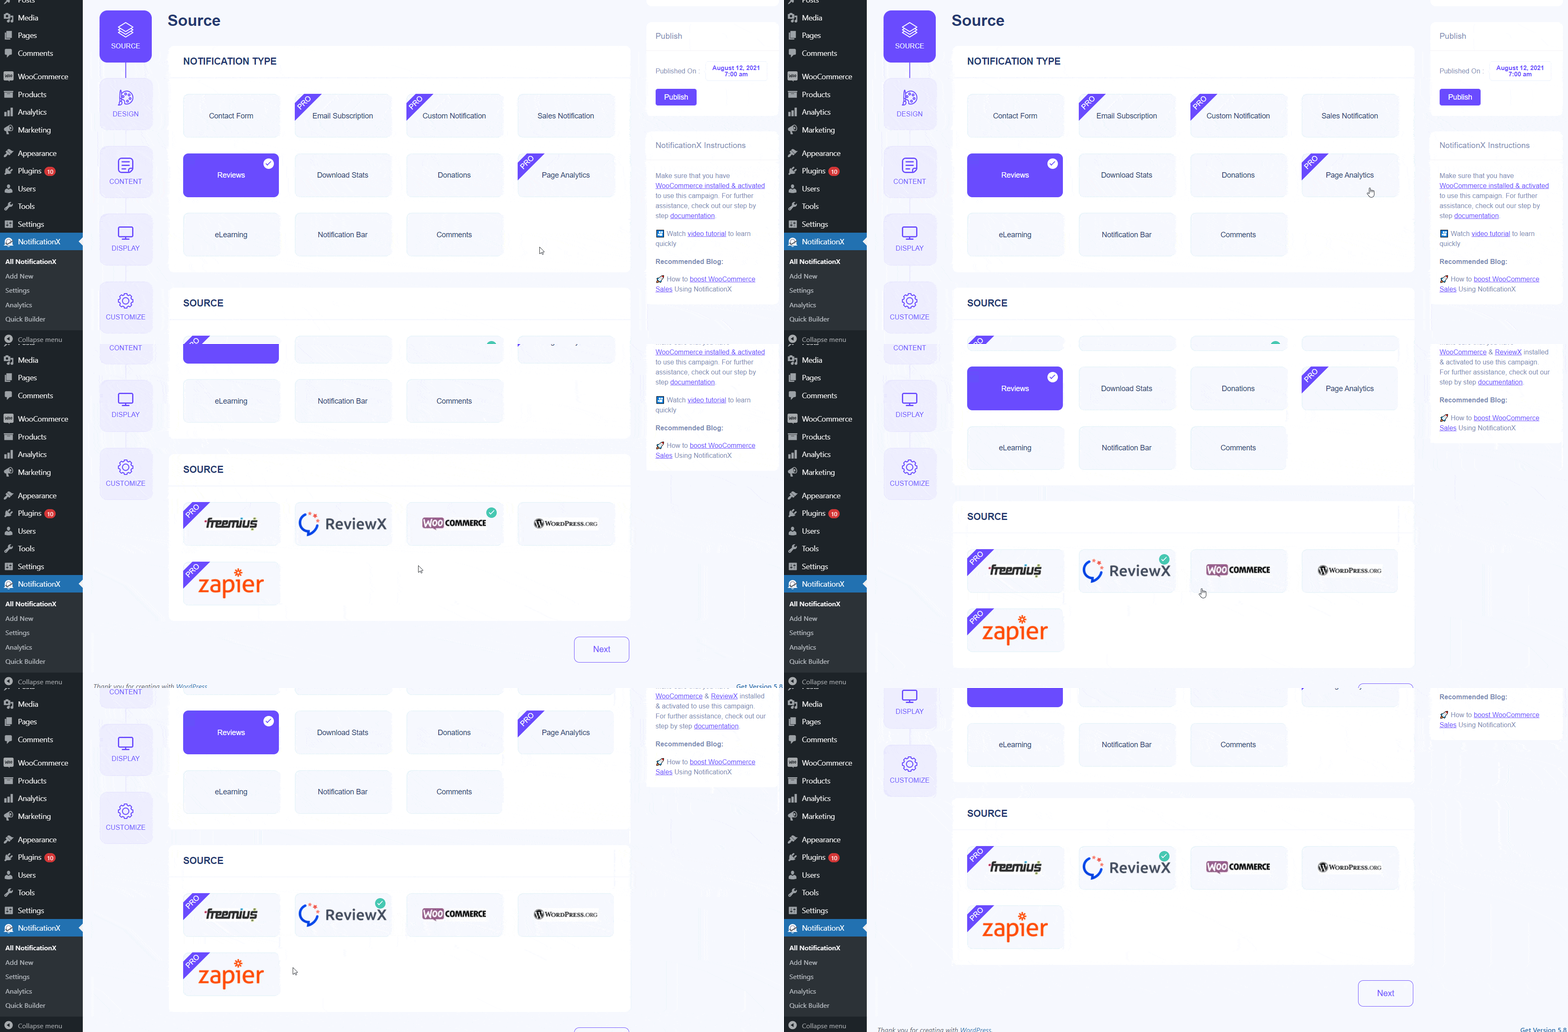
This will redirect you to the ‘Source’ tab where you can select the Notification Type for your new notification alert. Set your Notification Type to Reviews and then scroll down to select ReviewX as your ‘Source’. Once you are done, click Next to move to the next step.
Step 2: Choose A Design Theme #
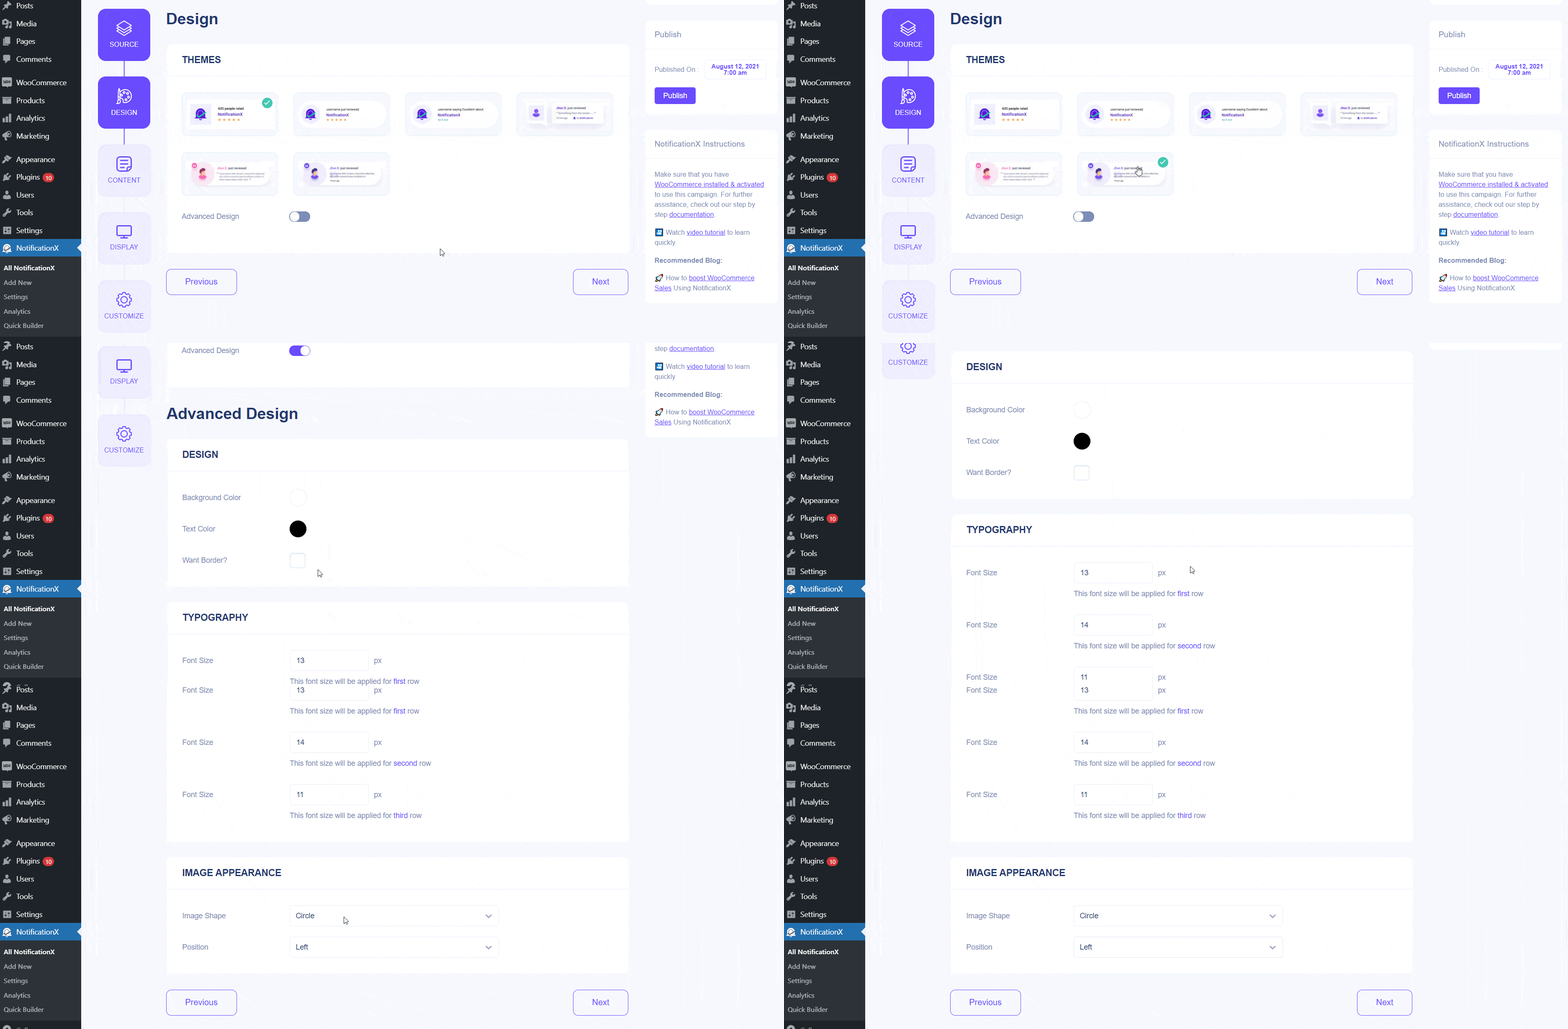
In this step, you can choose the design for your notification alert by selecting any of the design themes available under the ‘Design’ tab. Click Next when you are ready to move to the next step.
Step 3: Configure The Content Of Your Notification #
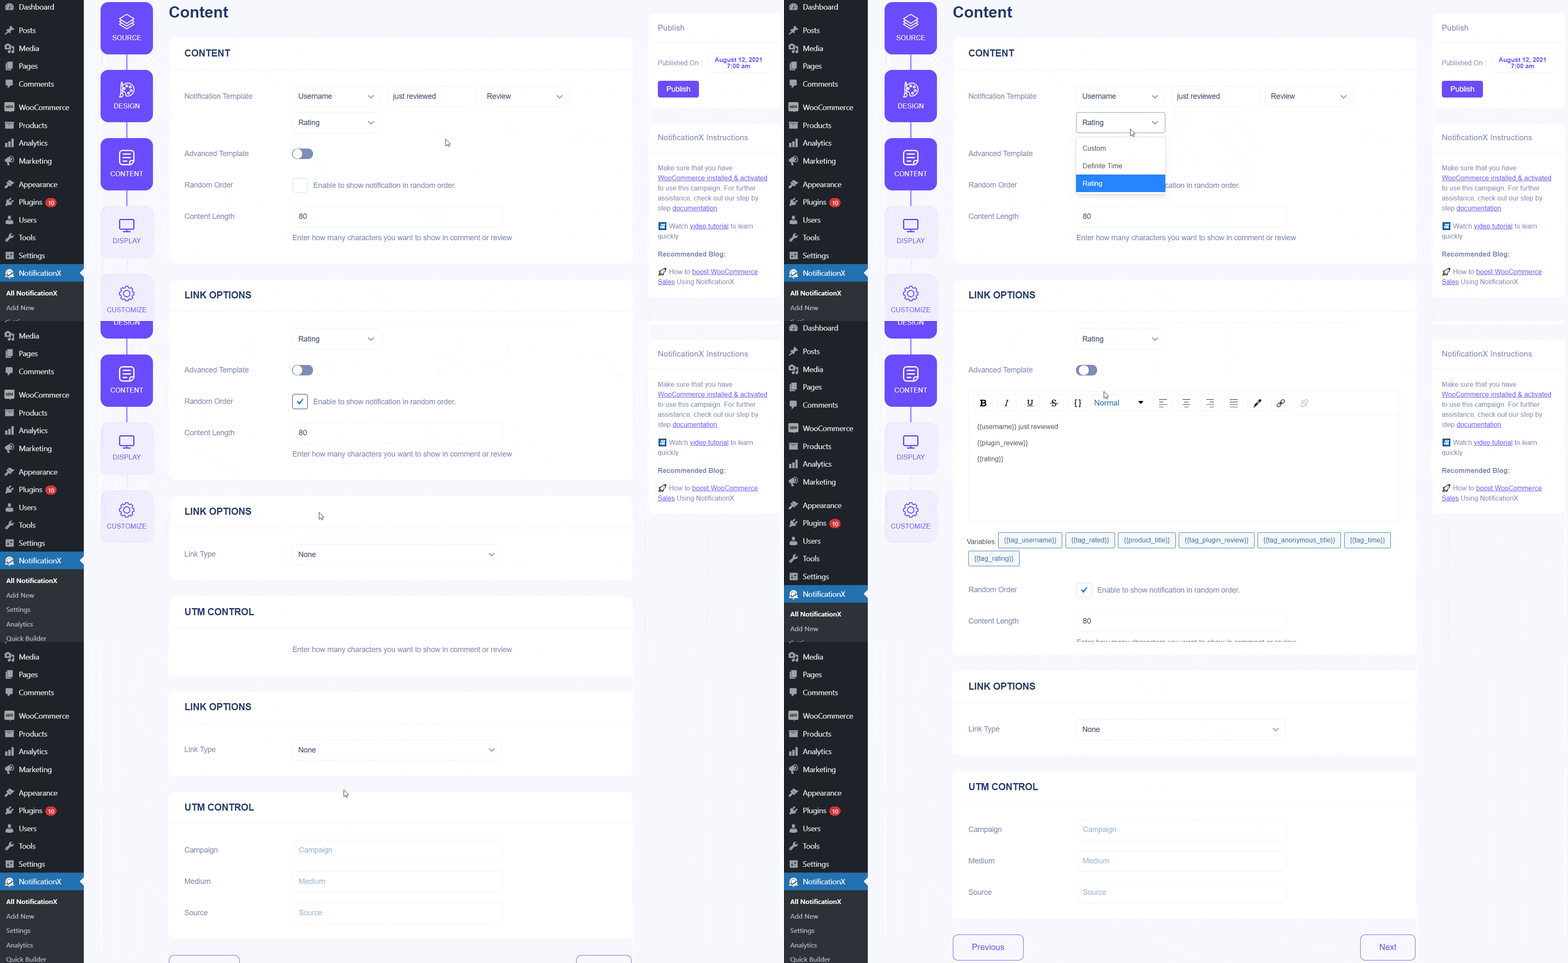
Next, you need to configure the content of your notification alerts by changing the settings under the ‘Content’ tab. You can choose whether to display ‘User Name’, ‘Rated’ or ‘Custom’ from the Notification Template drop-down menu. You can also select ‘Product Name’ and set a ‘Definite Time’ for when your customers reviewed your product.
By scrolling down you will see Link Options where you can decide the Link Type for your notification alert.
Step 4: Adjust the Display Options #
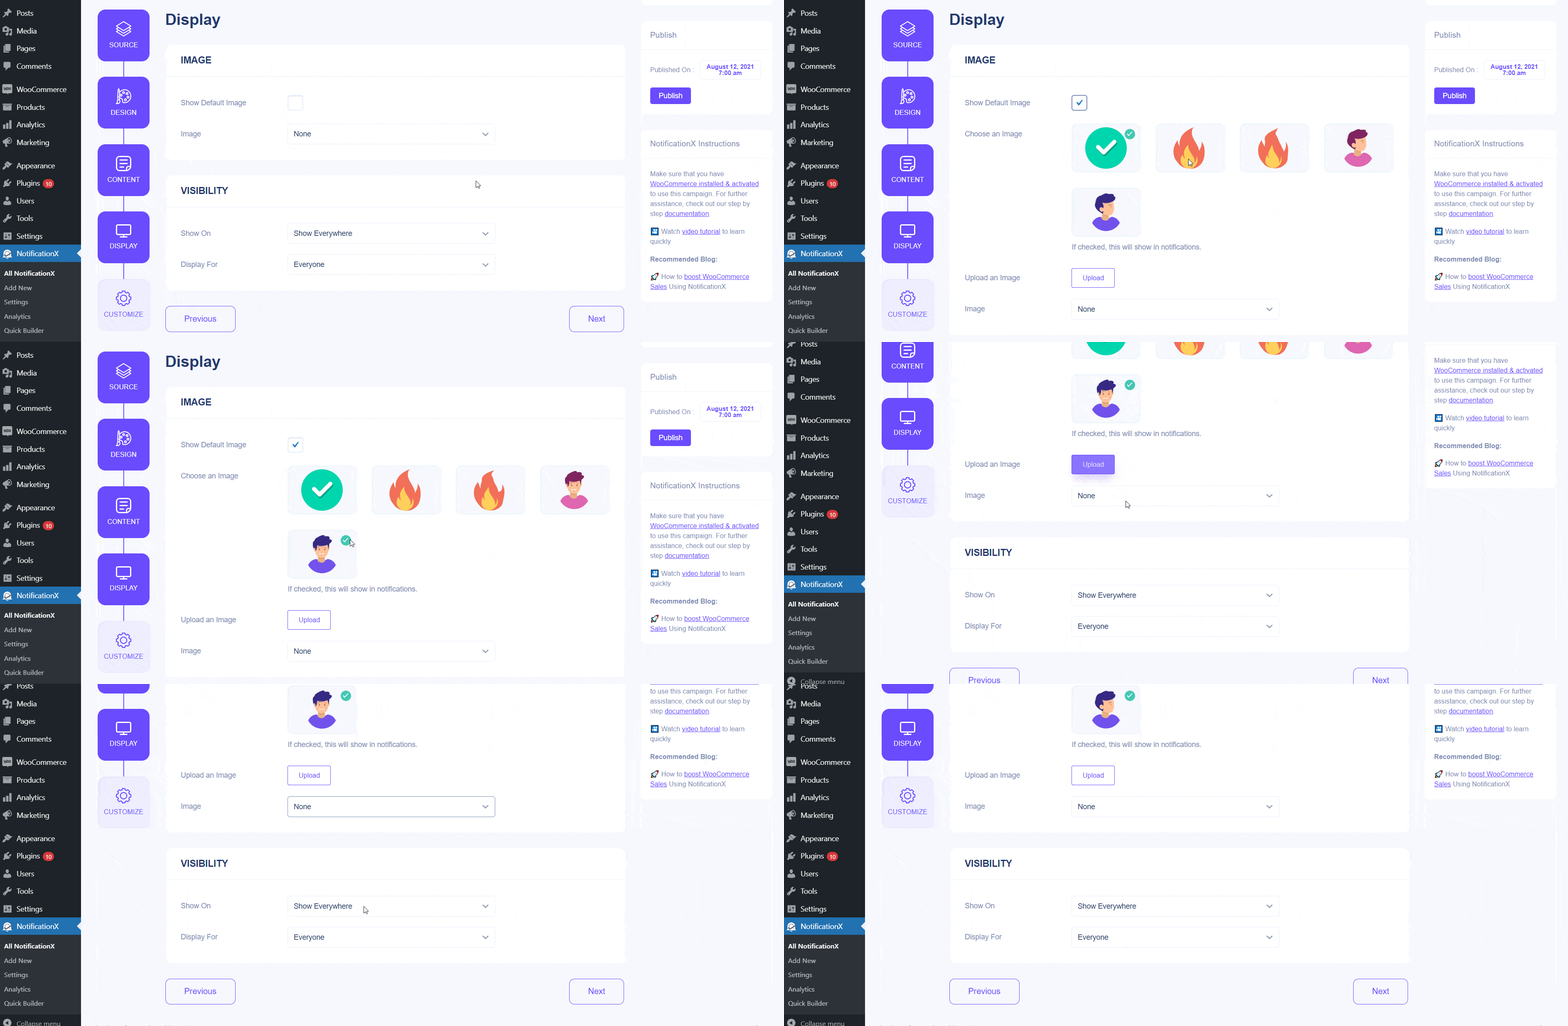
From the ‘Display’ tab, you will see a lot of options to help you customize how you want your notifications to be displayed on your website pages. From the Image settings, you can check the box to show a default image and choose what the default image will be for your notification alerts. You can also choose to add a ‘Featured Image’ or ‘Gravatar’ from these settings.
From the ‘Visibility’ settings, you can choose which pages you want to display your notification alerts. You can also choose who can see your notifications from the ‘Display For’ settings.
Step 5: Set Up Appearance For Your Notifications #
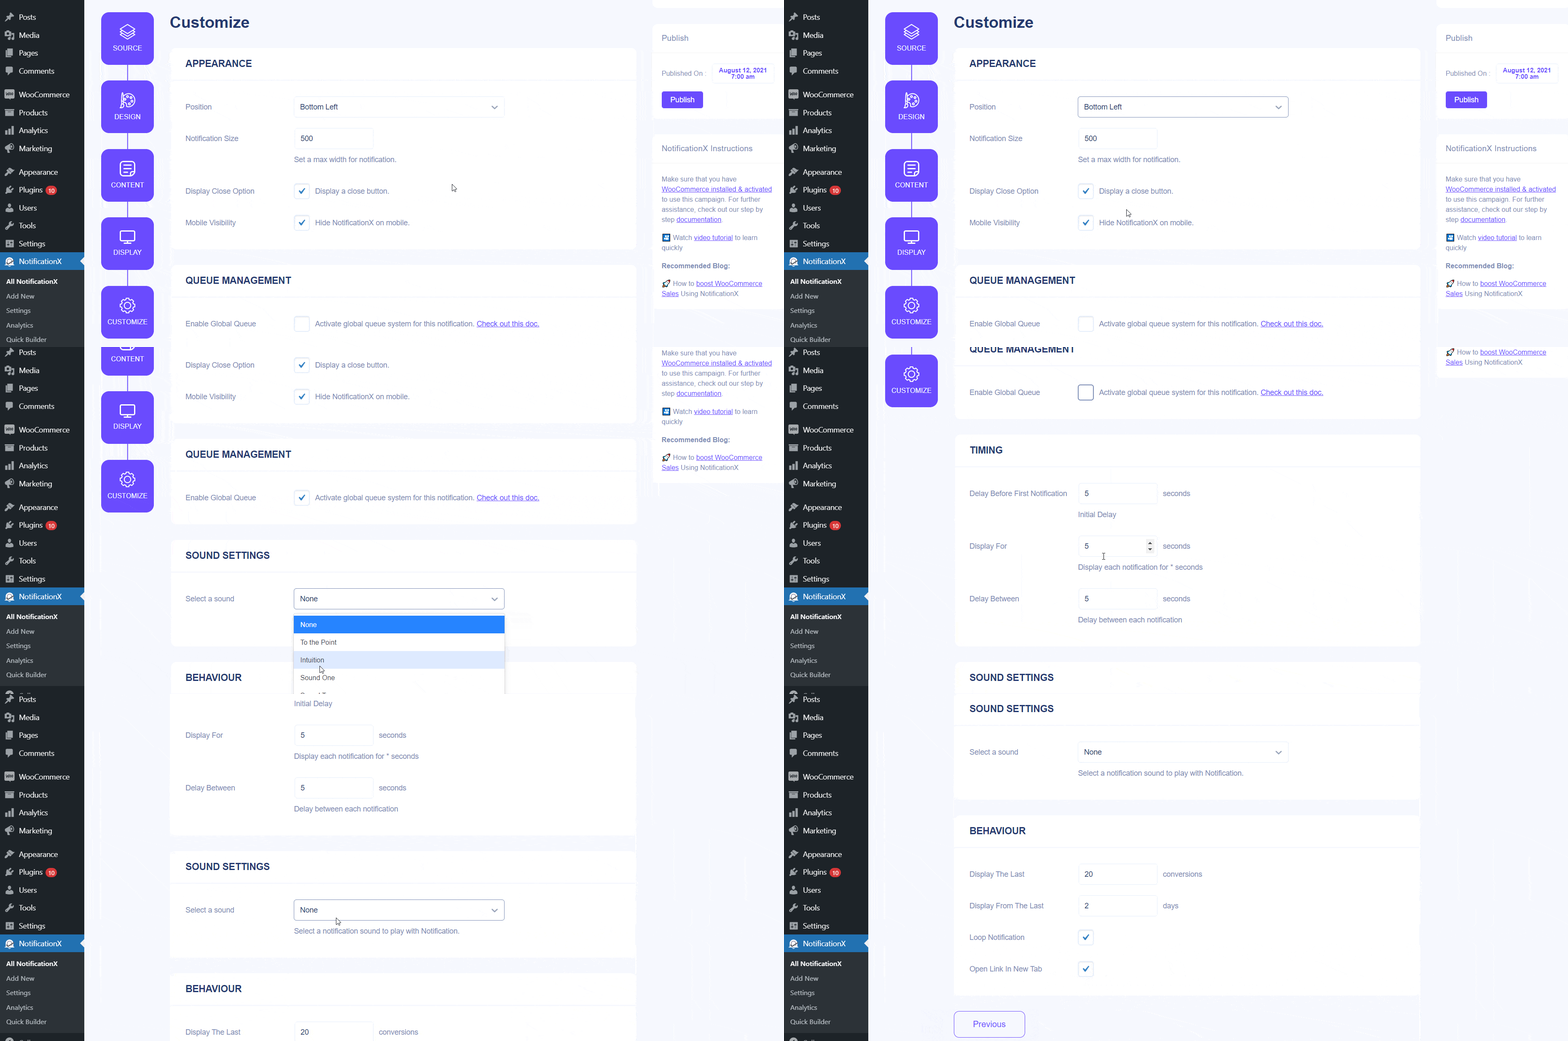
You can further style your notifications from the ‘Customize’ tab. Here you can turn on sound alerts with the ‘Enable Sound’ option if you want to. From the ‘Appearance’ settings you can choose the ‘Position’ of your notifications, adjust the ‘Notification Size’, and even choose to display a close button by checking the ‘Display Close Option’.
In addition to this, you can choose to ‘Hide NotificationX on mobile’ from the ‘Mobile Visibility’ option. From the ‘Timing’ settings you can adjust the ‘Delay Before First Notification’ and the ‘Delay Between Notifications’. You can also choose how many seconds the notification will be displayed.
Besides, from the ‘Behavior’ settings, you can choose to display your notifications on a loop and enable to open pages in new tabs should your visitors click on your notification alerts.
Final Outcome #
When you are done configuring and customizing your notification alerts for ReviewX, click on the ‘Publish’ button. Afterward, you will then be able to see your FOMO notification alerts displayed every time a customer reviews your WooCommerce products.
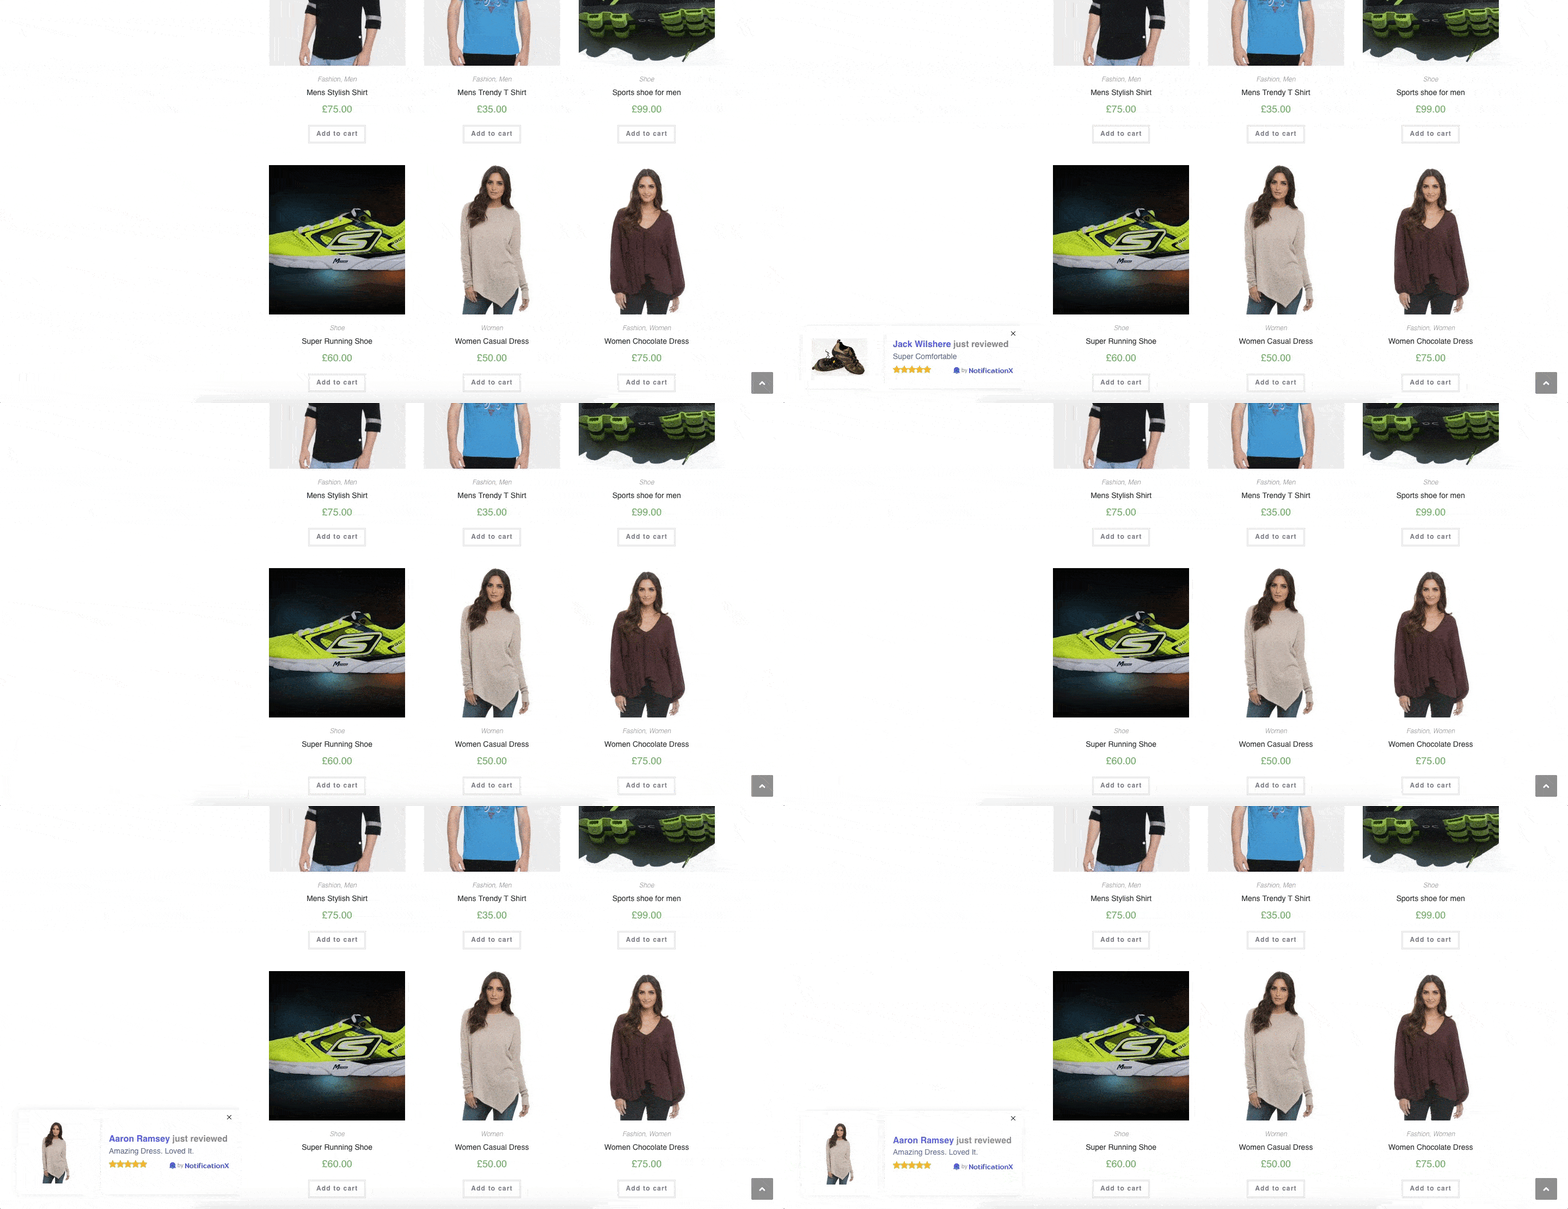
By following these basic steps, you can create amazing ReviewX notification alerts for your WooCommerce store and increase your conversion in the process.
If you face any difficulties, feel free to reach out to our support team for further assistance.


