NotificationX Pro comes with a ‘Cross Domain Notice’ feature to showcase your single, multiple, or all NotificationX live alerts from one website to another WordPress or other types of website. You just have to get the Cross Domain Notice code from your current website and include it on your preferred one without installing this NotificationX plugin there.
Check out the guideline to see how to configure NotificationX Cross Domain Notice on WordPress or any other websites below:
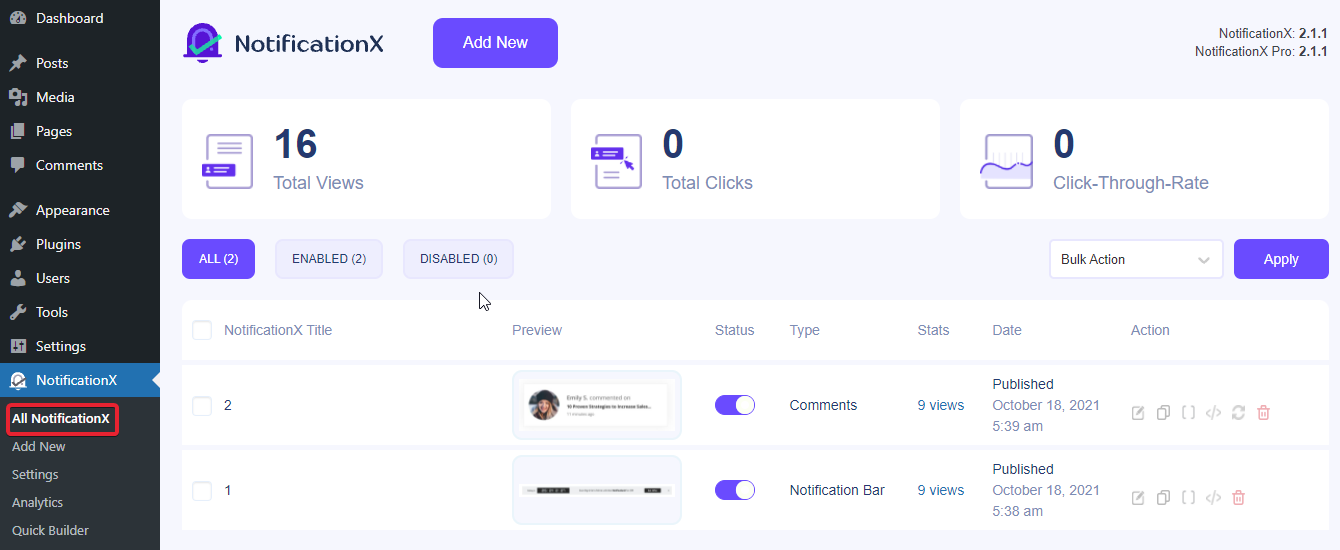
Step 1: Go To ‘All NotificationX’ Dashboard #
Make sure you have installed & activated NotificationX Pro plugin on your WordPress website. If you have already done it, you are then all ready to configure this NotificationX Cross Domain Notice On other owned websites.
First, navigate to NotificationX →All NotificationX dashboard. From there choose your preferred single, multiple, or all live notification popups.
Note: If you have newly installed & activated NotificationX from your website, you can then follow one of these detailed documentation steps to create multiple live notification popups.
Step 2: Get NotificationX ‘Cross Domain Notice’ #
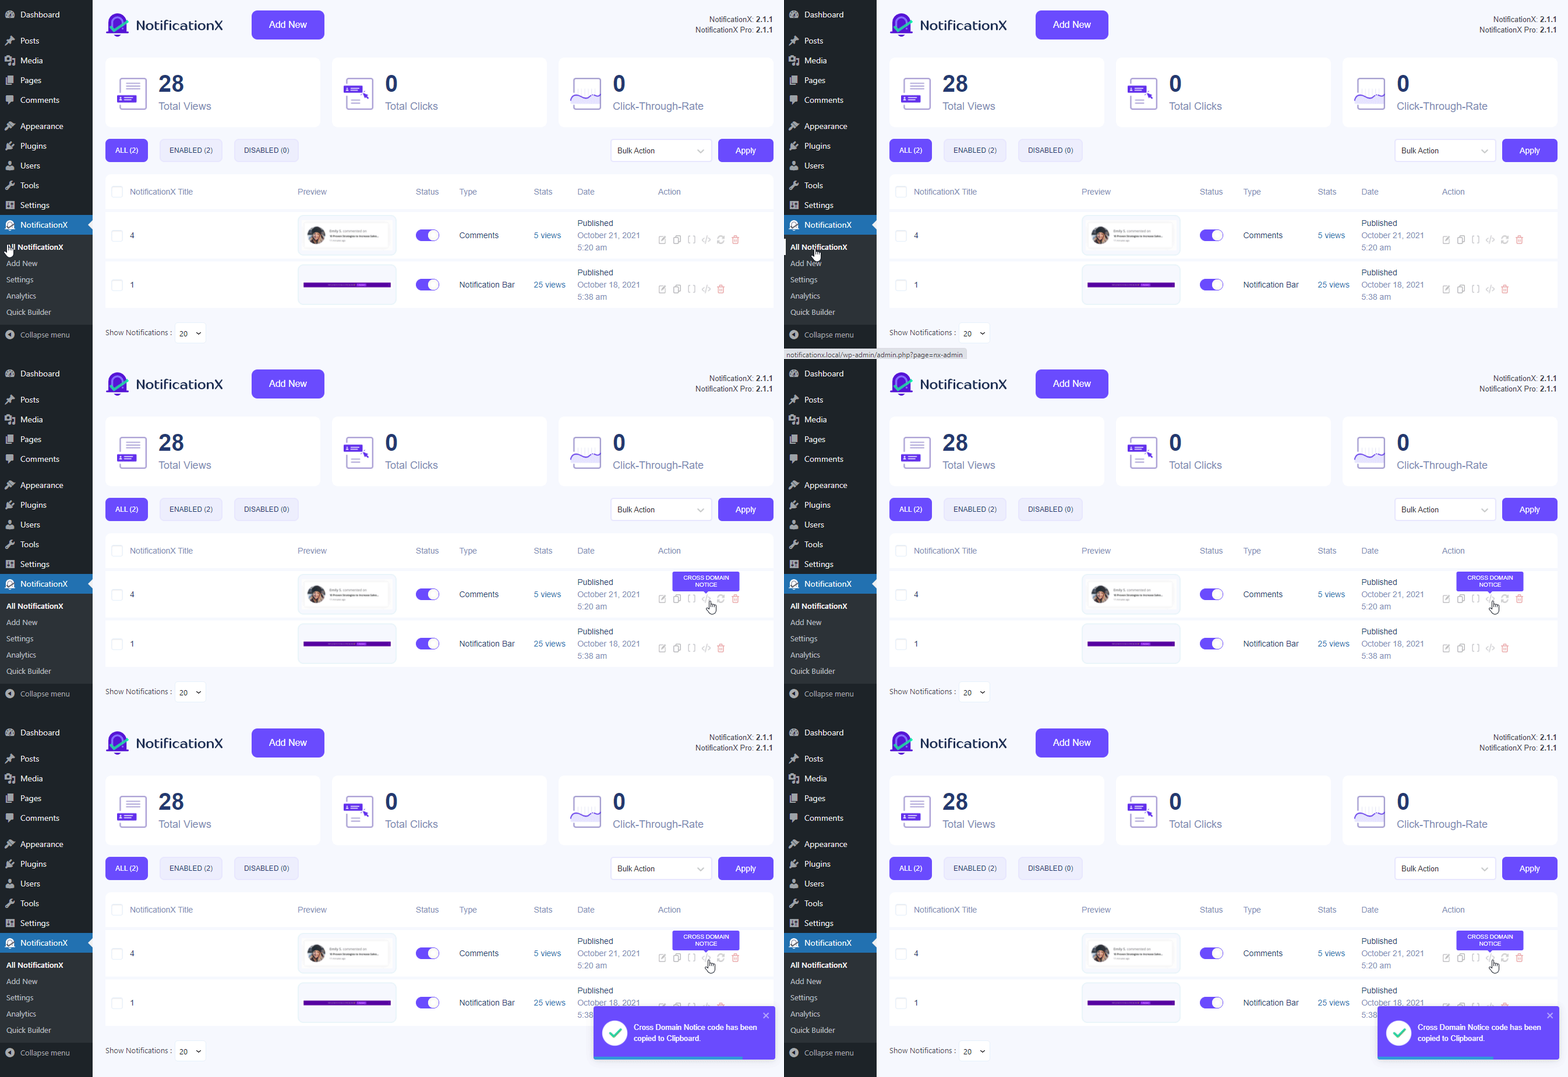
Afterward, right-click on your preferred single notification and click on the ‘Cross Domain Notice’ option to copy the code.
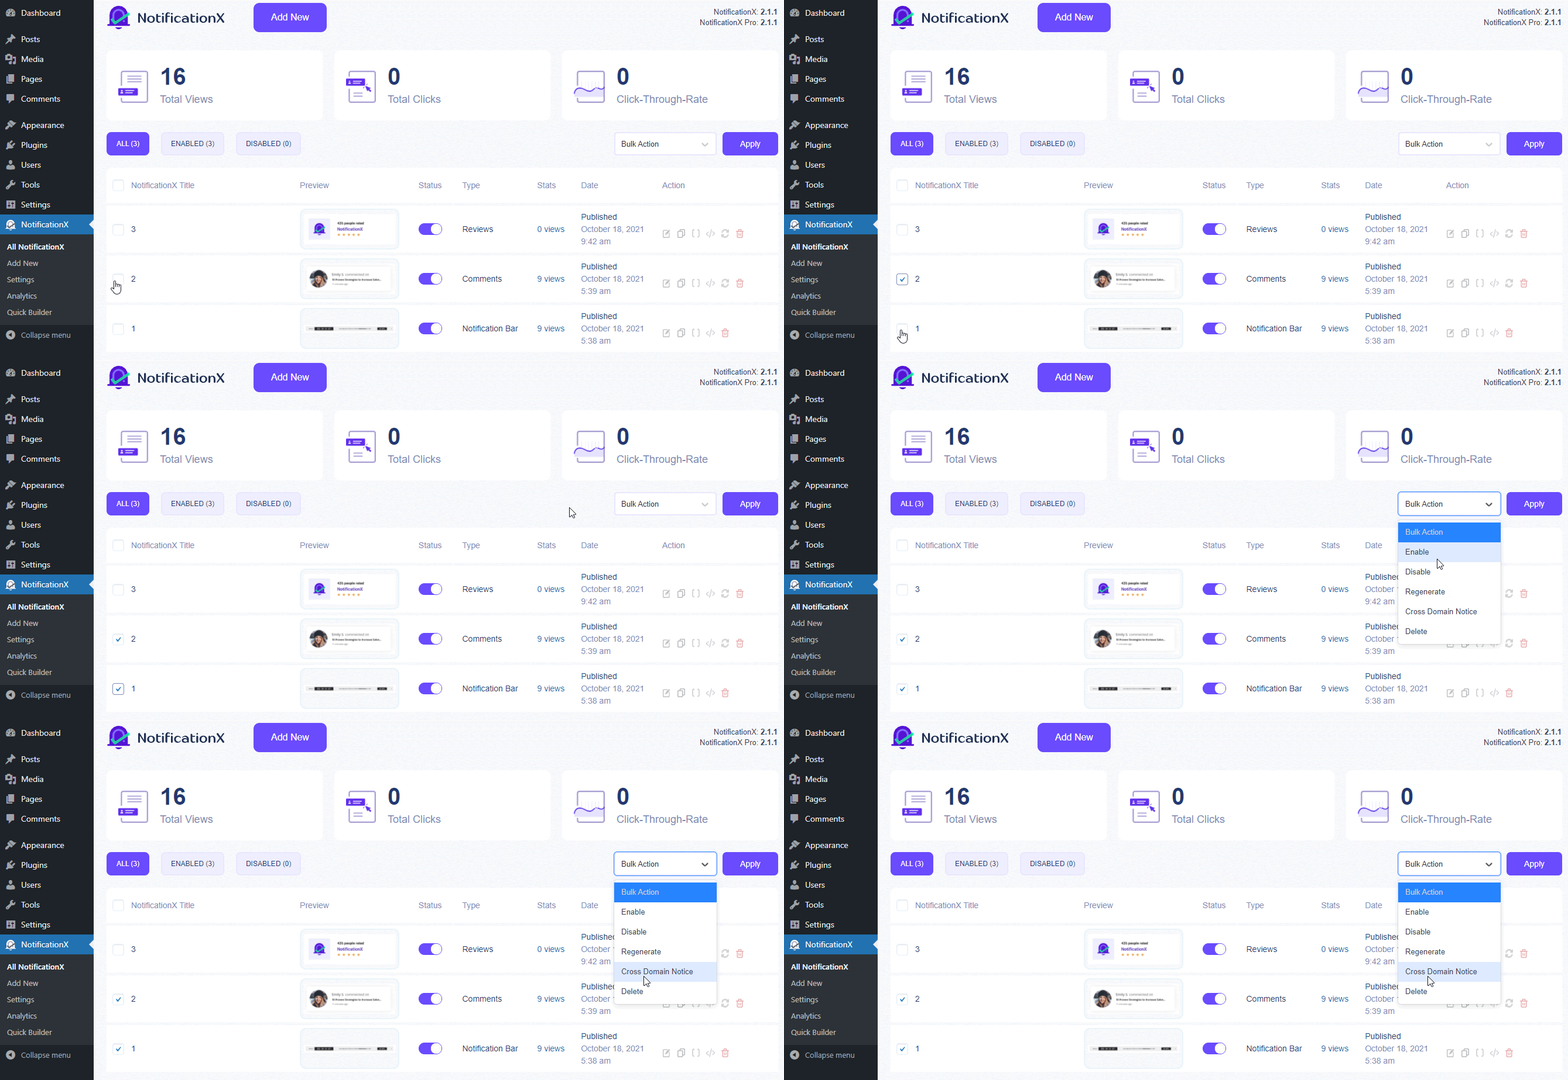
If you want to showcase multiple notifications on other websites, you can also do it by easily selecting the checkbox. And picking the ‘Cross Domain Notice’ option from the drop-down menu that is just opposite the top ‘Apply’ button above.
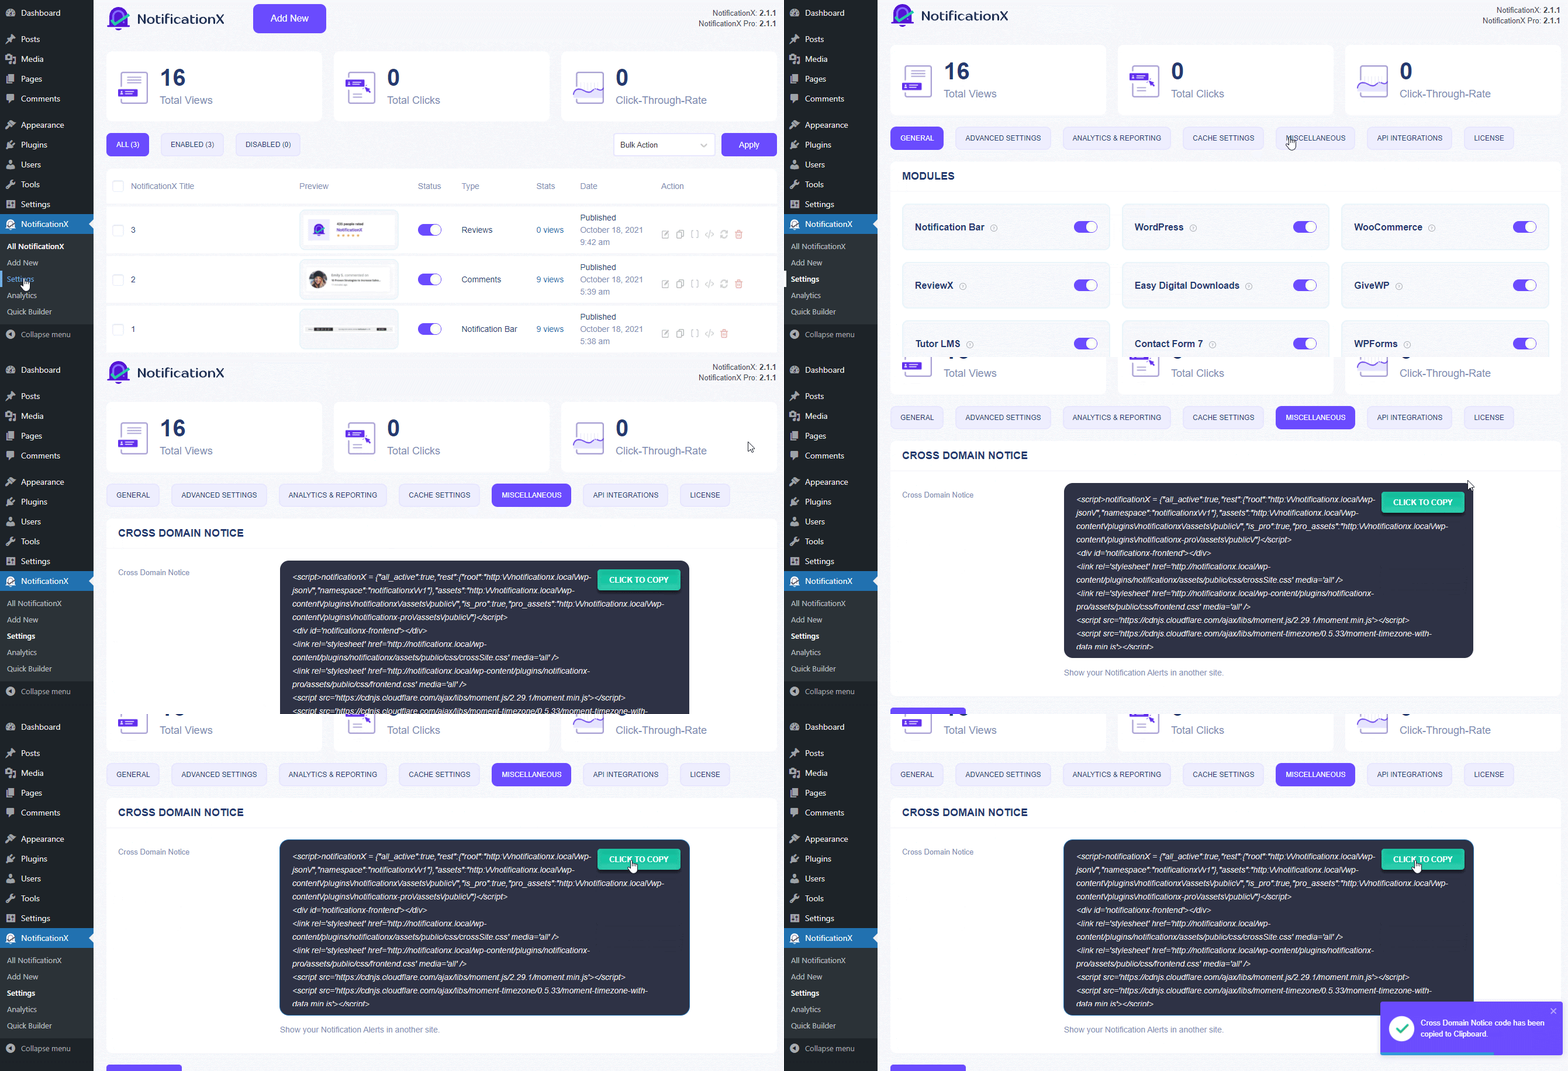
Besides, if you want to showcase all your current NotificationX configured site notifications to others, navigate to NotificationX →Settings. Choose the ‘Miscellaneous’ option from the top bar settings.
Next, just copy the code and you are all ready to include it on your other owned websites selected pages.
Step 3: Add Cross Domain Code On WordPress Or Other Websites #
Afterward, NotificationX notifications are single, multiple, or all notifications whatever you have chosen can easily be displayed on any WordPress or other website’s desired pages. Just paste cross domain notice code on other websites’ backend desired pages.
WordPress Websites: #
For a WordPress website, you have to check first that your theme supports the ‘Custom Code’ adding facility or not. If yes you can add this cross domain notice code there just like the image below.

If not then you can create a ‘Child Theme’ on your WordPress site or can add it to the Appearance →Theme Editor section.
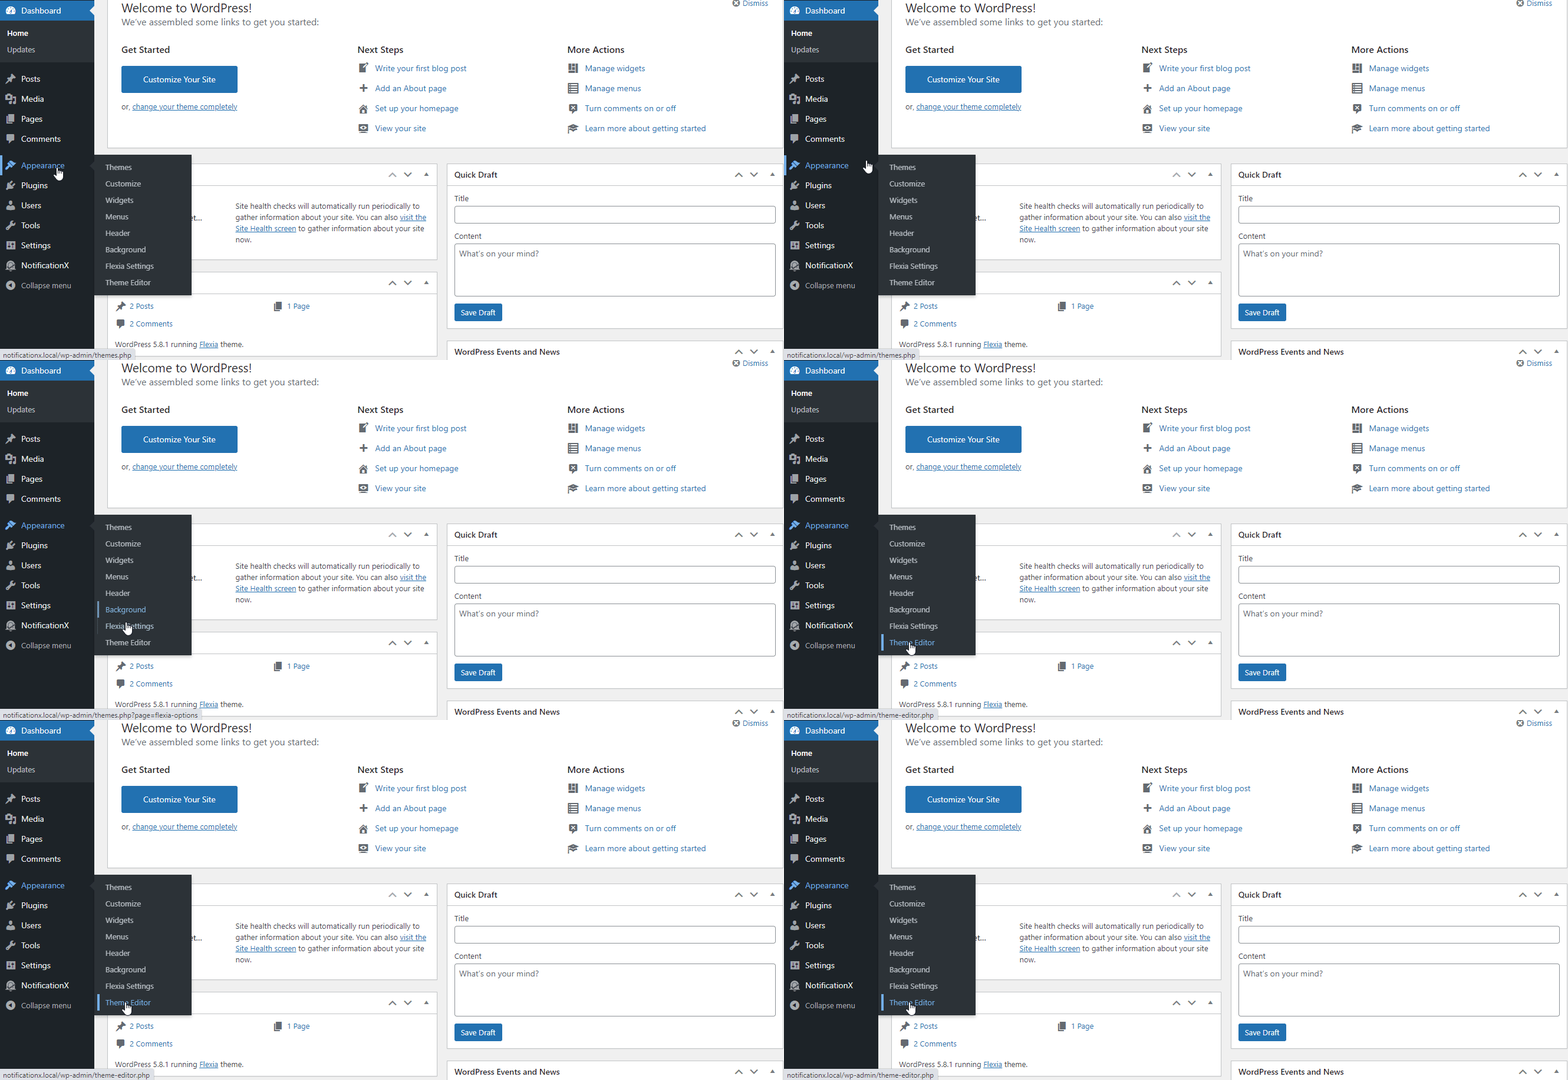
Besides, use this third-party plugin Simple Custom CSS and JS or any other as per your preference to add NotificationX cross domain notice code. Either way, you will be able to showcase your live NotificationX notifications on your WordPress site.
Other Type of Websites: #
Except for the WordPress website, you can add this cross domain notice code just on your website’s desired pages and make the changes.
Note: You can showcase any notification to any other single or multiple owned website desired pages.

Final Outcome #
By following these mentioned steps and a bit more modifying, this is how you can display single, multiple, or all your configure NotificationX notifications to any other owned websites without installing NotificationX Pro on it.
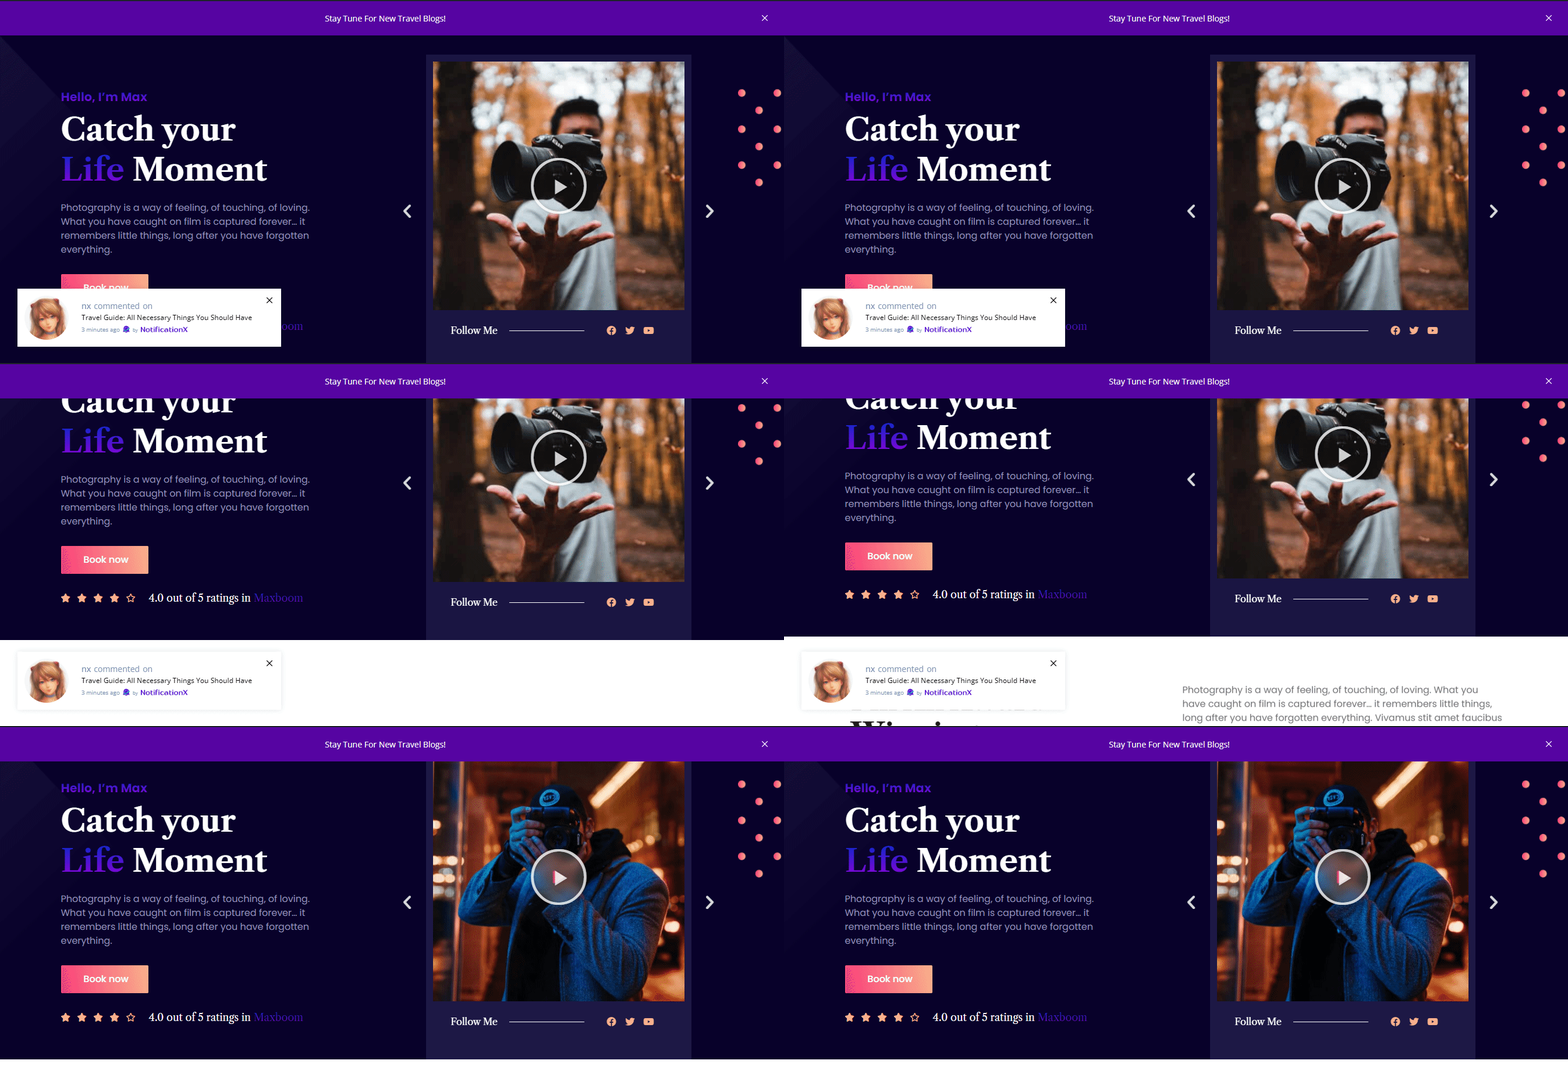
That’s it! This is how easily you can configure NotificationX Cross Domain Notice On your current website to other owned websites anytime.
Getting Stuck? If you face any issues, you can contact our Support Team.


