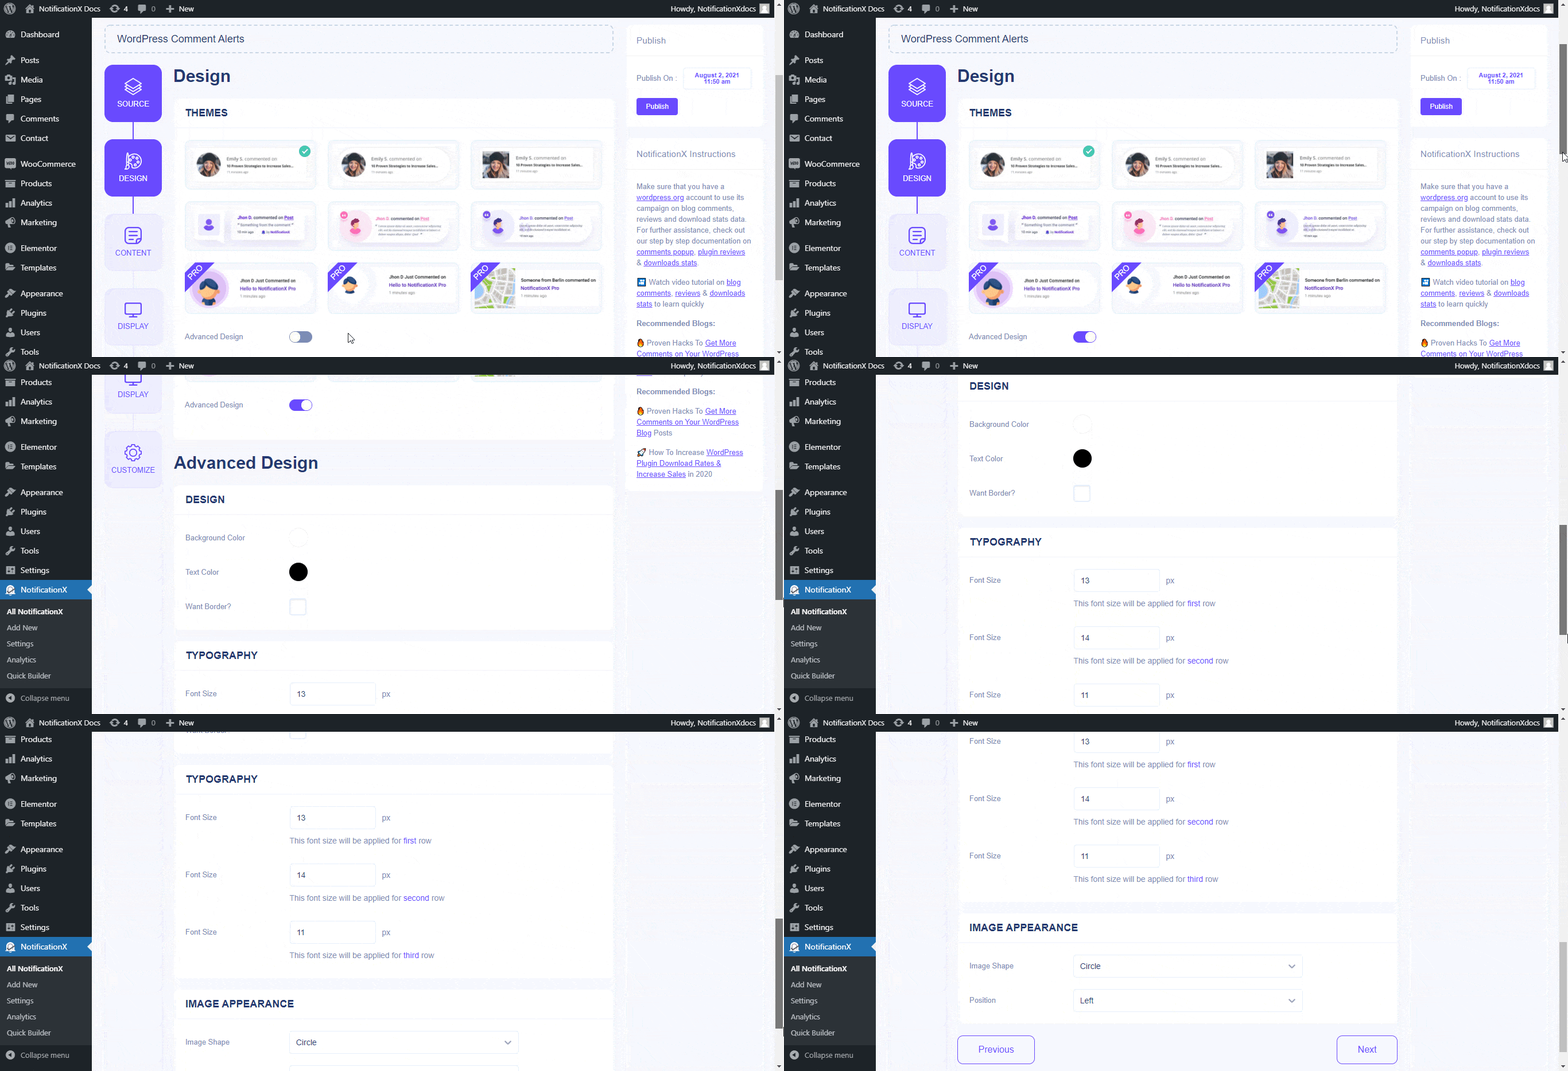
NotificationX Builder comes with the ‘Design’ option to let you choose a template and customize the entire appearance of your WordPress Notification Alert as per your preference. Let’s follow the guidelines to learn how to use the ‘Design’ tab in NotificationX:
Step 1: Choose A Notification Alert #
First of all, go to your WordPress dashboard and navigate to wp-admin -> NotificationX -> NotificationX Builder.
After picking your preferred ‘Notification Type’ from the ‘Source’ option, simply click on the ‘Next’ button. Or, you can simply click on the ‘Design’ tab as shown below.

Step 2: Configure The Display Settings #
From the ‘Design’ tab, you can pick a template or theme for your notification alert. Depending on the notification type and source, NotificationX will give you several predesigned themes. Your chosen theme is how the notification alert will be displayed on your WordPress website.

Moreover, you can use the ‘Advanced Design’ option to customize the template you have chosen which consists of three sections of its own: ‘Design’, ‘Image Appearance’ and ‘Typography’.
From the ‘Design’ section, you can change the background or text color for your notification popup. ‘Image Appearance’ section gives you the freedom to change the ‘Image Shape’ & ‘Image Position’. From the ‘Typography’ section, you can change the Font Size for each row of content as well.

So, this is how you can easily design amazing Notification Alerts for your chosen notification type and grow your conversion rate on your WordPress website.
Getting Stuck? Feel free to contact our dedicated Support Team for further assistance and queries.


