NotificationX Pro allows you to get full control over giving access to your WordPress site to multiple users in their preferred roles. This role management feature aims to help configure single or multiple roles for any of your WordPress site users. You can choose who can create notifications, edit settings, or can view in-built NotificationX Analytics data in advance.
Check out the guideline below to see how to set up the ‘Role Management’ feature with NotificationX:
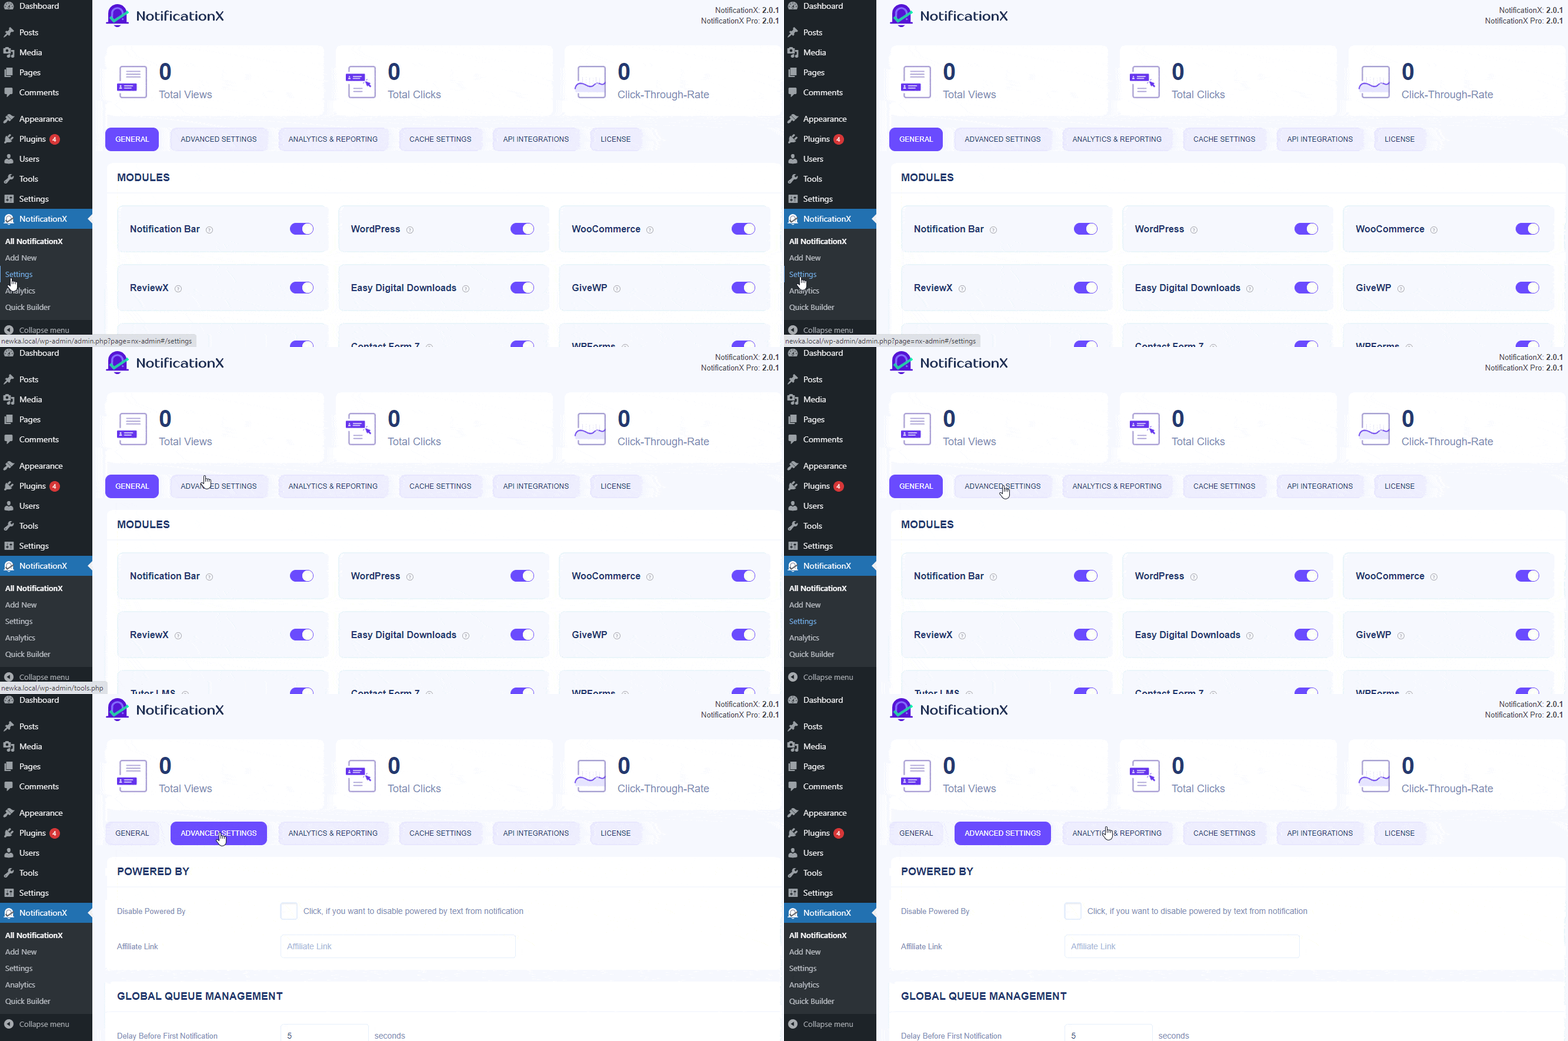
Step 1: Go To NotificationX Settings #
First, navigate to WordPress dashboard NotificationX →Settings →Advanced Settings tab.

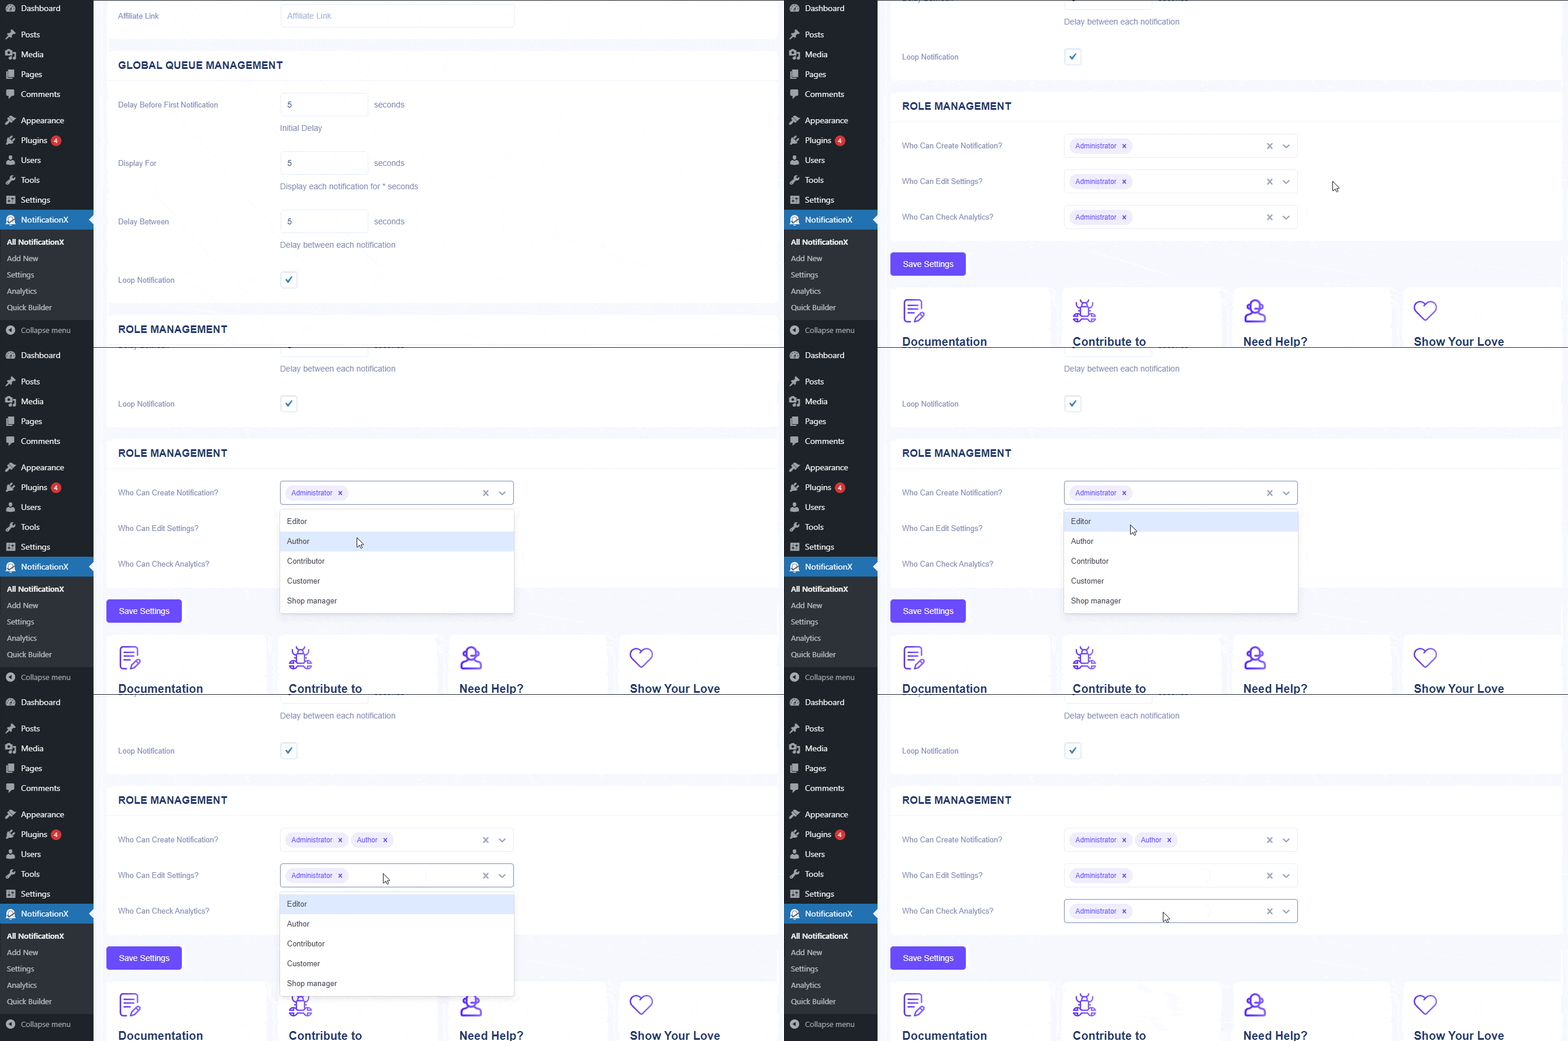
Step 2: Configure NotificationX Role Management #
Afterward, scroll down a bit to get the ‘Role Management’ option there to configure as per your preferences. You can choose to include or exclude administrators who can create any type of notifications, edit the settings, and can check the built-in analytics data.
This user role can be an administrator, author, editor, or another user role you have created for maintaining your specific WordPress site. You can pick multiple users to get access to manage particular activities or all in advance.

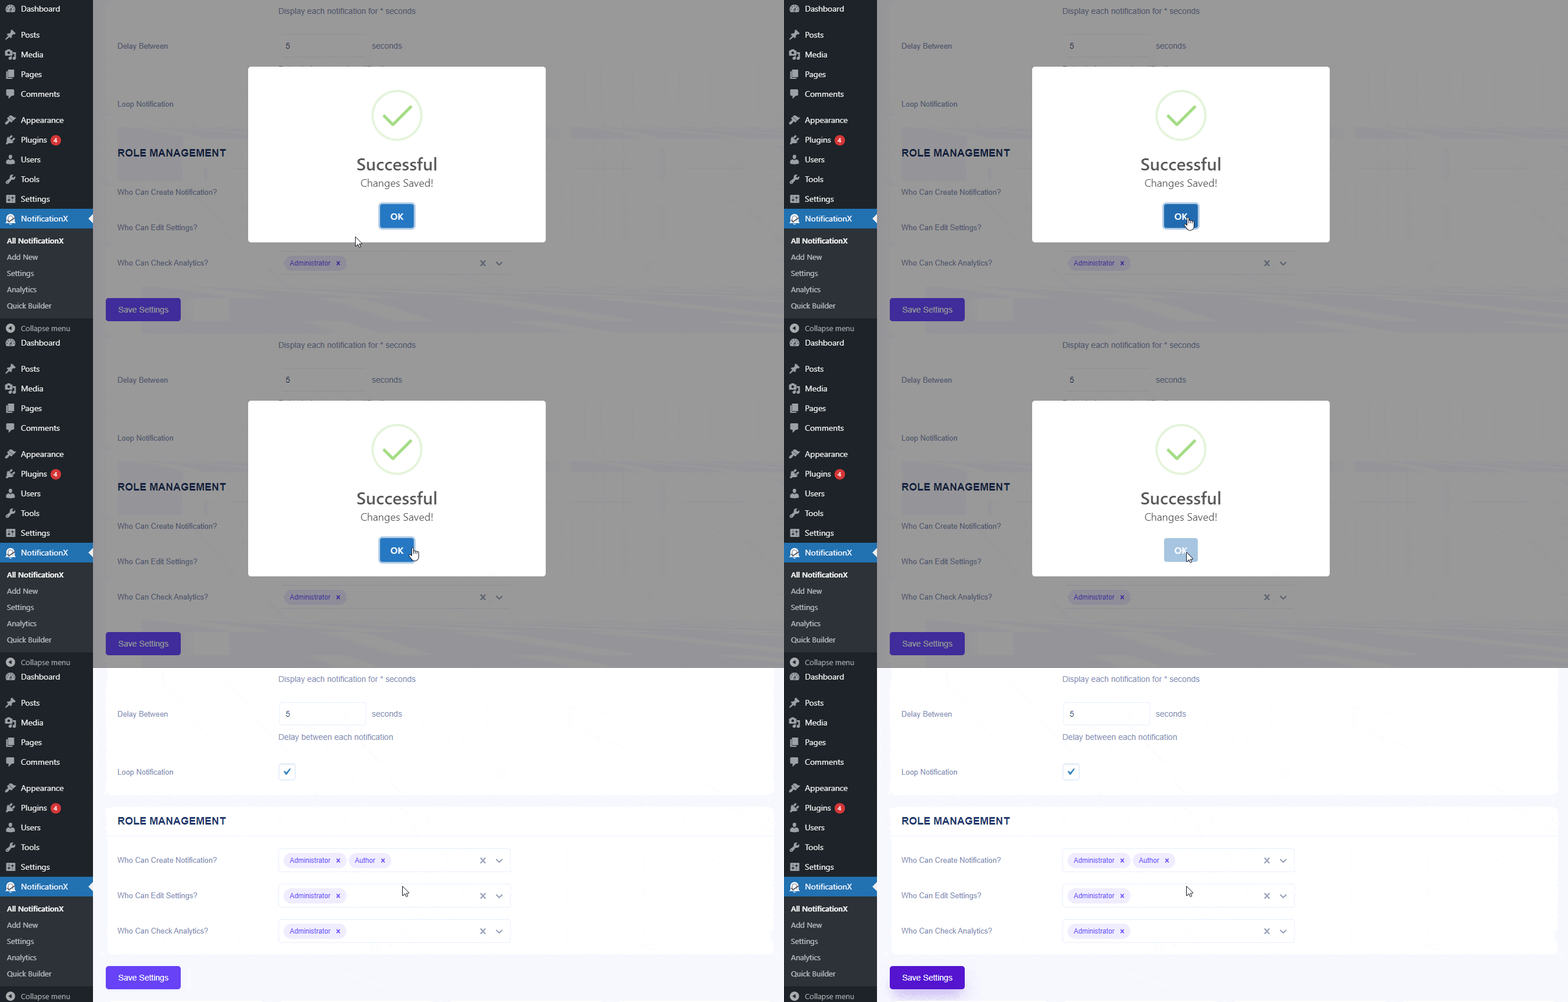
At last, after configuring user roles for managing your NotificationX activities, press the ‘Save Settings’ button.

Final Outcome #
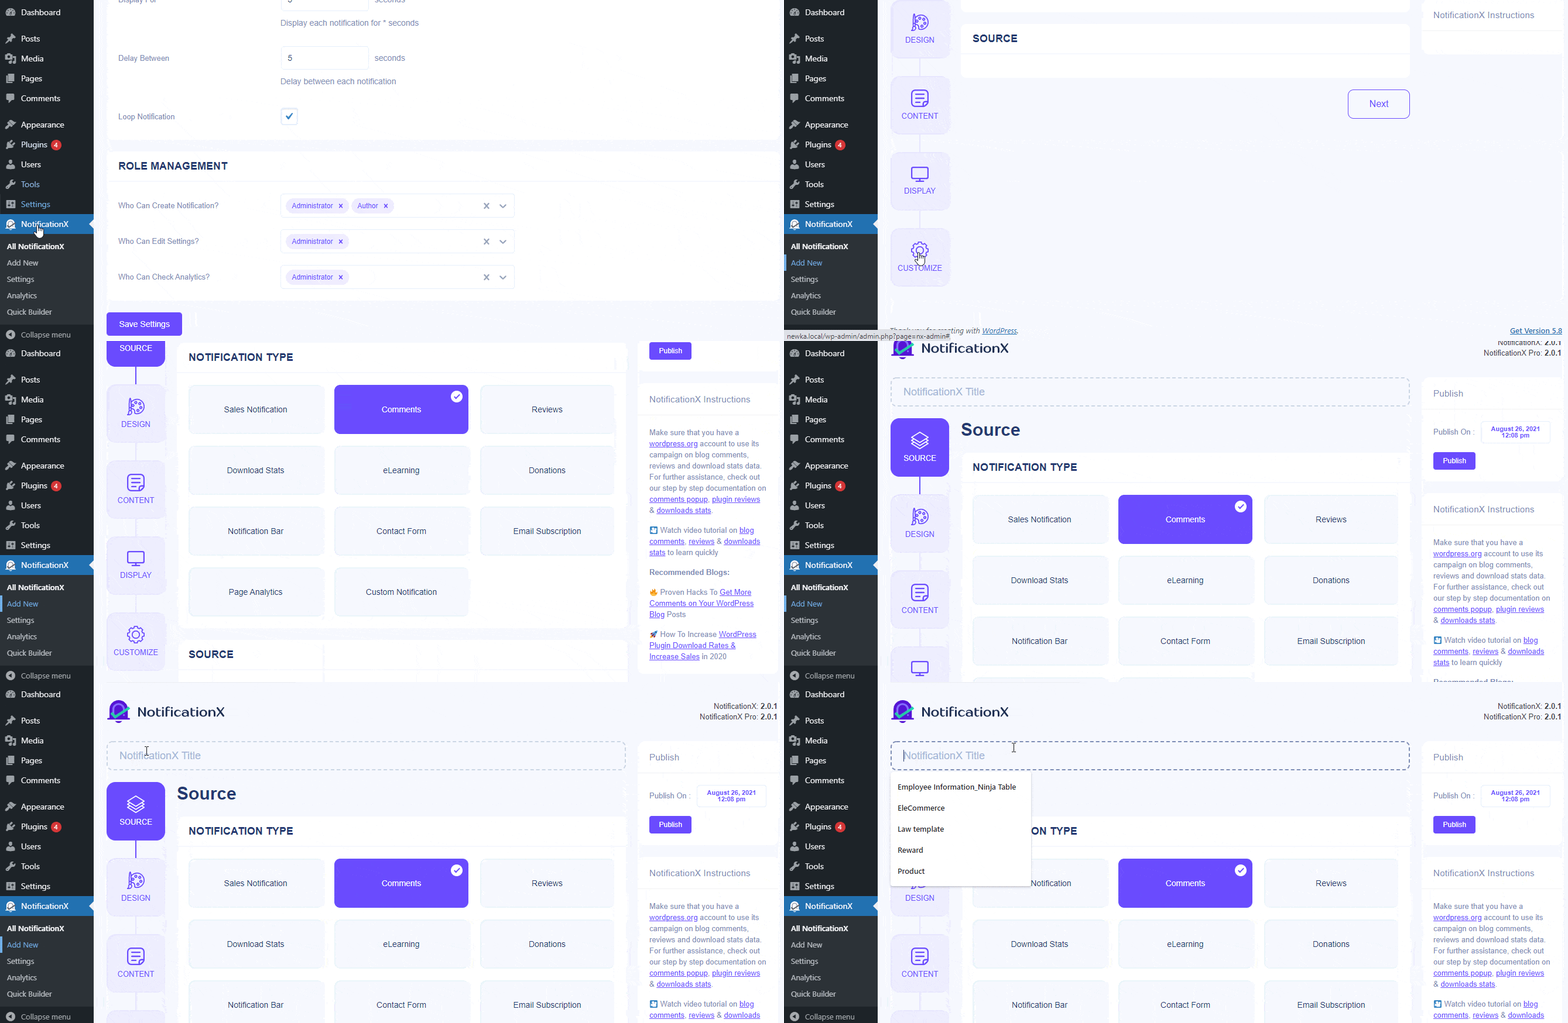
By following these mentioned steps you can easily manage your user roles and get full over access. As here ‘Author’ has got the access to create notifications that are shown in the following image.

This is how simple you can configure this NotificationX Role Management feature following some simple steps.
If you face any issues or need any further assistance, feel free to contact our Support Team.


