Notification Bars on the top of a web page help you display product discounts, announcements, promotions, CTAs, and other critical information. With NotificationX, you can easily configure a notification bar in Gutenberg and display your required information or sales promotions on your website for free. Follow the step-by-step guide below to learn how you can do that.
How To Configure A Notification Bar In Gutenberg With NotificationX? #
Before getting started, make sure you have đã cài đặt và kích hoạt NotificationX on your WordPress website.
Bước 1: Thêm thông báo mới #
Chuyển đến Bảng điều khiển WordPress của bạn và điều hướng đến wp-admin → NotificationX. Then, right at the top, click on ‘Thêm mới'.

Step 2: Choose Notification Type #
After completing step 1, you will be redirected to the ‘Nguồn’ tab page of your NotificationX. You can also set a title and select ‘Thanh thông báo’ as your Notification type. Afterward, go ahead & click on the ‘Kế tiếp' cái nút.
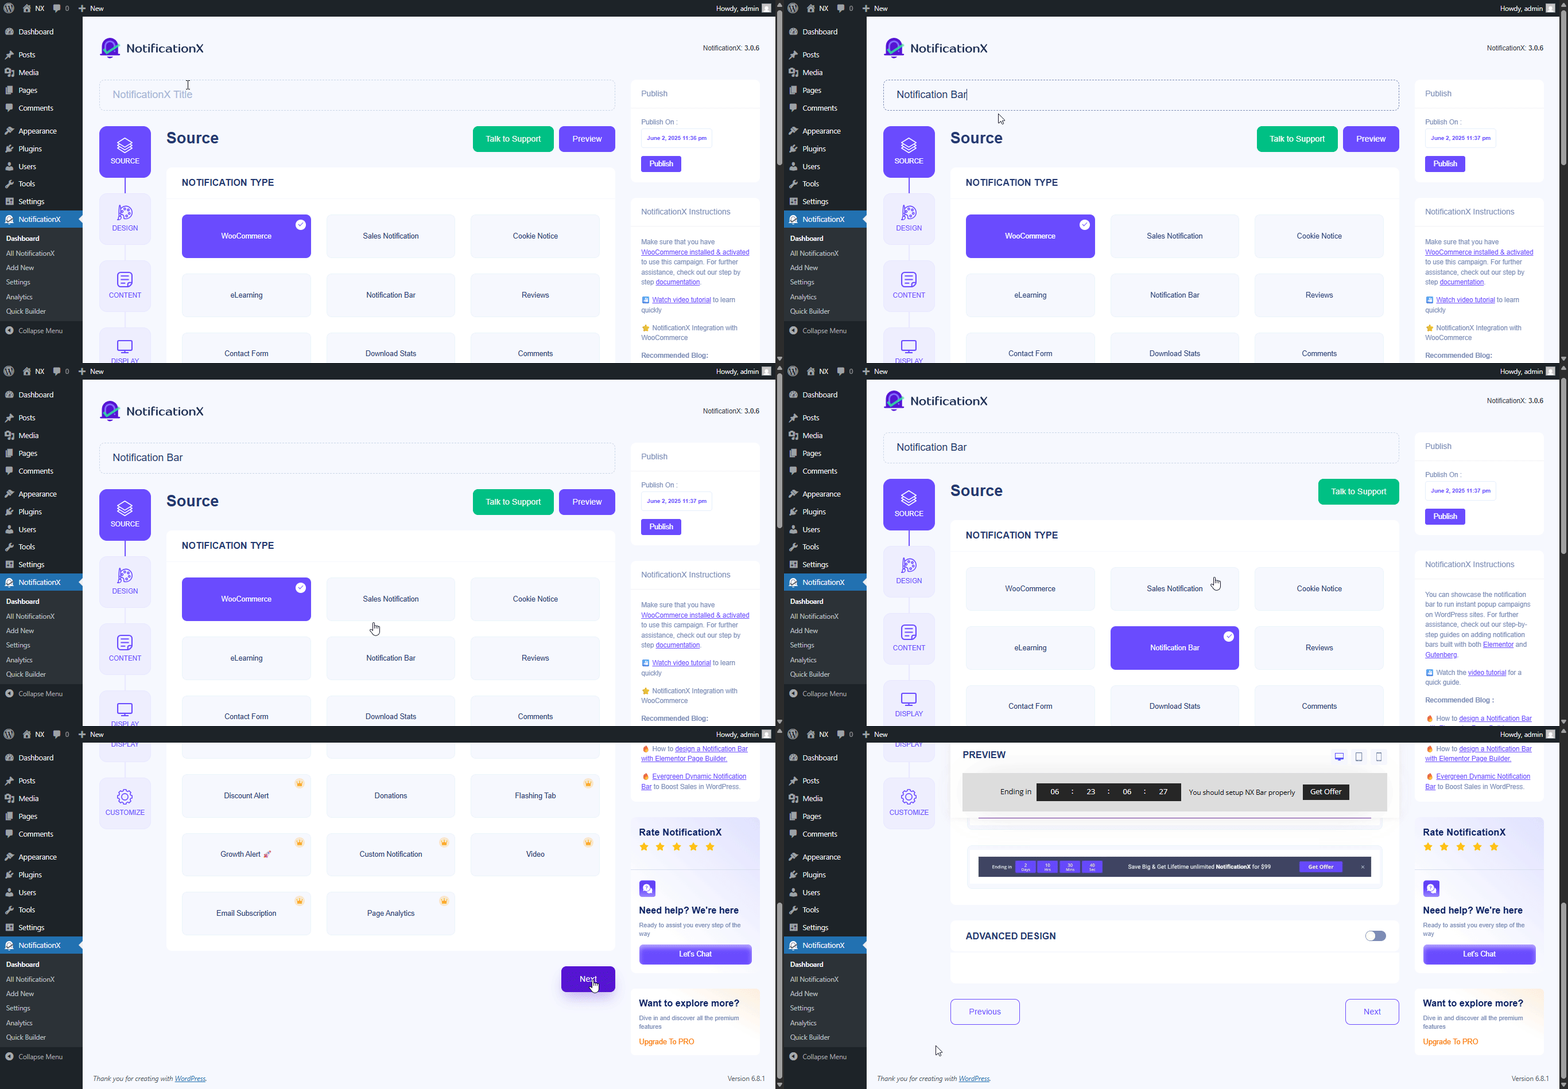
Step 3: Customize The Design #
Từ 'Thiết kế’ tab, you can choose a theme and customize it as per your preference. To use a notification bar in Gutenberg, turn the ‘Thiết kế tiên tiến ' toggle on.
If you do so, you’ll get the option ‘Built with Gutenberg’, click on it & you will get all the notification bar design options. Choose the one that you prefer most & click on ‘Import.’
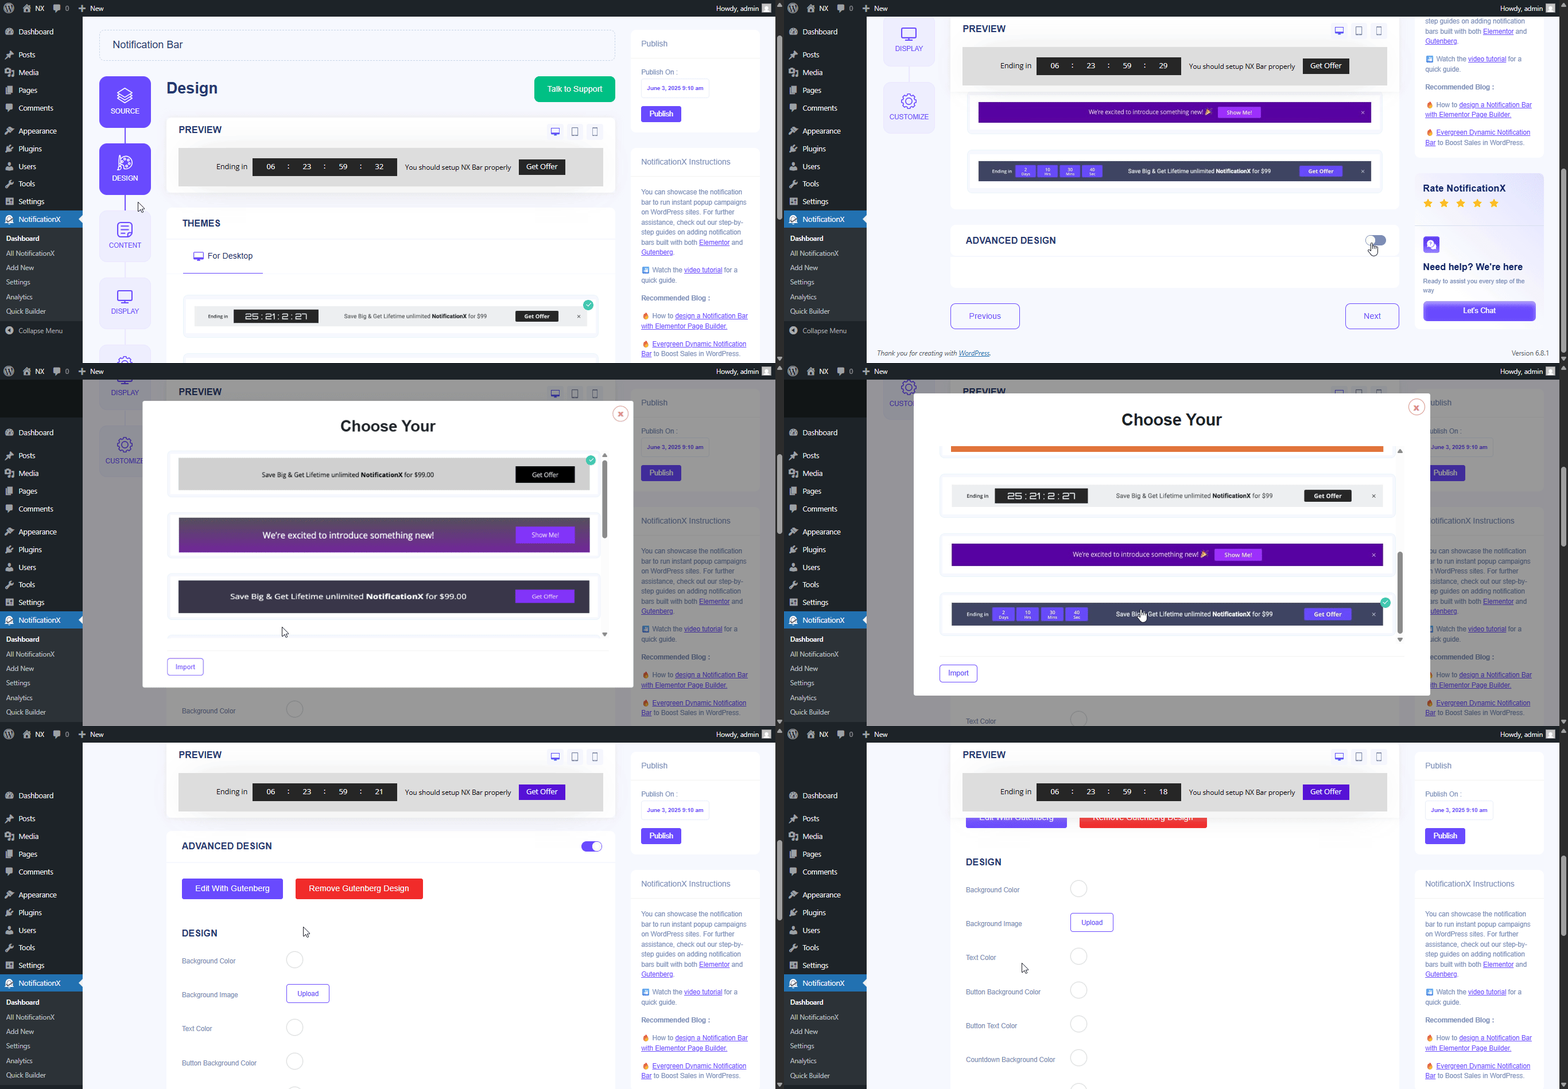
In ‘Thiết kế tiên tiến’ you also get the flexibility to modify the notification bar to reach the maximum potential of it.
Phía dưới cái 'Thiết kế' option, you can do a lot of customization to make your notification bar stand out. Such as changing the background color and image, making your own button color, countdown background color, countdown text color, closing button color, close button size, and position.
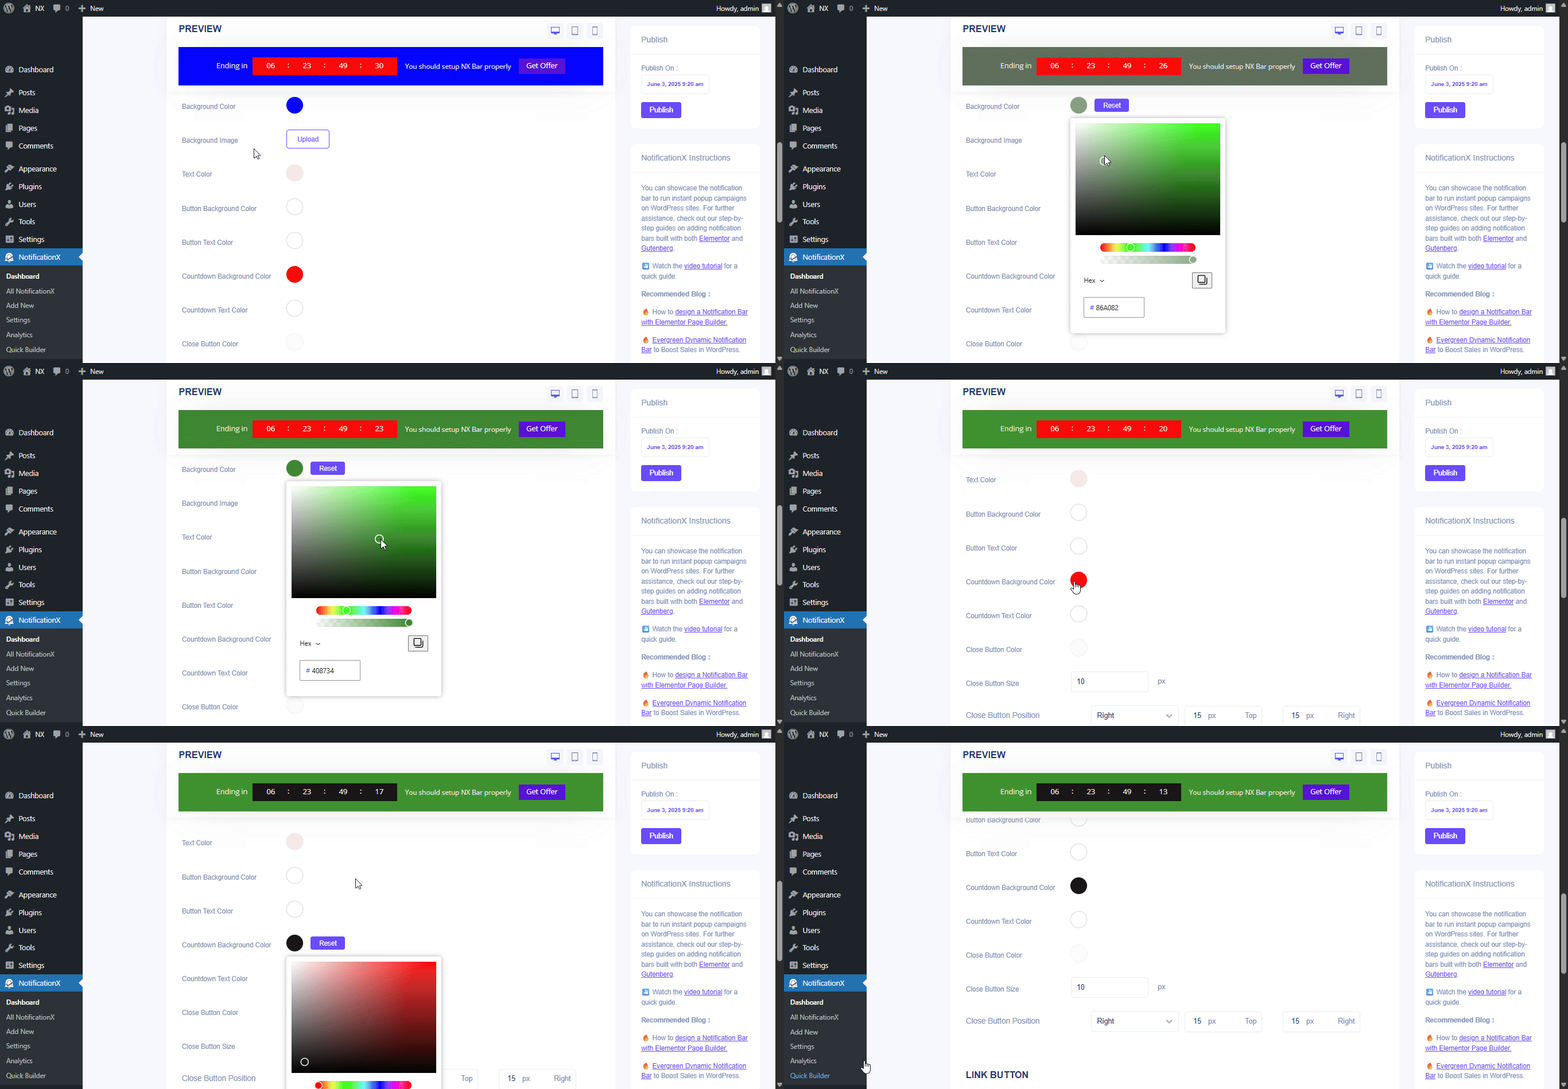
Plus, you can also customize the Link Button, Typography & add Custom CSS to your Gutenberg Notification from this section.
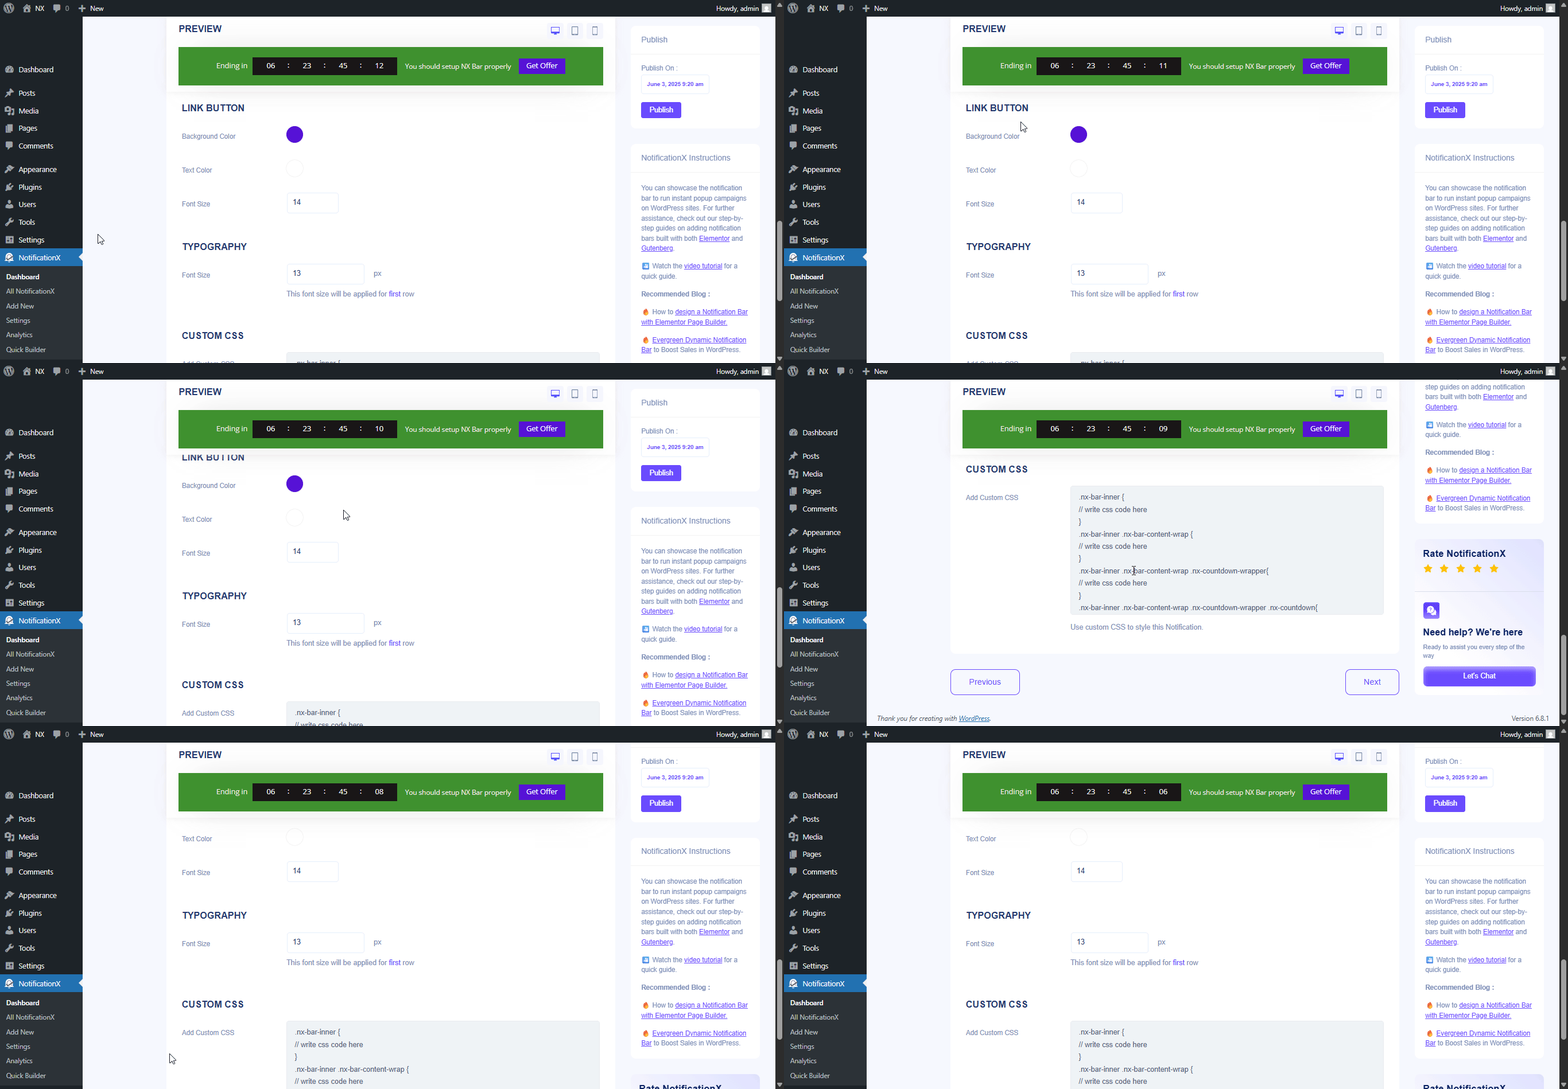
Step 4: Customize Your Notification Bar Directly From Gutenberg Editor #
To edit everything live, click on ‘Edit with Gutenberg’ under ‘Advanced Design.’ It’ll redirect you to the Gutenberg editor.

Note: Instead of seeing something like the above images, if you see a few broken blocks, make sure you have the Essential Blocks for Gutenberg installed & activated on your WordPress website.
Now Gutenberg gives you the flexibility of editing everything in your picked notification bar.
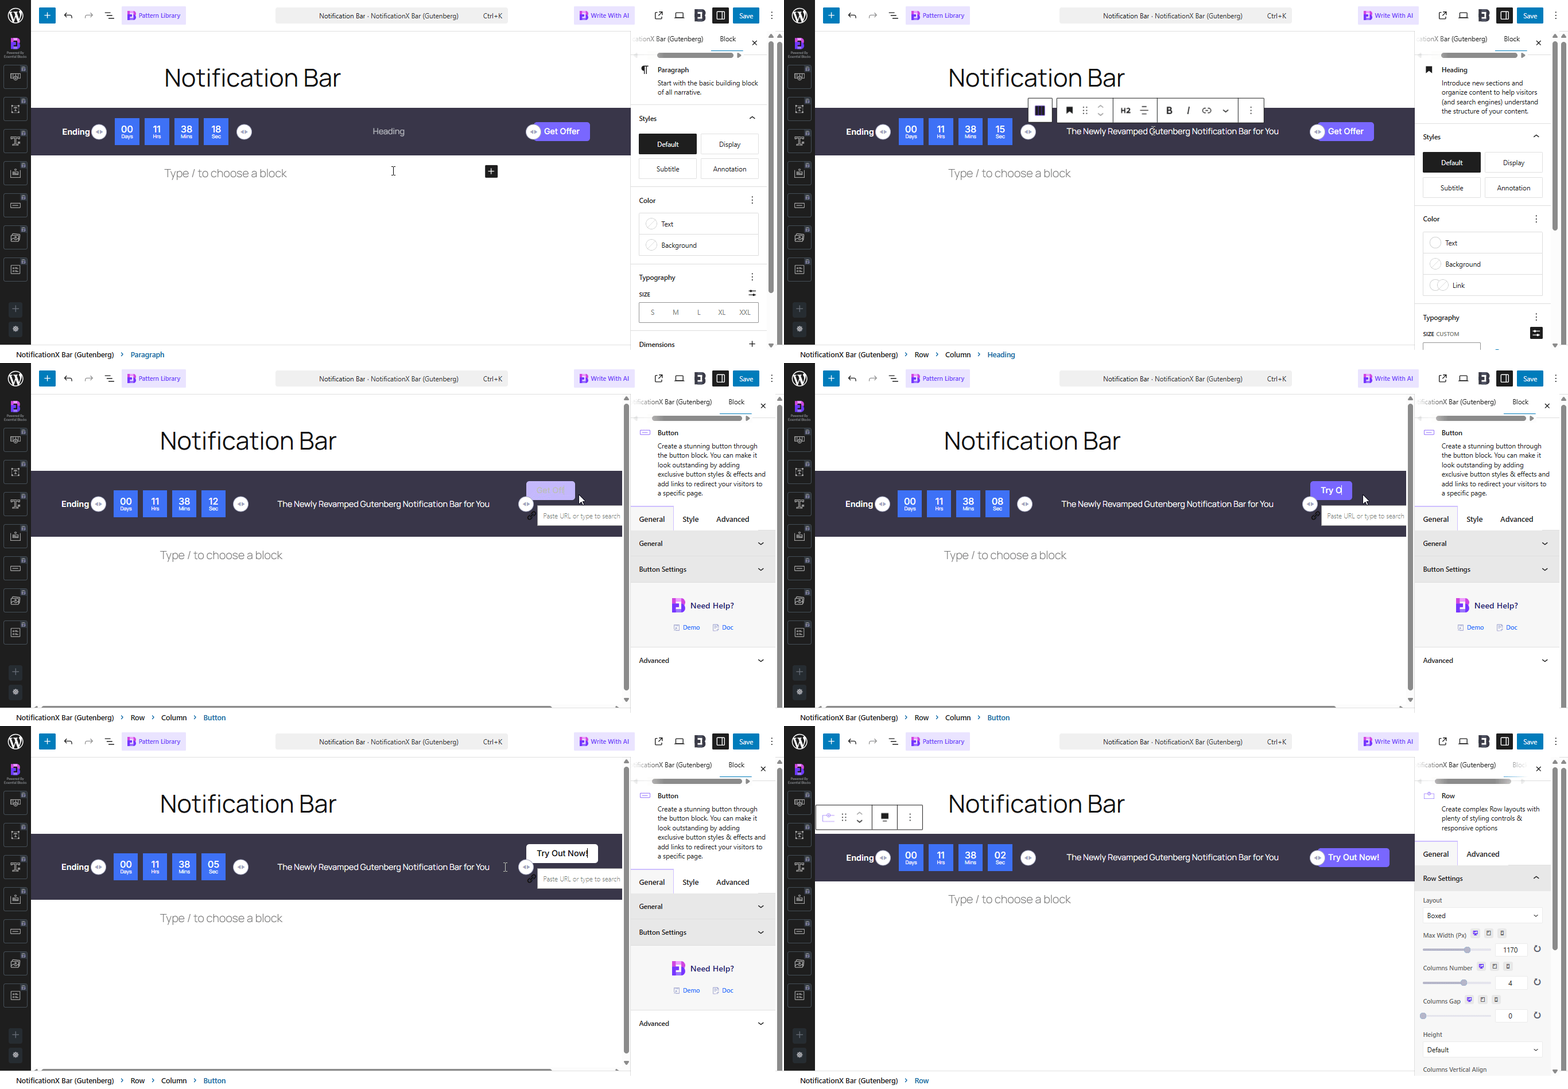
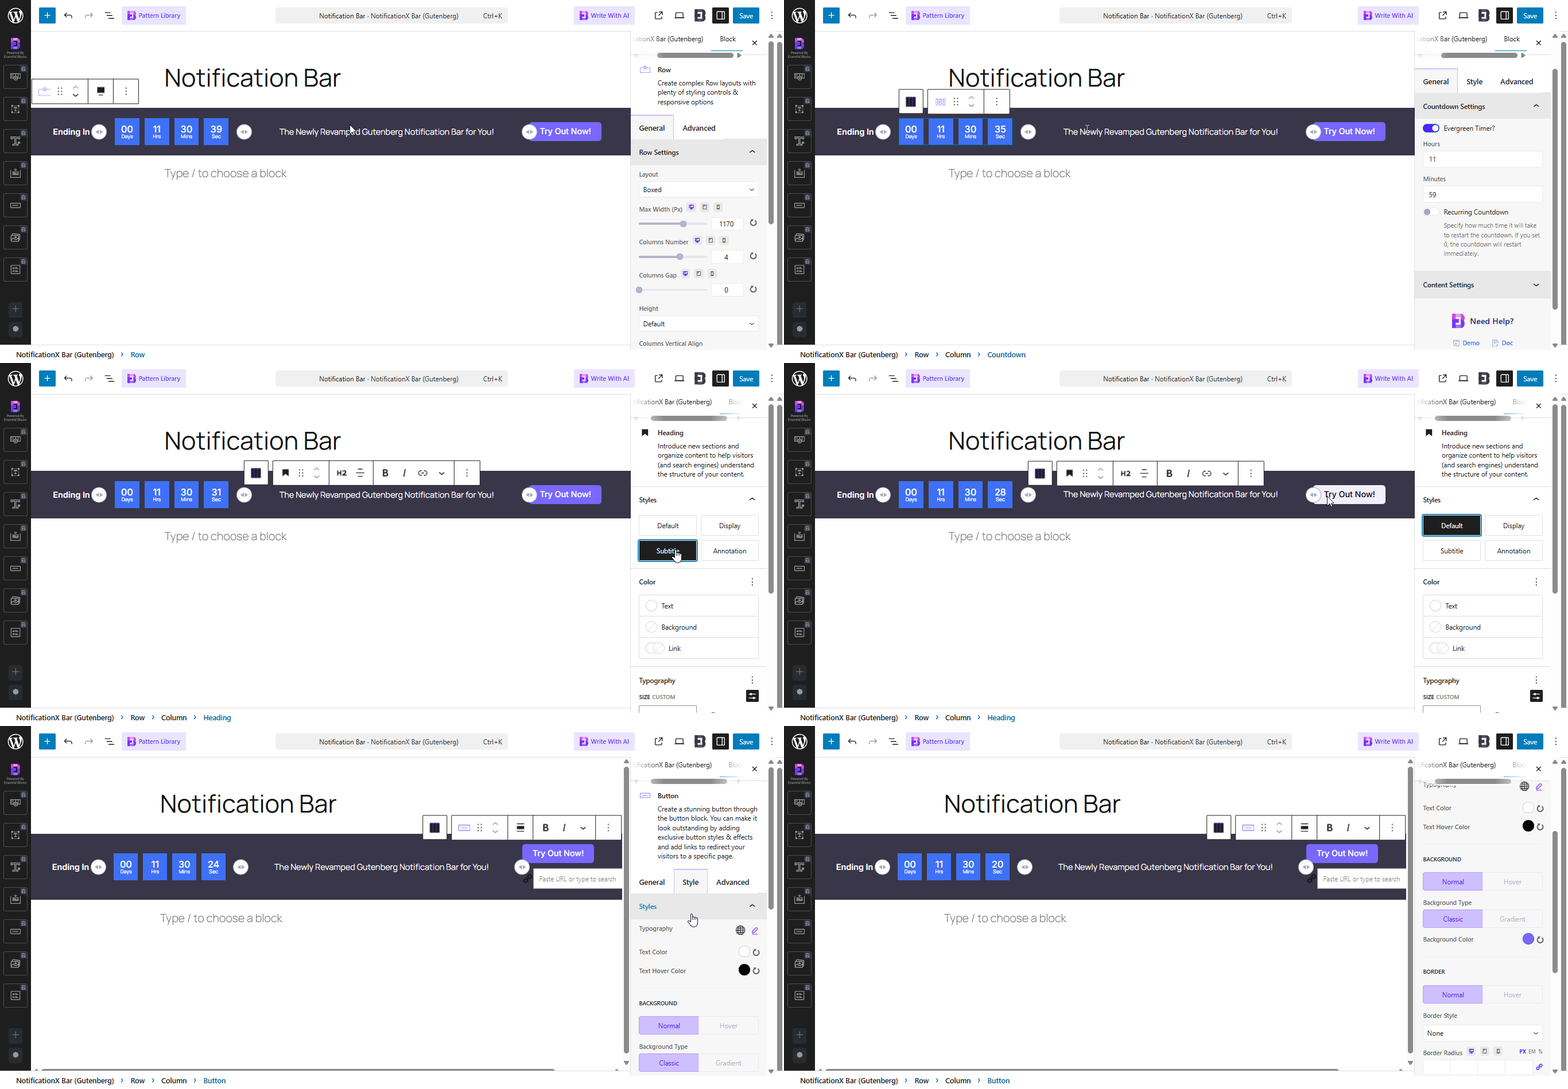
Click on the portion you want to edit and style the way you want from the right-side control panel. Set your notification bar exactly how you imagined. Once you’re done, revert back to NotificationX dashboard to do a few more customization.
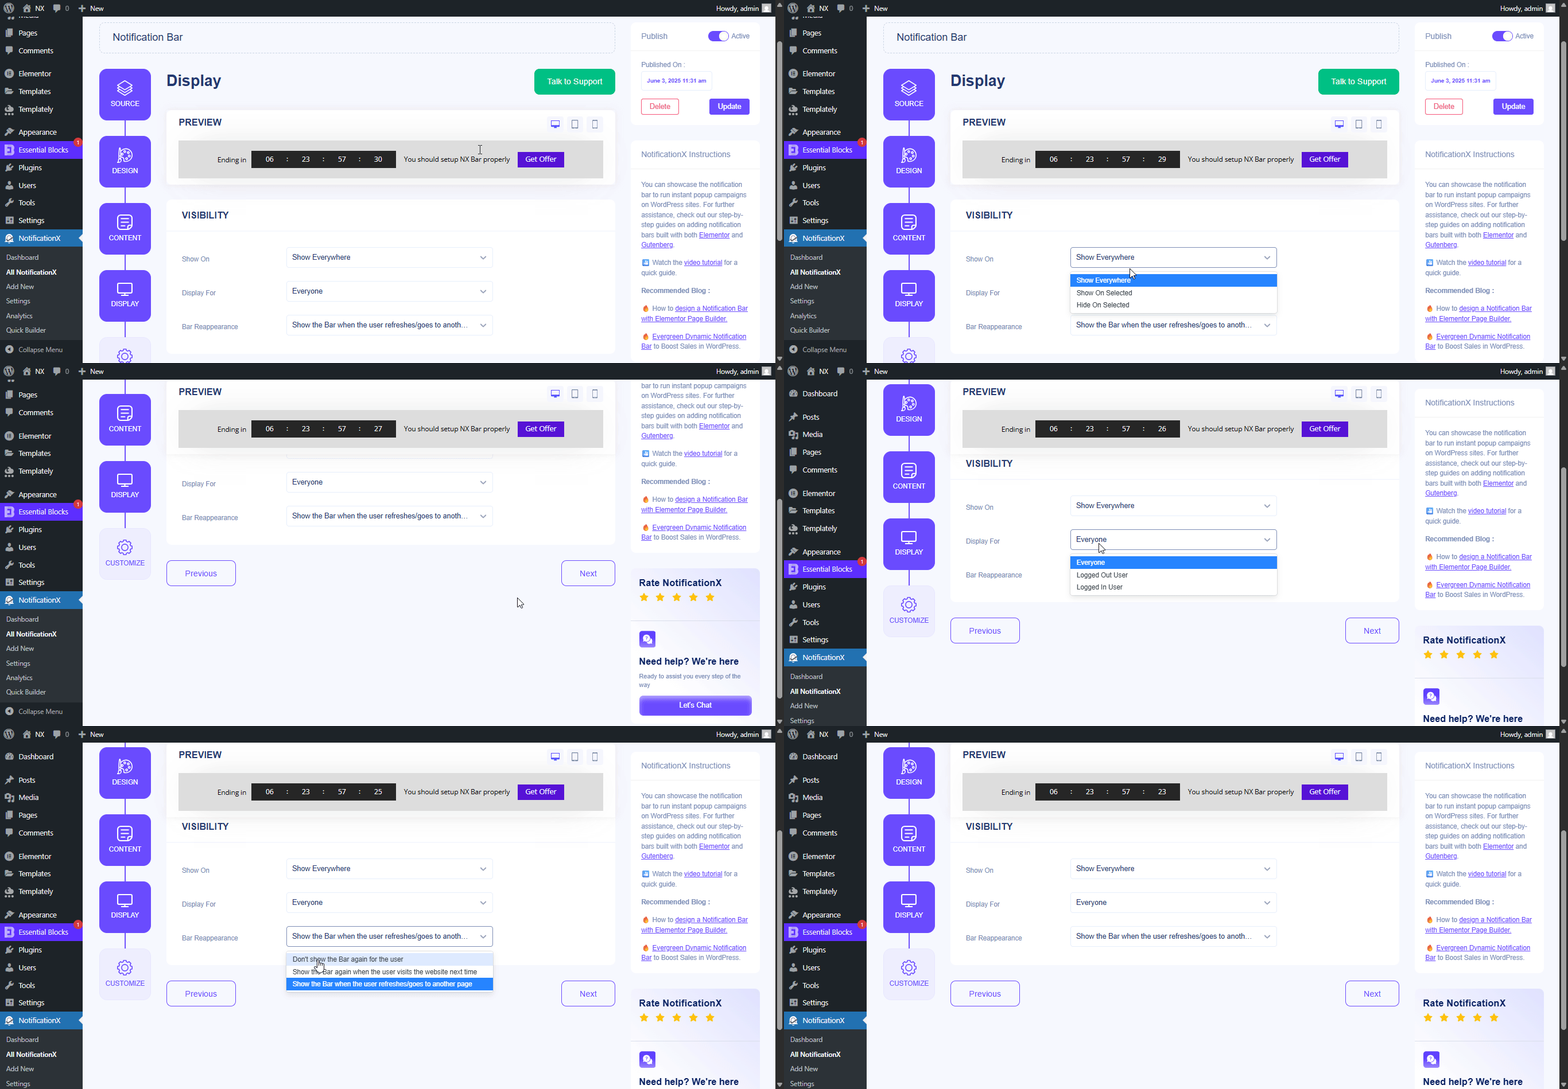
Step 5: Set Your Notification Bar Visibility #
bên trong 'Trưng bày' tab, you can now configure its settings to choose the location of your site where you want to display your notification bar and for whom you want to display the alert.
Step 6: Customize Your Notification Bar As You Prefer #
Sau đó, chỉ cần định cấu hình cài đặt từ 'Tùy chỉnh' và định cấu hình giao diện, thời gian và hành vi của thanh thông báo. Bạn có thể chọn vị trí hiển thị thanh thông báo trên trang web WordPress của mình, cho dù bạn có muốn hiển thị thanh trên thiết bị di động hay không và cũng có thể chọn xem bạn có muốn thêm nút đóng hay không.
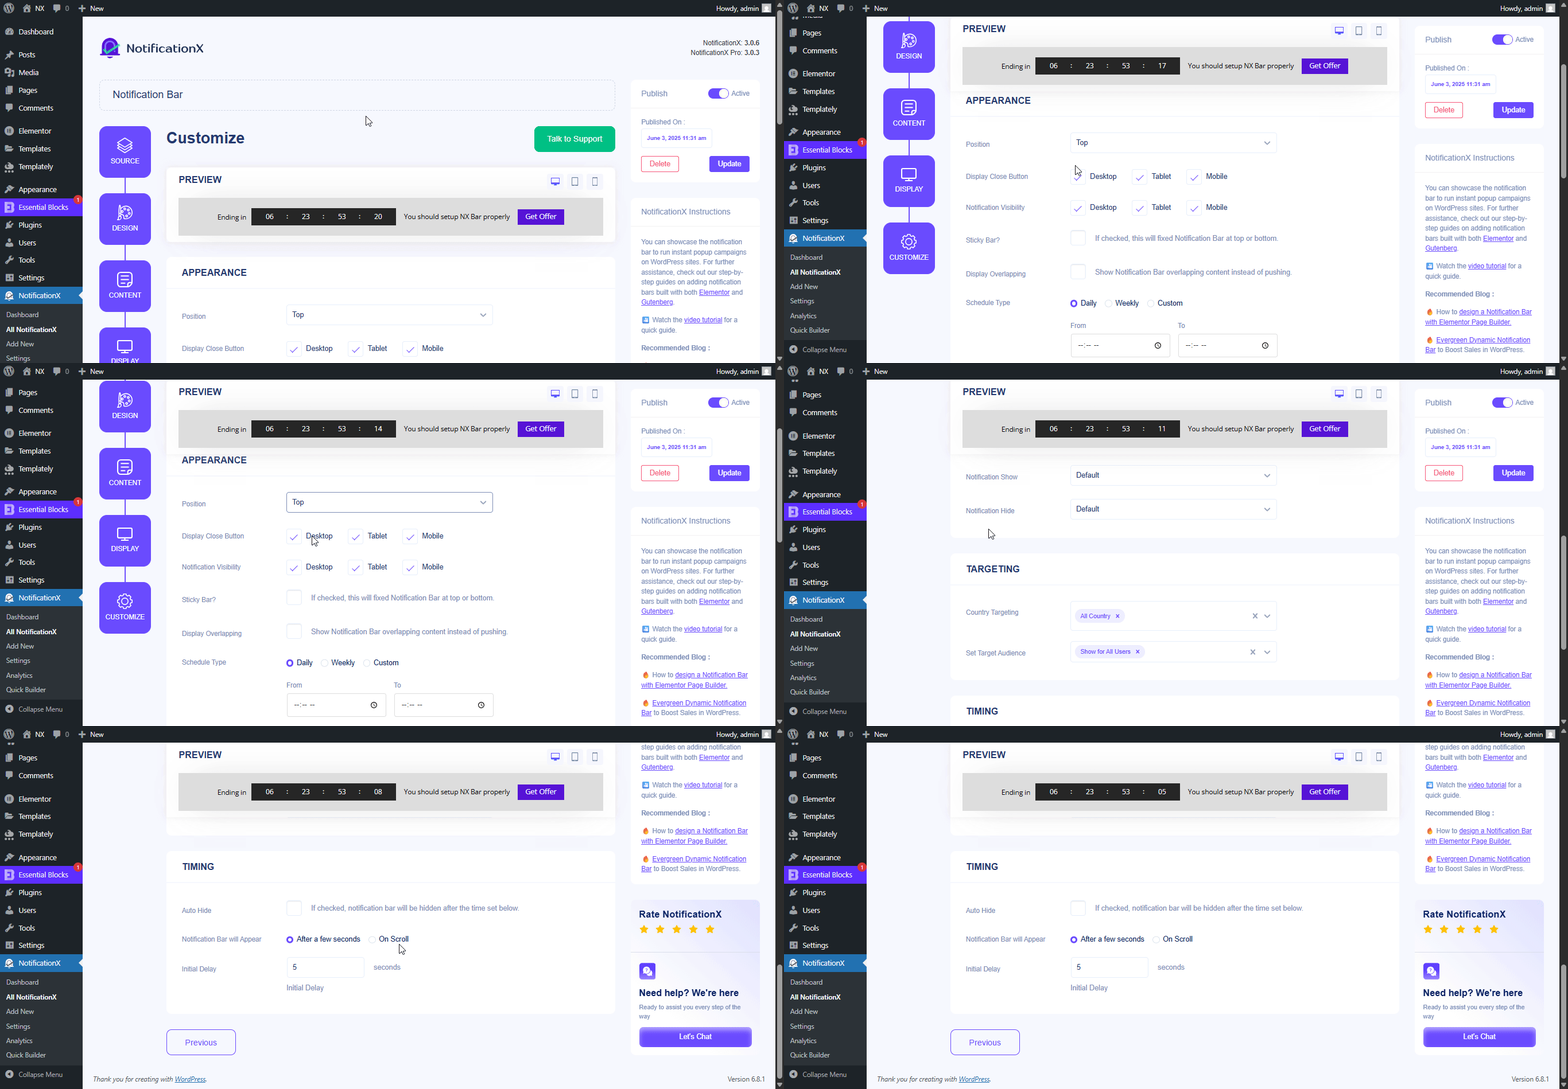
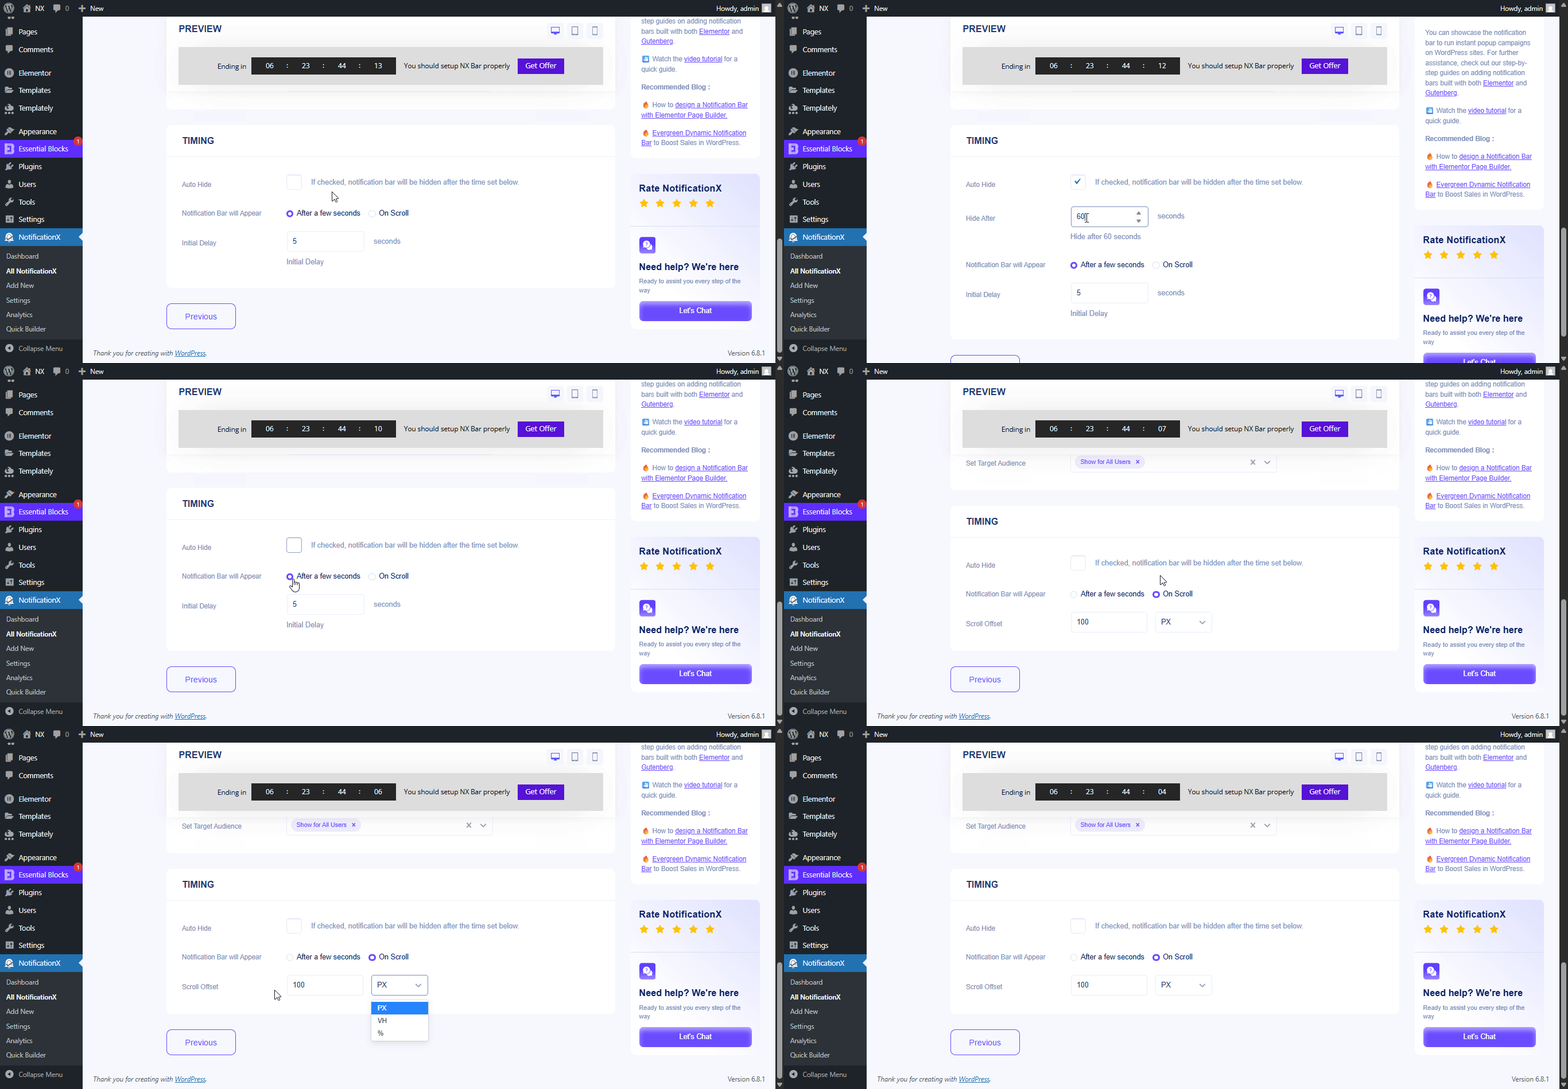
Với ‘Targeting’ option, you can target users who will be able to see the bar and who are not. The timing of the notification bar can also be customized from the ‘Timing’ section.
If you want to hide your bar automatically, you can do that by simply clicking on the ‘Auto Hide’ option. You have the flexibility of setting the timer for your auto-hiding.
If you want your notification bar will pop up after a few seconds your visitor come to your website, you can set that as well. You can also do this based on your visitor’s scrolling timing here.
After you have completed all the steps, click on the 'Công bố' cái nút.

Kết quả cuối cùng #
By following these mentioned steps and a bit more modifying, this is how your Notification Bar will appear on your Gutenberg website. For more information on cách cấu hình thanh thông báo, bạn có thể kiểm tra tài liệu chi tiết này.

Với sự trợ giúp của NotificationX, đây là cách bạn có thể dễ dàng tạo và thiết kế Thanh thông báo với Elementor & tăng chuyển đổi của bạn trong quá trình này.
Bạn đang gặp khó khăn? Nếu bạn gặp bất kỳ vấn đề hoặc thắc mắc nào, bạn có thể liên hệ với Nhóm hỗ trợ của chúng tôi.


