Notification Bars on the top of a web page help you display product discounts, announcements, promotions, CTAs, and other critical information. With NotificationX, you can easily configure a notification bar in Gutenberg and display your required information or sales promotions on your website for free. Follow the step-by-step guide below to learn how you can do that.
How To Configure A Notification Bar In Gutenberg With NotificationX? #
Before getting started, make sure you have installiert und aktiviert NotificationX on your WordPress website.
Schritt 1: Neue Benachrichtigung hinzufügen #
Gehen Sie zu Ihrem WordPress-Dashboard und navigieren Sie zu wp-admin → NotificationX. Then, right at the top, click on ‘Neue hinzufügen'.

Step 2: Choose Notification Type #
After completing step 1, you will be redirected to the ‘Quelle’ tab page of your NotificationX. You can also set a title and select ‘Benachrichtigungsleiste’ as your Notification type. Afterward, go ahead & click on the ‘Nächster' Taste.
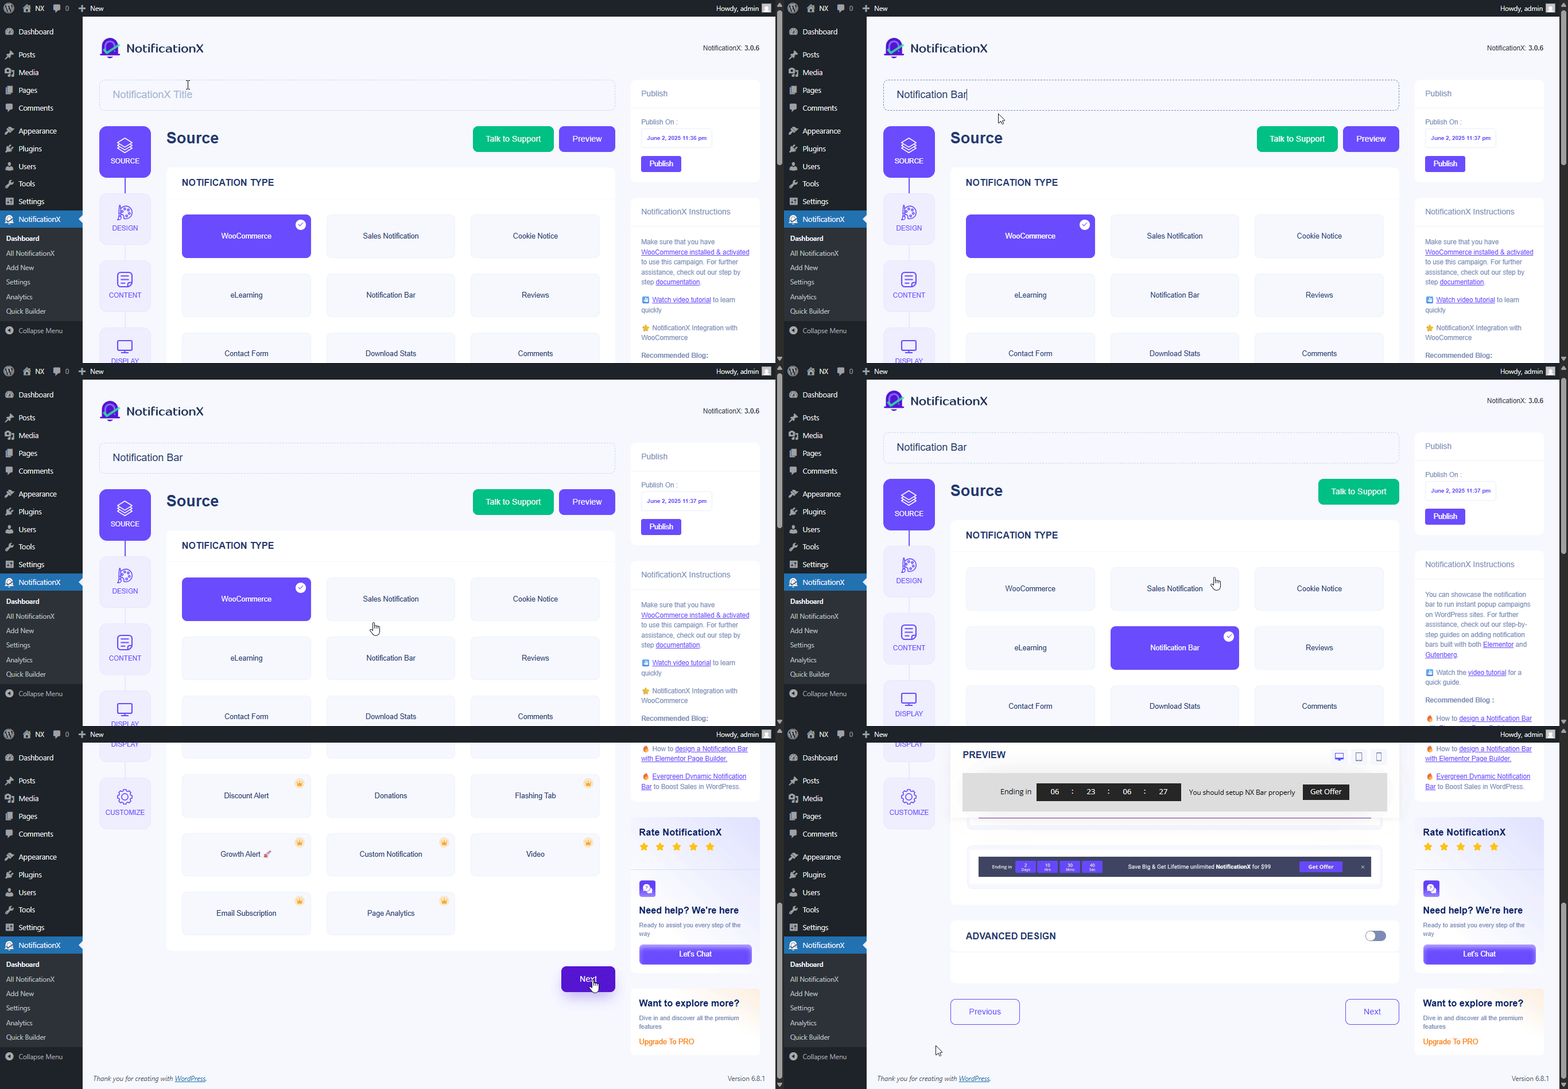
Step 3: Customize The Design #
Von dem 'Entwurf’ tab, you can choose a theme and customize it as per your preference. To use a notification bar in Gutenberg, turn the ‘Advanced Design ' toggle on.
If you do so, you’ll get the option ‘Built with Gutenberg’, click on it & you will get all the notification bar design options. Choose the one that you prefer most & click on ‘Import.’
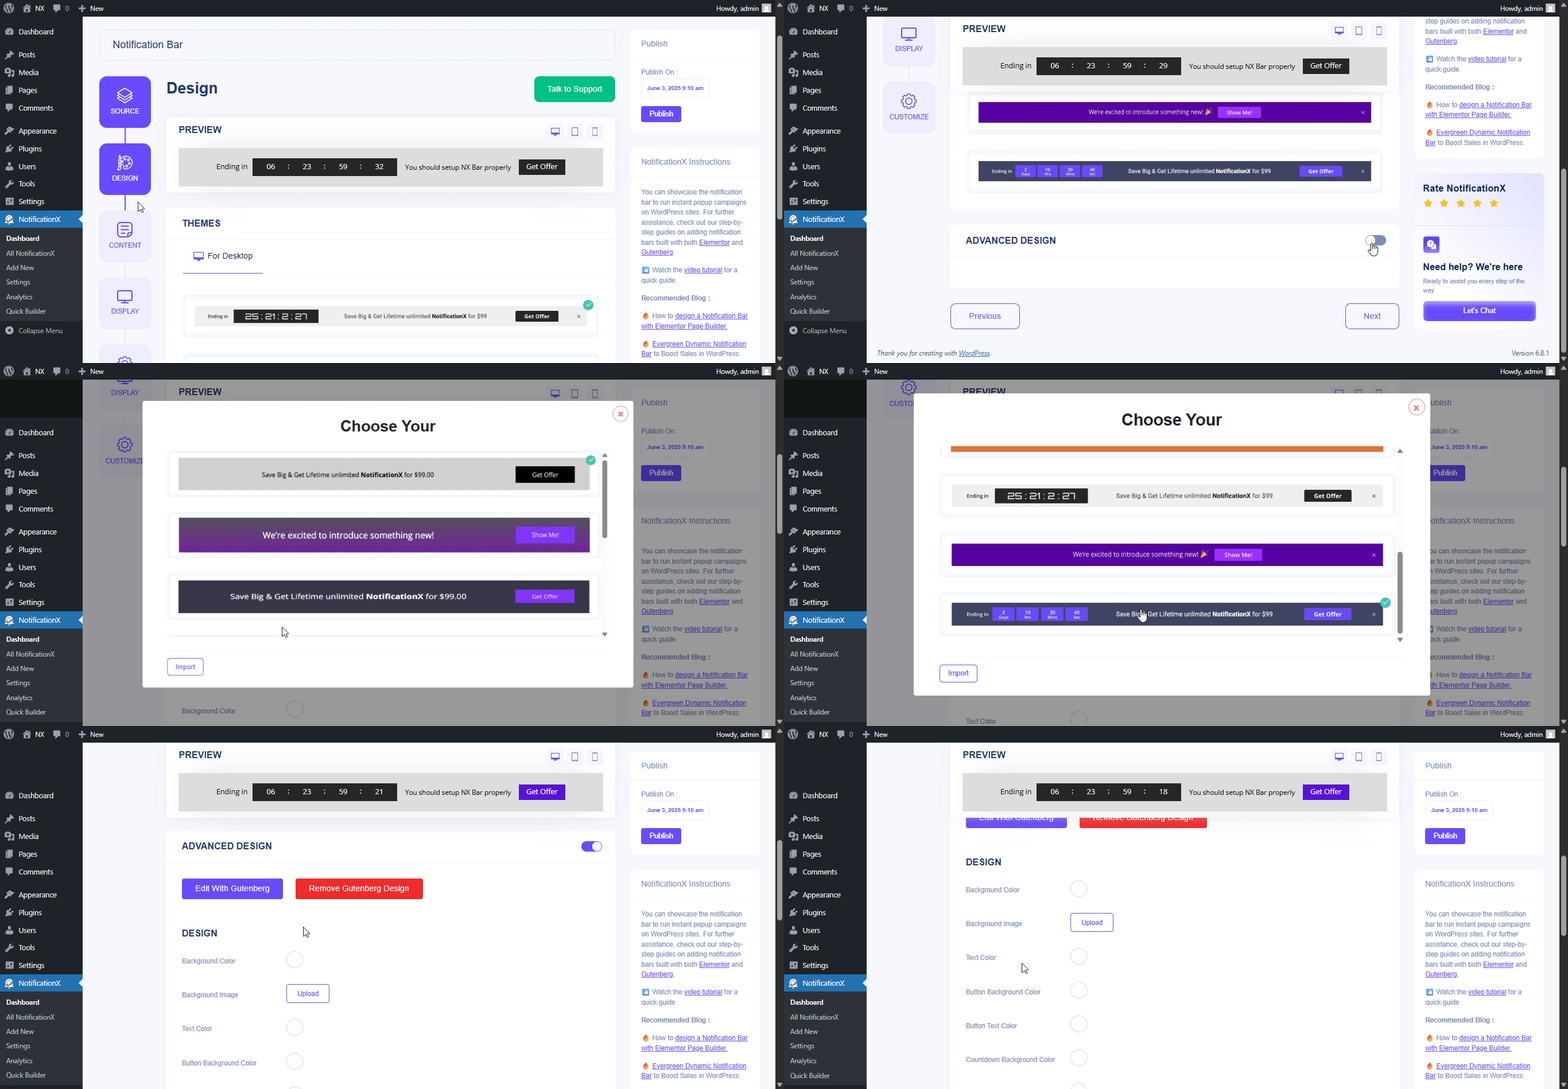
In ‘Erweitertes Design’ you also get the flexibility to modify the notification bar to reach the maximum potential of it.
Unter dem 'Design' option, you can do a lot of customization to make your notification bar stand out. Such as changing the background color and image, making your own button color, countdown background color, countdown text color, closing button color, close button size, and position.
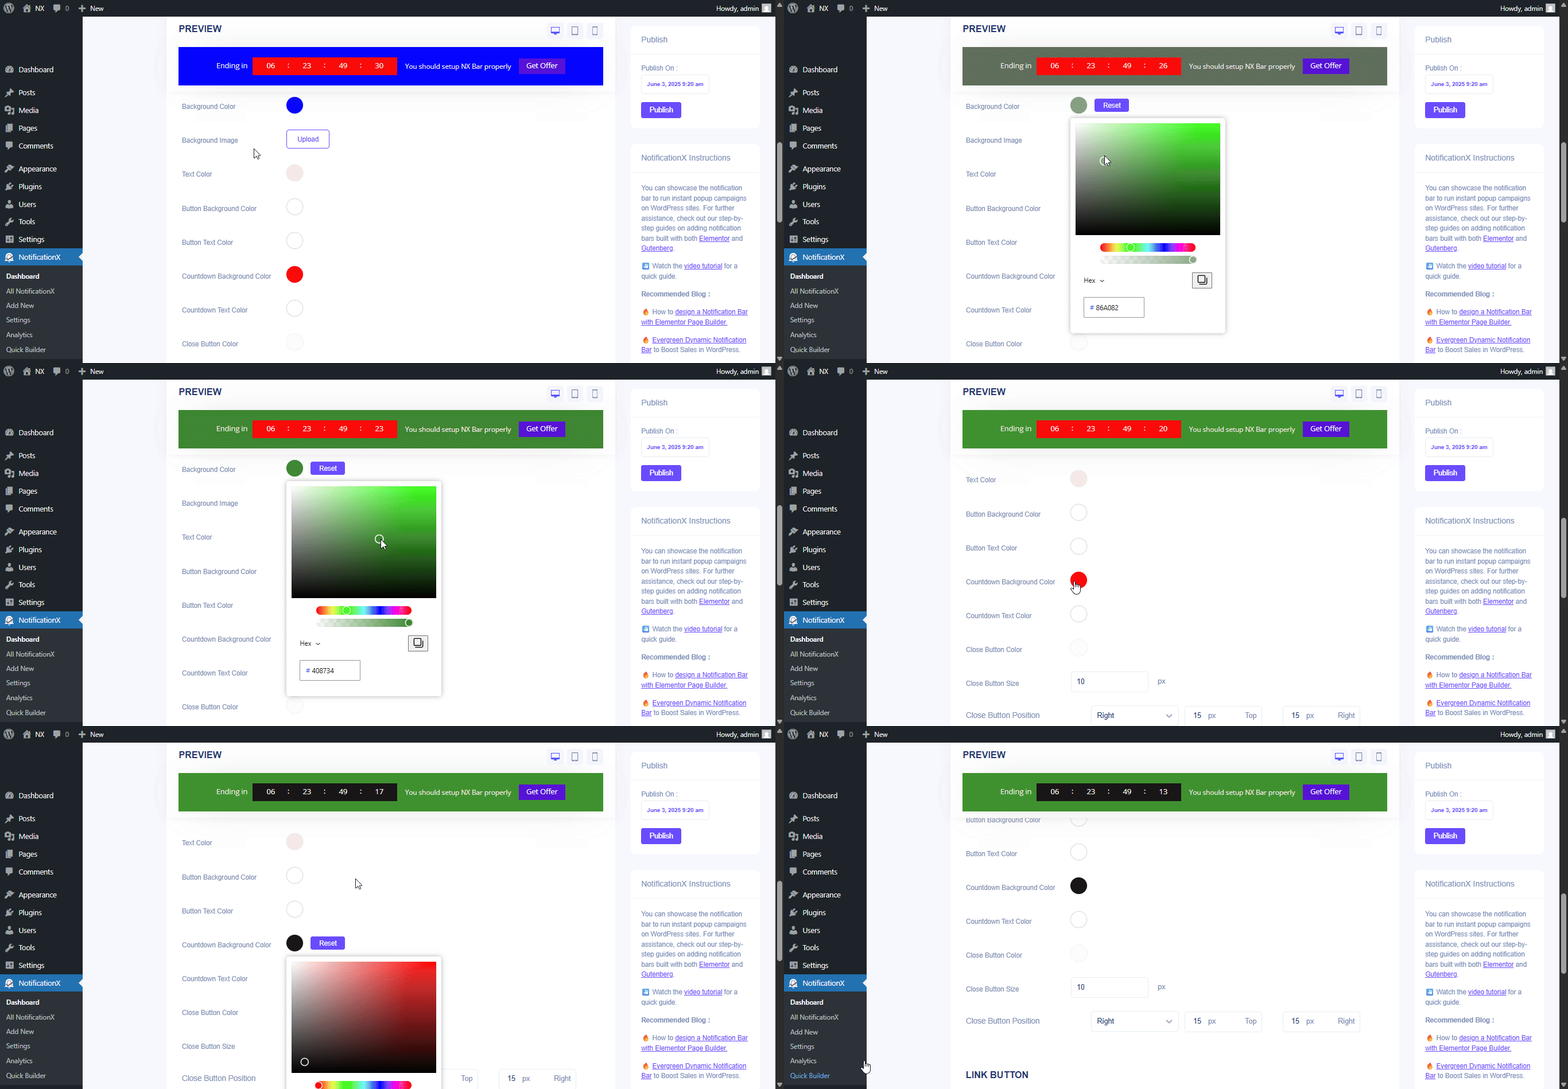
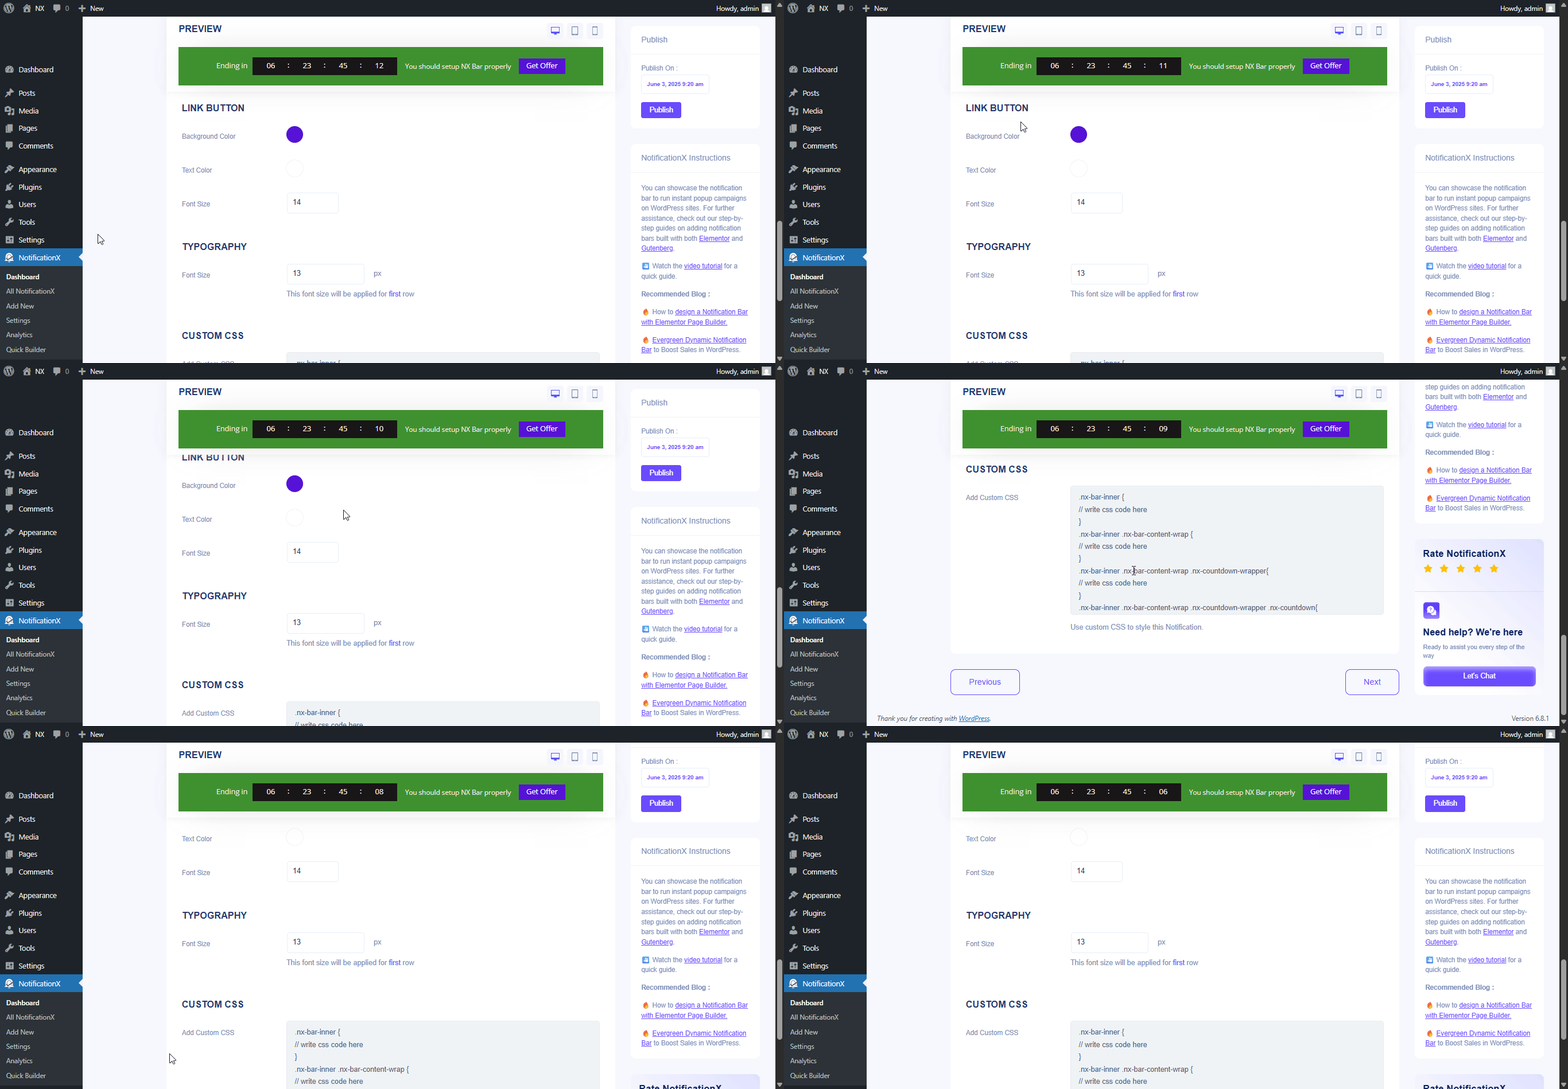
Plus, you can also customize the Link Button, Typography & add Custom CSS to your Gutenberg Notification from this section.
Step 4: Customize Your Notification Bar Directly From Gutenberg Editor #
To edit everything live, click on ‘Edit with Gutenberg’ under ‘Advanced Design.’ It’ll redirect you to the Gutenberg editor.

Note: Instead of seeing something like the above images, if you see a few broken blocks, make sure you have the Essential Blocks for Gutenberg installed & activated on your WordPress website.
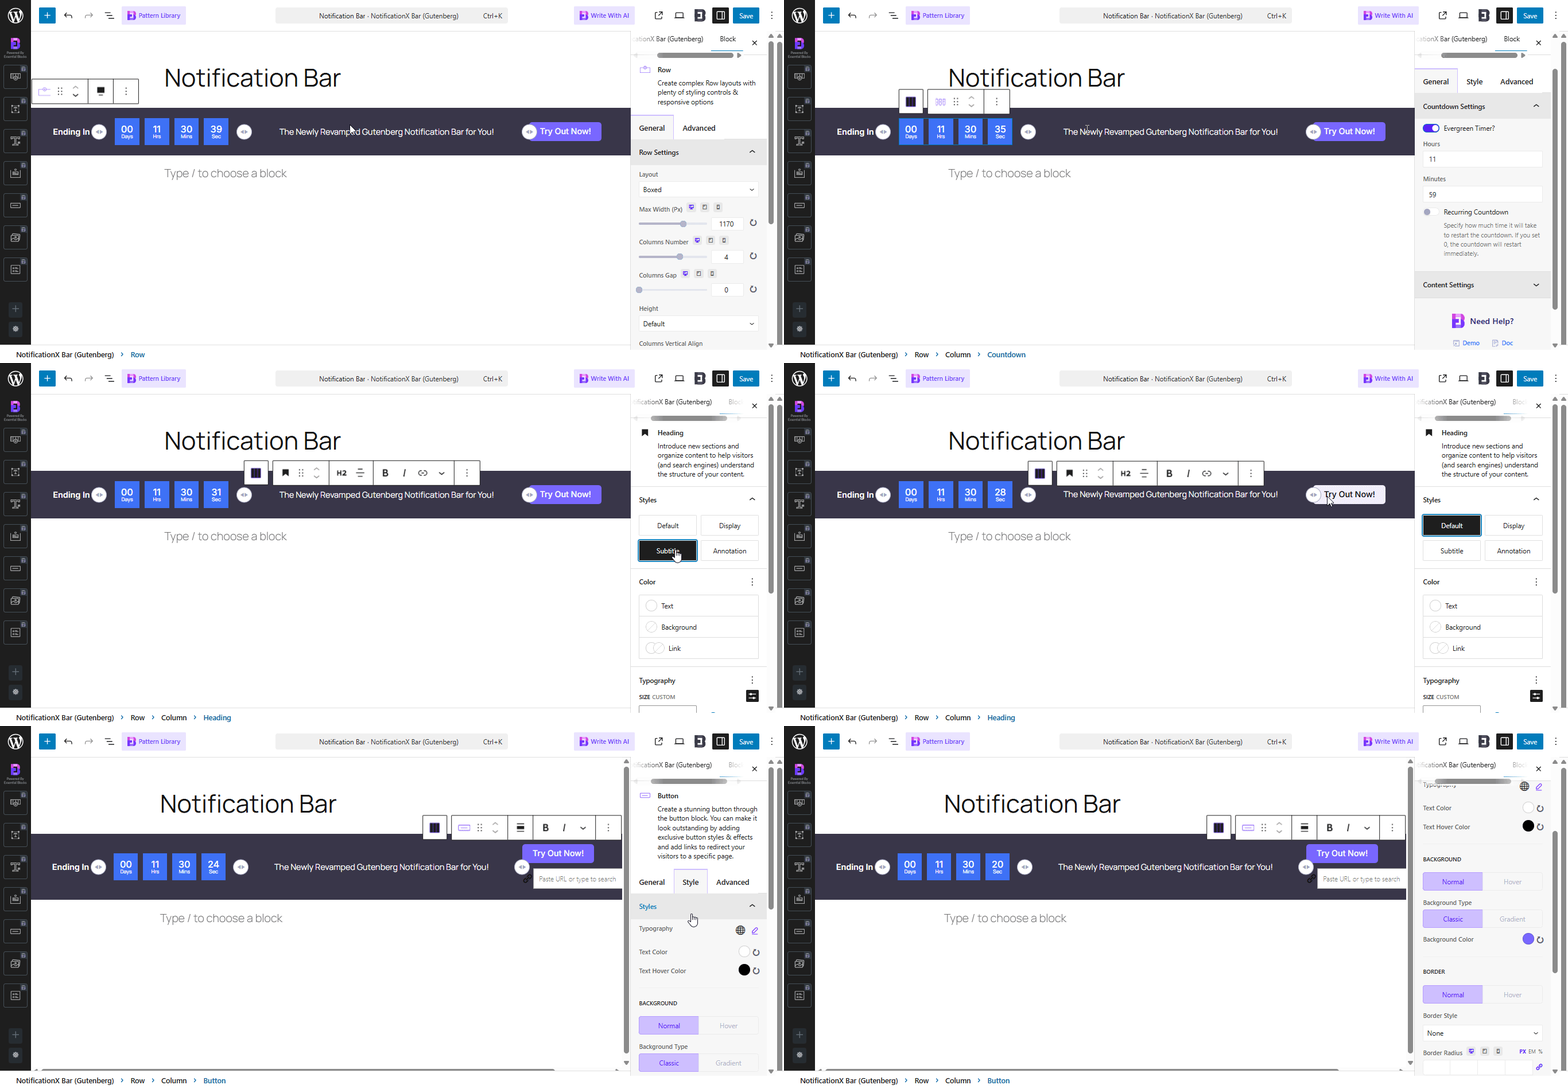
Now Gutenberg gives you the flexibility of editing everything in your picked notification bar.
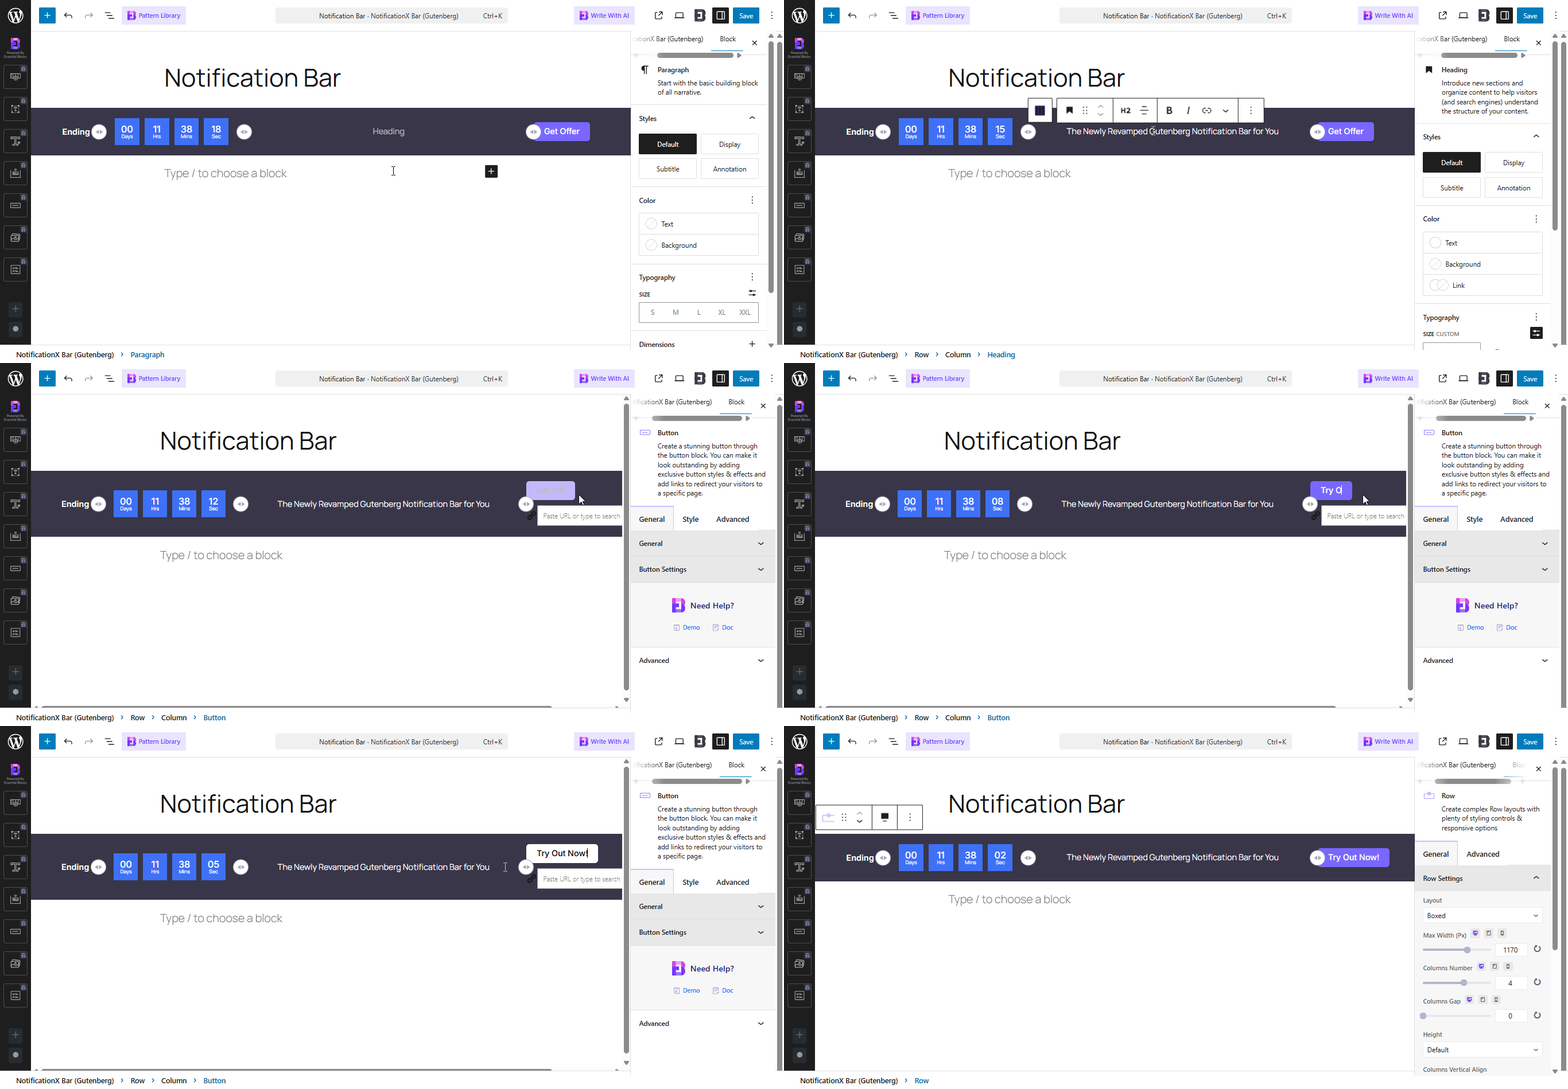
Click on the portion you want to edit and style the way you want from the right-side control panel. Set your notification bar exactly how you imagined. Once you’re done, revert back to NotificationX dashboard to do a few more customization.
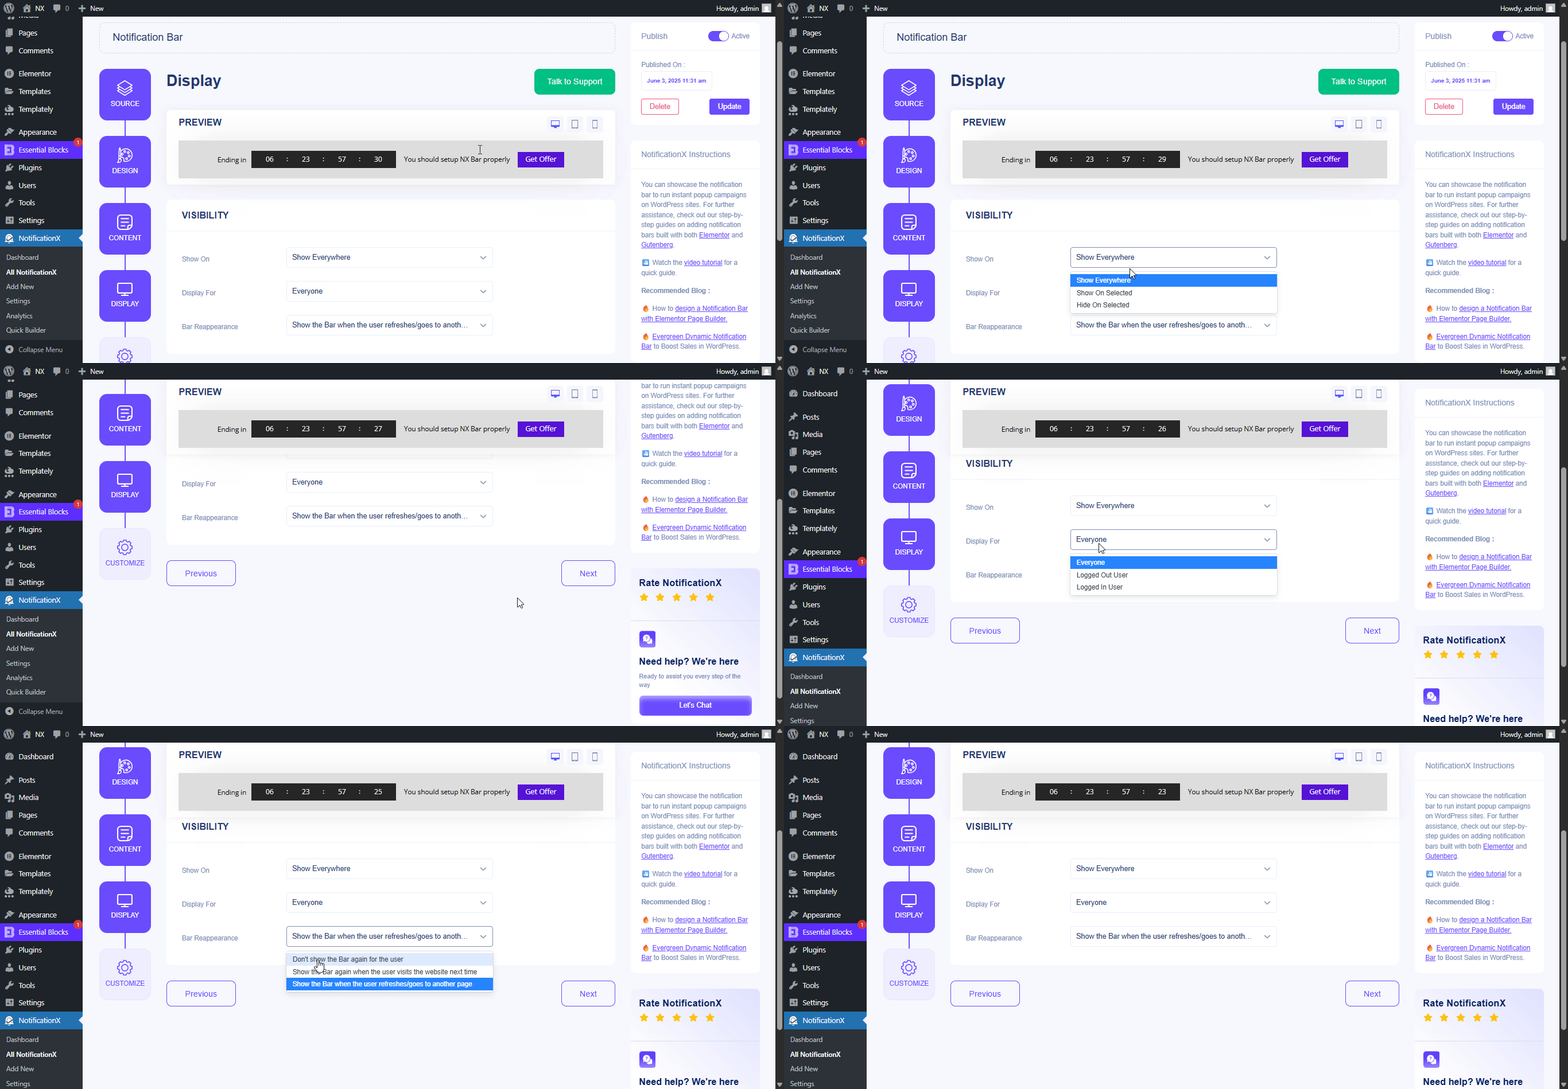
Step 5: Set Your Notification Bar Visibility #
In dem 'Anzeige' tab, you can now configure its settings to choose the location of your site where you want to display your notification bar and for whom you want to display the alert.
Step 6: Customize Your Notification Bar As You Prefer #
Anschließend konfigurieren Sie einfach die Einstellungen über das 'Anpassen' Registerkarte und konfigurieren Sie das Aussehen, das Timing und das Verhalten der Benachrichtigungsleiste. Sie können die Position auswählen, an der die Benachrichtigungsleiste auf Ihrer WordPress-Website angezeigt werden soll, ob Sie die Leiste auf mobilen Geräten anzeigen möchten, und auch auswählen, ob Sie eine Schaltfläche zum Schließen hinzufügen möchten.
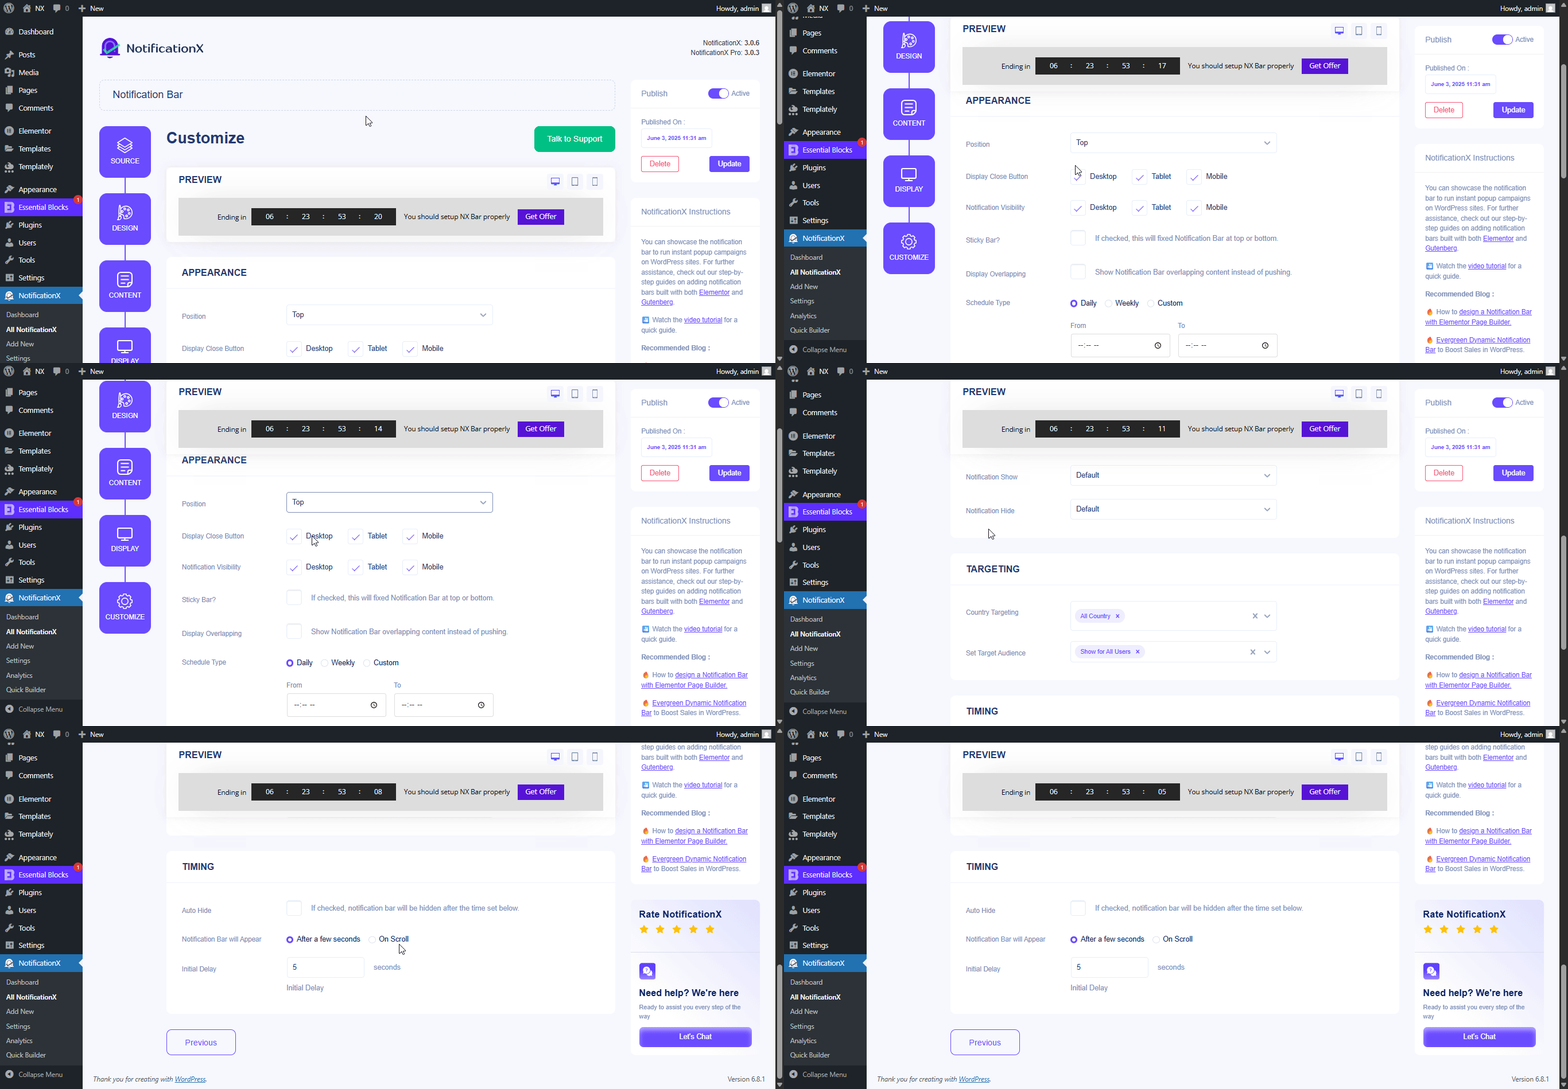
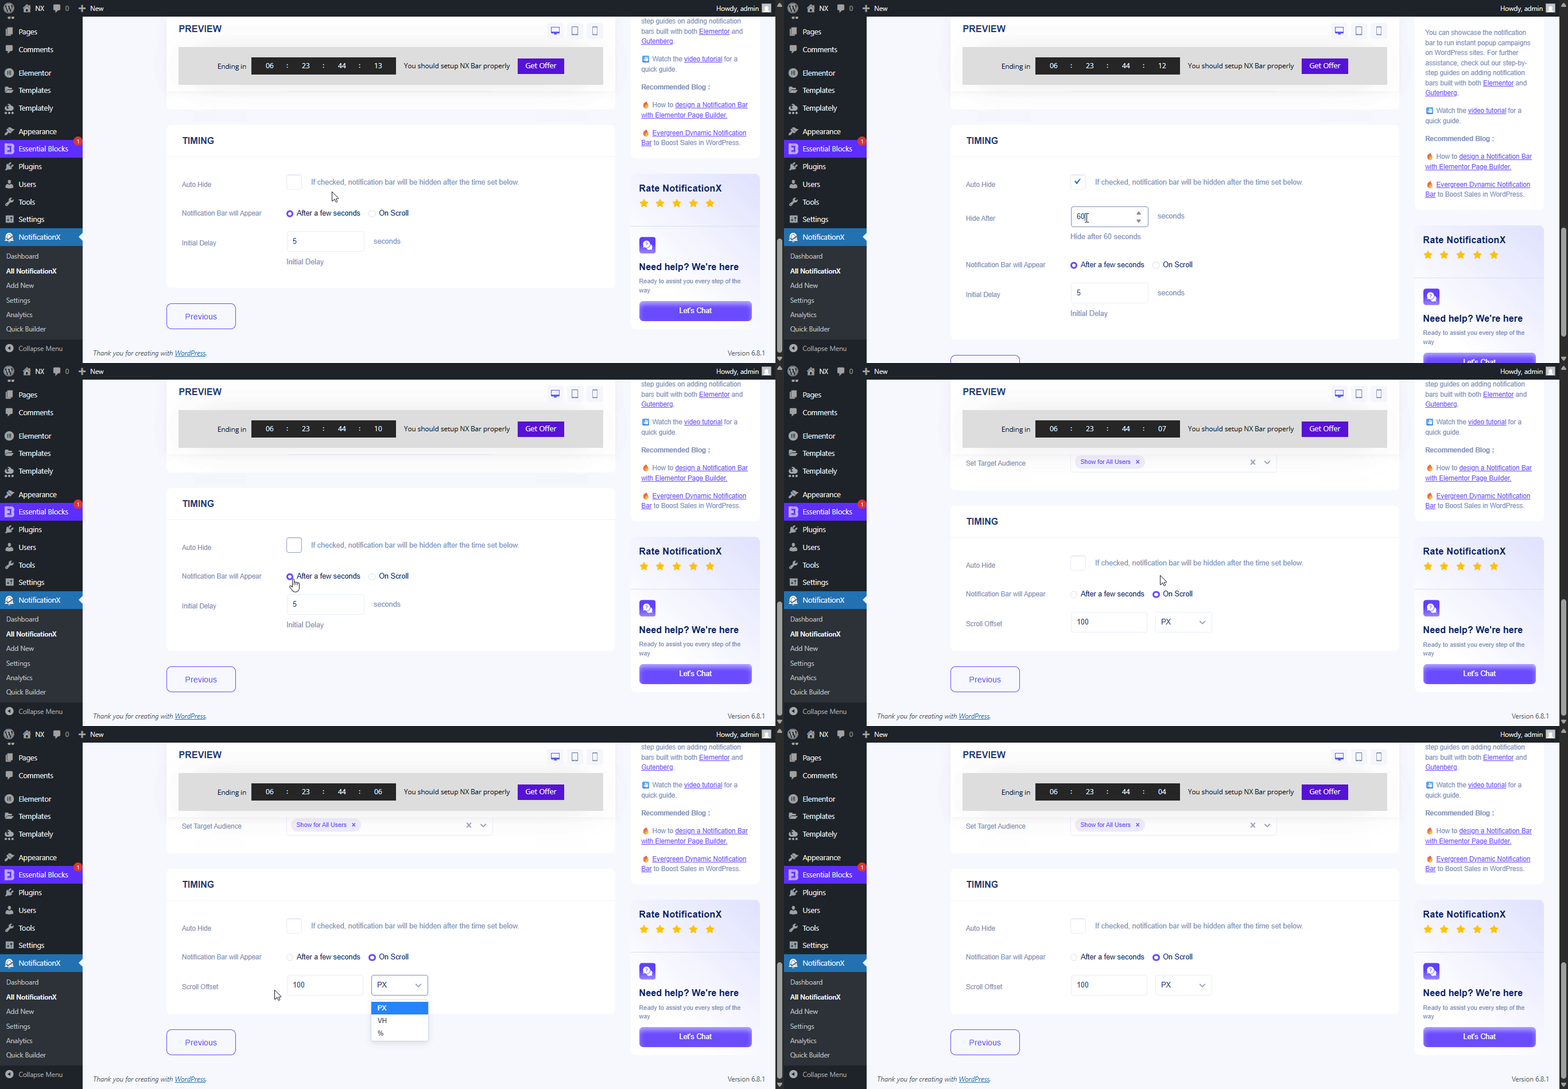
Mit dem ‘Targeting’ option, you can target users who will be able to see the bar and who are not. The timing of the notification bar can also be customized from the ‘Timing’ section.
If you want to hide your bar automatically, you can do that by simply clicking on the ‘Auto Hide’ option. You have the flexibility of setting the timer for your auto-hiding.
If you want your notification bar will pop up after a few seconds your visitor come to your website, you can set that as well. You can also do this based on your visitor’s scrolling timing here.
After you have completed all the steps, click on the 'Veröffentlichen' Taste.

Endergebnis #
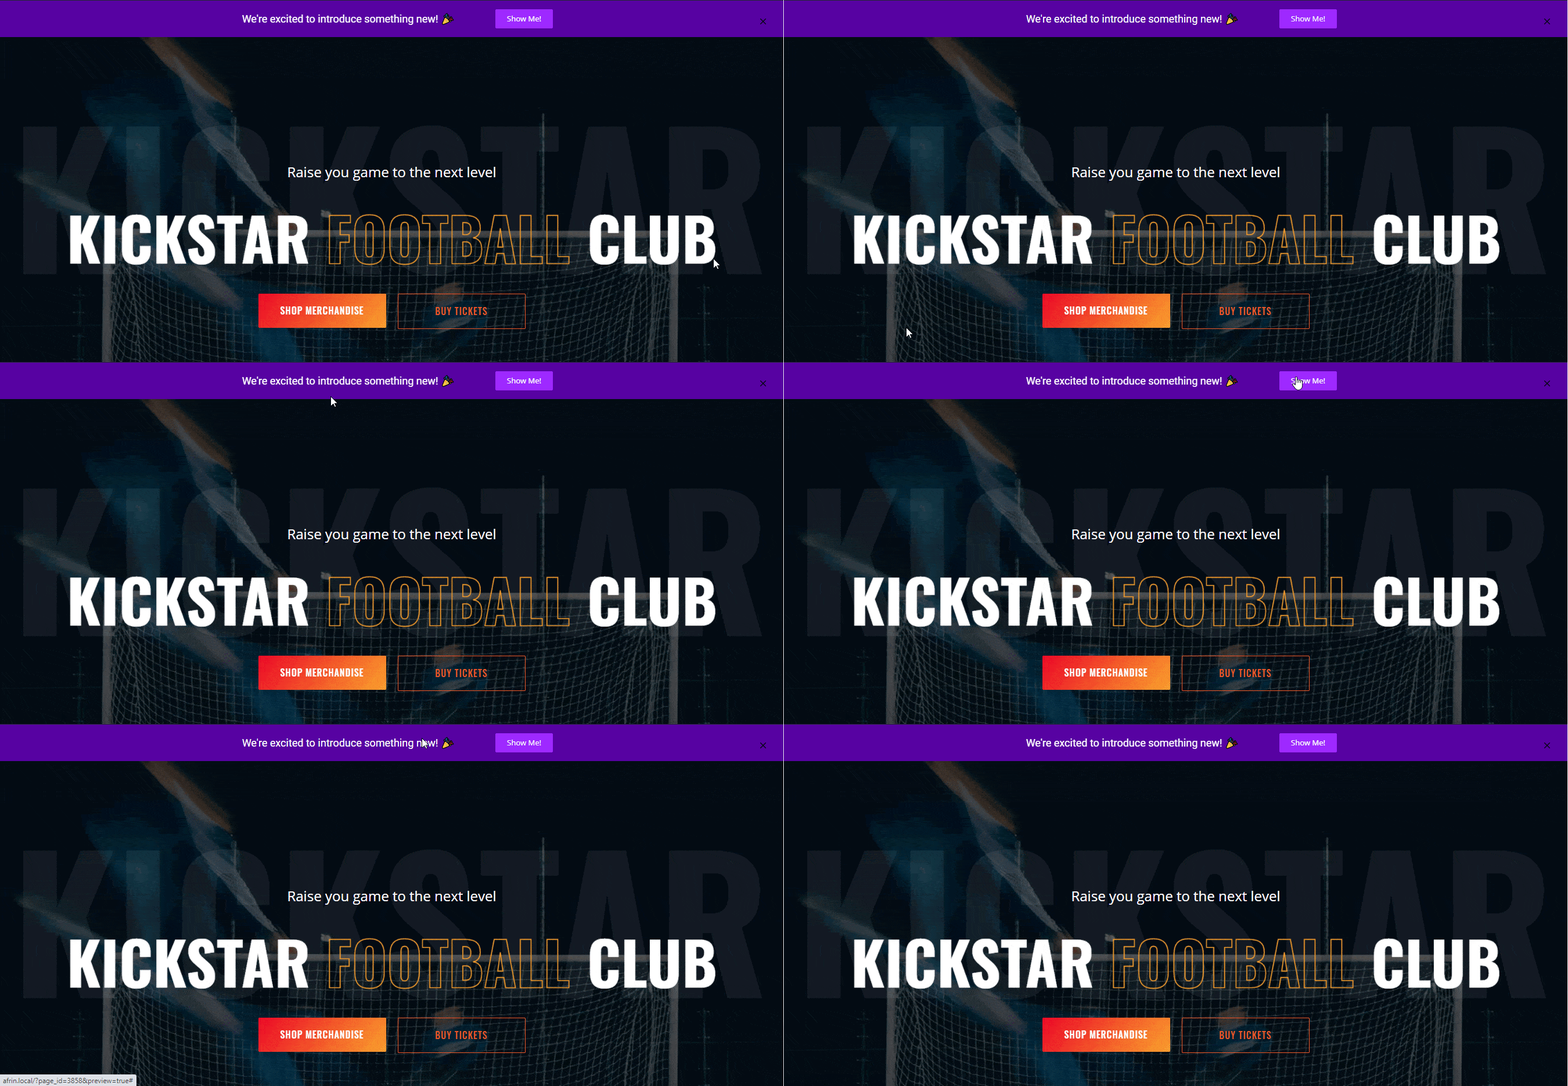
By following these mentioned steps and a bit more modifying, this is how your Notification Bar will appear on your Gutenberg website. For more information on So konfigurieren Sie die Benachrichtigungsleiste, du kannst Sehen Sie sich diese ausführliche Dokumentation an.
Mit Hilfe von NotificationX können Sie auf einfache Weise atemberaubende Bilder erstellen und gestalten Benachrichtigungsleisten mit Elementor & erhöhen Sie dabei Ihre Conversion.
Steckenbleiben? Wenn Sie Probleme oder Fragen haben, können Sie Kontaktieren Sie unser Support-Team.


