CHUYÊN NGHIỆP NotificationX cho phép bạn hiển thị WooCommerce Growth Alerts for products on your online store. It helps you show WooCommerce product sales count, stock-out alerts, and more.
How To Display WooCommerce Growth Alerts With NotificationX? #
Before getting started, you need to have WooCommerce installed and activated on your website to use this feature. Follow this step-by-step guide below to learn how to display WooCommerce Growth Alerts for products.
Bước 1: Thêm thông báo mới #
Chuyển đến Bảng điều khiển WordPress của bạn và điều hướng đến wp-admin –> NotificationX. Then, right at the top, click on ‘Add New'.

Step 2: Select Notification Source #
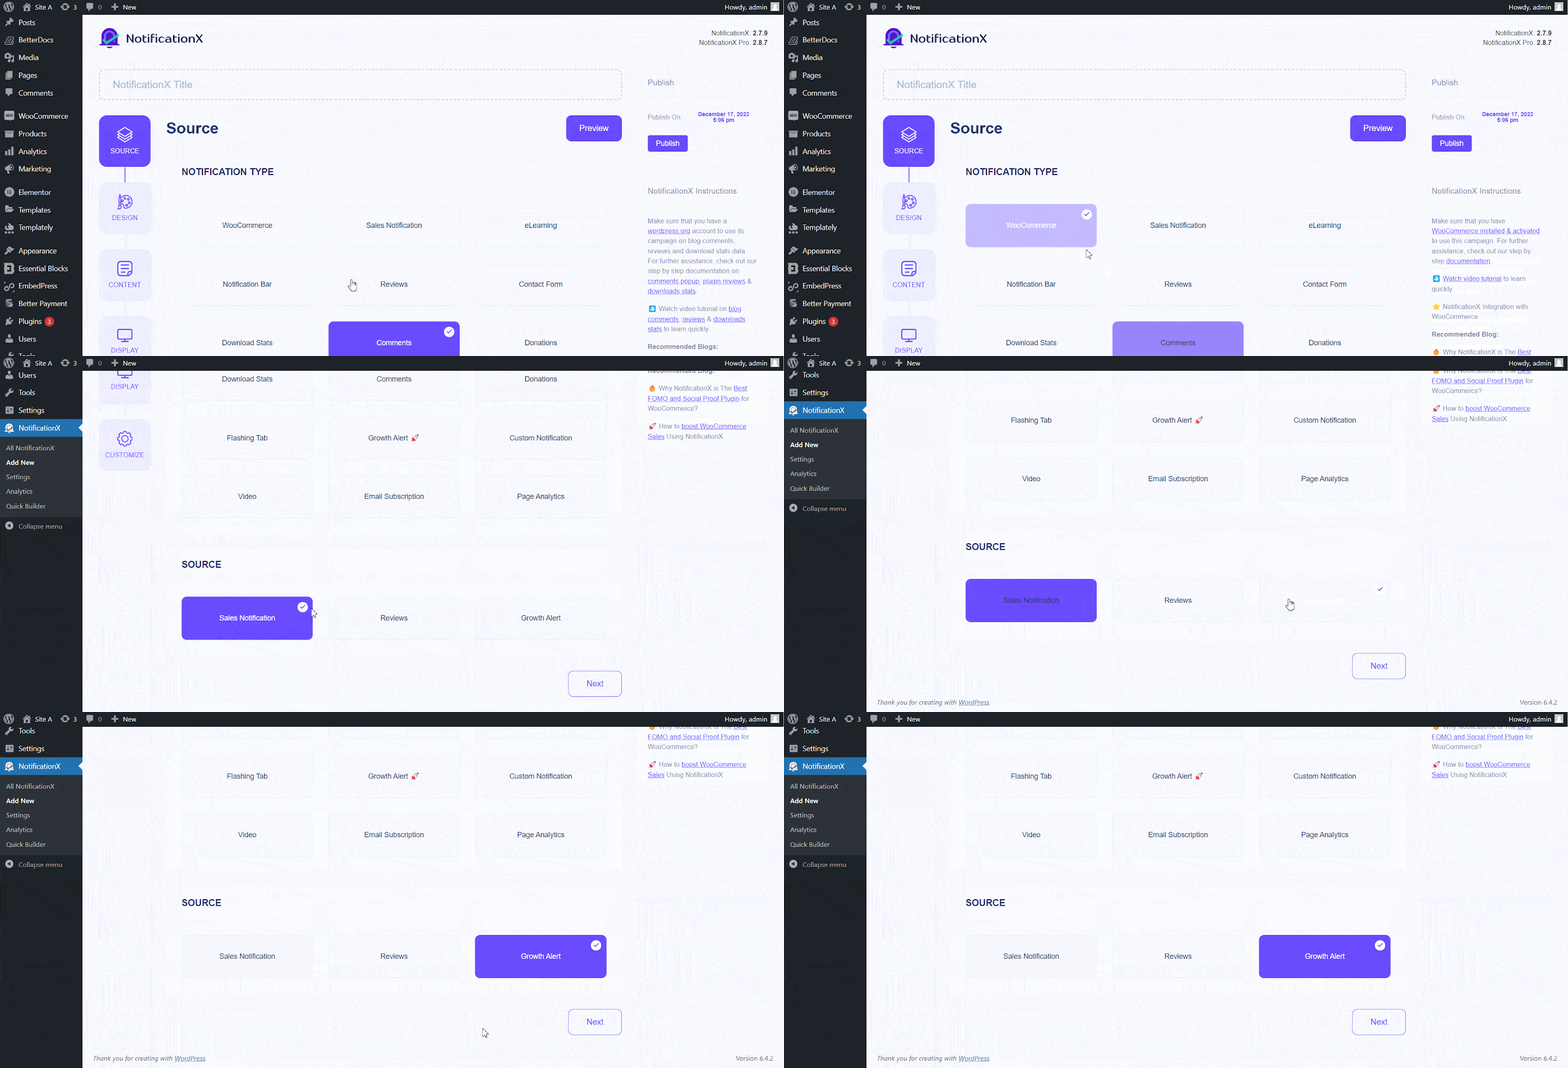
Sau khi hoàn thành bước 1, bạn sẽ được chuyển hướng đến 'Nguồn' Trang tab của NotificationX của bạn. Bạn cũng có thể đặt một tiêu đề. Sử dụng menu thả xuống để chọn 'Thương mại điện tử' như loại thông báo của bạn.
Drop down and choose 'Cảnh báo tăng trưởng' from the ‘Source’ options to choose your preferred notification type. There are also options to choose ‘Thông báo bán hàng' và 'Nhận xét’ to display those alerts for your WooCommerce store. Afterward, go ahead & click on the ‘Kế tiếp’ Button.

Step 3: Customize The Design #
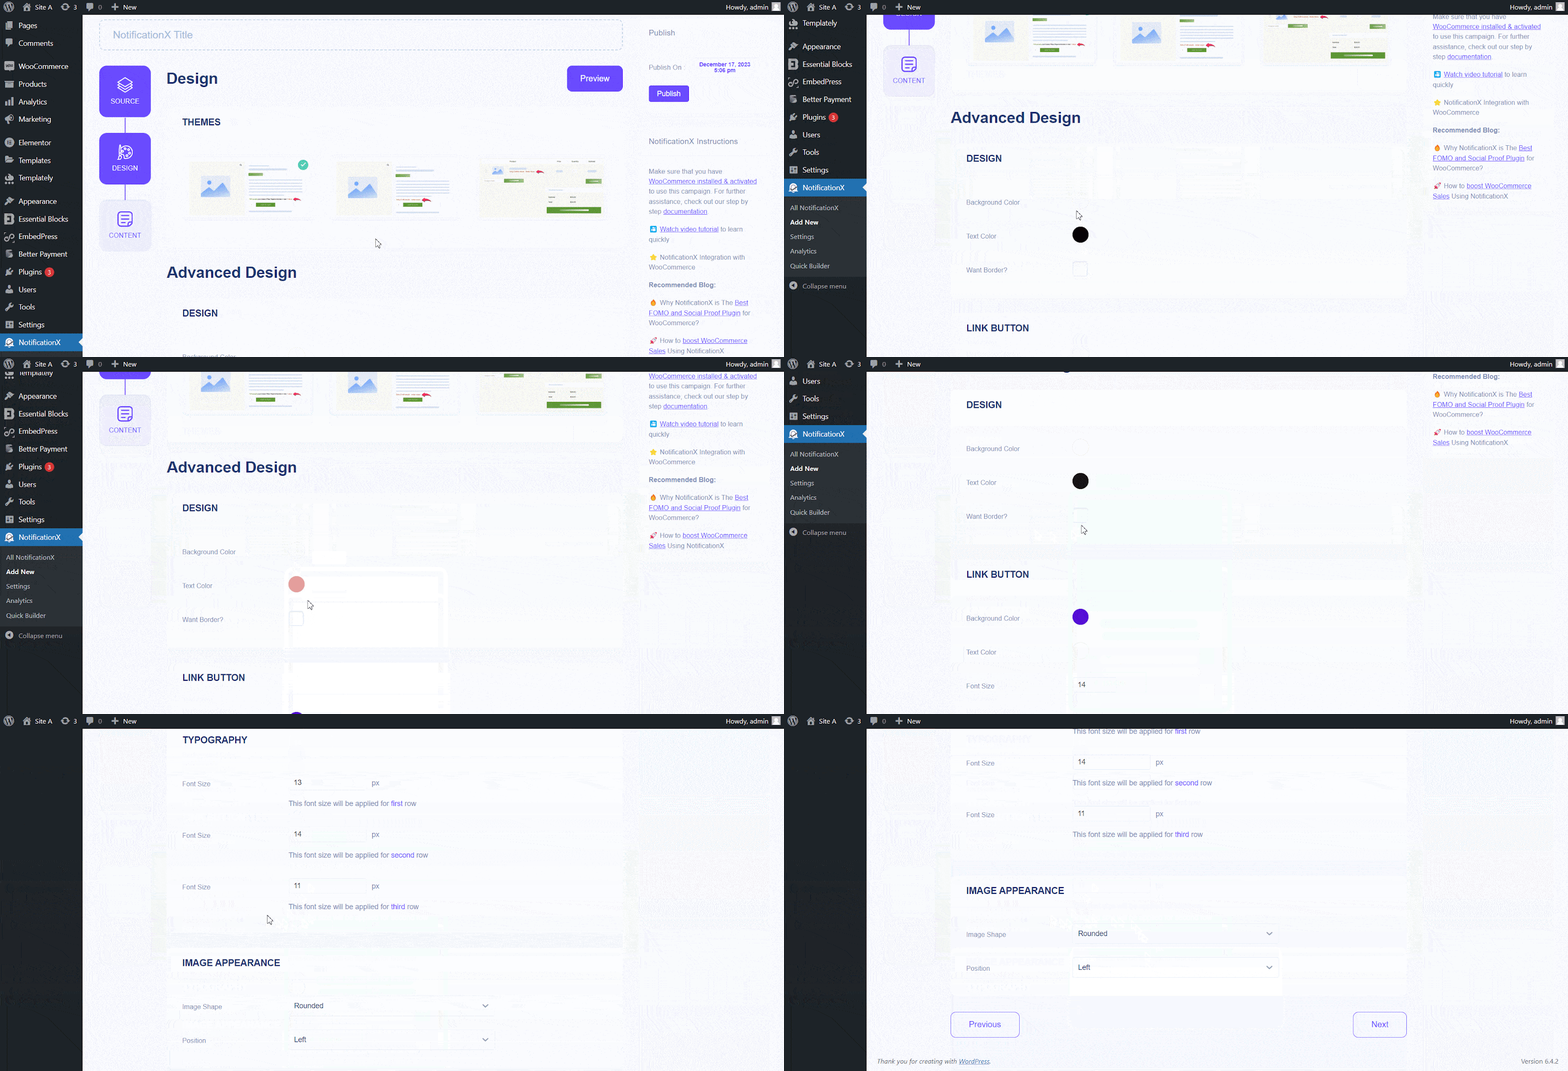
Từ 'Thiết kế’ tab, you can choose a layout and have the flexibility to use the ‘Thiết kế tiên tiến’ option to customize it according to your preference. From the 'Chủ đề' section, the chosen layout is how the growth notification will be displayed on your website.
You can customize your chosen Theme through the ‘Advanced Design’ option. You can easily add styling to your design, image appearance, and typography from this section. You can add a Background or Text color for the notification popup. Besides you can also add a Border and add styling to it.

'Xuất hiện hình ảnh' section lets you change the ‘Image Shape’ to out of these three: Rounded, Circle & Square. You can also use the drop-down menu ‘Position’ to change the position of the image: Left or Right. Basically, this consists of Three rows. From ‘Typography’ section, you can change the Font Size for each row as well.
Step 4: Modify Notification Content #
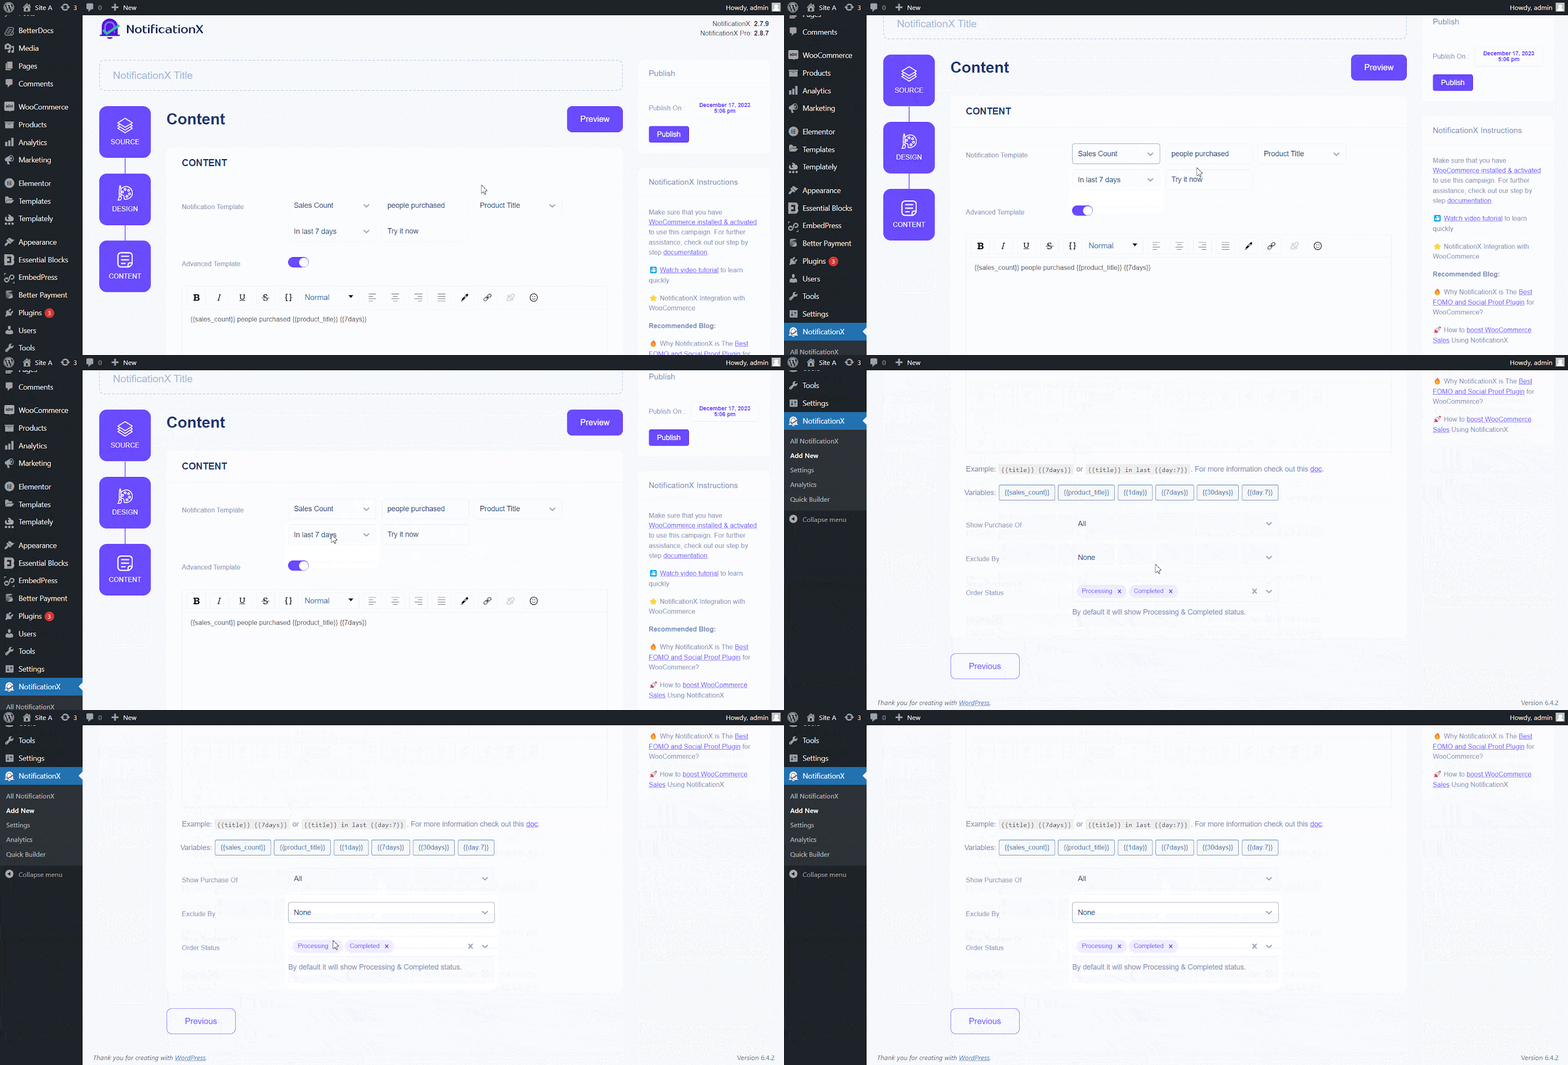
Sau đó bạn sẽ được chuyển hướng đến 'Nội dung' tab, where you can modify your 'Mẫu thông báo' and add your preferred content text. These settings vary depending on the notification type you are working with.

Ưu đãi NotificationX Một ‘Notification Template’ for your Content. You can easily go ahead and choose your preferred variables. These variables help display the user’s name who has purchased a specific product within a certain time interval. You can also add your text, which will appear in the notification popup.
Step 5: Publish The Notification #
After you have completed step 4, click on the 'Công bố' cái nút.

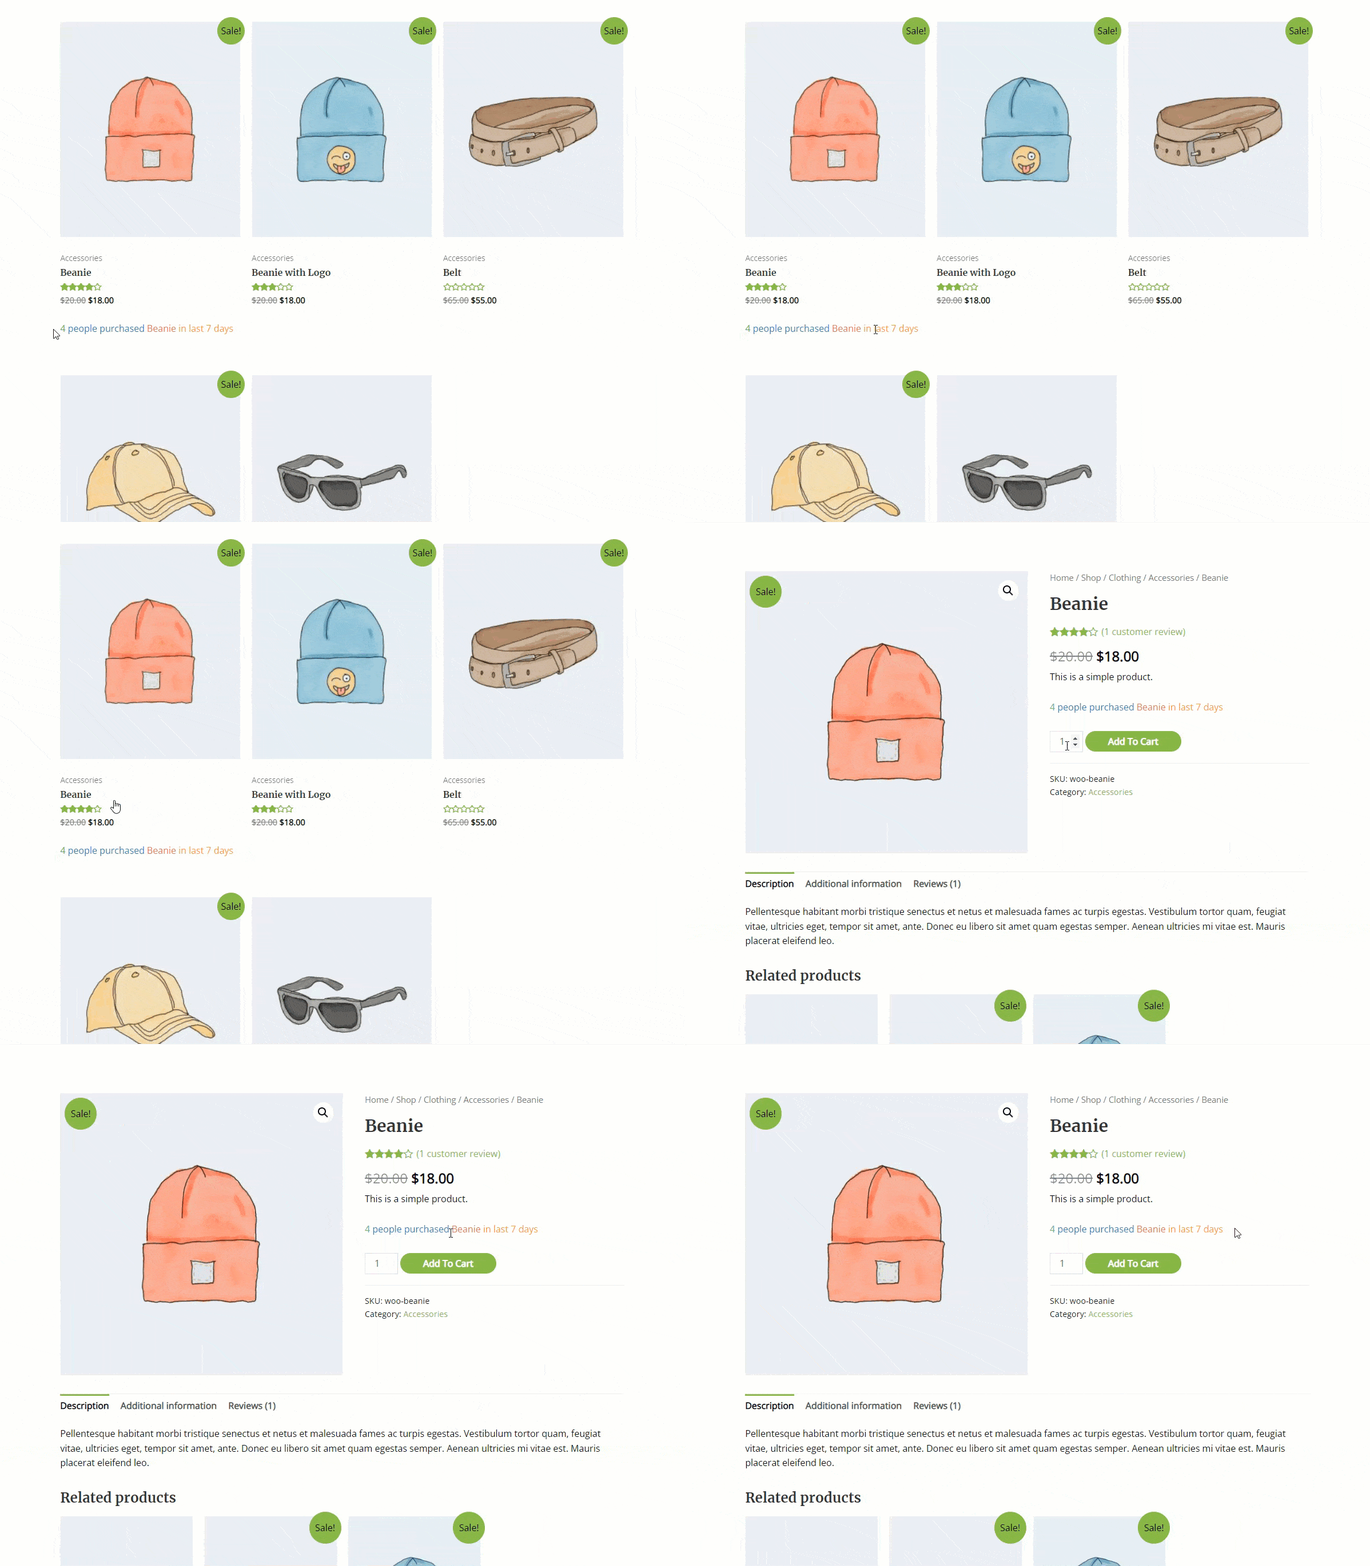
As a result, the growth notification will be successfully created. By following these steps and slightly modifying & styling, your final outcome would look like this.

This is how you can easily design and display appealing ‘WooCommerce Growth Alerts’ for products trên trang web WordPress của bạn bằng NotificationX.
Nếu bạn gặp phải bất kỳ vấn đề nào, bạn có thể liên hệ với chúng tôi Nhóm hỗ trợ.


