と NotificationX, you can showcase attractive popups to let everyone know when someone subscribes to your newsletter using ActiveCampaign. This premium feature of NotificationX PRO helps you to display ActiveCampaign email subscription alerts that boost your business by increasing conversions. This simple marketing trick helps you grow your user base and take your business to the next level.
ActiveCampaign stands as a leading Email Marketing platform renowned for its effectiveness. NotificationX offers seamless integration with ActiveCampaign, enabling you to showcase recent subscriptions through eye-catching notification alerts on your website.
To initiate this integration, ensure you have your ActiveCampaign Account Keys in hand. These include the API Key and API URL, which you must generate from your ActiveCampaign Account. Simply copy these keys for further use.

Guide To Show ActiveCampaign Email Subscription Alert Using NotificationX #
Once you have the ActiveCampaign keys, go to your WordPress Dashboard and navigate to wp-admin → NotificationX → Settings → API Integrations. From there, navigate to the ‘ActiveCampaign Settings’ tab and input the appropriate keys from your ActiveCampaign account.
Additionally, you can specify a time interval for NotificationX to check your account for new subscriptions in the ‘Cache Duration’ settings. Once this is completed successfully, you’re all set.

Once you’ve completed the previous steps, follow the guidelines below to showcase ActiveCampaign Email Subscription alerts using NotificationX.
ステップ1:新しい通知を追加する #
WordPressダッシュボードに移動して、 wp-admin → NotificationX → すべてのNotificationX。次に、右上にある ‘Add New’. Or you can also simply go to the ‘Add New’ tab from the sidebar.

ステップ2:ソースを選択する #
手順1を完了すると、にリダイレクトされます 'ソース' NotificationXユーザーインターフェイスのタブページ。
By default, the notification type is set as ‘Sales Notifications’. Simply write a title and choose ‘Email Subscription’ as your Notification type. Afterward, select ‘ActiveCampaign’ as your source to display ActiveCampaign Email Subscription alerts. Then, click on the ‘Next‘ ボタン。

ステップ3:デザインテーマを選択する #
から '設計' タブでは、レイアウトを選択でき、使用する柔軟性もあります 「高度なデザイン」 option to customize it as per your preference.
から 「テーマ」 section, you can choose a ‘theme‘ for your notification alert and this will be the layout of the Email Subscription Alerts that will be displayed on your website.

Moreover, you can modify your chosen Theme by customizing it through the 「高度なデザイン」 option. From this section, you will be able to easily add styling to your design, image appearance, and typography. You can add a Background or Text color for the notification popup.
Besides, you can also add a Border and add styling to it. Basically, an Email Subscription consists of three rows. From the 'タイポグラフィ' セクションでは、各行のフォントサイズも変更できます。

ステップ4:テンプレートコンテンツを構成する #
次にリダイレクトされます 'コンテンツ' 変更できるタブ ‘Notification Template‘ and add your preferred content text. From here, you specify the ‘ActiveCampaign List’ from which the Email Subscription List will be fetched and displayed on your WordPress website.
NotificationX offers a 「通知テンプレート」 for your content where you can easily choose your preferred variables. These variables help to display the names of the users who have subscribed to your ActiveCampaign Email Newsletter on a certain day. On the other hand, 「高度なテンプレート」 コンテンツ全体のカスタマイズを完全に制御できます ‘ActiveCampaign Email Subscription’ 同じように。

さらに、NotificationXを介してさまざまなタイプのキャンペーンを追跡することもできます。 「UTMコントロール」 allows you to add ‘Campaign’, ‘Medium’ そして 'ソース' to your ‘ActiveCampaign Email Subscription’ アラート。

ステップ5:表示オプションを調整する #
の中に '表示' タブには、2つの利用可能なセクションがあります:画像と可視性。から ‘Image‘ section, you can use the checkbox to display the default image or an avatar in the notification popup. If the users don’t have any ‘Gravatar’ set in their profile, you can simply display the ‘Default‘ image by selecting the ‘Default Image’ checkbox and uploading a default image.
から 「可視性」 section, you can set the pages where you want to display the Email Subscription. You also have the option to restrict the notification popup based on certain user roles: Always, Logged In & Logged Out. By default, ‘Show On’ に設定されています ‘Show Everywhere’ as a result the Email Subscription popup will be displayed on every single page of your website.
On the other hand, you can also specify the pages where you want to display or hide the ‘Email Subscription’ notification alert. Afterward, when you click on the '次' ボタンをクリックすると、 'カスタマイズ' タブ。
ステップ6:外観を設定する #
You also have the freedom to set time for the ‘Initial’, ‘Display For’ & ‘Delay Between’ からの好みに応じたオプション ‘Timing’ section. You can set an initial time after which your ‘Email Subscription’ 通知がポップアップされます。デフォルトでは、5秒に設定されています。

You can also set a time limit for how long you want each notification popup to be displayed by modifying the ‘Display For’ field. To choose a time interval between two notifications of Review, simply set the time in the ‘Display Between’ field. Or, if you want to display multiple types of notifications, you can simply activate the 'グローバルキュー管理’option using NotificationX PRO.

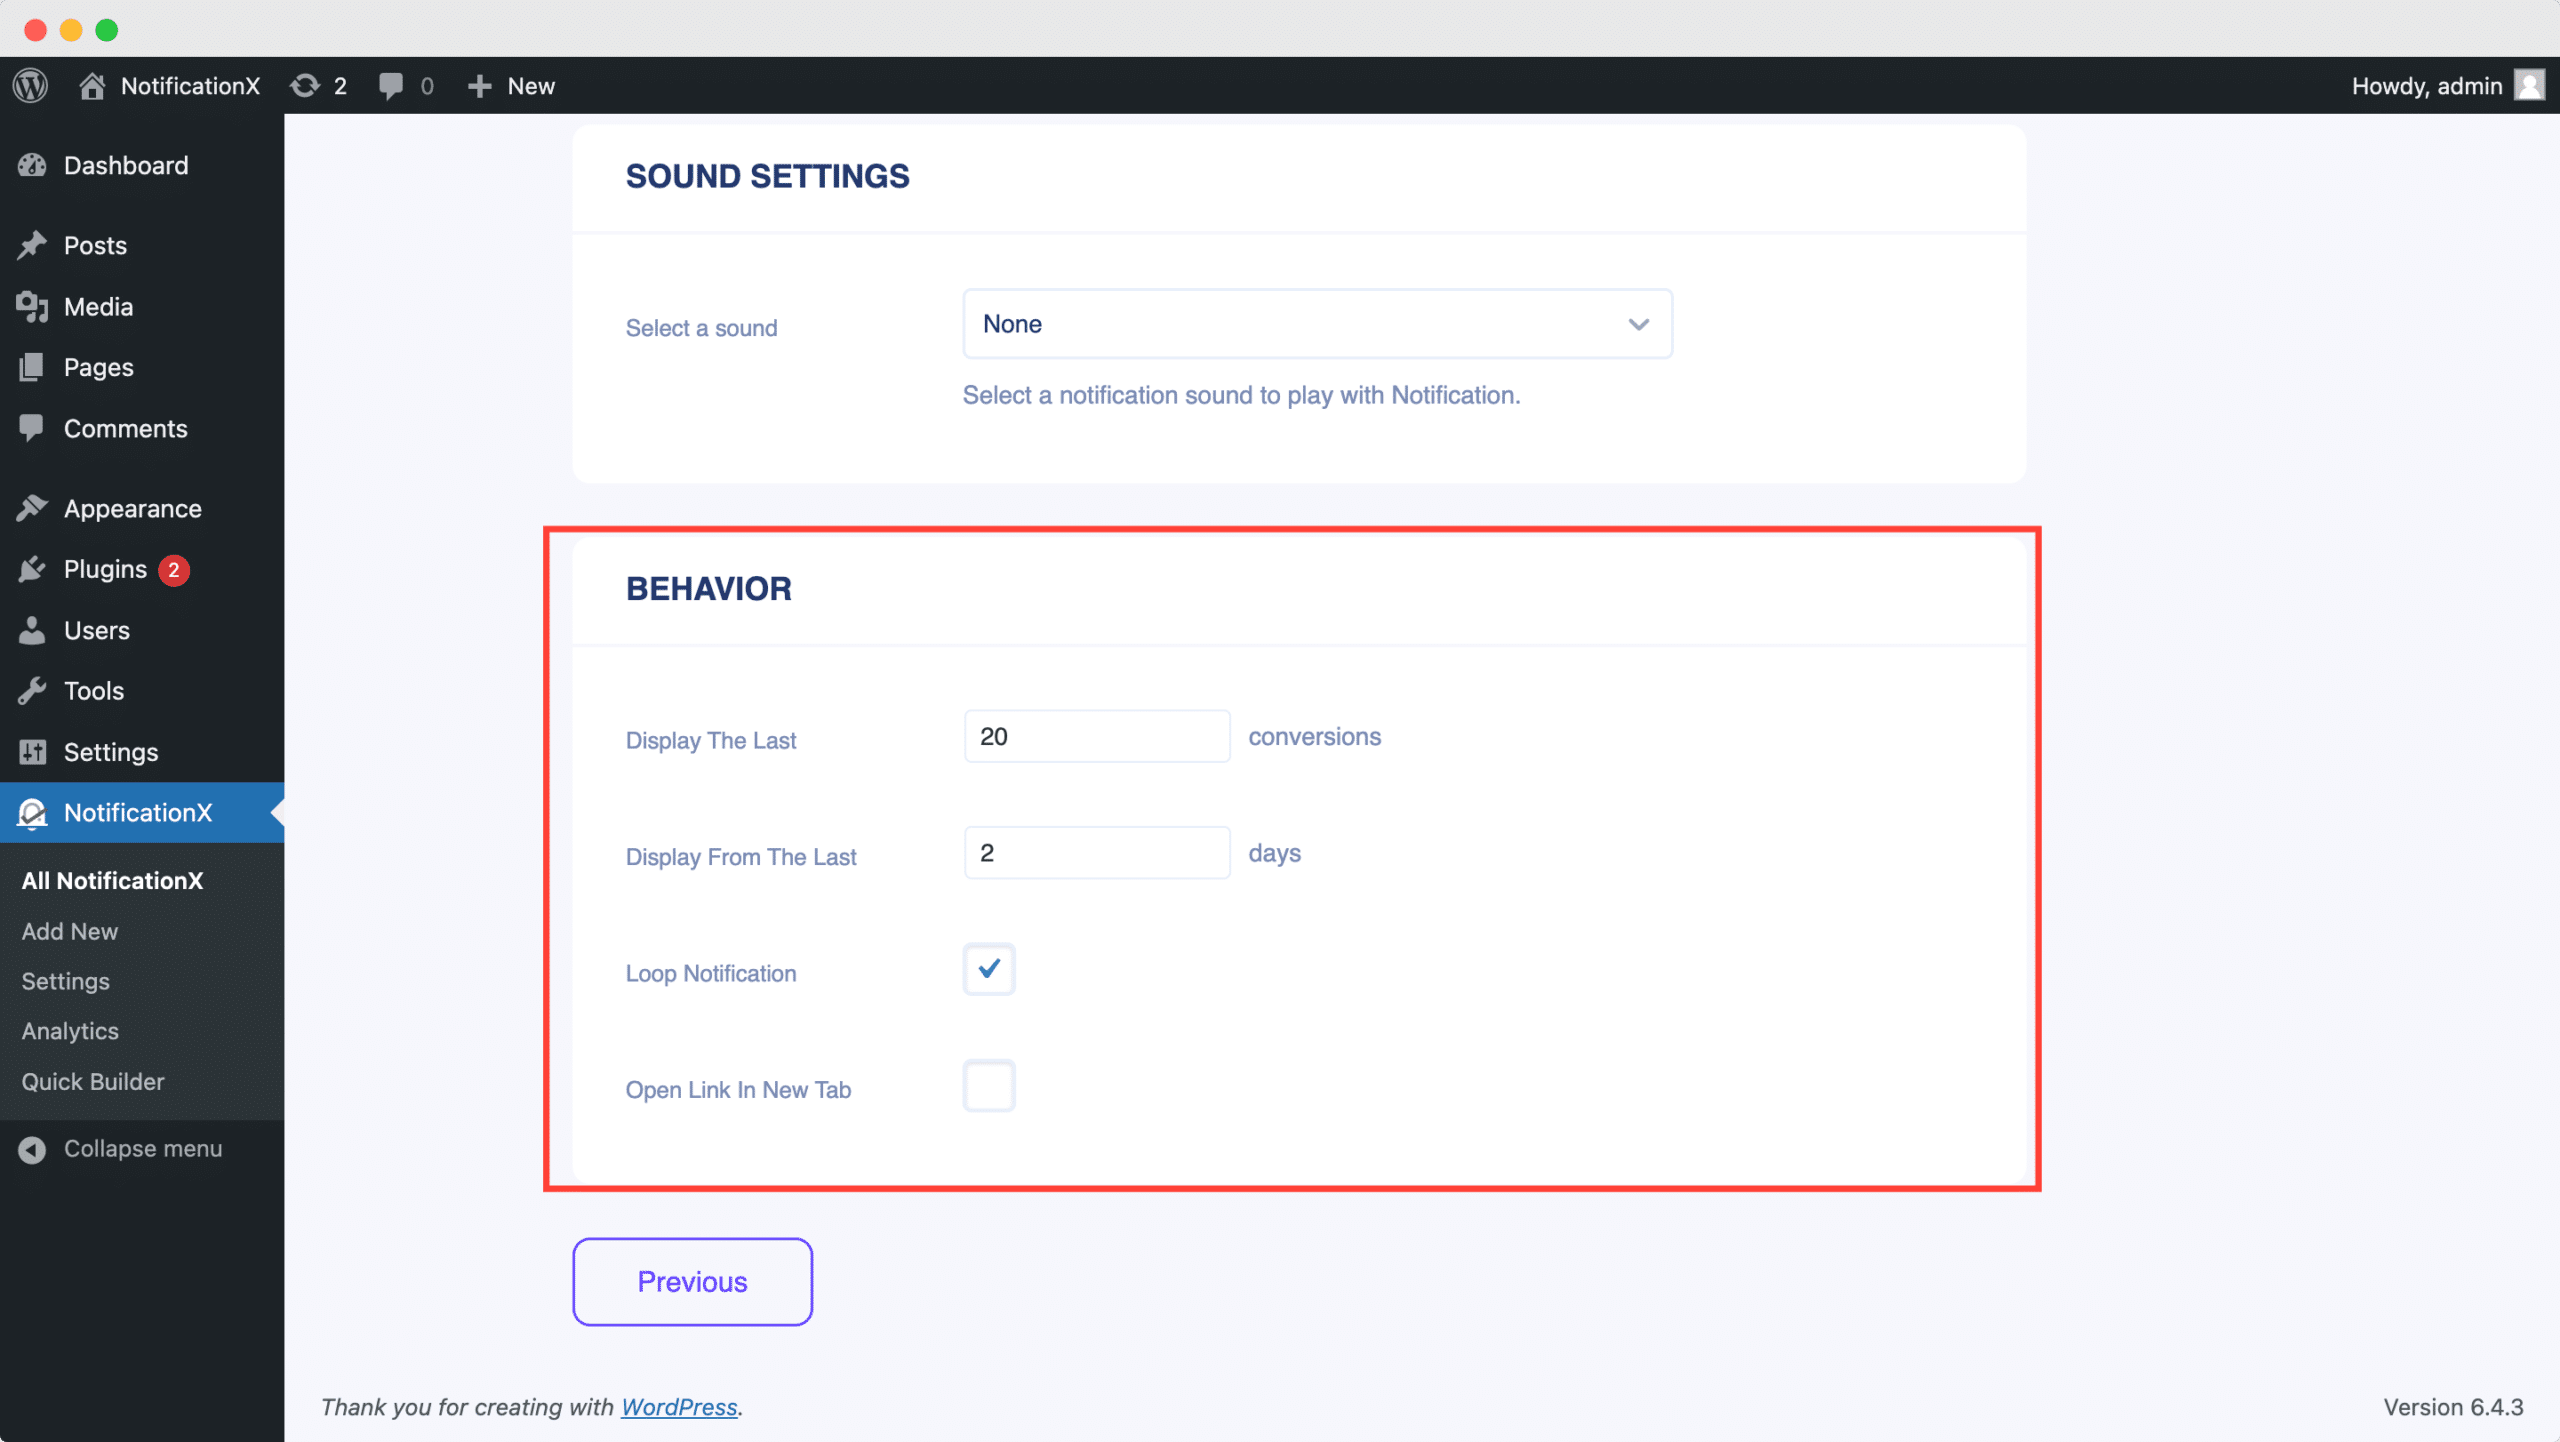
から '動作' section, you can choose to display a number of users who have subscribed to your Email Newsletter for certain past few days. By checking the ‘Loop Notification’ box, the notification popup will keep on displaying. You can disable this as well. When a visitor clicks on the notification popup, you can control whether you want the link to open in a new window or a new tab from the ‘Open link in new tab’ checkbox.

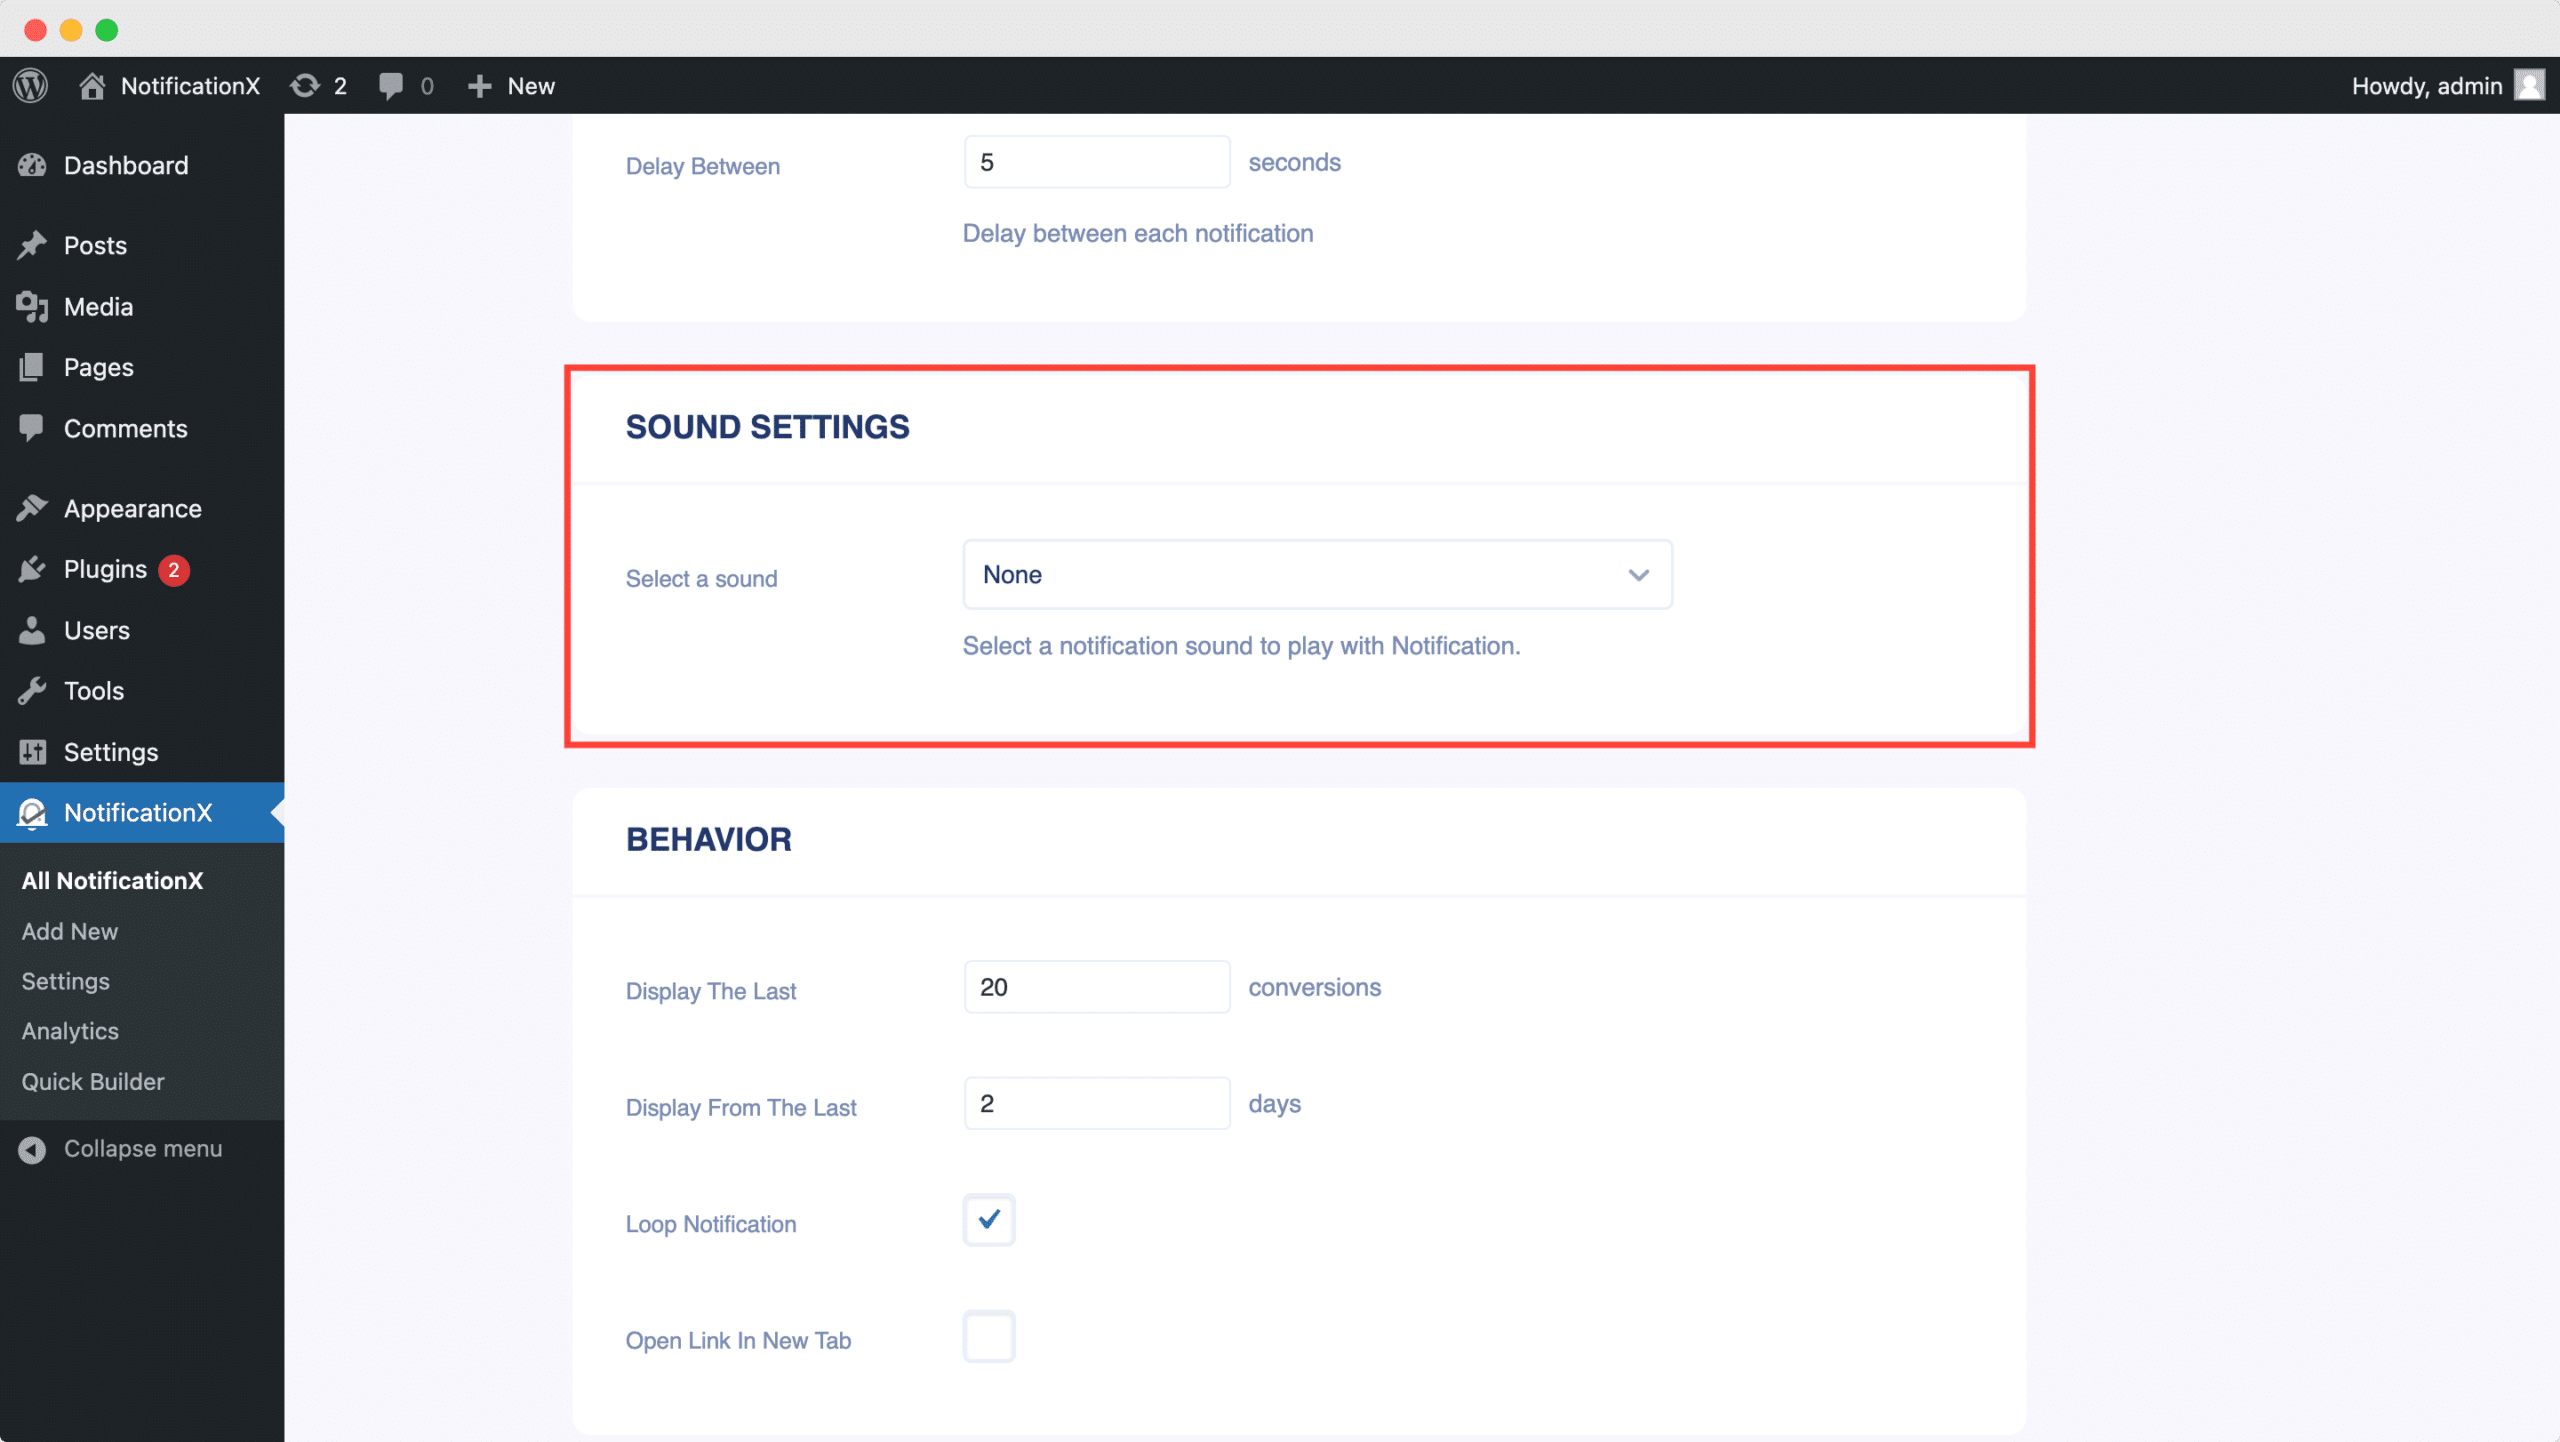
一方、 「サウンド設定」 セクションでは、電子メールサブスクリプションポップアップのサウンドアラートを選択できます。その音量も制御できます。

Step 7: Publish Your ActiveCampaign Notification #
手順6を完了したら、 「公開」 button. As a result, the ActiveCampaign Email Subscription alert will be successfully created.

By following these mentioned steps and a bit more modifying & styling, the final outcome of your ActiveCampaign email subscription alert would look something like this.

By using NotificationX, this is how you can easily design and display an attractive ActiveCampaign Email Subscription alert on your WordPress website & grow your user base.
問題や質問に直面した場合は、 サポートチームにお問い合わせください.


