無料版を使用している場合 NotificationX、ライセンスをアクティブ化する必要はありません。を使用している場合 プロ バージョンについては、以下の手順に従ってください NotificationXライセンスキーをアクティブ化する:
ステップ1:NotificationXライセンスキーを取得する #
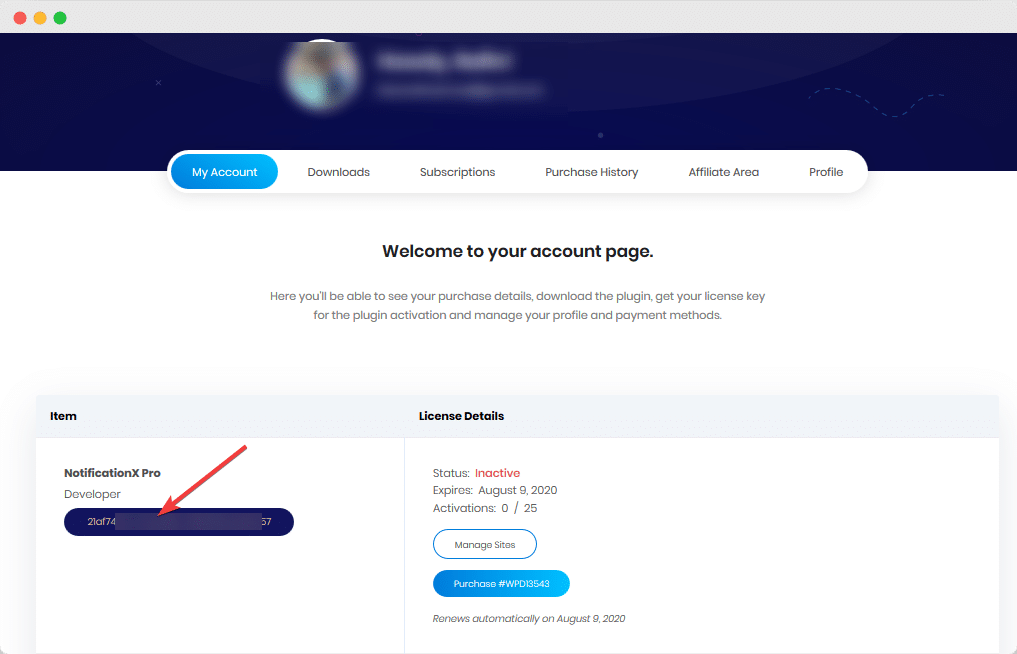
に行く WPDeveloperアカウント。から 'マイアカウント' タブ、あなたは見ることができるでしょう NotificationX あなたがすでに持っているプラグイン 購入した。そこからライセンスキーを「コピー」するだけです。

ステップ2:NotificationXライセンスキーをアクティブ化する: #
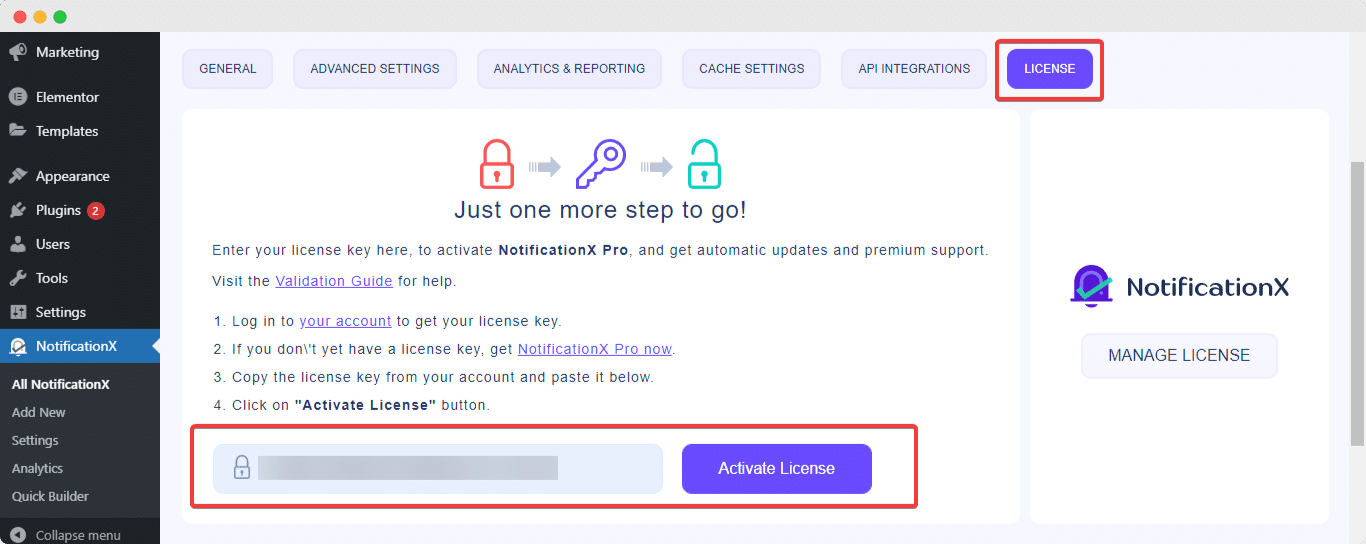
次に、WordPressWebサイトに戻ります。案内する wp-admin-> NotificationX->設定 を選択します 'ライセンス' タブ。次に、ライセンスキーを貼り付けて、「」をクリックします。ライセンスをアクティブ化'ボタン、以下に示すように。

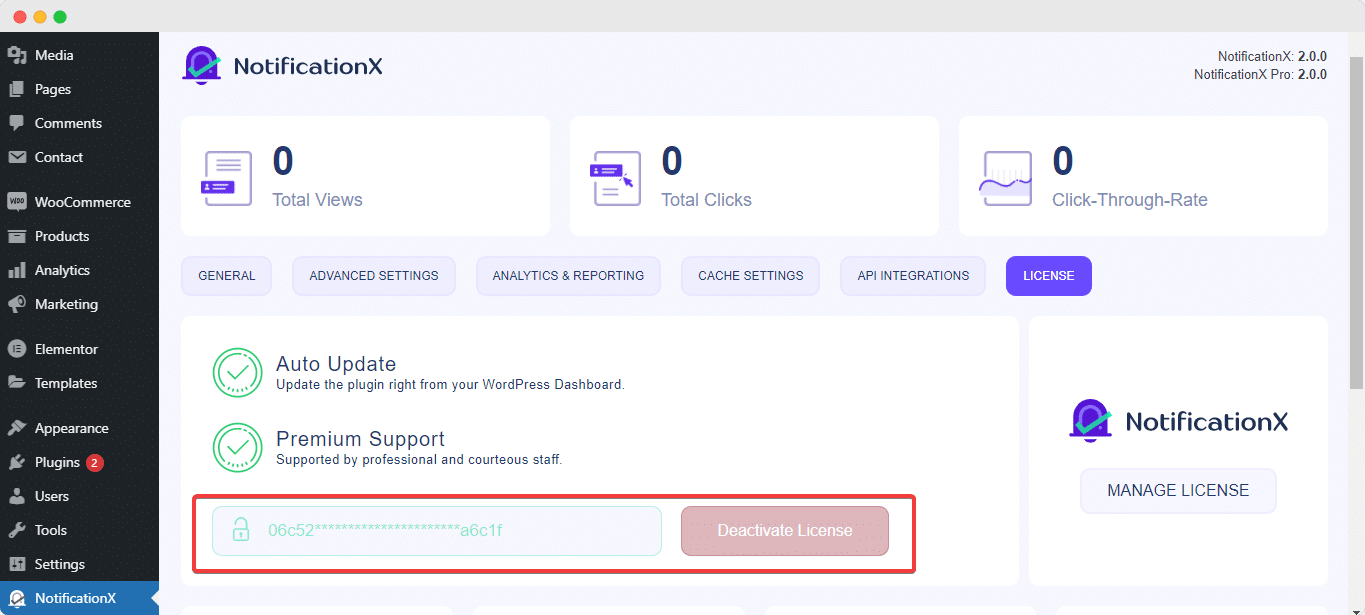
After you have successfully activated your License Key, this is how the 'ライセンス' タブは次のようになります。

トラブルシューティング : #
- 問題が発生した場合は、「無効なライセンス" また "ライセンスが失効しています「。これで、ライセンスのステータスを理解できます。
- If you see it’s not activating or not showing any notice, hard refresh the page and clean your cache if you have any caching plugins. Then try again.
- それでも理解できない場合でも、心配はいりません。 サポートチームに連絡する そして私たちはあなたが問題を解決するのを助けます。
これは、ライセンスを簡単にアクティブ化する方法です NotificationX PRO。ご不明な点がございましたら、お気軽にお問い合わせください サポートチームに連絡してください さらなる支援のため。
注意: You need to verify & authenticate your license key as well. To learn how, follow this documentation.


