NotificationX bietet Ihnen vollständige Kompatibilität mit dem beliebtesten WordPress Multilingual Translation Plugin WPML. Es erlaubt Ihnen übersetze NotificationX Inhalte der Benutzeroberfläche in eine beliebige Sprache umwandeln und auf Ihre mehrsprachige Website anwenden. Befolgen Sie diese Schritt-für-Schritt-Anleitung unten, um die Benutzeroberfläche und Zeichenfolgen von NotificationX mit WPML zu übersetzen.
Wie konfiguriere ich die WPML-Plugin-Einstellungen? #
Um NotificationX mit WPML zu übersetzen, installieren und aktivieren Sie zuerst die folgenden Plugins auf Ihrer WordPress-Site; Mehrsprachiges WPML-CMS und WPML-String-Übersetzung. You can check out this WPML-Dokument to configure it on your WordPress site for more information.

After installing these plugins on your WordPress website, go to ‘WPML’→ ‘Setup’ from your dashboard and select the current language and the language you want to translate to. For instance, we are selecting the ‘German’ language to translate our website.

Follow the on-screen instructions in the WPML Setup wizard and add your site key. Select the site URL format from the three options to choose from. Click on the ‘Continue’ button for the next step

Enter the site key from your WPML account. After that, click on the ‘Continue’ button to proceed to the next step.

Next, you will find the AI Translations option. Here, you can set the context and target audience for your language settings. First, add the product/ service/ website name. Then describe more about the website. After that, select the “Target Audience”, that you want to translate for.

Besides the AI translation, next, you can choose human translation as well. Select how you would like to set up your human translation from the setup.

Now, to get faster support and compatibility alerts, you can choose to get theme and plugin information if required.

Once you complete the previous steps, the WPML plugin will be ready. You can now use it on your WordPress website.

Now, to enable translation, go to ‘WPML’ → ‘Languages’. Set your native language, and select any language you prefer.

Now, navigate to ‘WPML‘→ ‘Settings‘. Enable ‘Private Translation Cloud (PTC)’ options. Afterward, click on the ‘Save’ button before hitting the ‘Apply’ button at the bottom of the page.

How To Use The WPML Automatic Translation Option? #
NotificationX und NotificationX PRO Plugins sind kompatibel mit WPML’s automatic translation feature. In the Translation Management section of the WPML plugin dashboard, you can access this advanced feature.
With this, you can automatically translate your website’s content, including NotificationX alerts. Simply toggle the “Translate Everything Automatically’ button to enable it. You can also select a review option for each translation. You will have the option to change it later from the WPML Settings option.
Hinweis: You can enable Translate Everything Automatically after sending some content for translation.

After that, go to ‘WPML’ ⮕ ‘Languages’ to change the default language, add or remove the translation language for the NotificationX plugin.

Wie übersetzen Sie Ihre Admin-Interface-Strings mit WPML? #
WPML-String-Übersetzung goes beyond regular WPML translation. It lets you translate all alerts, including the plugin elements of NotificationX, for a multilingual WordPress site.
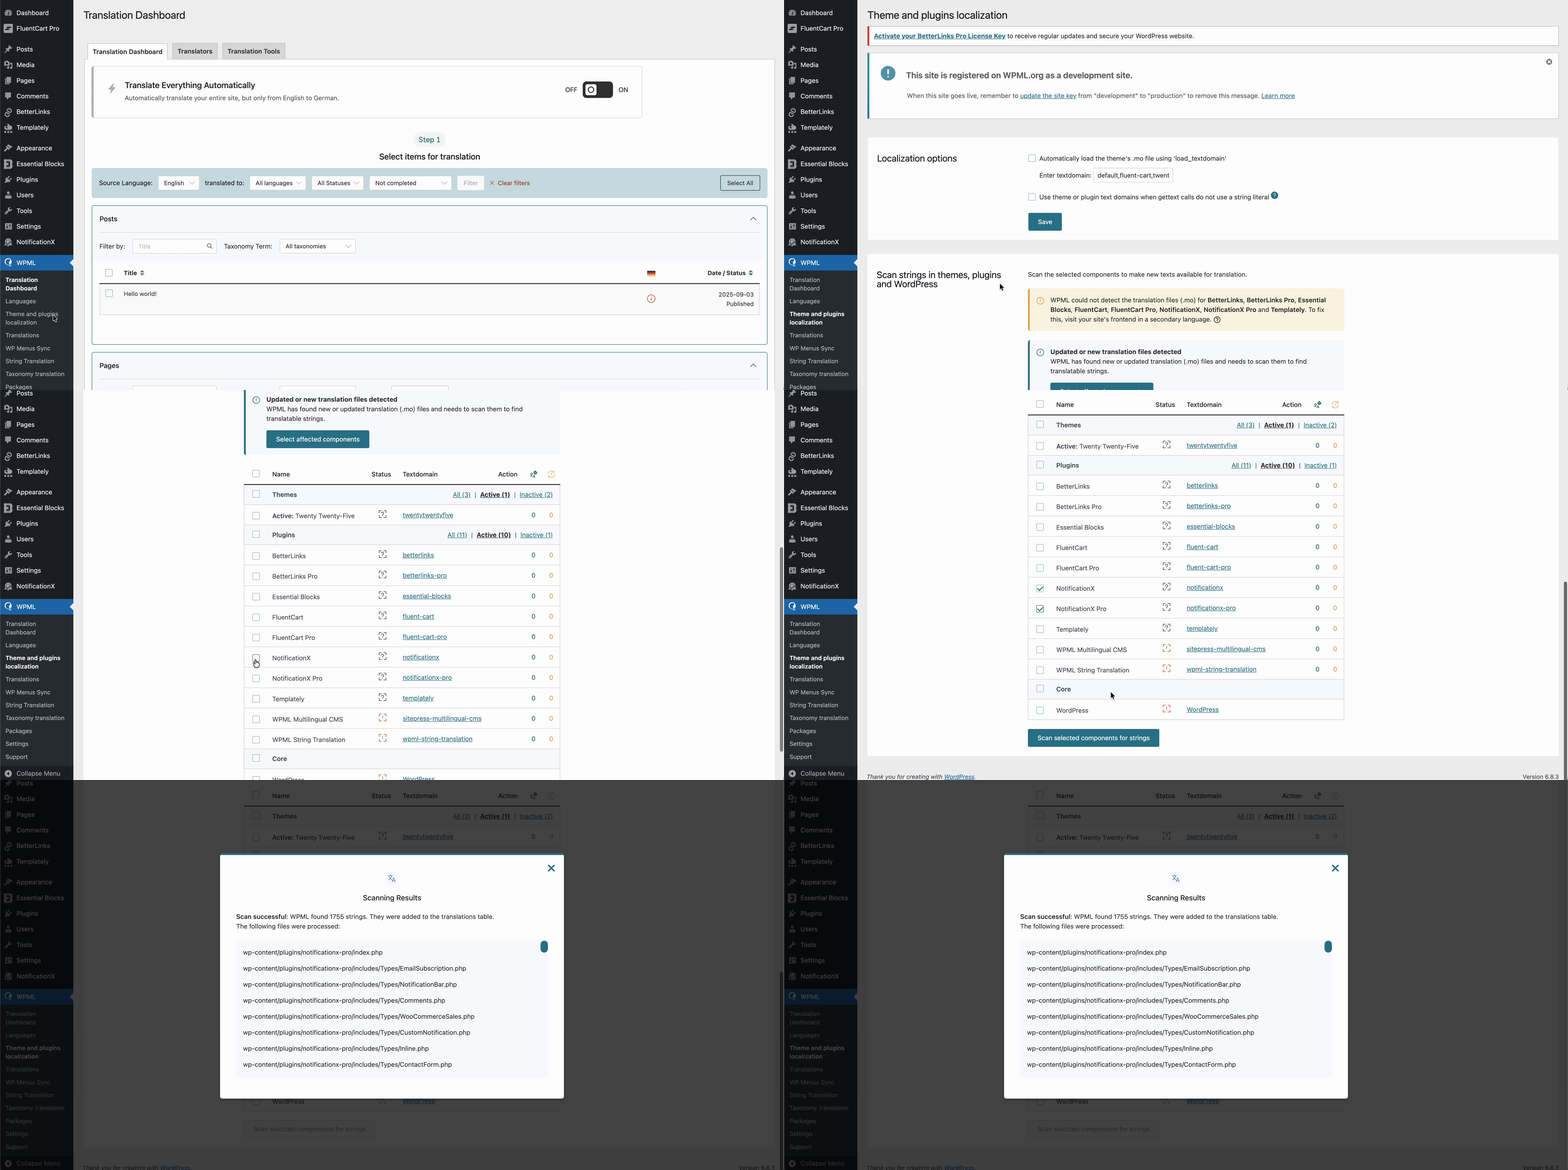
Navigate to ‘WPML’→’Theme and plugins localization’ from your WordPress dashboard. Select the ‘NotificationX’ and ‘NotificationX PRO’ plugins and hit the ‘Scan selected components for strings' Taste.

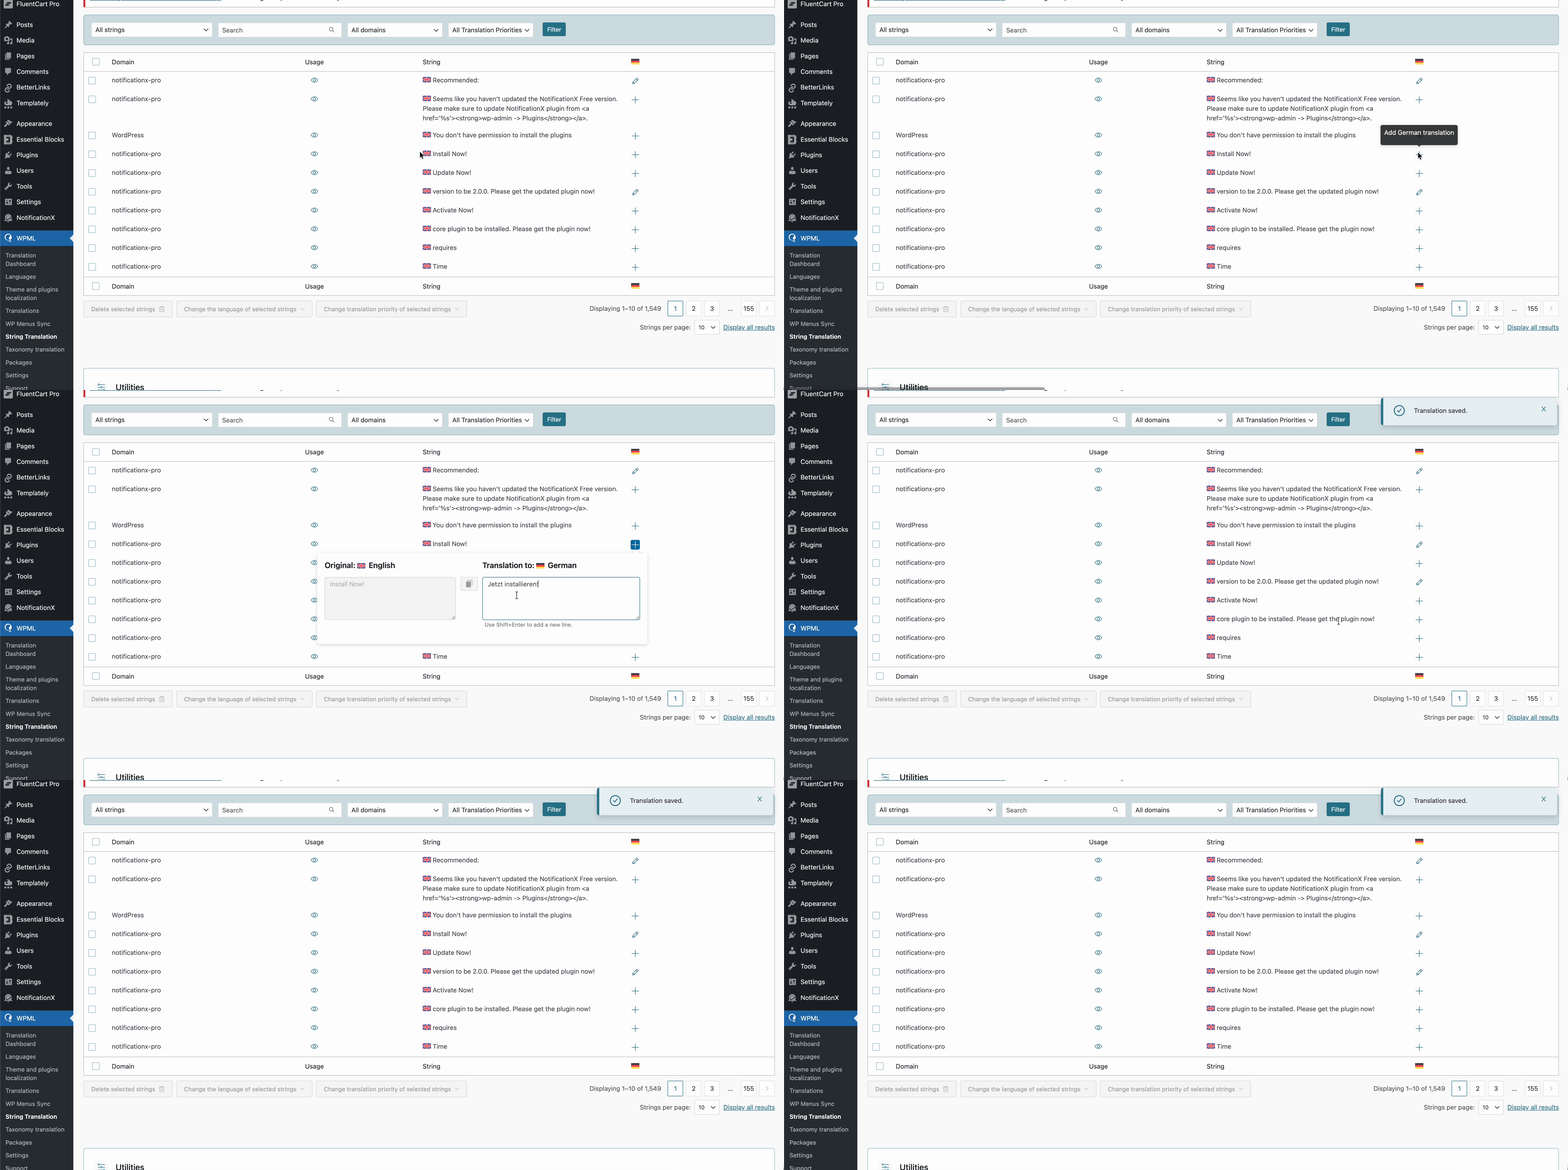
After you have scanned all the strings on your plugin, now you can navigate to ‘WPML’ → ‘String Translation’ um eine beliebige Zeichenfolge zu übersetzen. Sie können nach der Zeichenfolge suchen, die Sie übersetzen möchten. Dies kann eine beliebige Zeichenfolge aus der Benutzeroberfläche sein.

Durch Anklicken des '+' icon, you can choose the language you want to translate the string to. After that, you can manually add the translation to the text.
For example, for this doc, we are translating NotificationX strings to the German language. Hit the '+' und geben Sie die übersetzte Version des Strings in das Eingabefeld ein. Sie können die Übersetzung speichern, indem Sie die Eingabetaste drücken.

Finally, you can go to the NotificationX interface and check the translated string from the dashboard.

Wenn Sie NotificationX-Eingabefelder übersetzen möchten, wählen Sie einfach das ‘admin_texts_notificationx’ domain from ‘WPML’ → ‘String Translation’ und befolgen Sie einfach den gleichen Vorgang wie oben beschrieben.
Wie übersetzt man Benachrichtigungswarnungen von NotificationX? #
Navigieren Sie einfach zu Alle NotificationX from your NotificationX Dashboard and select the three-dot action option on a Notification type you want to translate. Here, you will find the translate option. Clicking on this icon will take you to the WPML String settings so you can translate the string as you want.

Ein neues Fenster wird angezeigt, genannt ‘String Translation,’ where you will find the string you want to translate. Click on the ‘+’ button to add a translation for the string.

Now, to translate NotificationX, you can click on the ‘+’ icon to translate the string and paste your translated text in the box. Click 'Eingeben' die Übersetzung anzuwenden. Ihre Übersetzung wurde erfolgreich gespeichert.

Gehen Sie nun auf die Live-Site und scrollen Sie nach unten, um alle Sprachen zu sehen Sie haben die Übersetzung eingestellt. Für diese Dokumentation haben wir die 'Kommentar' in die deutsche Sprache aufmerksam machen. Klicken Sie auf Sprachsymbol und Ihr Kommentaralarm wird automatisch übersetzt.

How To Translate The Notification Bar Built With Elementor? #
If you have made a notification bar with Elementor, you can translate it too. Go to ‘All NotificationX’ from the dashboard and click the three dots on the one you want to translate. Then, click the ‘Translate’ icon to open WPML’s String Management settings.

From the new window, select the notification bar and click on the “Add Note for translator” button to add information for your alerts translation.

Now navigate to String Translation again and add translation of each section of the notification bar build with Elementor. click on the ‘+’ icon to translate the string and paste your translated text in the box. Click 'Eingeben' die Übersetzung anzuwenden. Ihre Übersetzung wurde erfolgreich gespeichert.

Go to your live website and change the language. Your NotificationX Bar gebaut mit Elementor wird erfolgreich übersetzt.

Wenn Sie jetzt zu Ihrer Live-Site gehen, können Sie die Übersetzung der Benachrichtigungsleiste einfach anzeigen, indem Sie die Sprache mit dem mehrsprachigen Übersetzungs-Plugin wechseln WPML mit NotificationX. This is how easily you can translate NotificationX interface, comments and notification bar using the WPML plugin.
Steckenbleiben? Fühlen Sie sich frei, unsere zu kontaktieren engagiertes Support-Team für weitere Hilfe und Fragen.


