
साथ में NotificationX प्रो आप आसानी से अपना दिखा सकते हैं एलिमेंट फॉर्म सबमिशन अलर्ट अपने आगंतुकों को विश्वसनीयता प्रदान करने के लिए और उन्हें अपने प्रश्न भी प्रस्तुत करने के लिए राजी करें। अपनी वर्डप्रेस वेबसाइट पर, आप शानदार बना सकते हैं एलिमेंट फॉर्म सबमिशन अलर्ट आगंतुकों को रुचि रखने के लिए पॉपअप। देखने के लिए नीचे दिए गए दिशानिर्देश देखें किसी भी वर्डप्रेस साइट पर NotificationX का उपयोग करके एलिमेनेटर फॉर्म सबमिशन अलर्ट कैसे प्रदर्शित करें।
ध्यान दें: आप सुनिश्चित करें कि आपके पास स्थापित और सक्रिय एलिमेंट प्रो अपने वर्डप्रेस डैशबोर्ड पर।
चरण 1: 'नया जोड़ें' डैशबोर्ड पर जाएं #
आप सुनिश्चित करें कि आपके पास स्थापित और सक्रिय NotificationX प्रो अपनी वर्डप्रेस वेबसाइट पर प्लगइन। यदि आप इसे पहले ही कर चुके हैं, तो आप एलिमेंट फॉर्म अलर्ट को आसानी से कॉन्फ़िगर करने के लिए तैयार हैं।
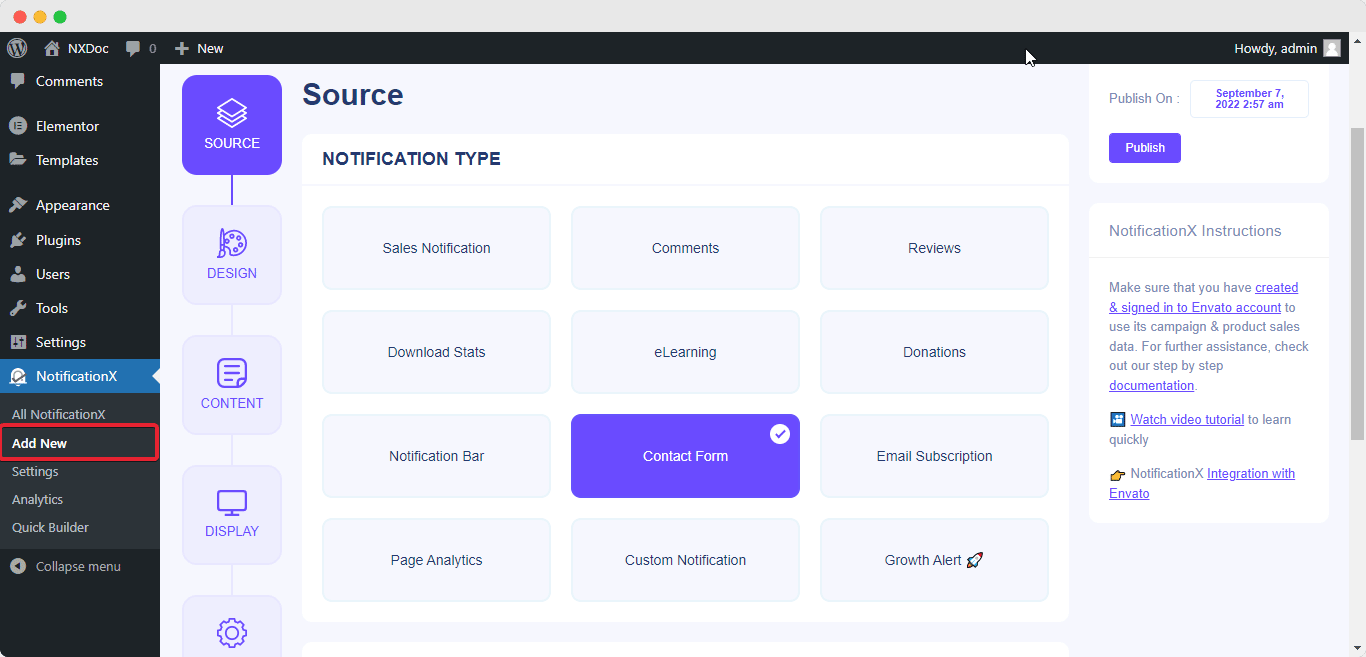
चरण 2: संपर्क फ़ॉर्म को प्रकार और स्रोत के रूप में चुनें #
वहाँ से 'स्रोत टैब', चुनते हैं 'संपर्क करें प्रपत्र'अपने अधिसूचना प्रकार के रूप में और' चुनेंएलिमेंट फॉर्म' आपके स्रोत के रूप में।
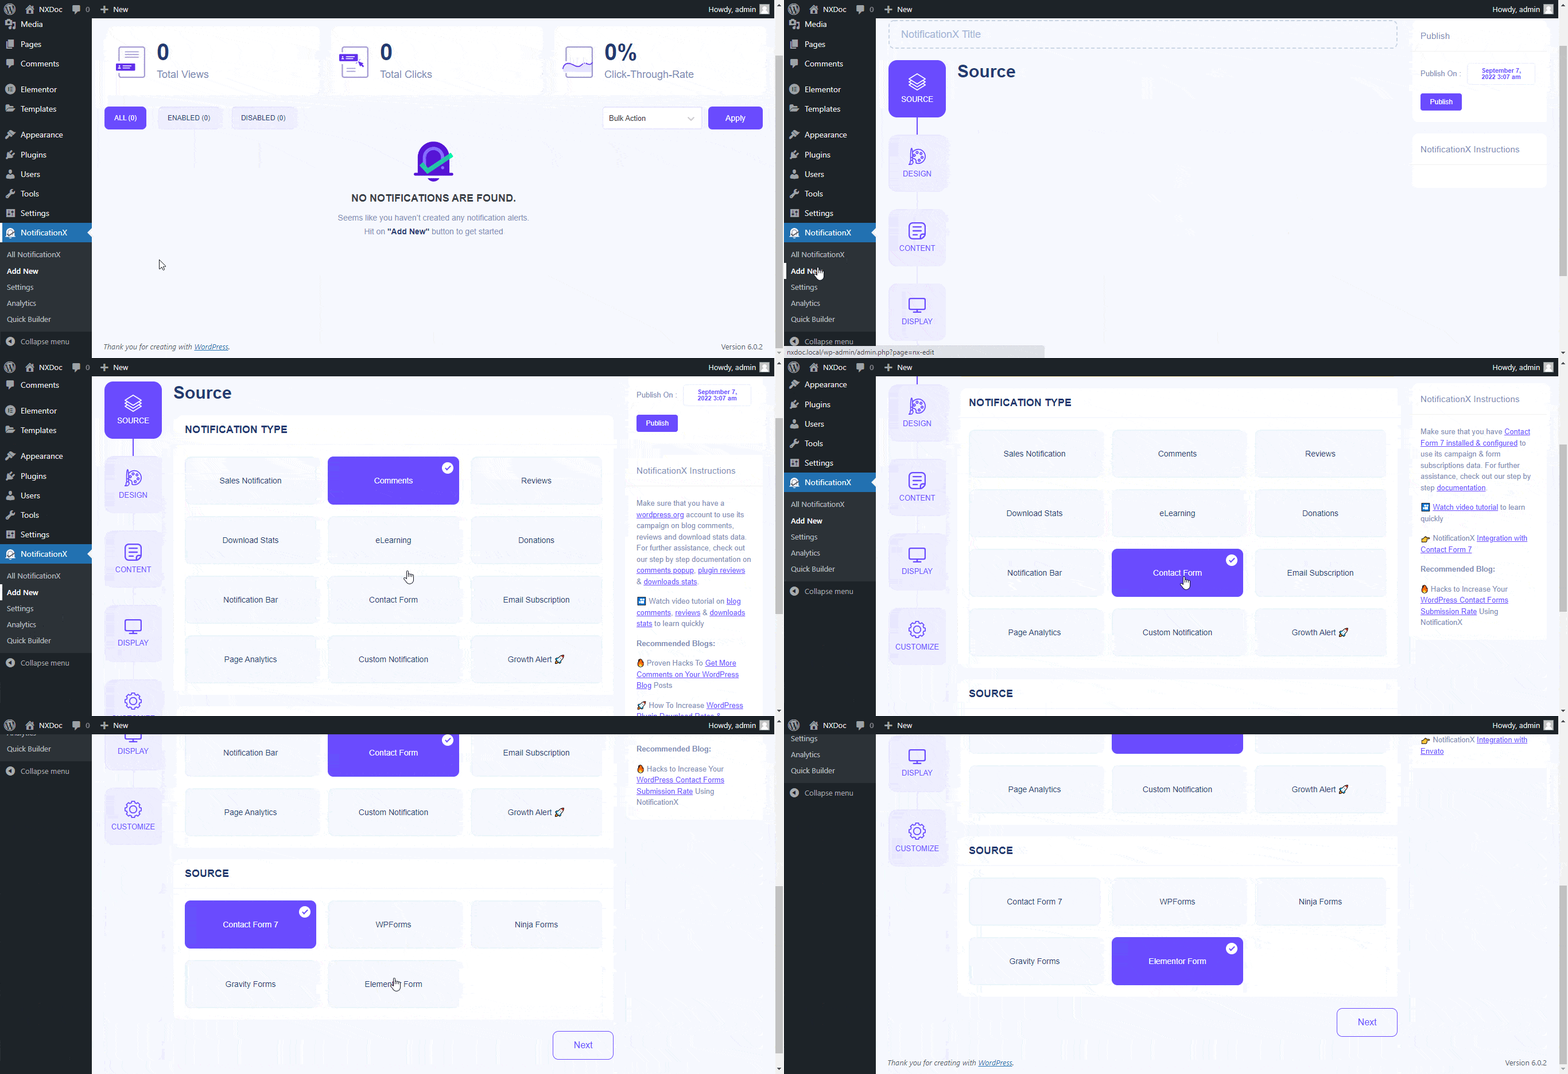
चरण 3: अपना एलिमेंट फॉर्म थीम चुनें #
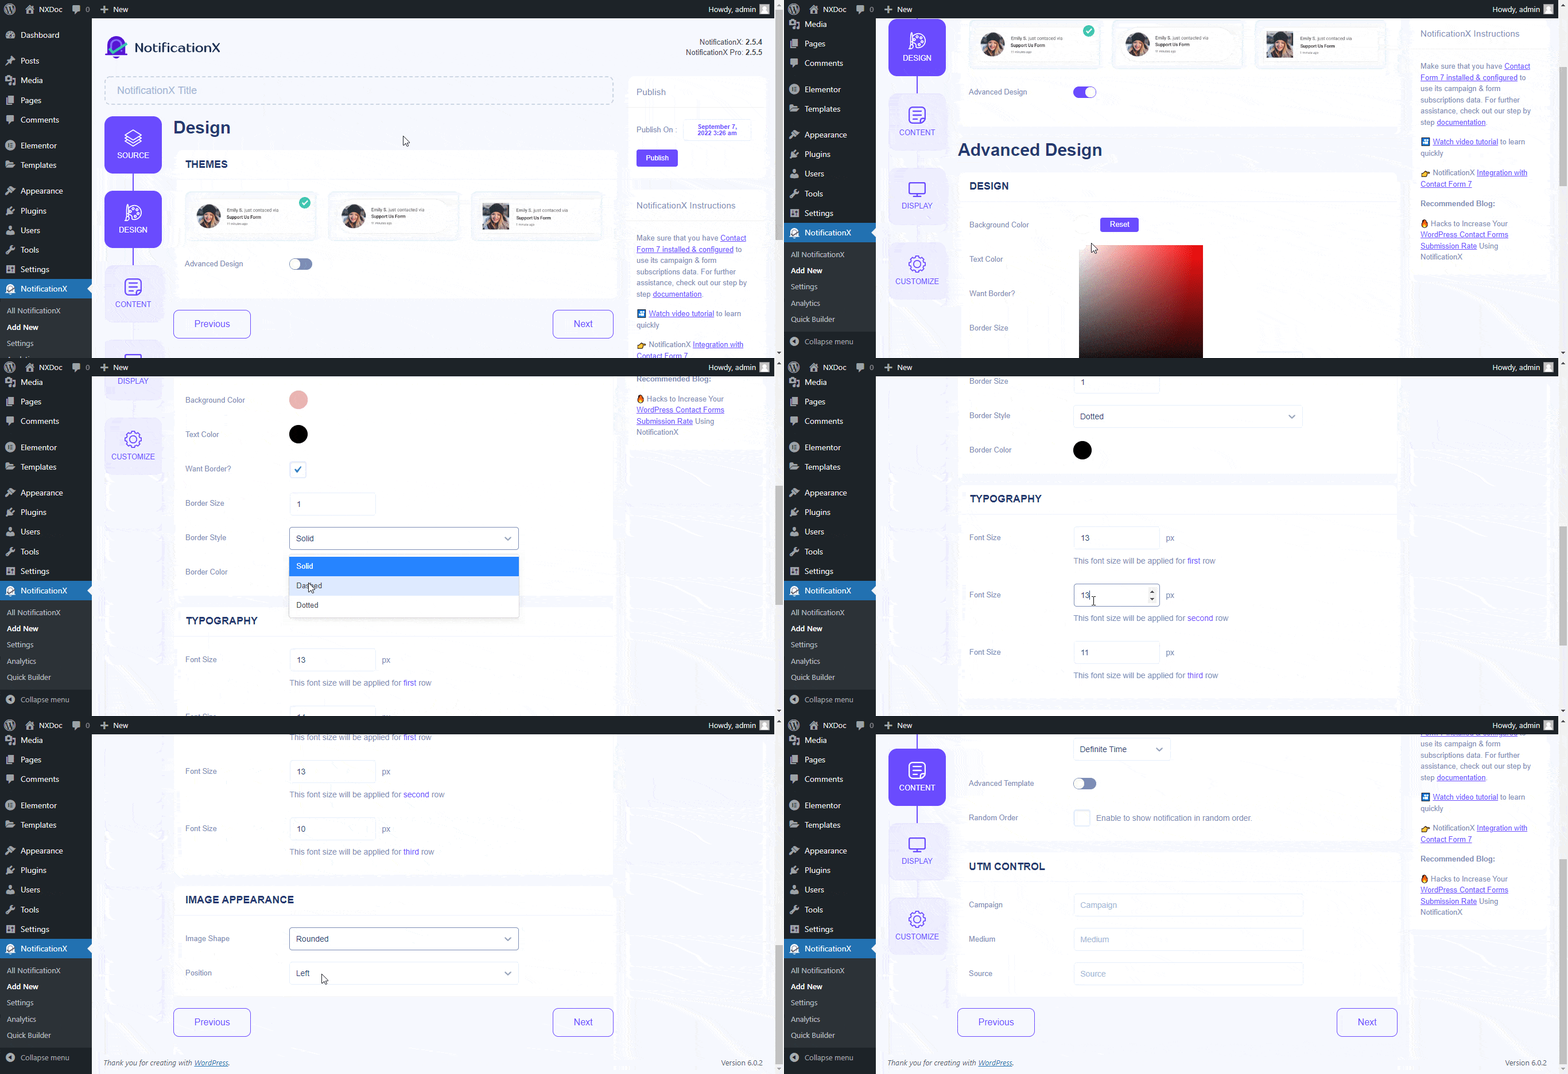
वहाँ से 'डिज़ाइन' टैब कोई भी अधिसूचना विषय चुनें जो आप चाहते हैं। यदि आप सक्षम करते हैं 'उन्नत डिजाइन'विकल्प आप फॉर्म को ट्वीक कर सकते हैं'पीछे का रंग', तथा 'लिखावट का रंग'अनंत के साथ'सीमा' अनुकूलन विकल्प।
नीचे 'टाइपोग्राफी' टैब आप टेक्स्ट के लिए अपना पसंदीदा फ़ॉन्ट आकार सेट कर सकते हैं। साथ ही, आप अपनी छवियों के स्थान को आसानी से अनुकूलित कर सकते हैं।
चरण 4: एलिमेंट फॉर्म सामग्री सेट करें #
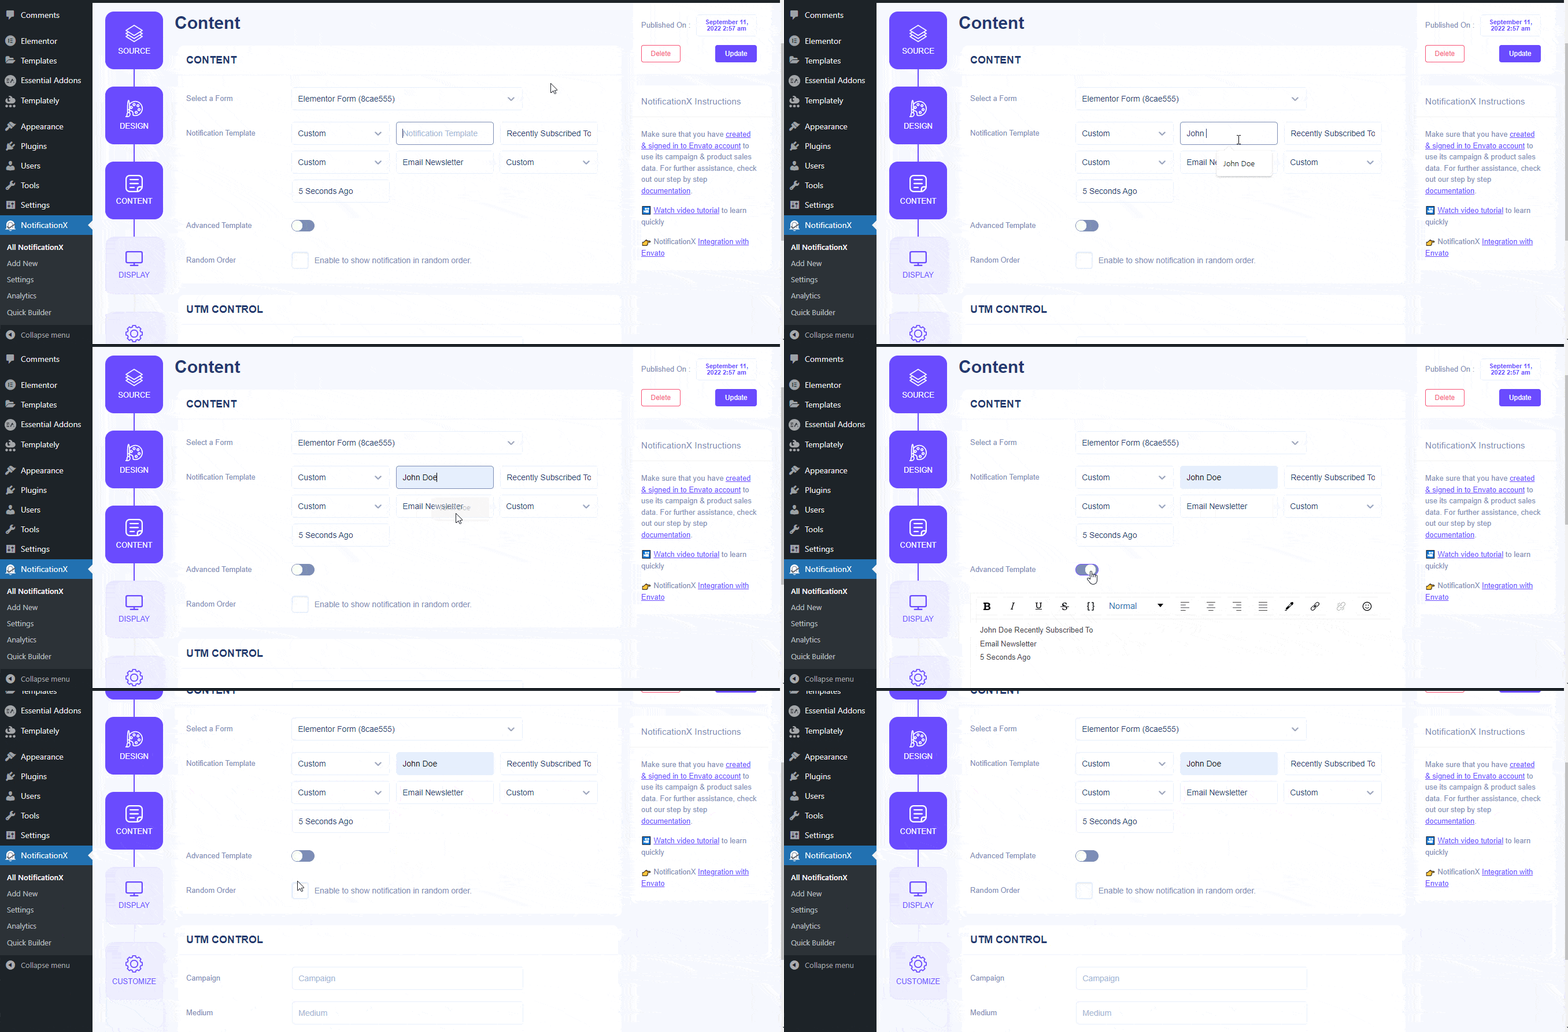
अपनी प्रपत्र सामग्री बदलने के लिए, 'पर जाएँसामग्री' टैब और आपके पास अपने फॉर्म को अनुकूलित करने के लिए कई उन्नत विकल्प होंगे। वहां से आप चुन सकते हैं अपना फॉर्म और अधिसूचना टेम्पलेट को अनुकूलित करें. यदि आप सक्षम करते हैं 'उन्नत टेम्पलेट' विकल्प आप मैन्युअल रूप से अपने संपर्क फ़ॉर्म में विशेषताएँ जोड़ सकते हैं। सूचनाओं को यादृच्छिक क्रम में प्रदर्शित करने के लिए 'रैंडम ऑर्डर' विकल्प को सक्रिय करें।
चरण 5: एलिमेंट फॉर्म डिस्प्ले को कस्टमाइज़ करें #
के नीचे 'प्रदर्शन' टैब पर, आप या तो कोई छवि अपलोड कर सकते हैं या डिफ़ॉल्ट छवियों को प्रदर्शित कर सकते हैं। आप कहीं भी अपनी अधिसूचना की दृश्यता सेट कर सकते हैं आप उचित प्रदर्शन स्थितियों के साथ चाहते हैं।
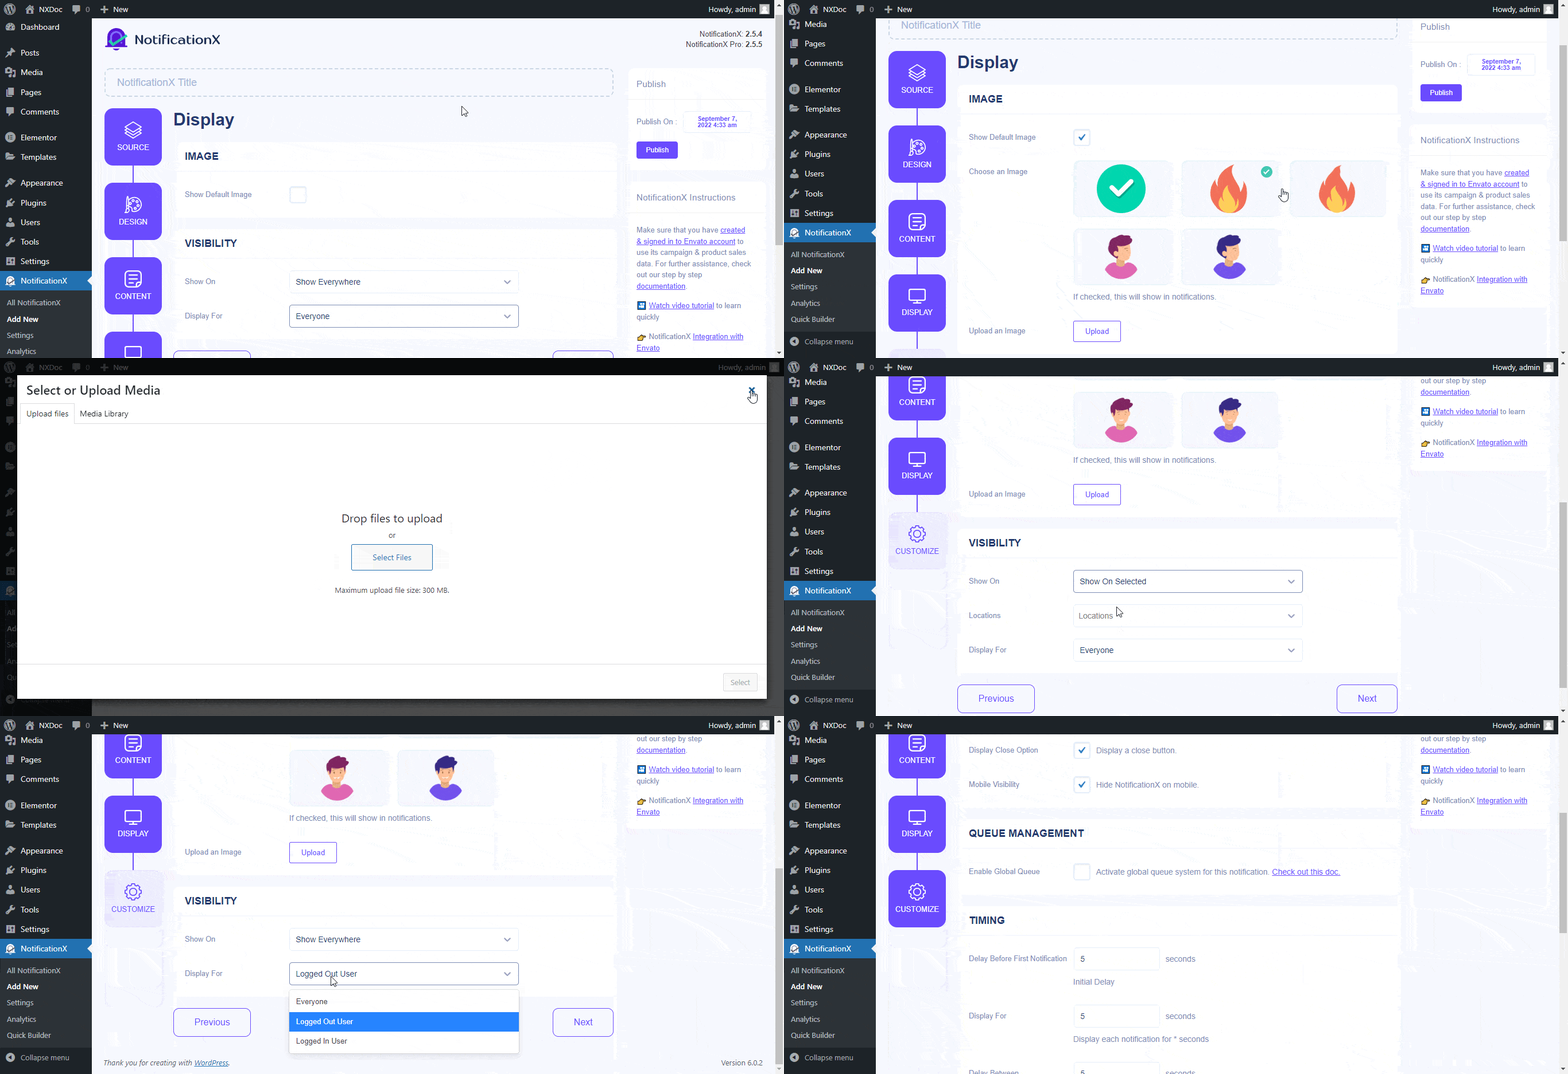
चरण 6: प्रपत्र सेटिंग कॉन्फ़िगर करें #
'कस्टमाइज़' टैब से, आप अपना एलिमेंट फॉर्म 'बदल सकते हैं'दिखावट','कतार प्रबंधन','समय','ध्वनि सेटिंग', आदि आसानी से।
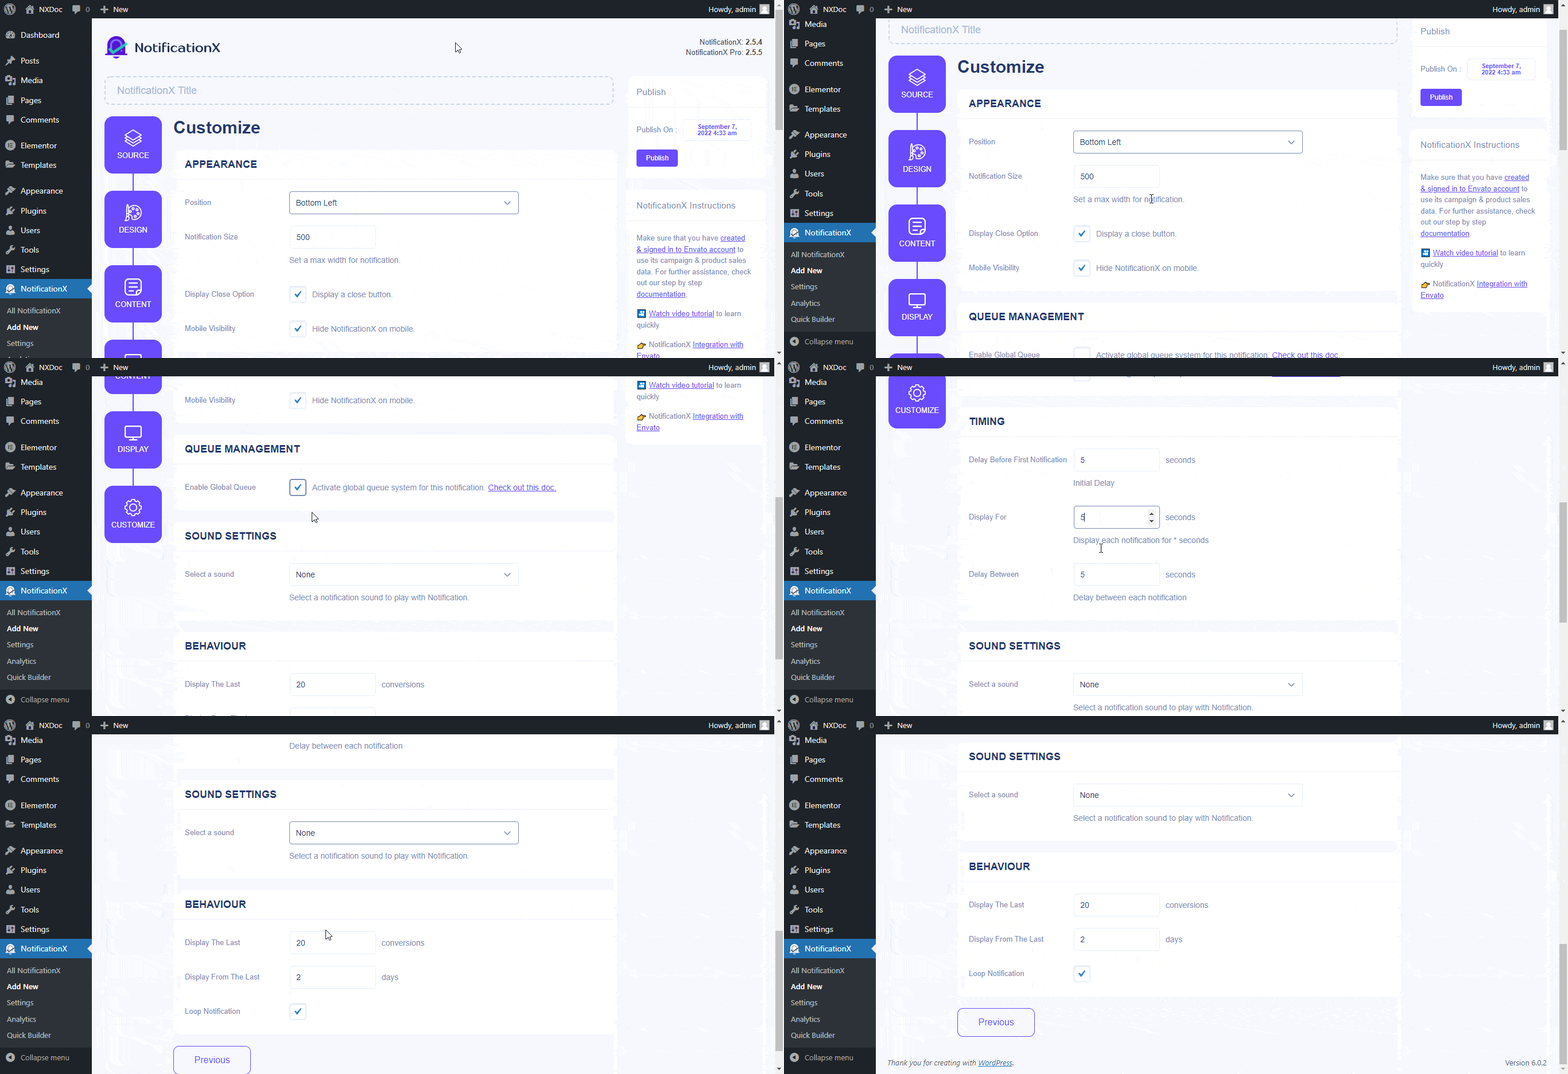
अंतिम परिणाम #
इन उल्लिखित चरणों का पालन करके और थोड़ा और संशोधित करके, आप एकल, एकाधिक प्रदर्शित कर सकते हैं, NotificationX . का उपयोग करके एलिमेंट सबमिशन अलर्ट.

यदि आपको किसी समस्या का सामना करना पड़ता है या किसी और सहायता की आवश्यकता है, तो बेझिझक संपर्क करें टीम का समर्थन.
 English
  Arabic
  Indonesian
  Spanish
  Portuguese
  German
  Dutch
Dutch  Russian
  Hindi
Hindi  French
  Japanese
  Chinese
  Vietnamese
  Malay
Malay