
NotificationX now supports MCP (Model Context Protocol), letting AI assistants like Claude, ChatGPT, Cursor & others read and write your notification campaigns directly, right from your chat window.
Once connected, with MCP in NotificationX, you can ask the AI assistant to create new notifications, update or duplicate existing ones, toggle campaigns on or off, or check your notification analytics, all without opening wp-admin.
This saves you the back-and-forth of building campaigns manually and lets you manage your social proof and FOMO alerts through a simple conversation.
Let’s see the step-by-step guide below to learn how it actually works.
How to Enable MCP in NotificationX #
Go to WP-व्यवस्थापक → NotificationX → समायोजन → MCP. Toggle on ‘Enable MCP access’ under MCP Server.
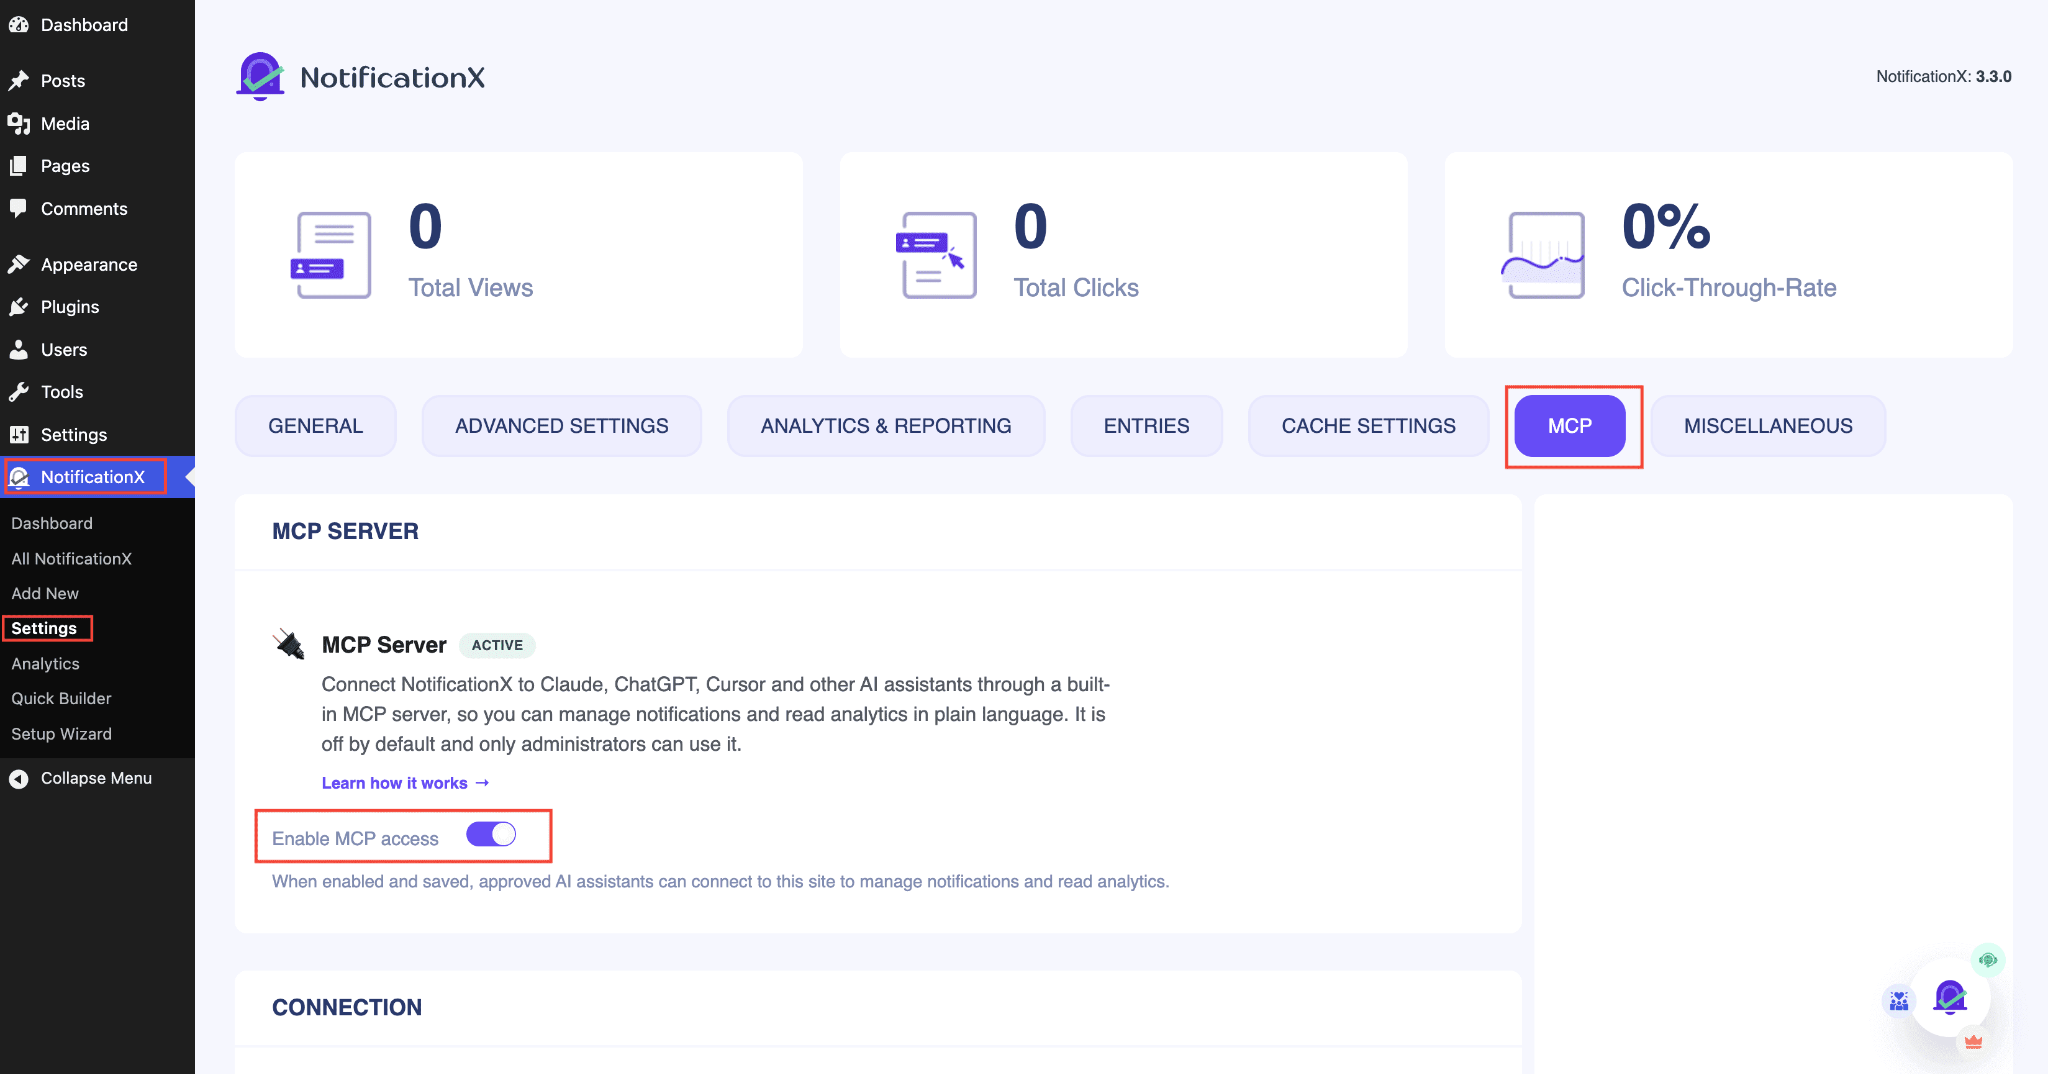
This activates your site’s MCP server and generates a connector URL that AI assistants use to communicate with your documentation.
How to Connect Claude to NotificationX MCP #
Follow the simple steps below to connect Claude to NotificationX MCP.
Step 1: Get Your Connector URL #
On the same MCP page, under the ‘CONNECTION’ section, you’ll get the Connector URL. Now, click ‘Copy’ next to the Connector URL field.
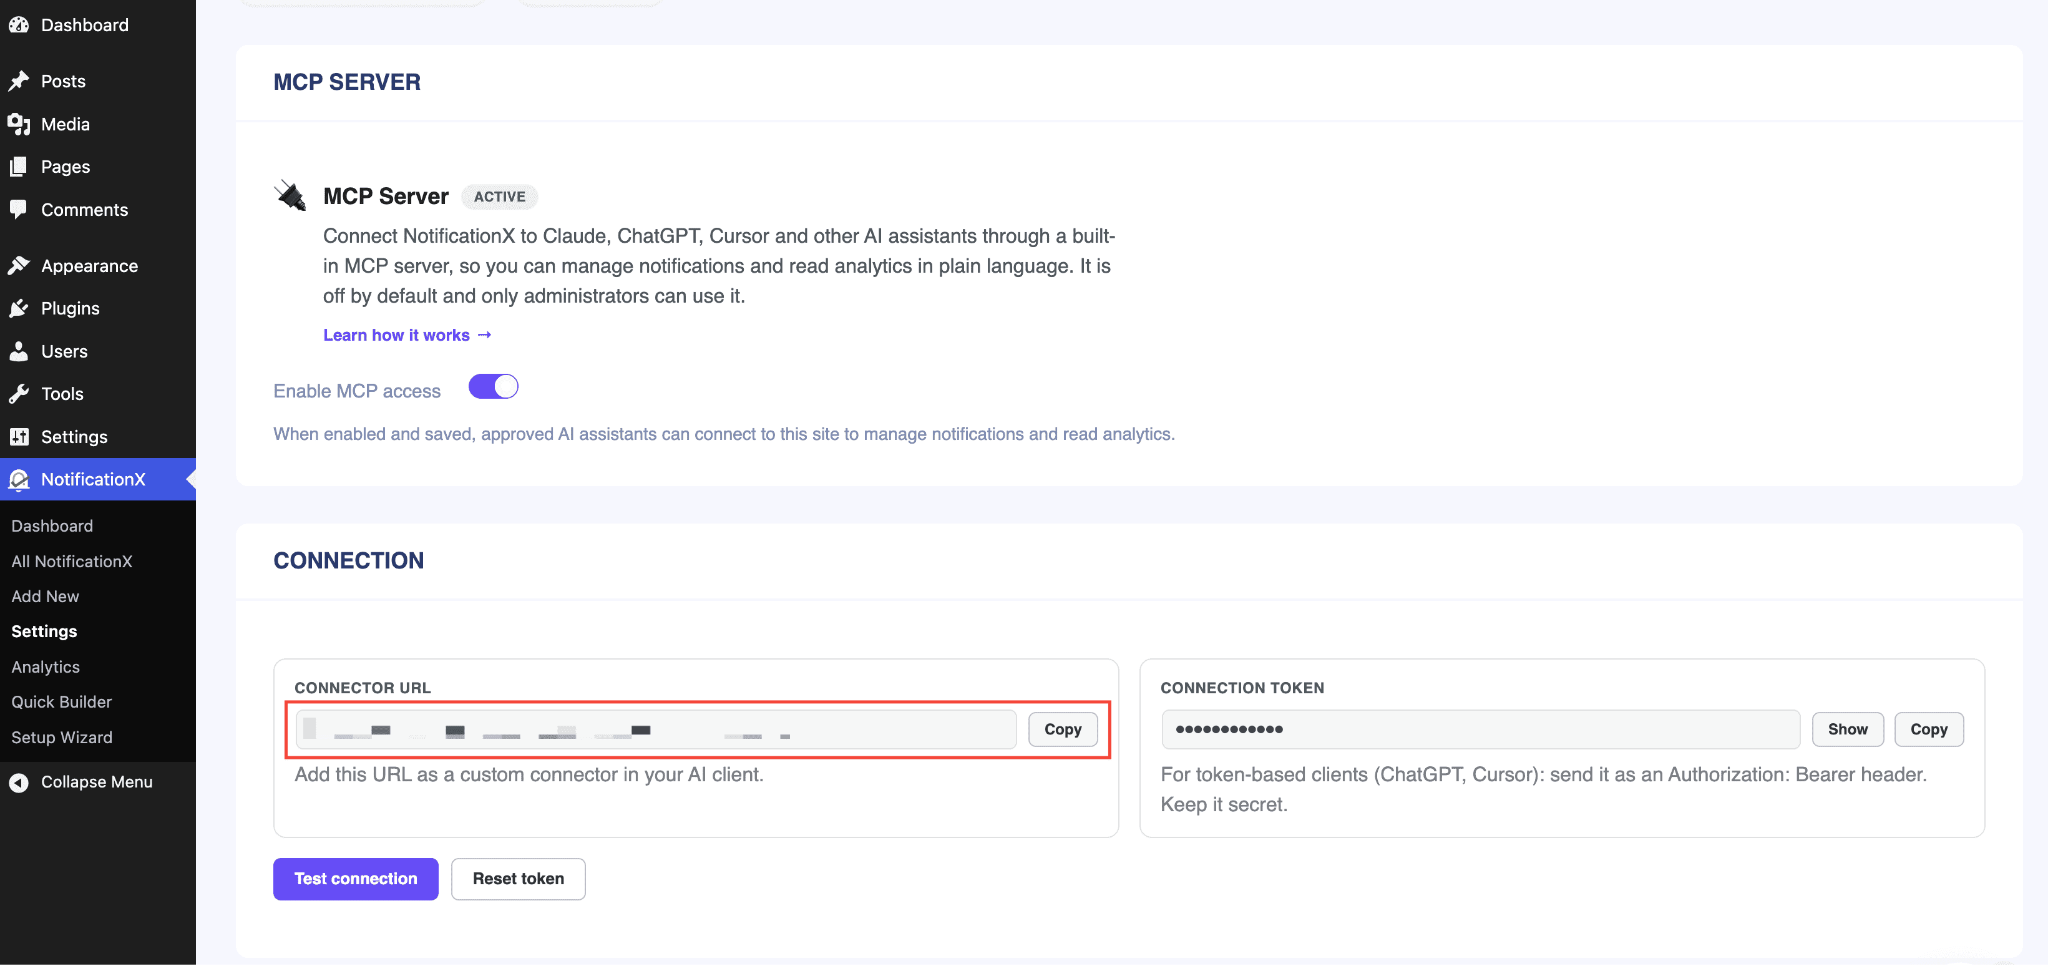
ध्यान दें: Don’t forget to click on ‘Save Settings’ below after enabling MCP & copying the Connector URL.
Step 2: Add Notification as a Custom Connector in Claude #
In this process, you will learn more about how to add a custom connector in Claude.
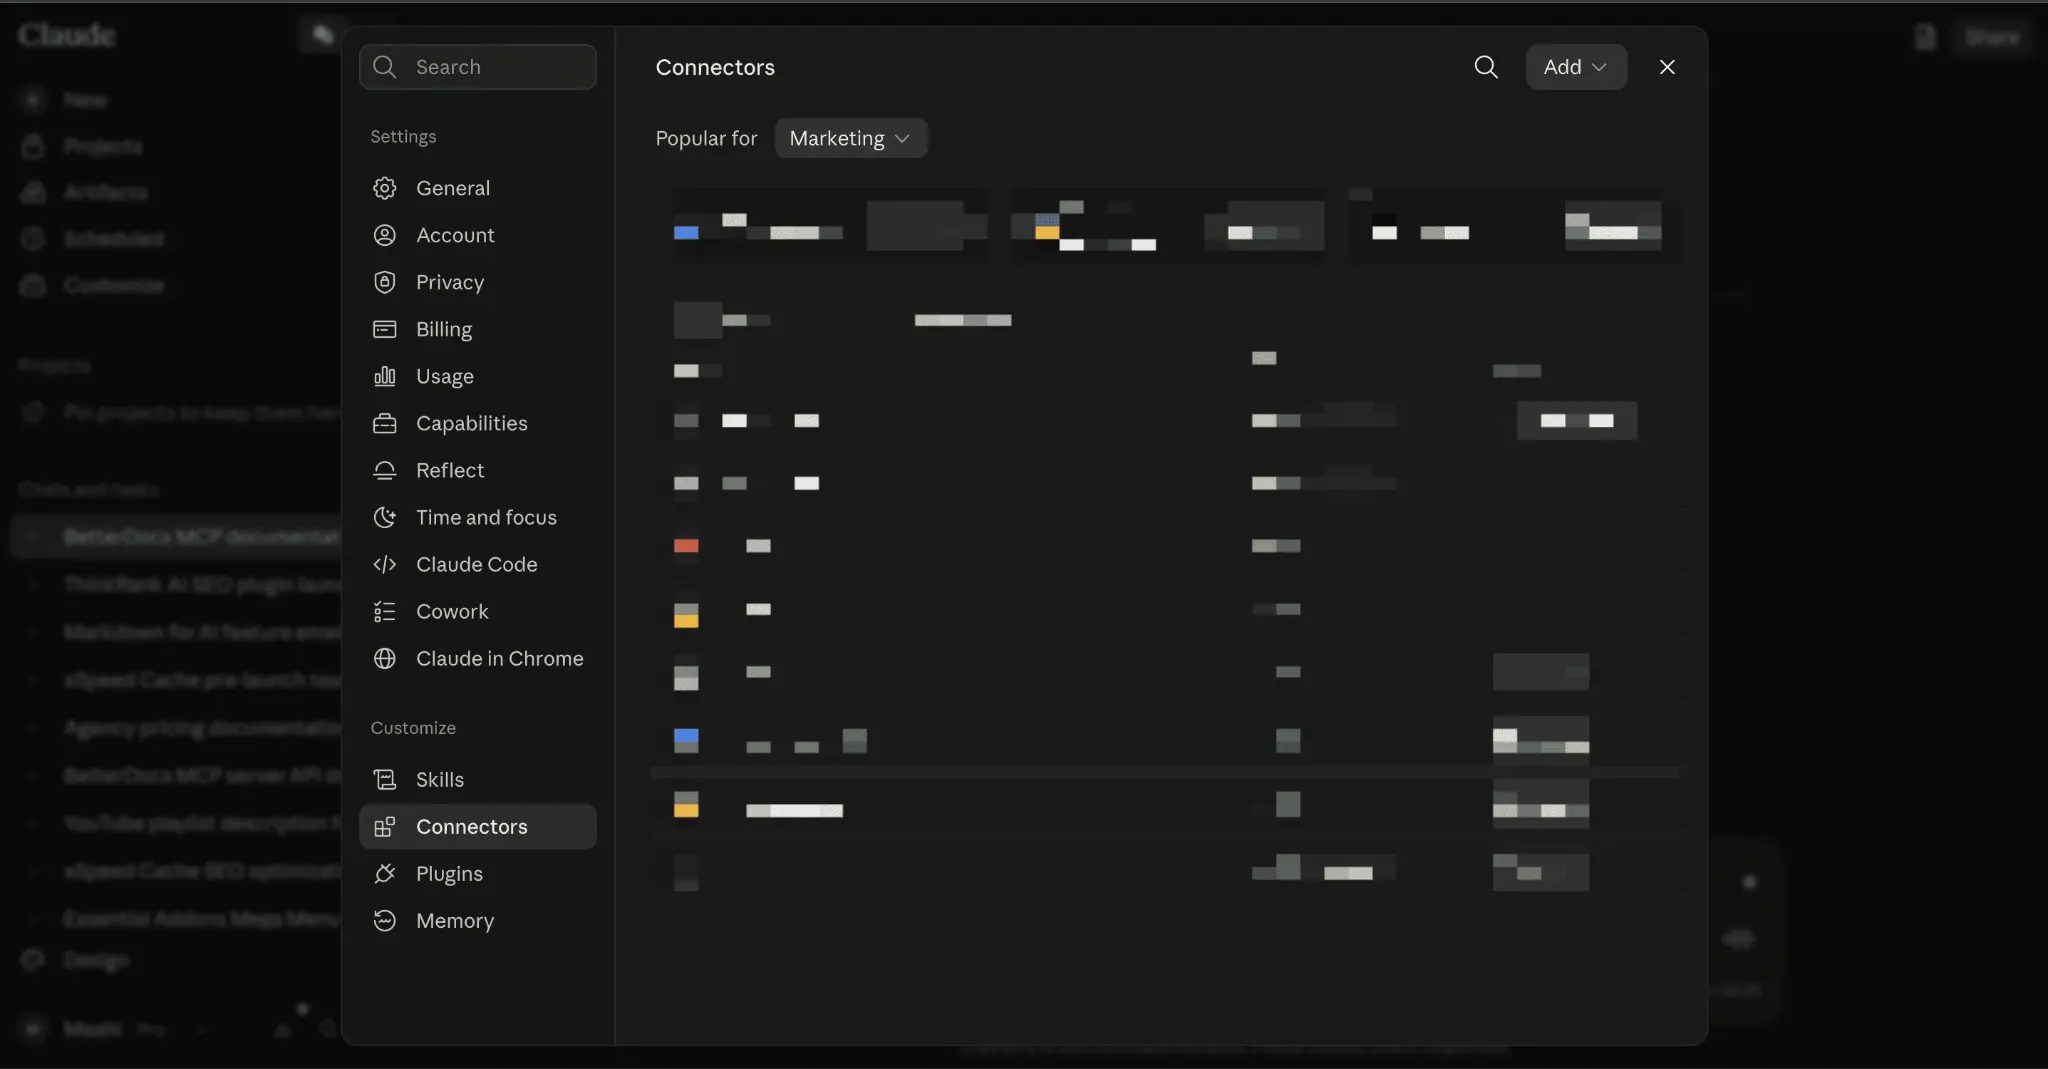
Open the Connectors Menu #
In Claude, click your profile at the bottom left, then go to समायोजन → Connectors.
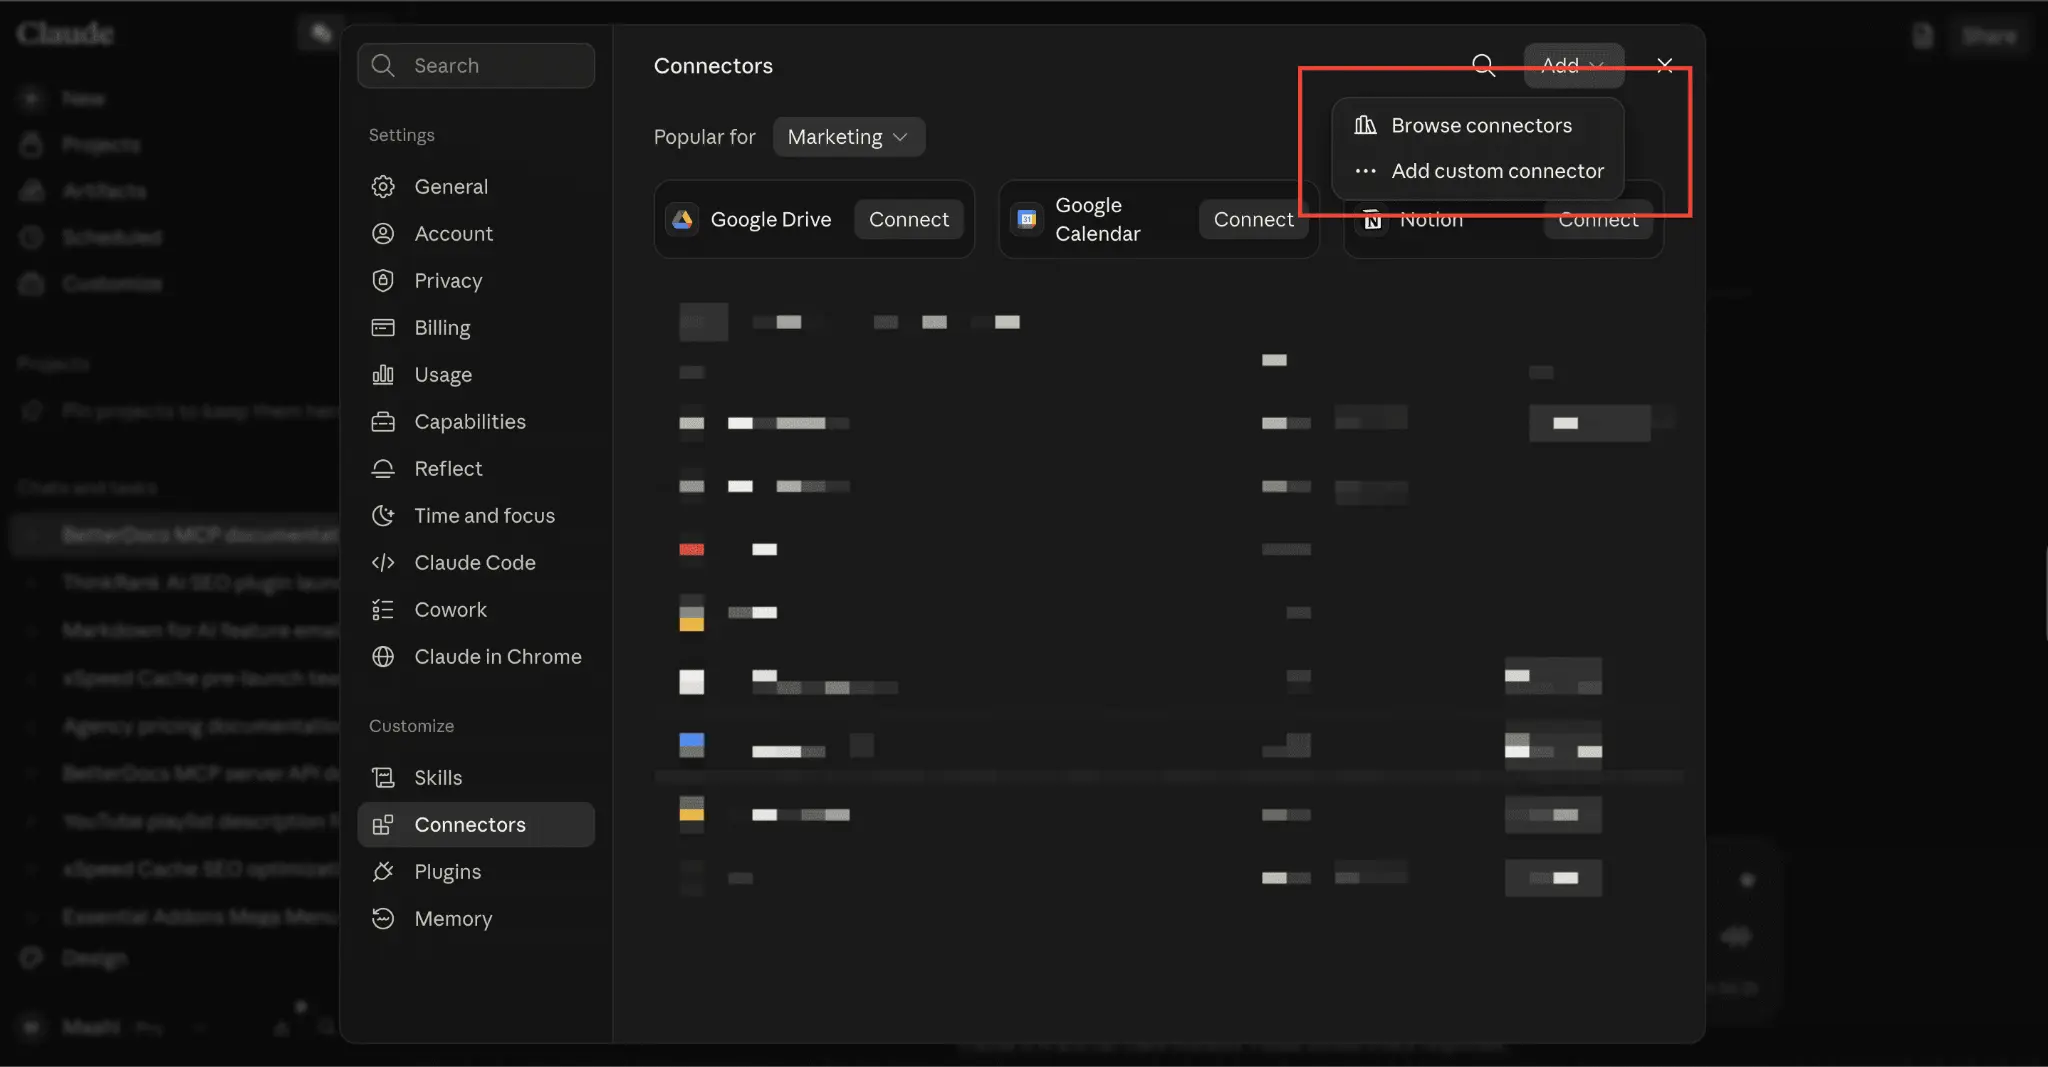
Add a Custom Connector #
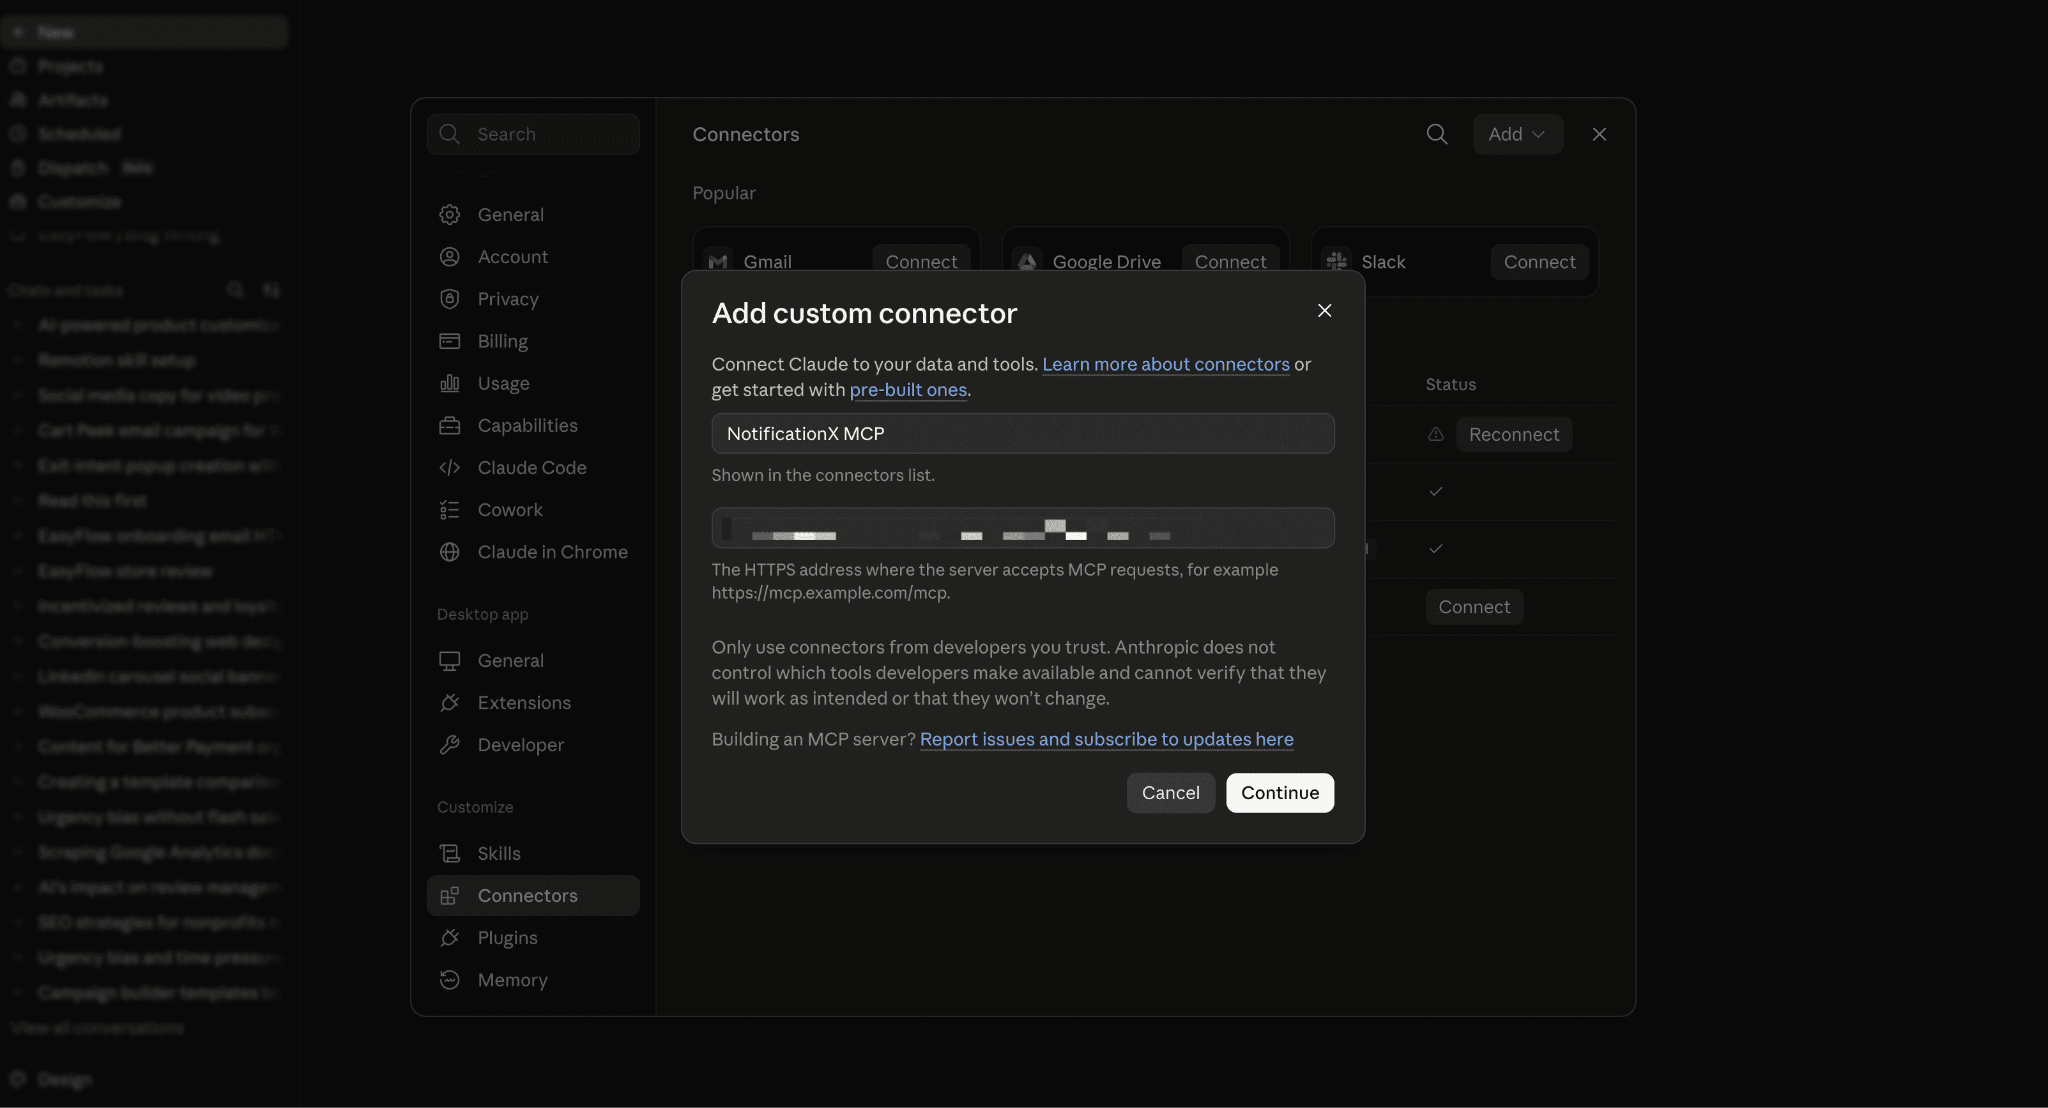
Click ‘Add Custom Connector’. A dialog box opens asking for your connector’s details.
Enter the Connector Details #
First, enter a name, e.g., ‘NotificationX MCP’. After that, paste the connector URL you copied in Step 1 into the HTTPS address field. Click on ‘Continue’ for the Advanced settings.
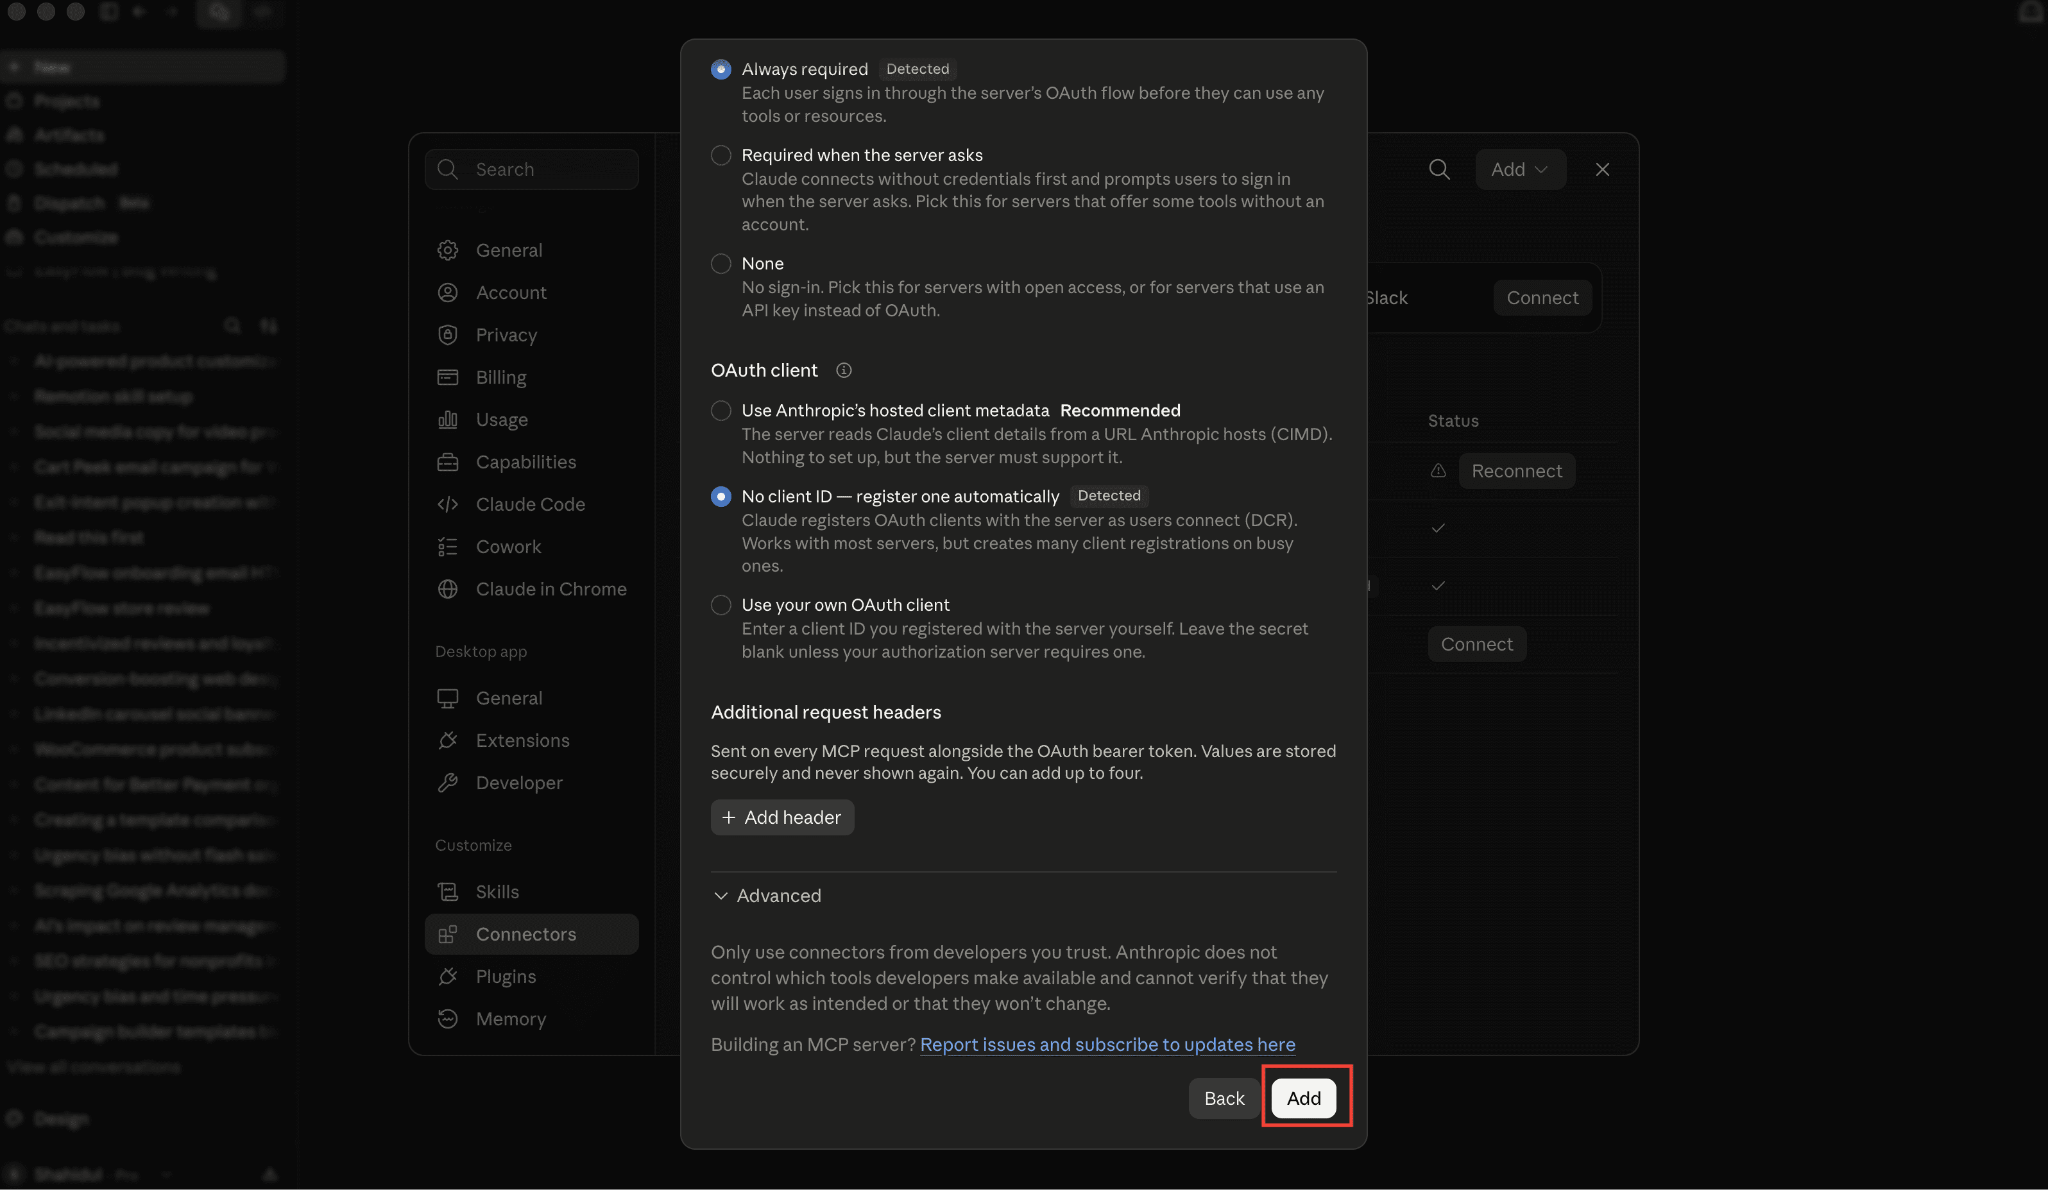
Leave the Advanced settings (OAuth Client ID/Secret) blank unless your setup requires them. Click ‘जोड़ें'।
Step 3: Approve the Connection #
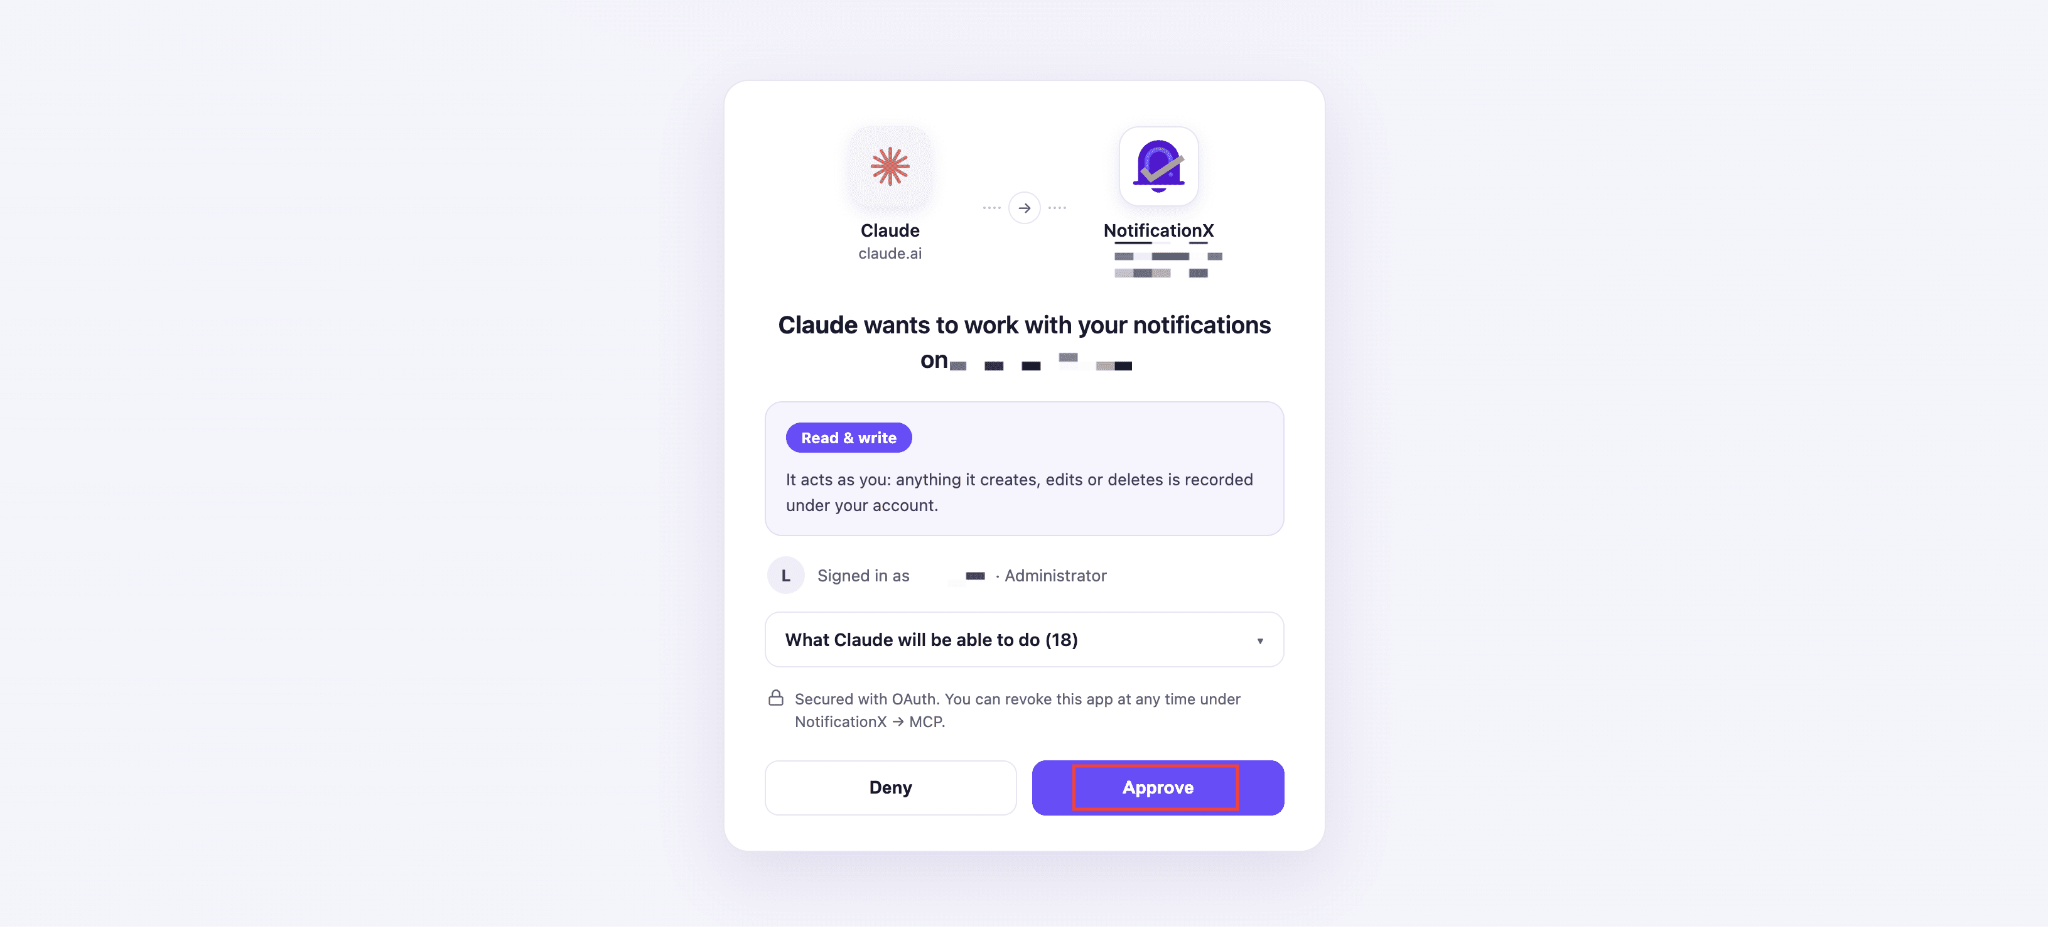
Claude will prompt you to sign in and approve access. You’ll see a confirmation screen showing:
- The permission level (Read & write): Claude acts as your account, so anything it creates, edits, or deletes is recorded under your admin user
- A full list of what Claude will be able to do, including describe a notification type, export a notification, get analytics, create a notification, delete a notification, update a notification & more.
Review the list, then click ‘Approve'।
Step 4: Verify the Claude Connection #
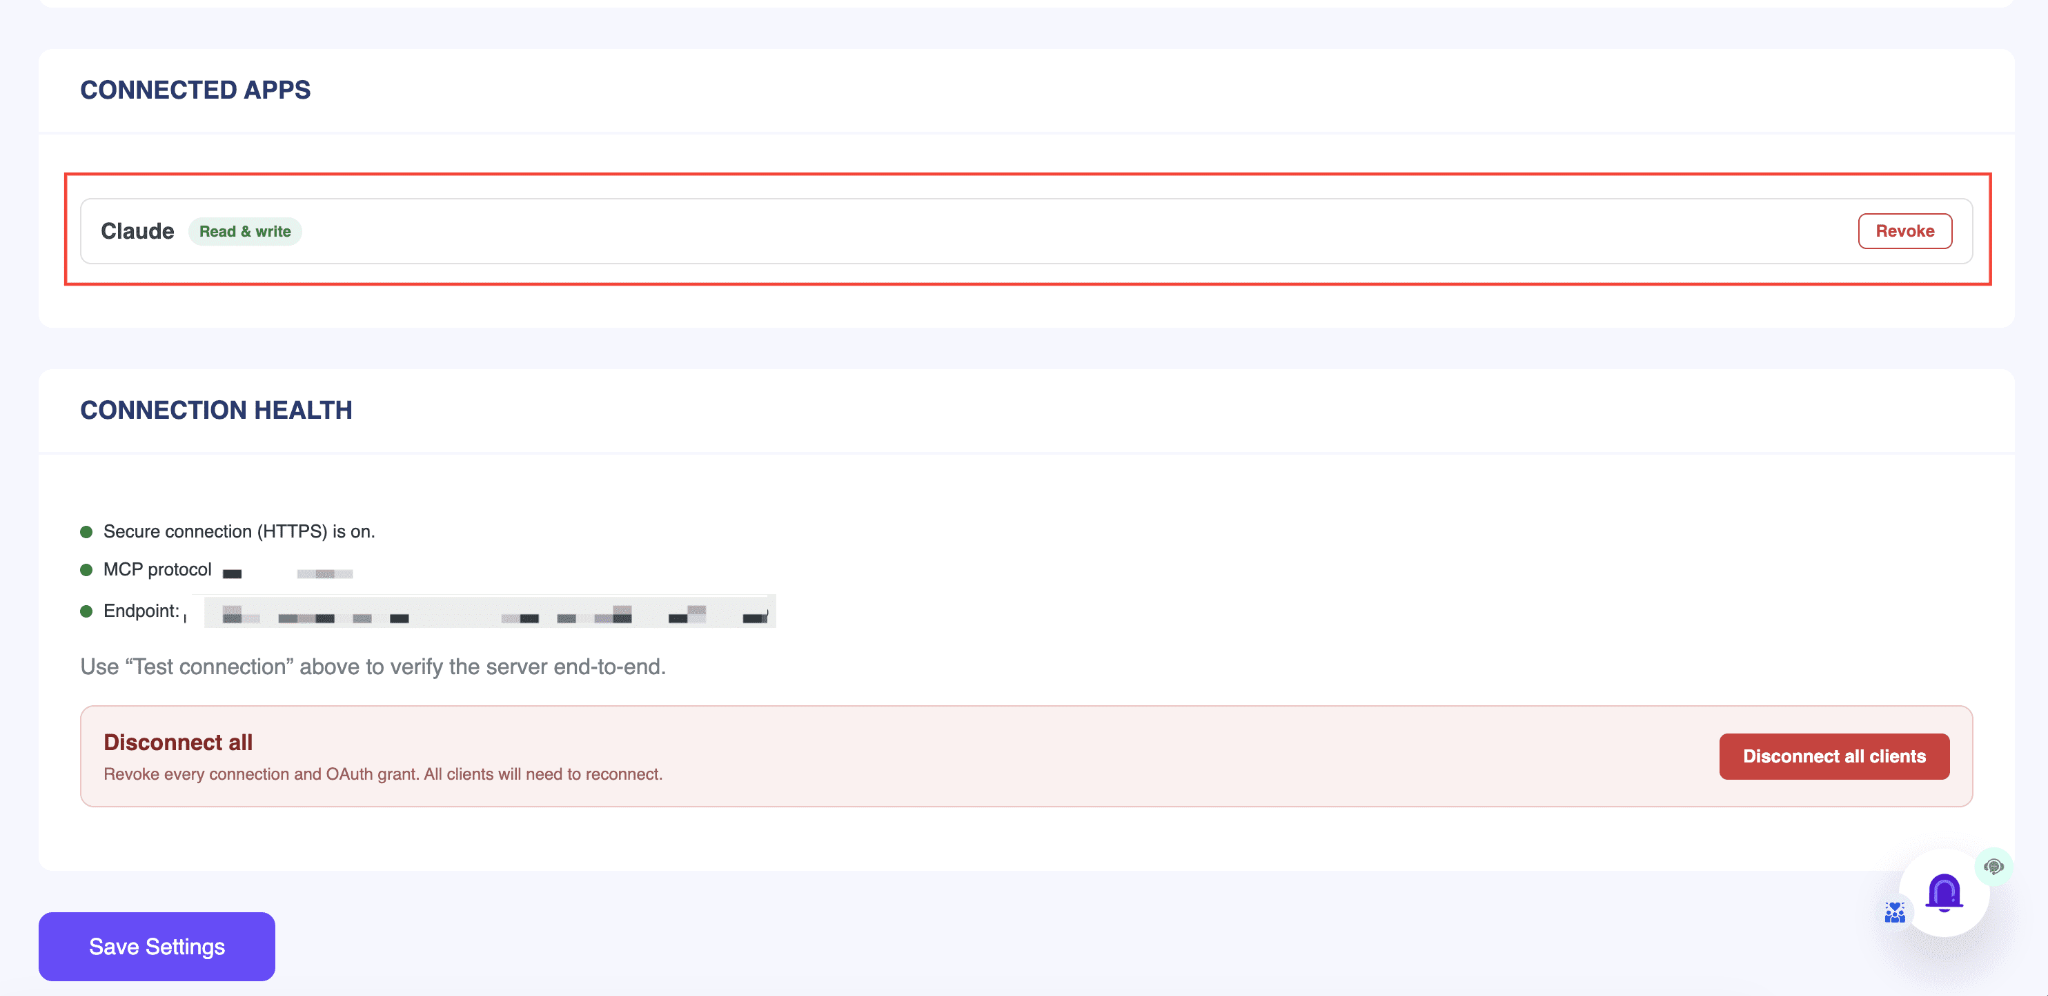
Back in wp-admin, go to NotificationX → समायोजन → MCP and check the ‘Connected apps’ table. You should see Claude listed with Read & write access and today’s date under Approved.
From here you can:
- Click ‘Refresh’ to update the connection status
- Click ‘Revoke’ to disconnect Claude at any time
Step 5: Start Creating Notifications Using Claude #
You can now ask Claude to work with your website notification directly in chat. For example, ask Claude to create a sales notification on the details you provide.
Create a Sales type notification and publish it. Theme: any. Display: image = gravatar, position bottom_right. Timing: delay_before 2, display_for 3,delay_between 4, looping, show everywhere
When Claude calls a NotificationX tool for the first time, you will see a permission prompt.
- Choose ‘Allow once’ to approve just that single action
- Choose ‘Always allow’ to skip this prompt for future NotificationX actions in that chat
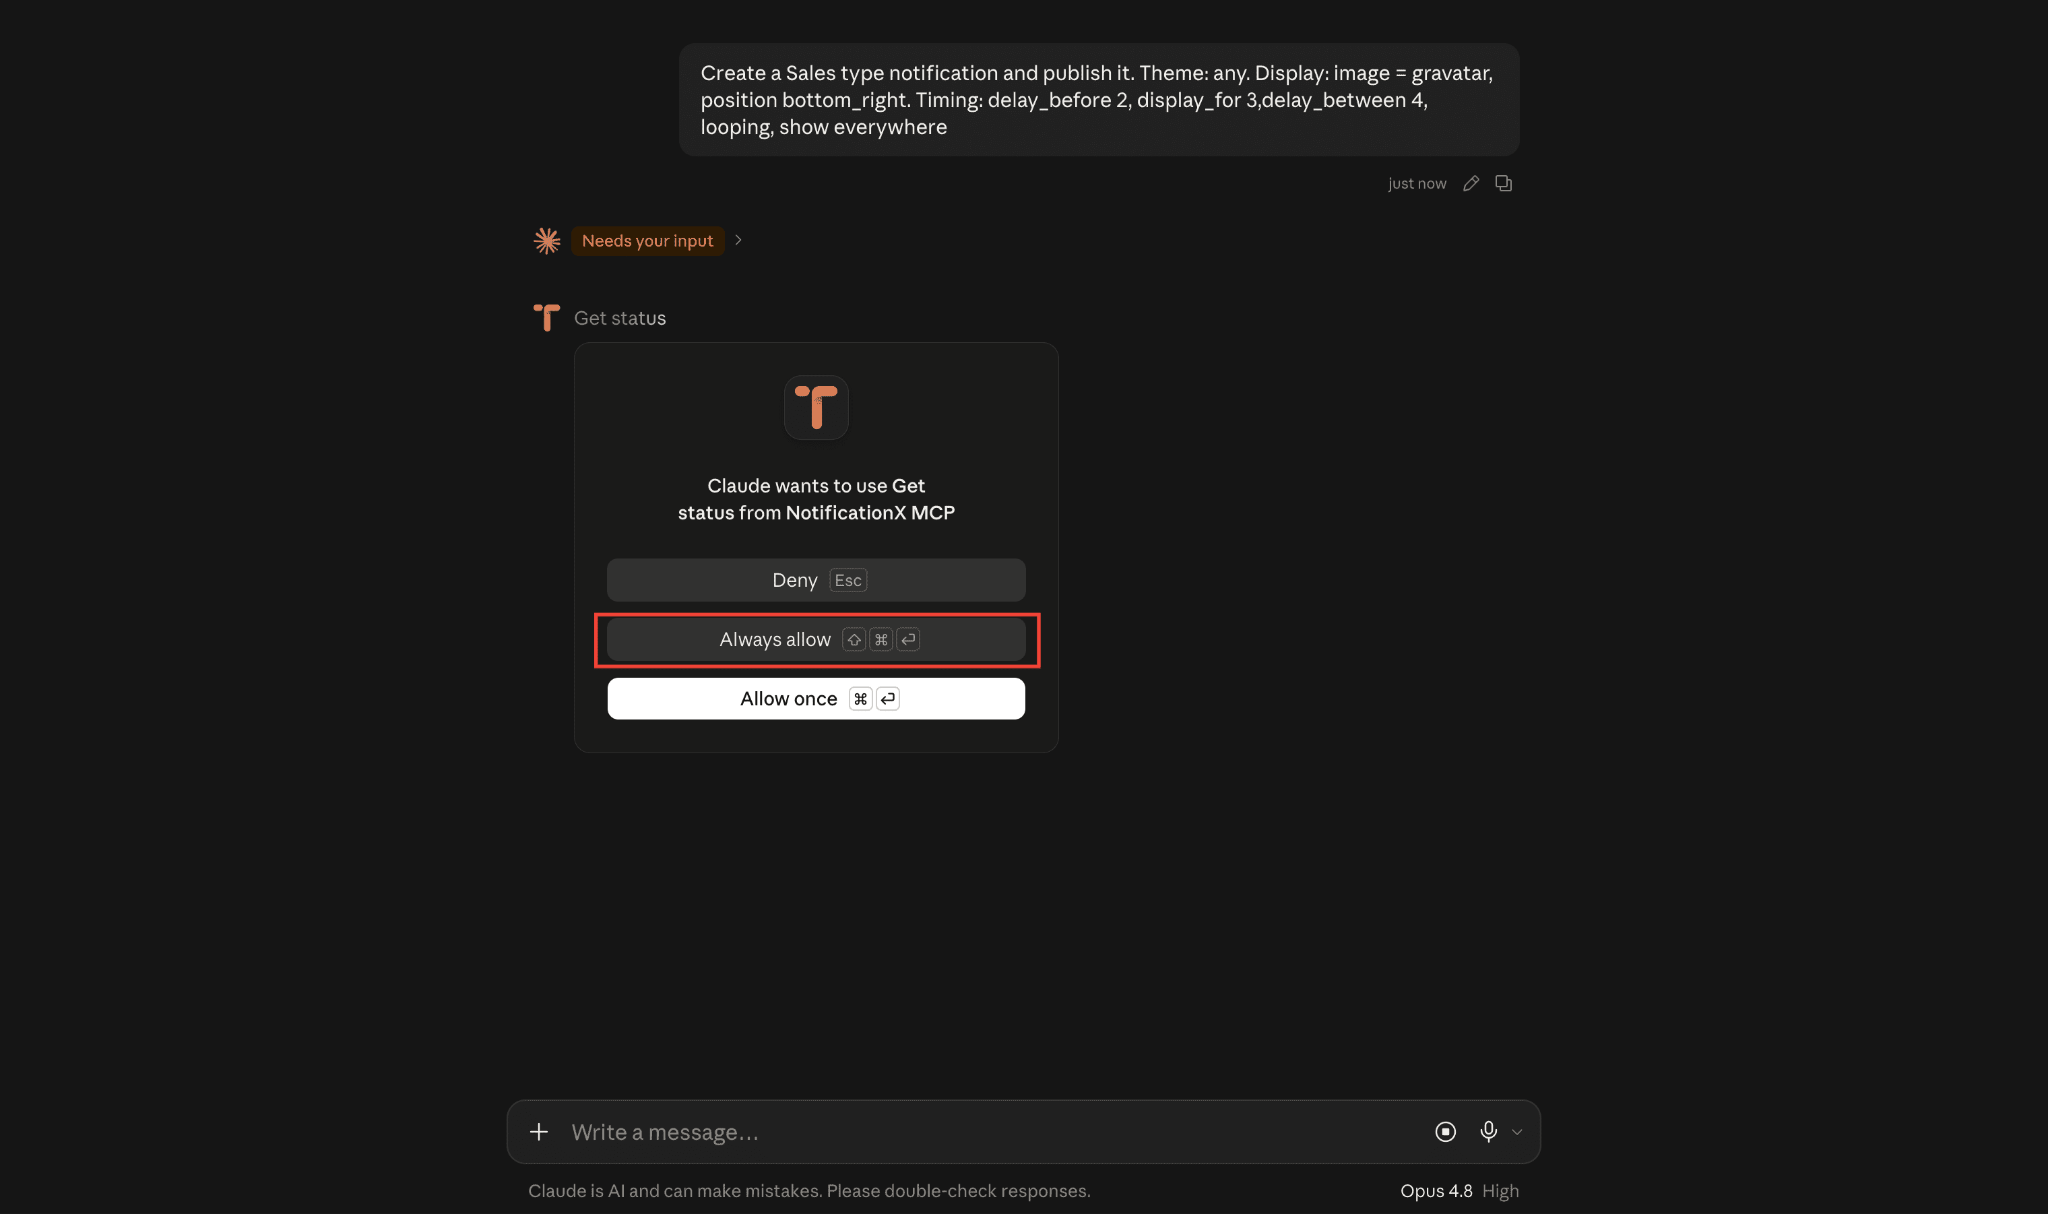
This is how easily you can use MCP in NotificationX, from setup to execution, all in just a few clicks.
यदि आप किसी भी मुद्दे का सामना करते हैं, तो आप हमसे संपर्क कर सकते हैं टीम का समर्थन.
 English
  Arabic
  Indonesian
  Spanish
  Portuguese
  German
  Dutch
Dutch  Russian
  Hindi
Hindi  French
  Japanese
  Chinese
  Vietnamese
  Malay
Malay