
NotificationX now lets you display a Cart Peek notification on your website, giving visitors a glance at what’s already sitting in their shopping cart, right when they need a nudge to complete the purchase. Instead of letting shoppers forget about the items they’ve added, Cart Peek keeps their cart top of mind with a subtle, well-timed preview that links straight to checkout.
With this notification type, you can reduce cart abandonment, remind potential buyers of the products they were interested in and gently guide them back toward completing their order. And all without interrupting their browsing experience.
Let’s see how to create a Cart Peek notification using NotificationX.
Note: To use this PRO feature, make sure you have installed and activated NotificationX Free & PRO on your WordPress website before getting started.
How to Create a Cart Peek Notification in NotificationX #
Follow this step-by-step process to set up and display a Cart Peek notification on your website using NotificationX.
Langkah 1: Tambah Pemberitahuan Baharu #
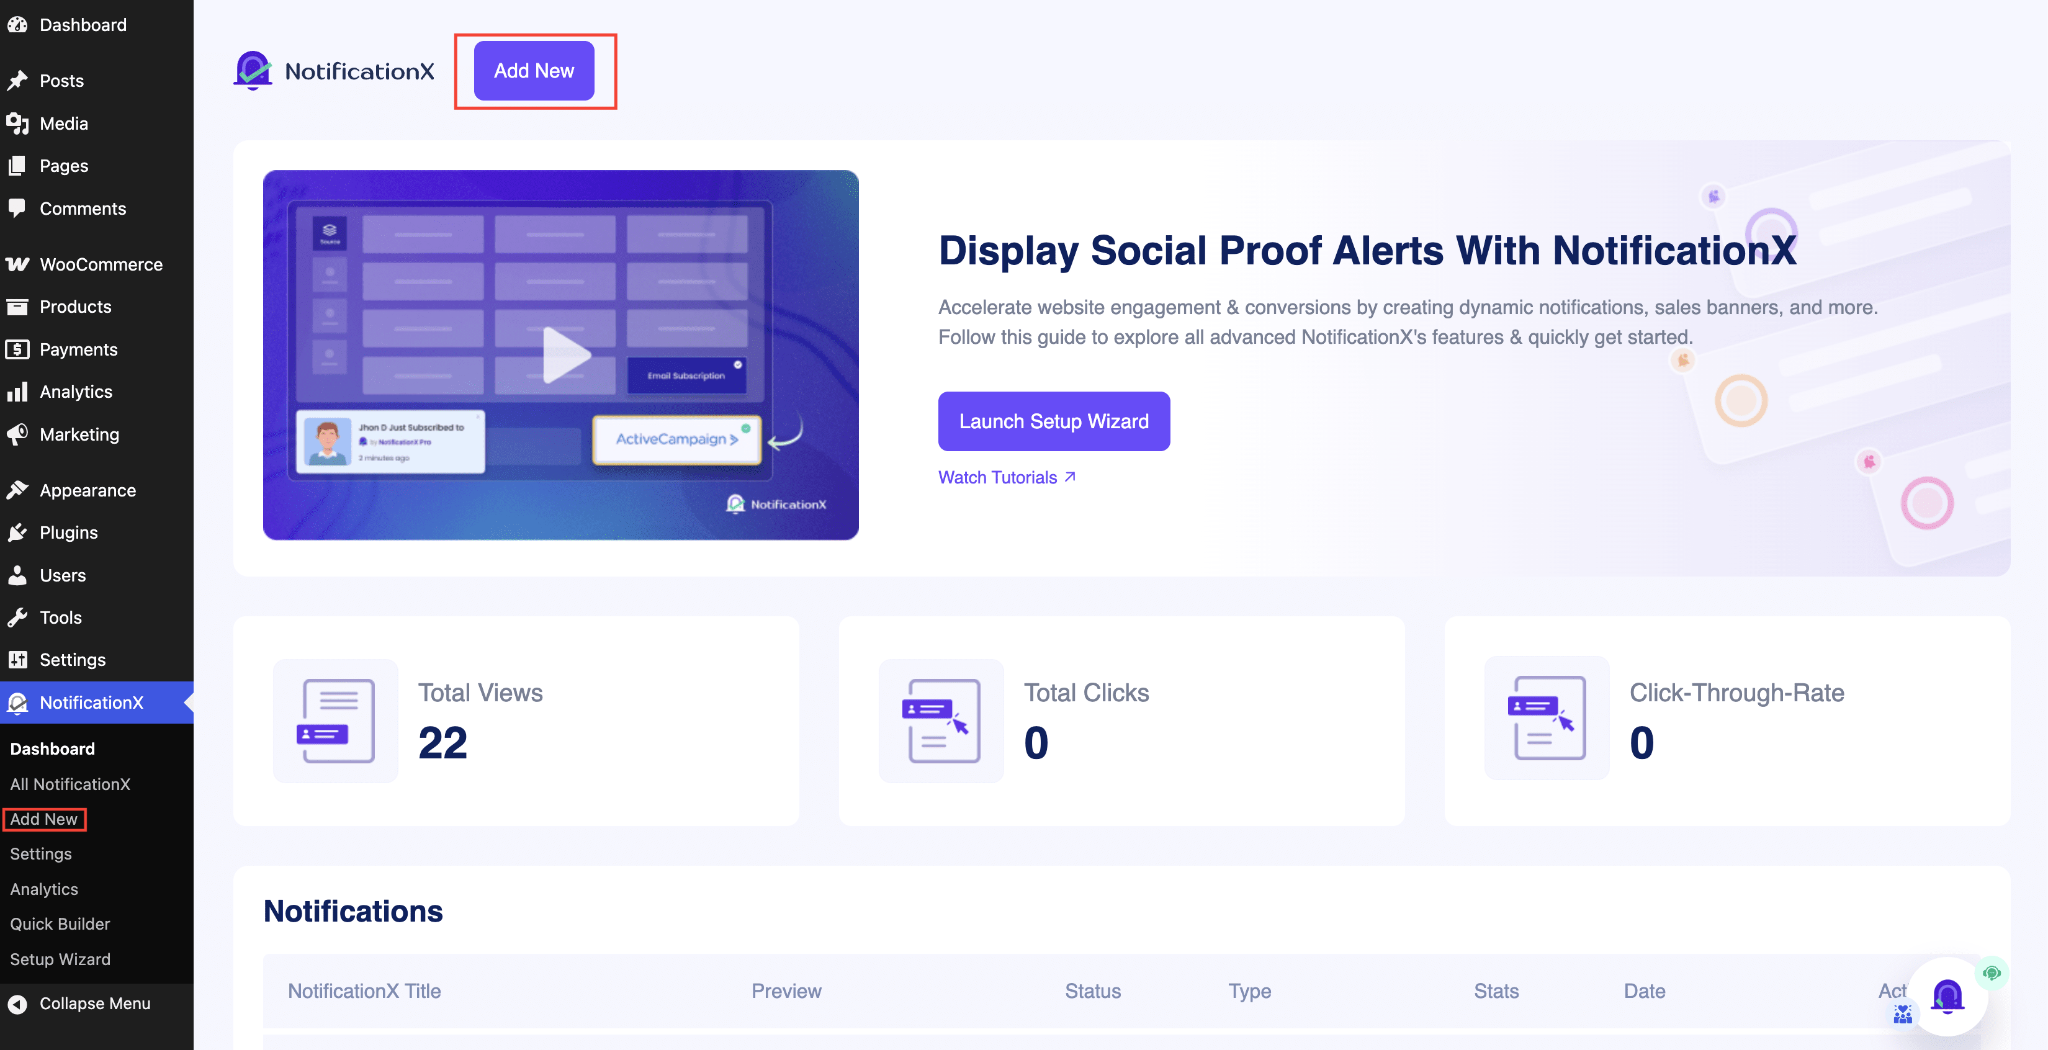
Pergi ke Papan Pemuka WordPress anda dan arahkan ke wp-admin -> NotificationX. Then, right at the top, click on ‘Tambah baru‘.
Step 2: Select Your Notification Type #
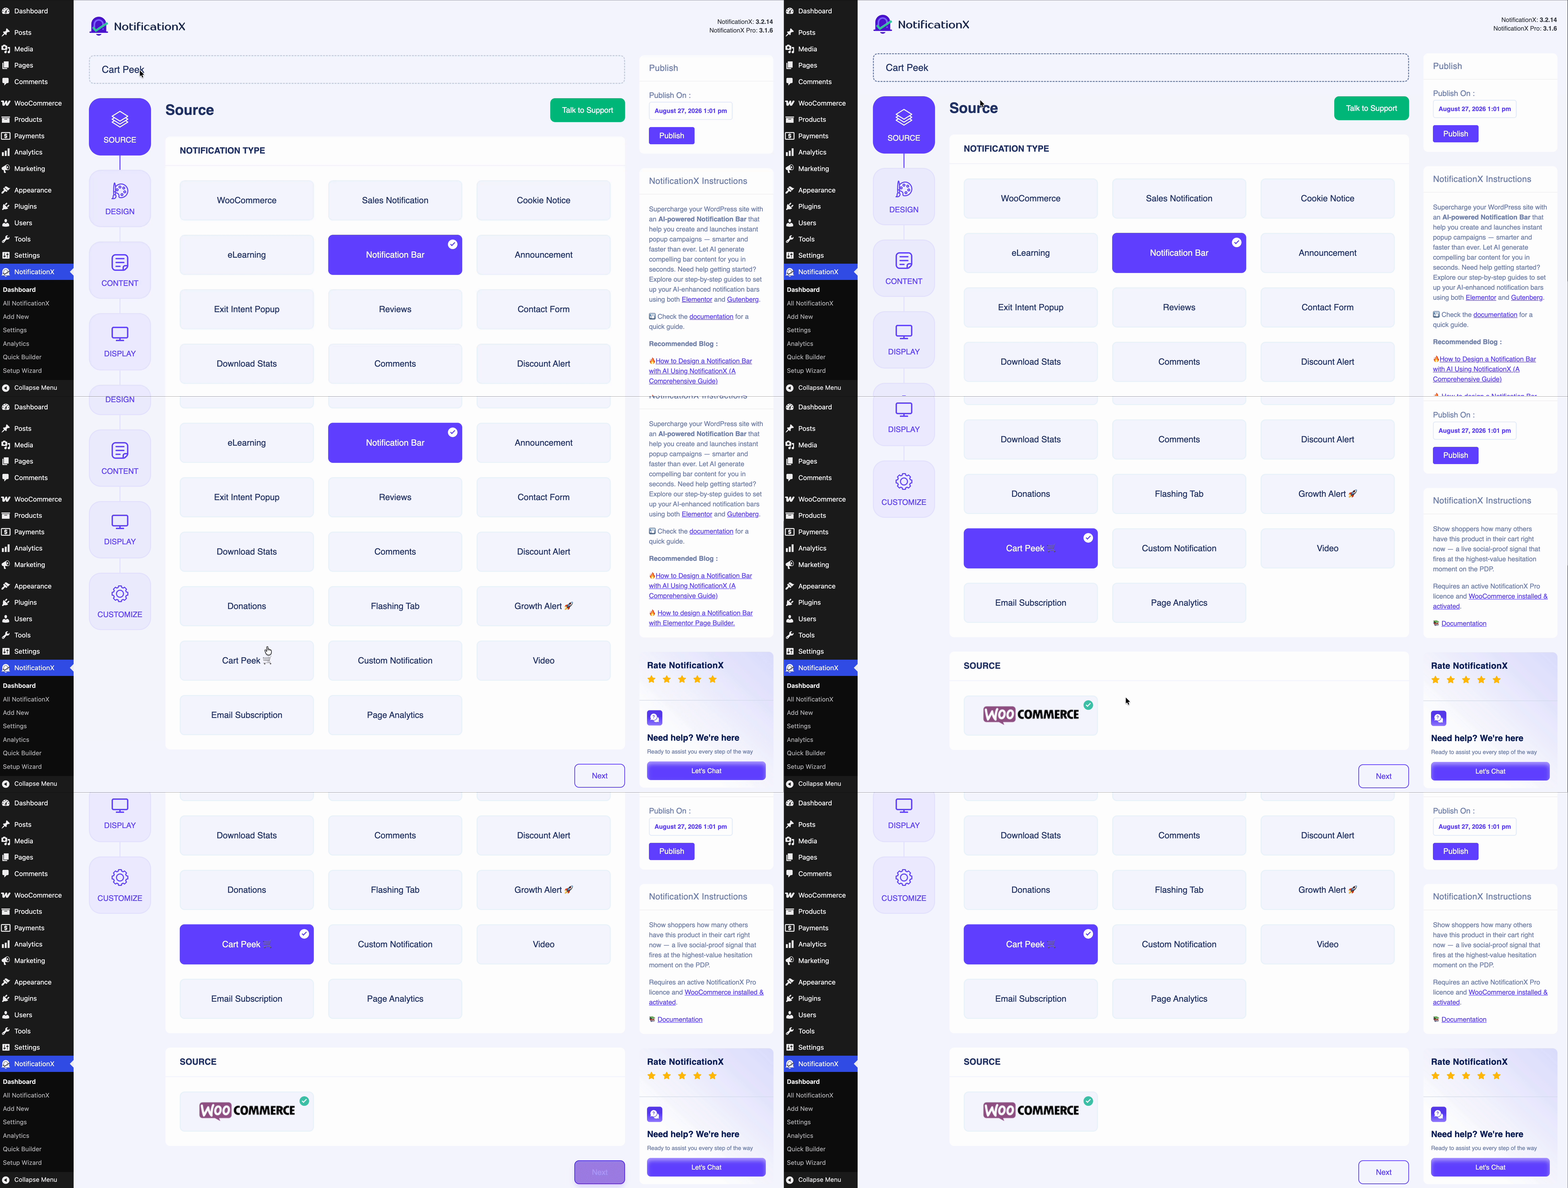
After you are done with Step 1, you will be redirected to the ‘Sumber‘ tab page of your NotificationX. You can also add a title here. From the options, select ‘Cart Peek‘ as your Source type.
Step 3: Configure the Cart Peek Design #
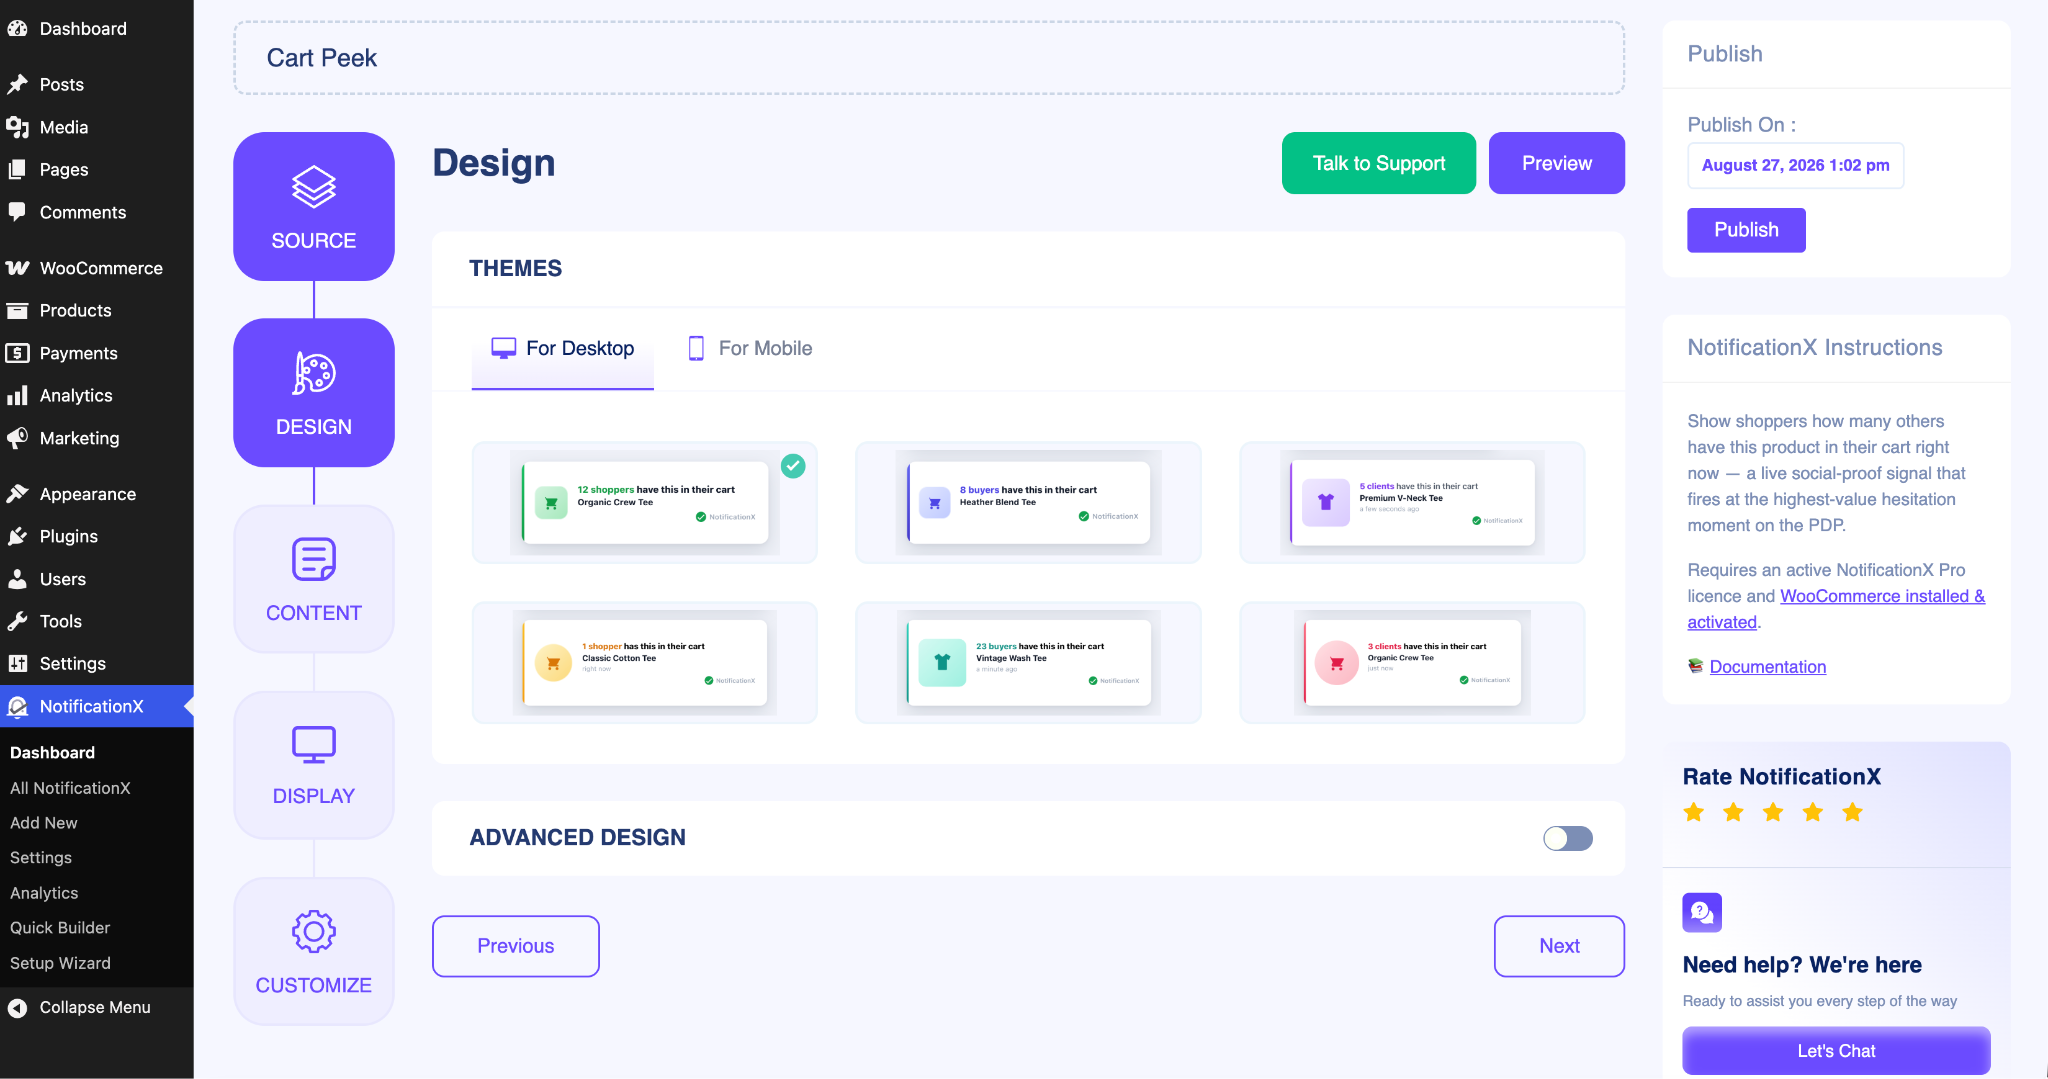
Head over to the ‘Reka bentuk‘ tab to set up how your Cart Peek notification looks. Here you can choose a ready-made theme or customize the appearance so it blends naturally with your store’s branding.
Enable the ‘Reka Bentuk Lanjutan‘ button to manually fine-tune the details. You can adjust the background color, text color, and layout, along with the typography, font size and weight.
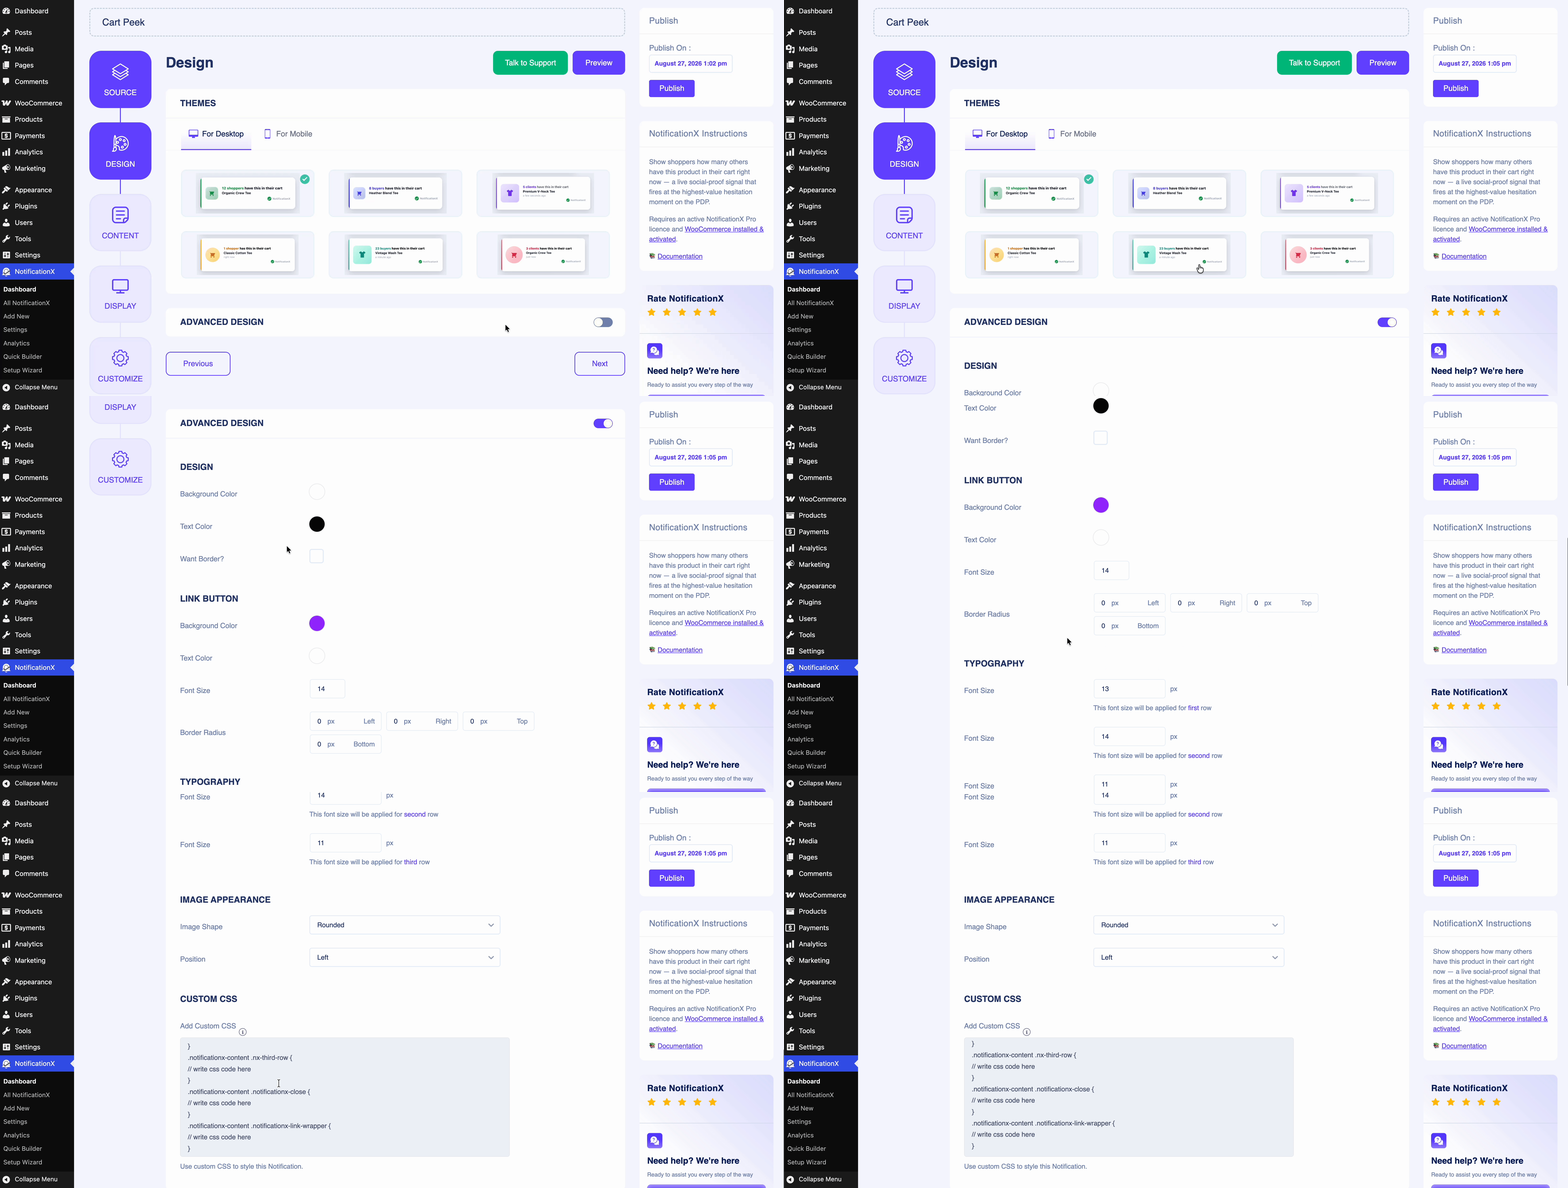
You can also customize the button by changing its color, font size, radius, padding, and width so the checkout call-to-action stands out.
Step 4: Customize the Content for Cart Peek #
After clicking the ‘Seterusnya‘ button, you will find the ‘Kandungan‘ tab. Here, you can review and edit the text shown in the Cart Peek notification — such as the headline, the message that appears alongside the cart items, and the button text that leads shoppers to checkout.
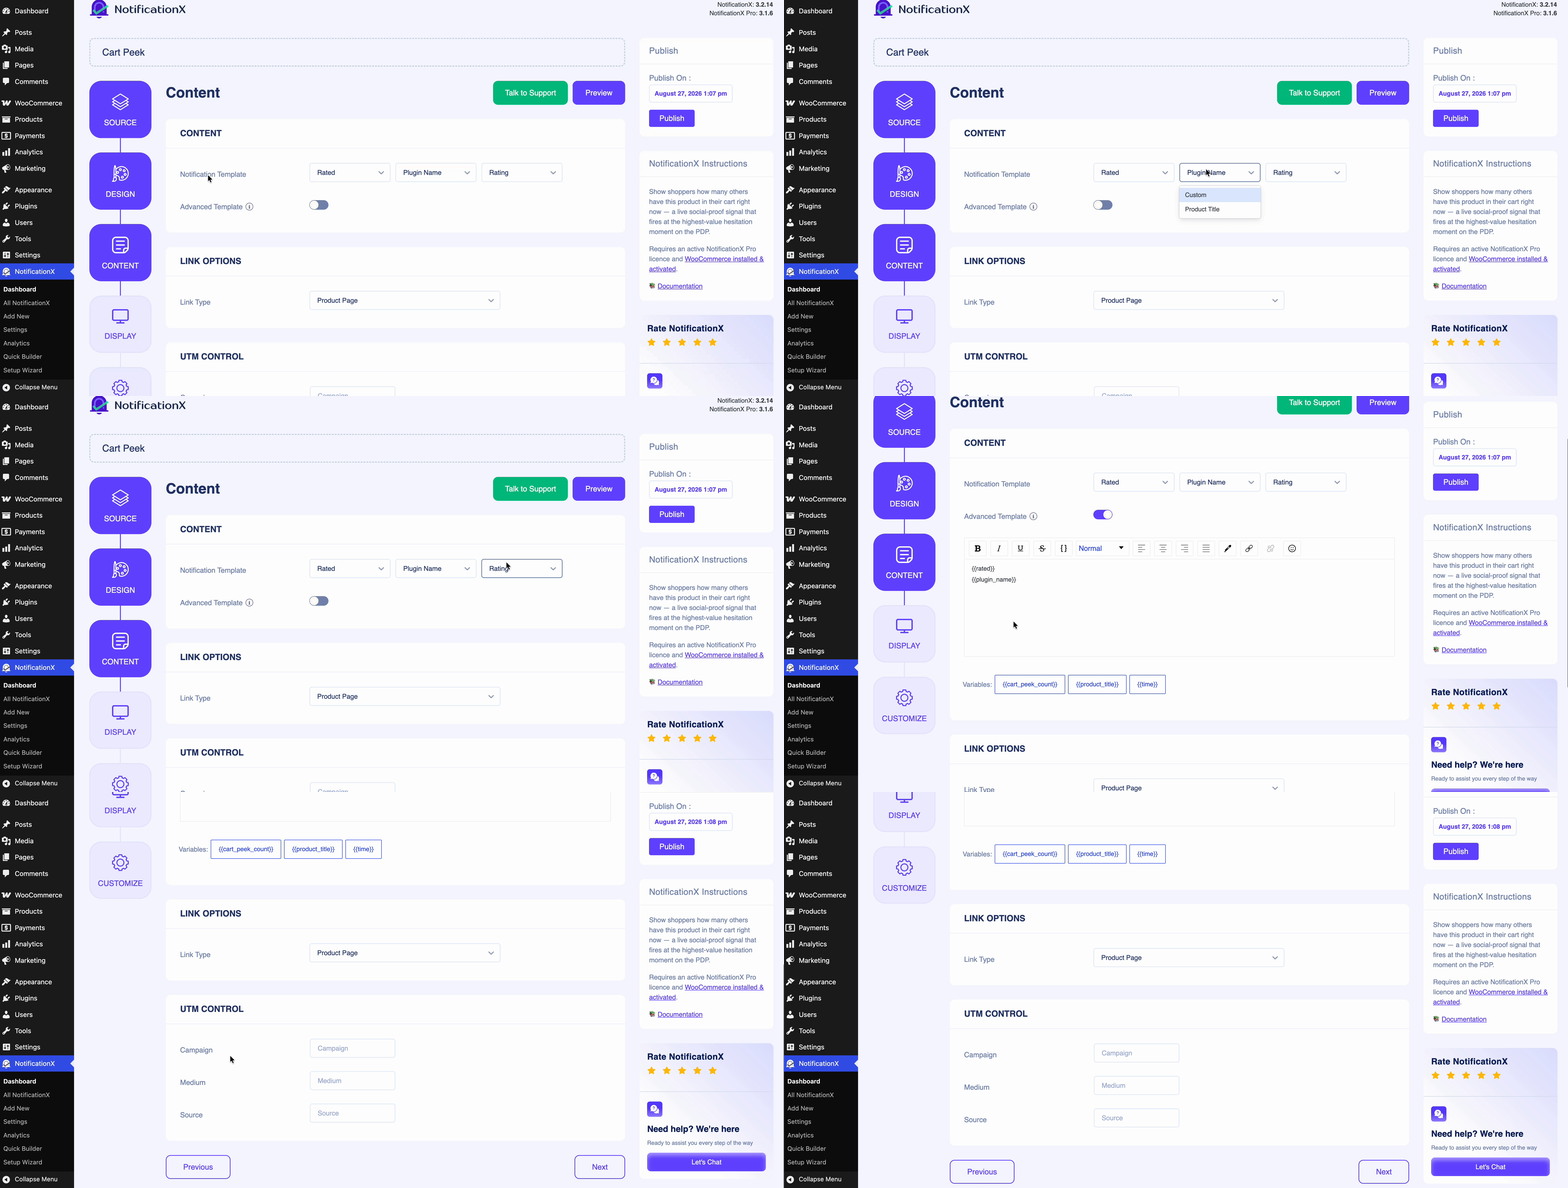
After the settings, click on the ‘Seterusnya‘ button to control the visibility of the Cart Peek notification.
Step 5: Control the Visibility #
Next, from the ‘Paparan‘ tab, select the visibility options for where you want to show or hide the Cart Peek notification on your website. You can also choose to whom you want to display this notification type.
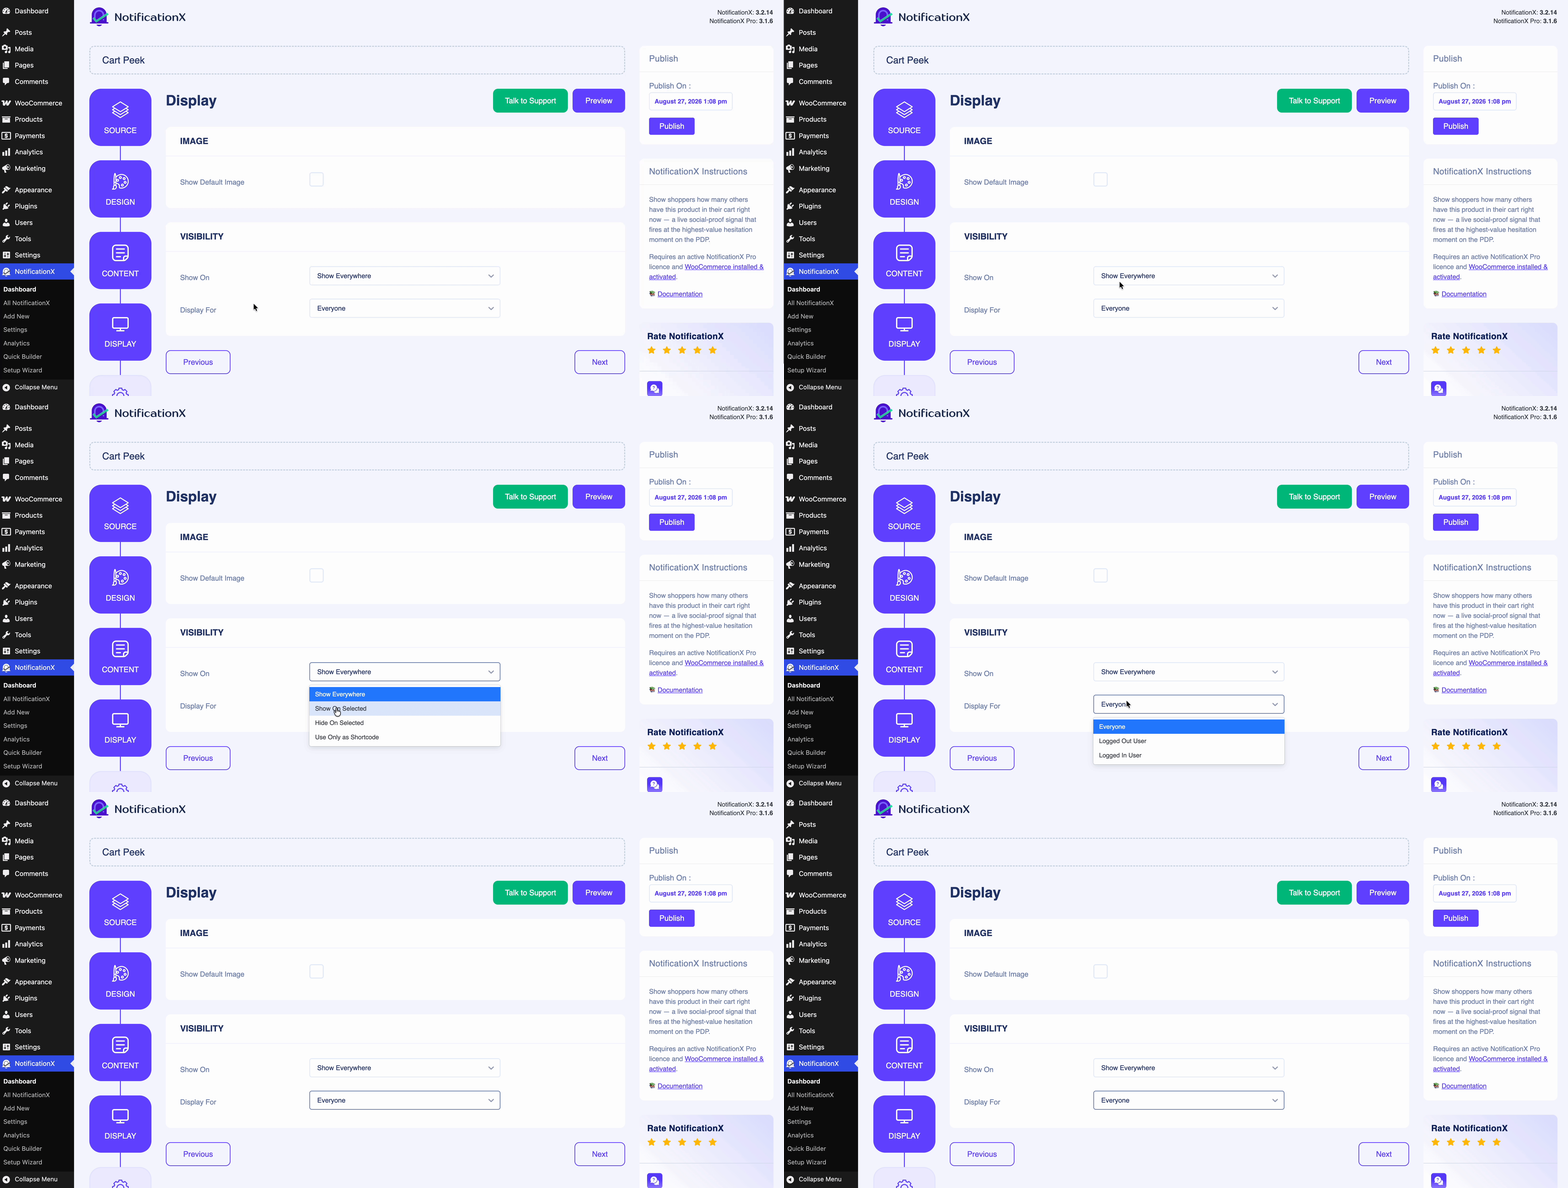
Step 6: Configure the Customization #
Next, under the ‘Sesuaikan‘ tab, you can choose the Penampilan of the Cart Peek notification — that is, which position on your website you want it to appear. You can also control the mobile visibility and set the Masa to add a delay before the notification is shown.
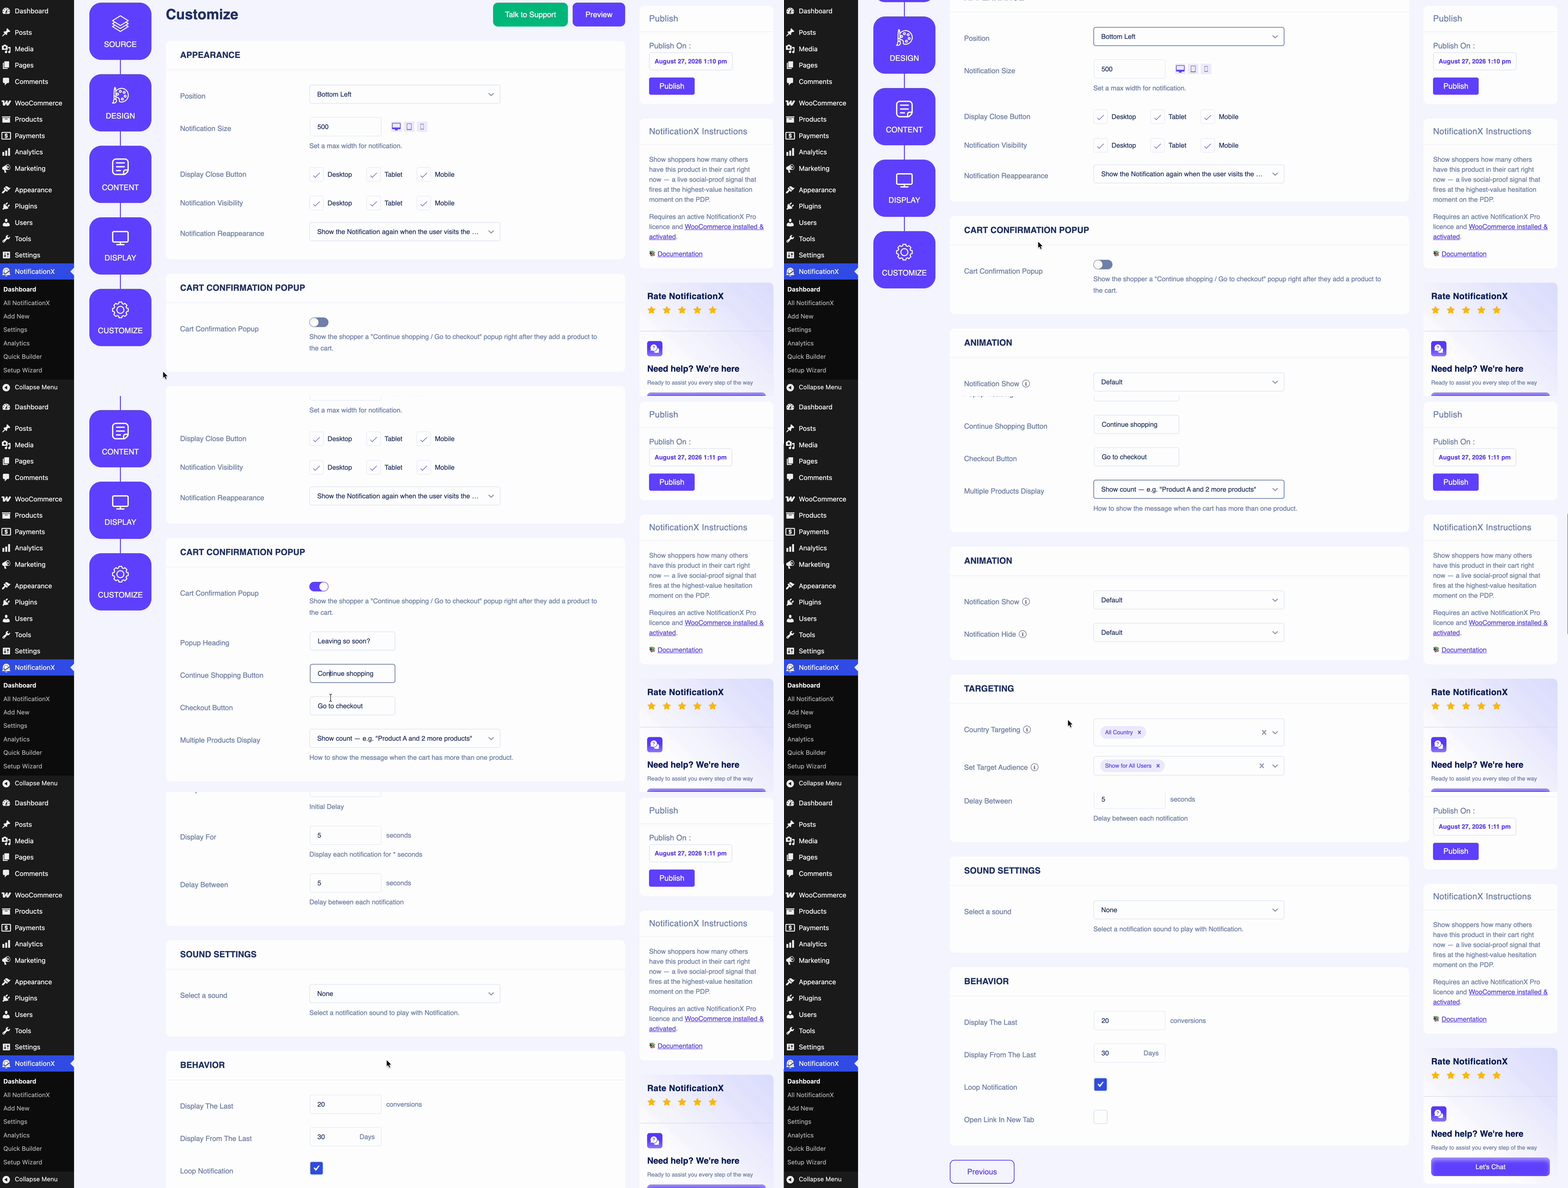
From this tab, you can enable the cart confirmation popup option and edit the content as you like. It’ll popup the moment shoppers go to leave after adding something to the cart.
Once everything looks right, click on the ‘Menerbitkan‘ button to make the Cart Peek notification live on your website.
Hasil Akhir #
By following these steps, this is how your Cart Peek notification will appear on your WordPress website, gently reminding visitors of the items waiting in their cart & make them pause before leaving the tab.
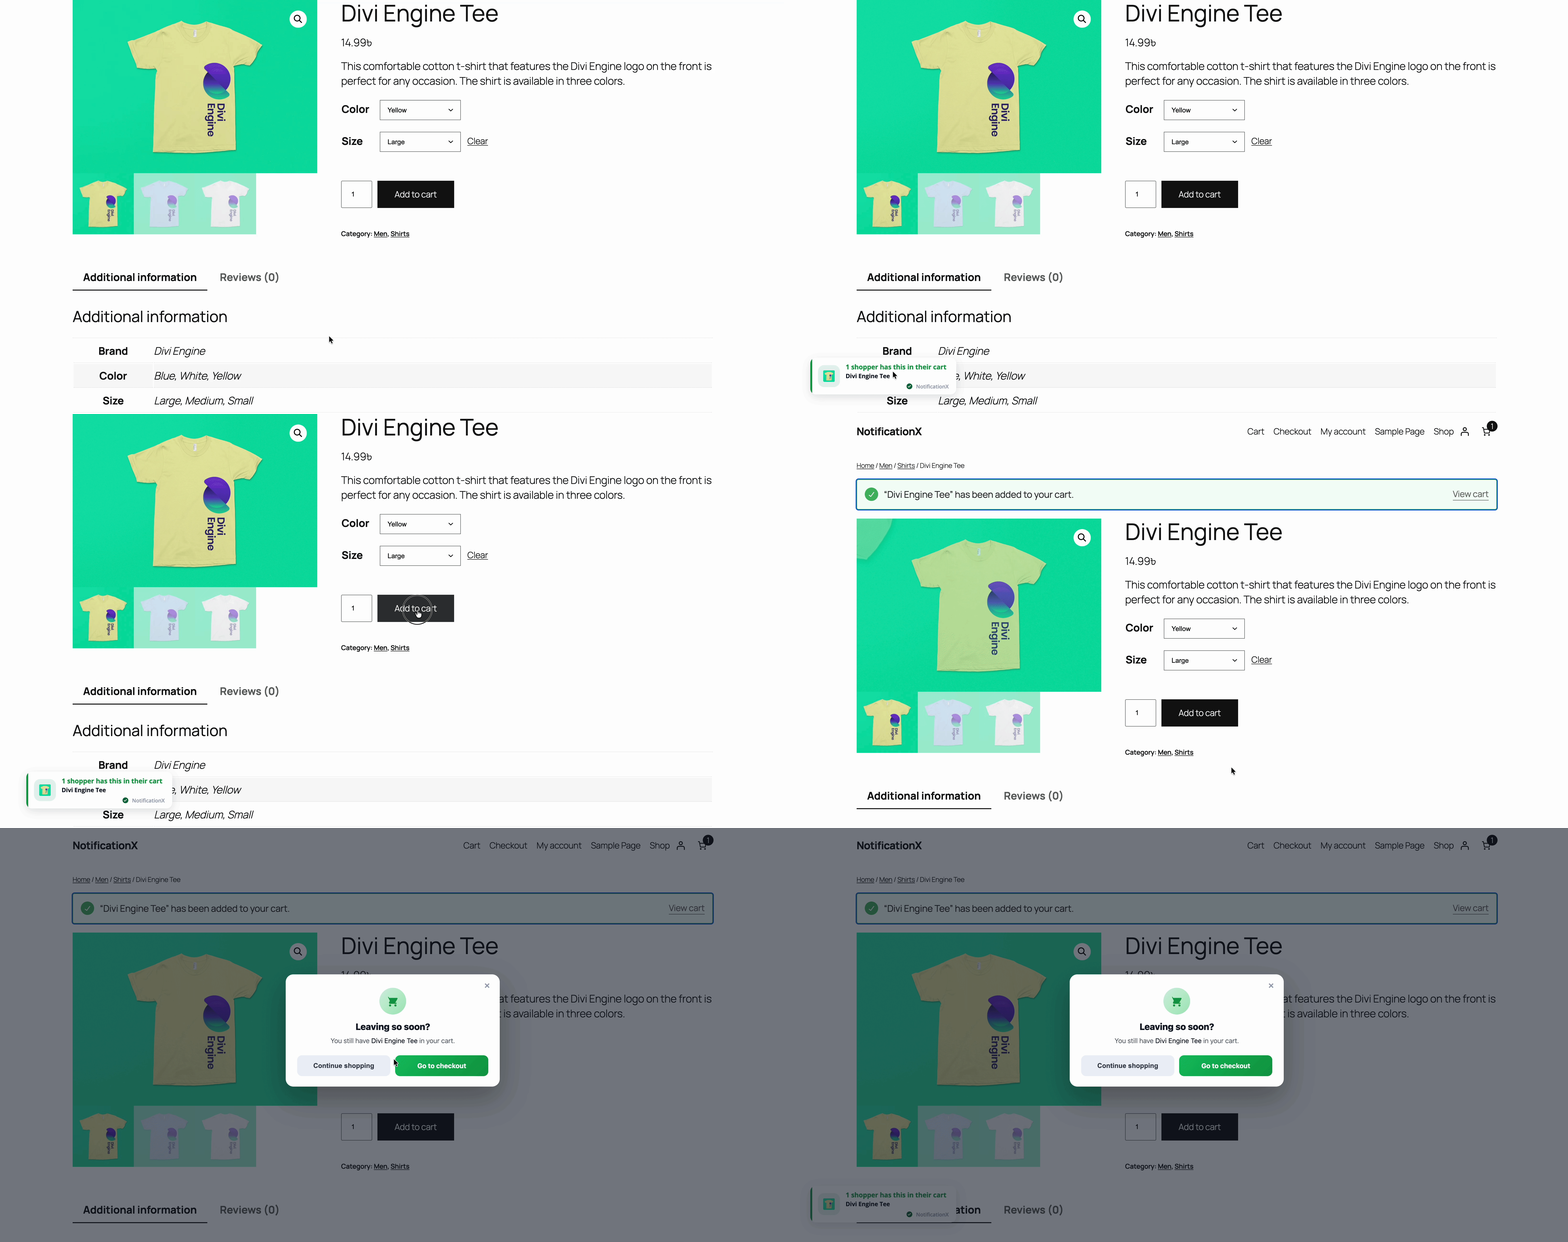
This is how easily you can create a Cart Peek notification using NotificationX, from setup to execution, all in just a few clicks.
Sekiranya anda menghadapi sebarang masalah, anda boleh menghubungi kami Pasukan penyokong.
 English
  Arabic
  Indonesian
  Spanish
  Portuguese
  German
  Dutch
Dutch  Russian
  Hindi
Hindi  French
  Japanese
  Chinese
  Vietnamese
  Malay
Malay