Dengan NotificationX PRO, you get the chance to show your sales notification in Shopify store. In this doc, you will get a thorough step-by-step guide on how to show sales notification in Shopify store. But before that, you will need a Zapier account, a live WordPress site, dan Shopify store.
You have to-
- Create sales notifications using NotificationX
- Create Zap and connect with Shopify
- Connect Zapier with the WordPress site
- Showcase Shopify sales alert on the Shopify store
Follow the step-by-step guide to configure Zapier notification alerts in WordPress and Shopify stores using NotificationX.
Segment 1- Setup Sales Notification In NotificationX #
To draw visitors’ attention through a sales notification alert, you must create 'Pemberitahuan Penjualan' using NotificationX to display the most recent product purchases made by consumers as a popup notification on your website. You can easily create an engaging Sales Notification on your WordPress website with PemberitahuanX to keep visitors interested.
Step 1: Add New Notification Alert #
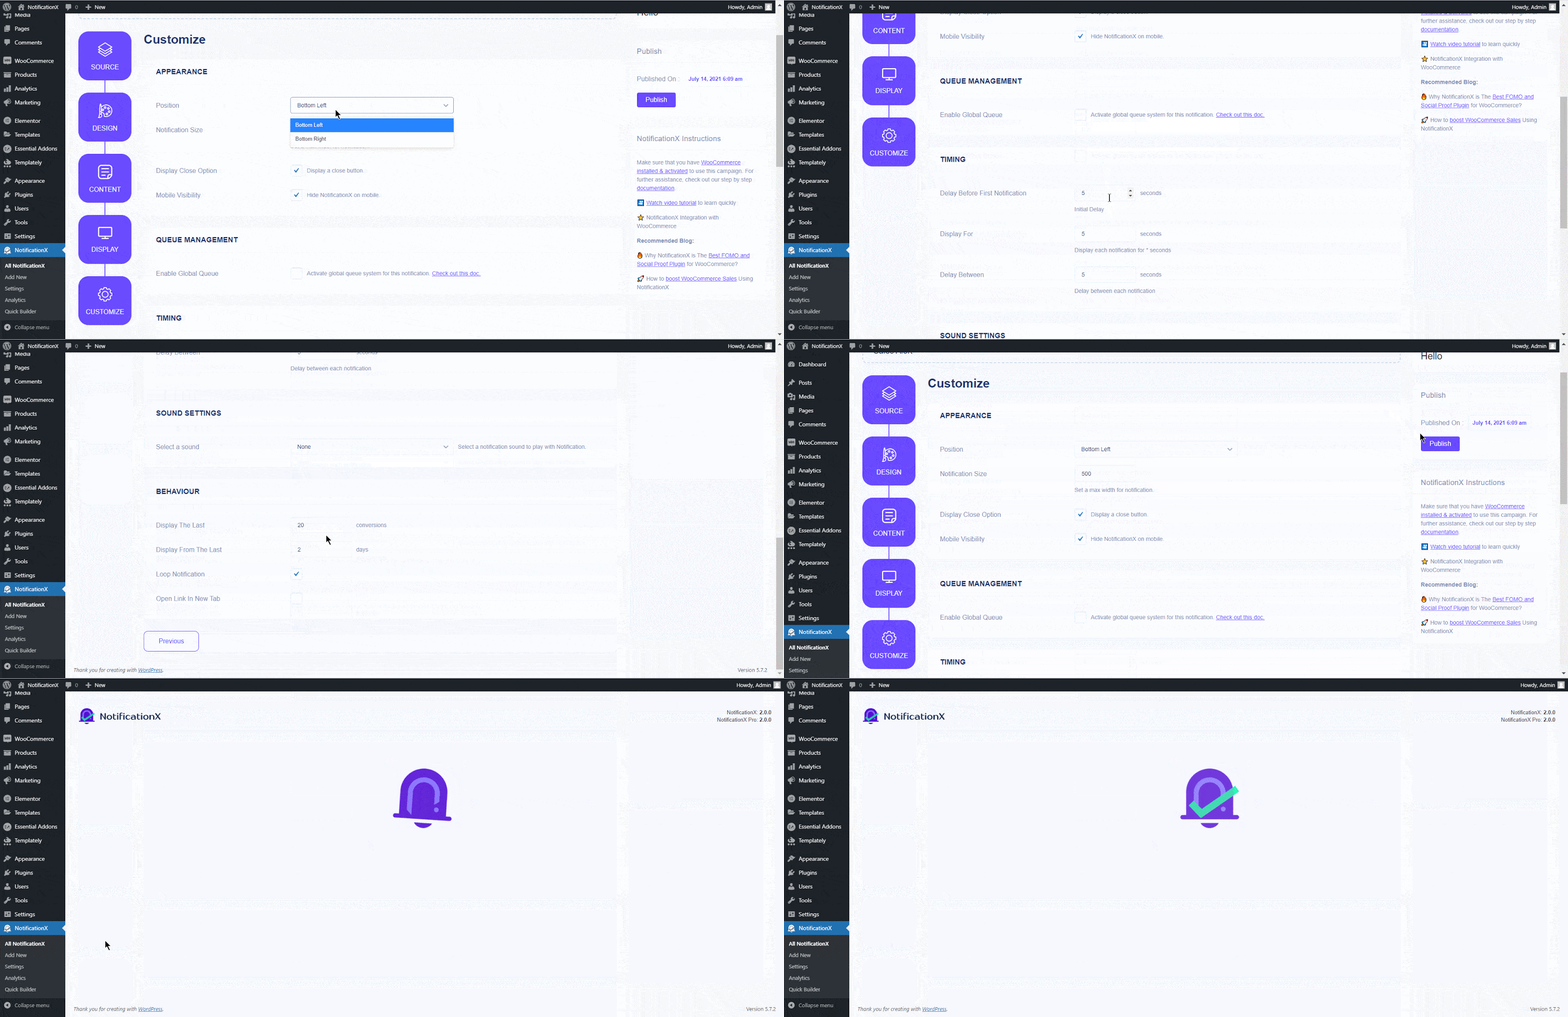
Buka Dashboard WordPress Anda dan arahkan ke wp-admin -> NotificationX -> Semua NotificationX. Lalu tepat di atas, klik ‘Add New’.
Step 2: Pick Zapier As A Source #
Setelah Anda selesai dengan langkah 1, Anda akan diarahkan ke 'Sumber' Tab page of your PemberitahuanX. You can also put a title. Select ‘Pemberitahuan Penjualan’ as your Notification type. Then, simply pick ‘Zapier’ sebagai Sumber Anda. Setelah itu, lanjutkan & klik pada 'Lanjut' tombol.
Step 3: Publish The Sales Notification #
Configure the sales notification, check out this doc. After you are done with all the steps, you can then publish the sales notification alert.
Segment 2- Configure Zapier Notification Alert For Shopify #
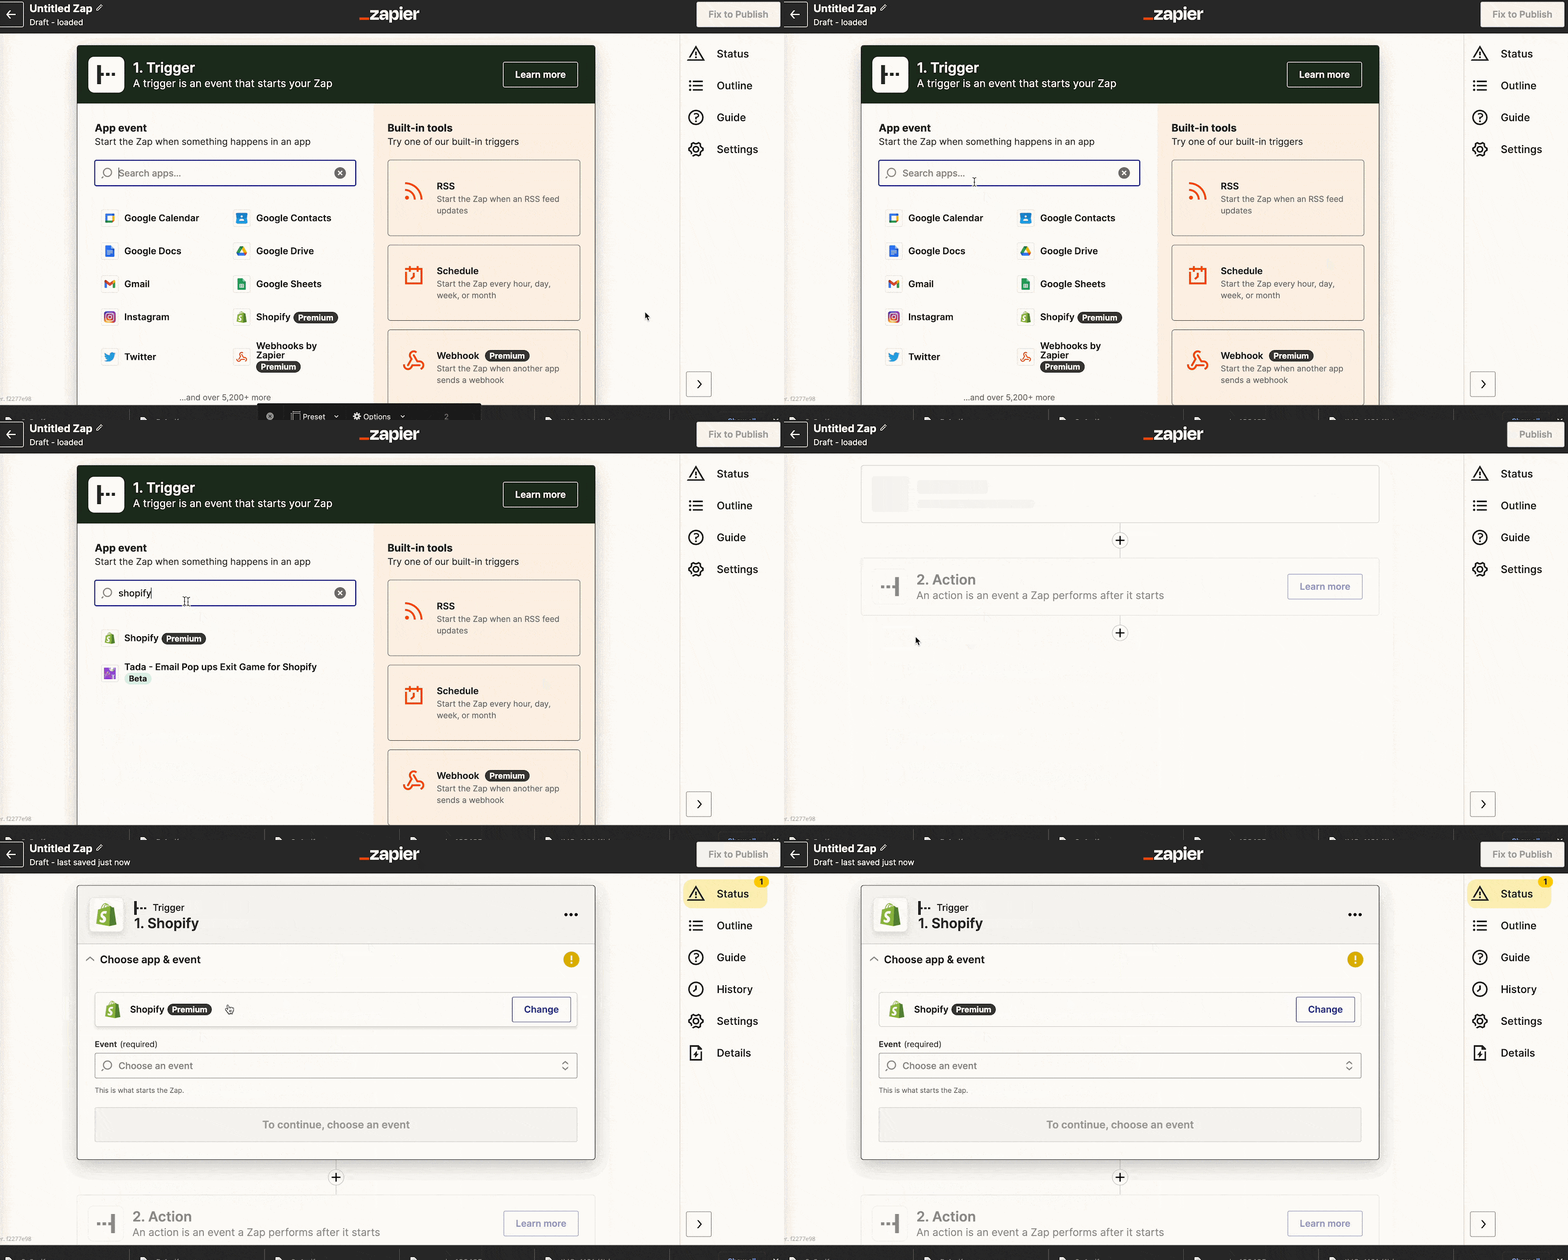
Head over to your Zapier account dan klik pada ‘Create Zap’ button. Search for ‘Shopify’ in the search box.
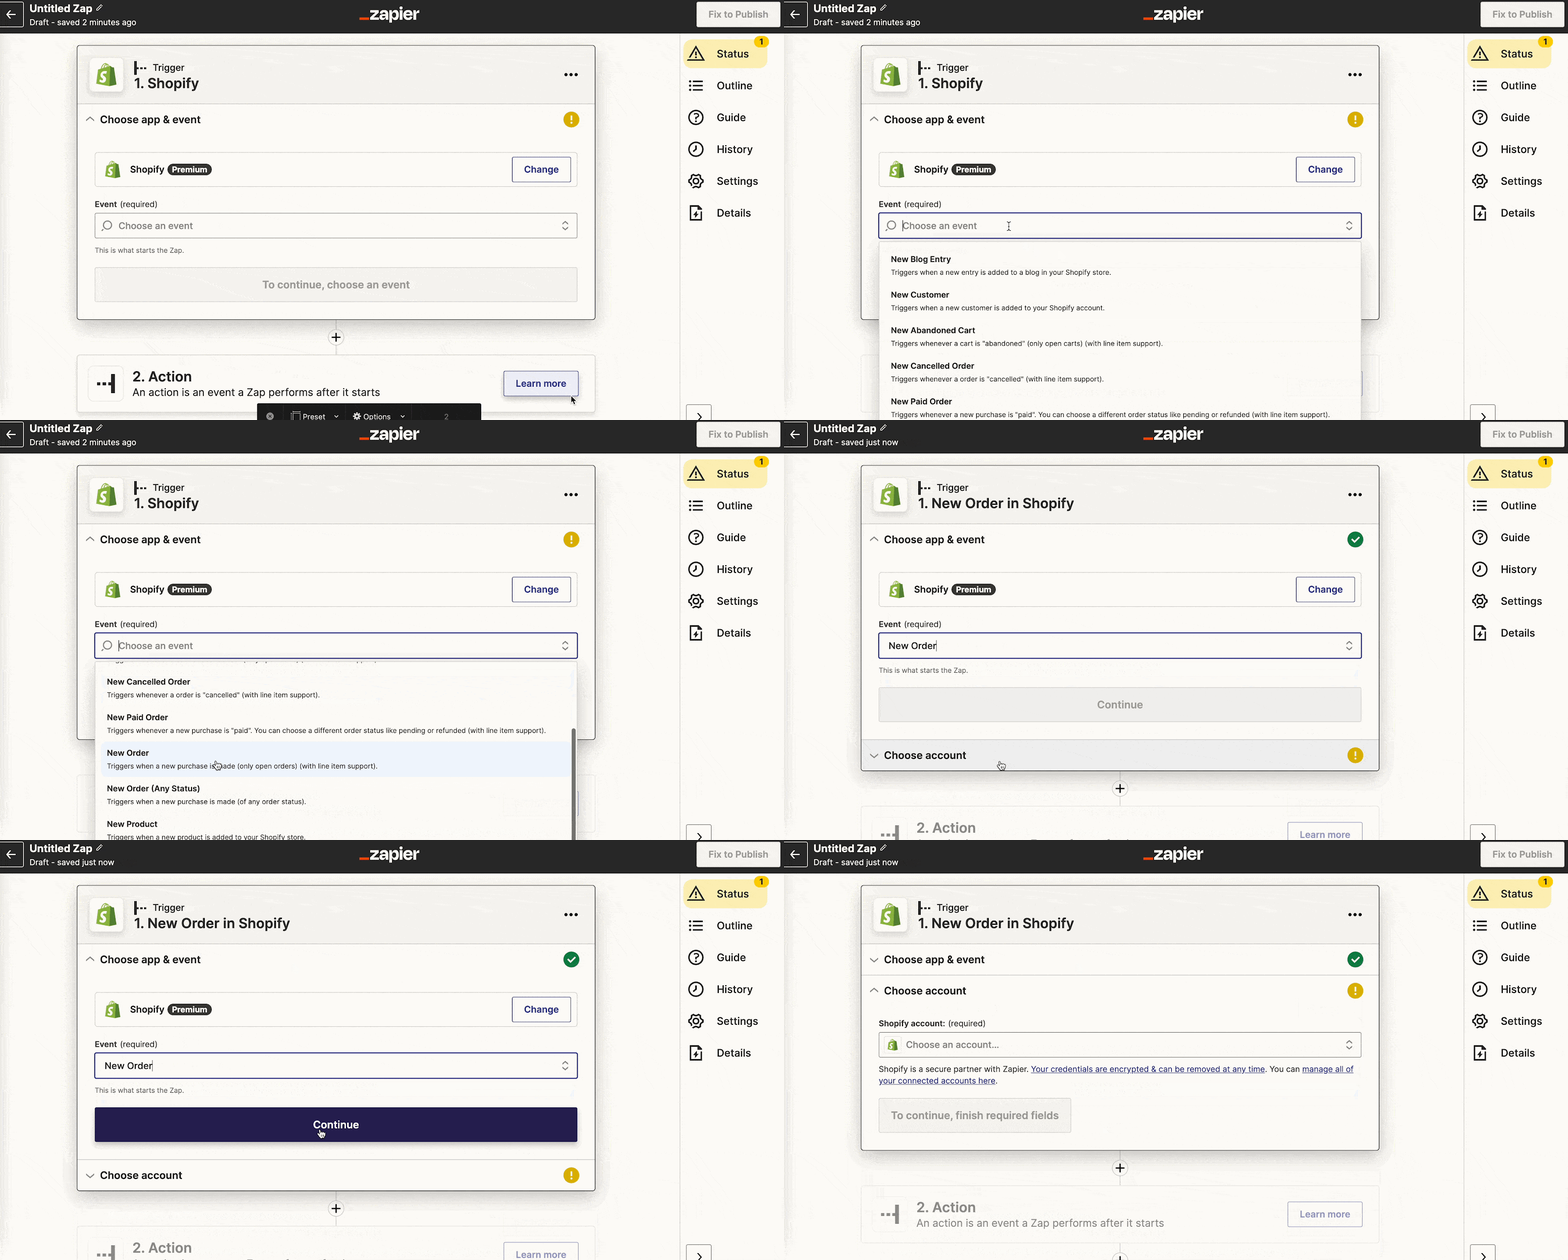
Select ‘New order’ from the drop-down options in the event section. Click on 'Melanjutkan' to save all the progress and go to the next step.
Now you need to search for the Shopify account and choose it. In this case, you must have a Shopify account already.
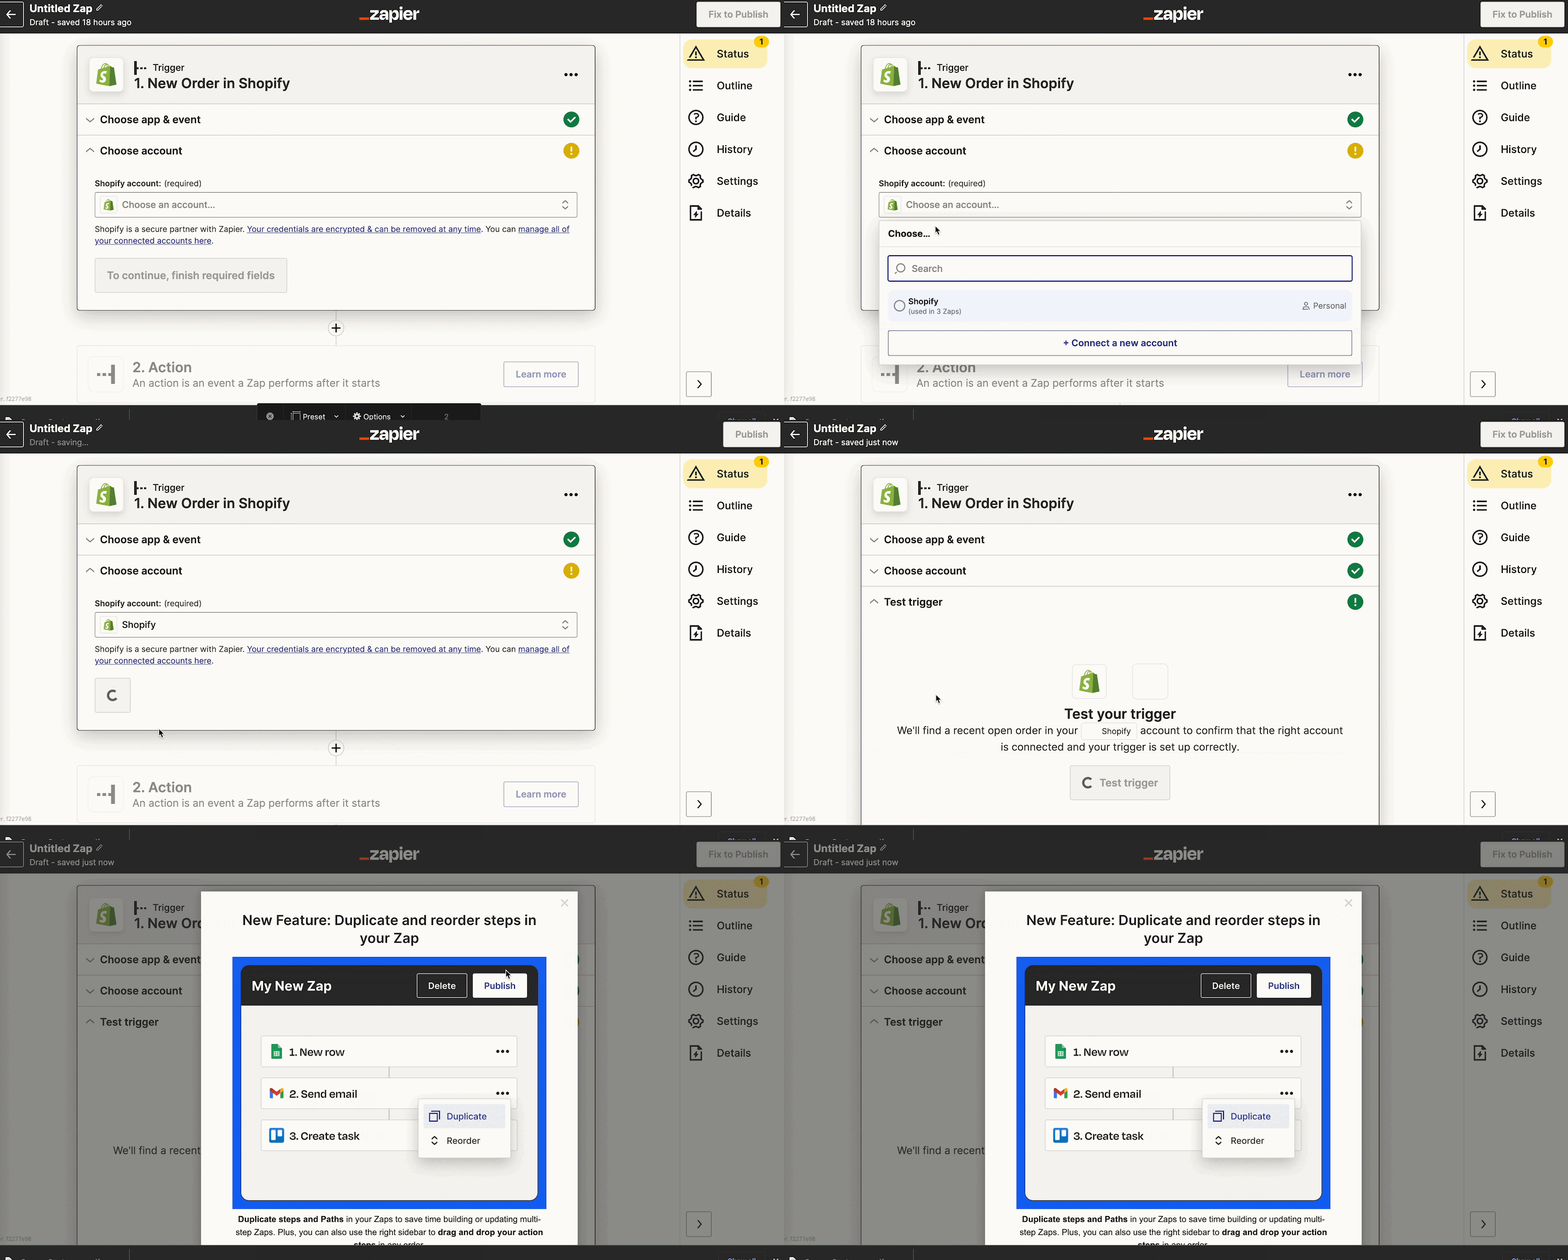
Next, click on the ‘Test Trigger’ button to run the test. A new order will be created.
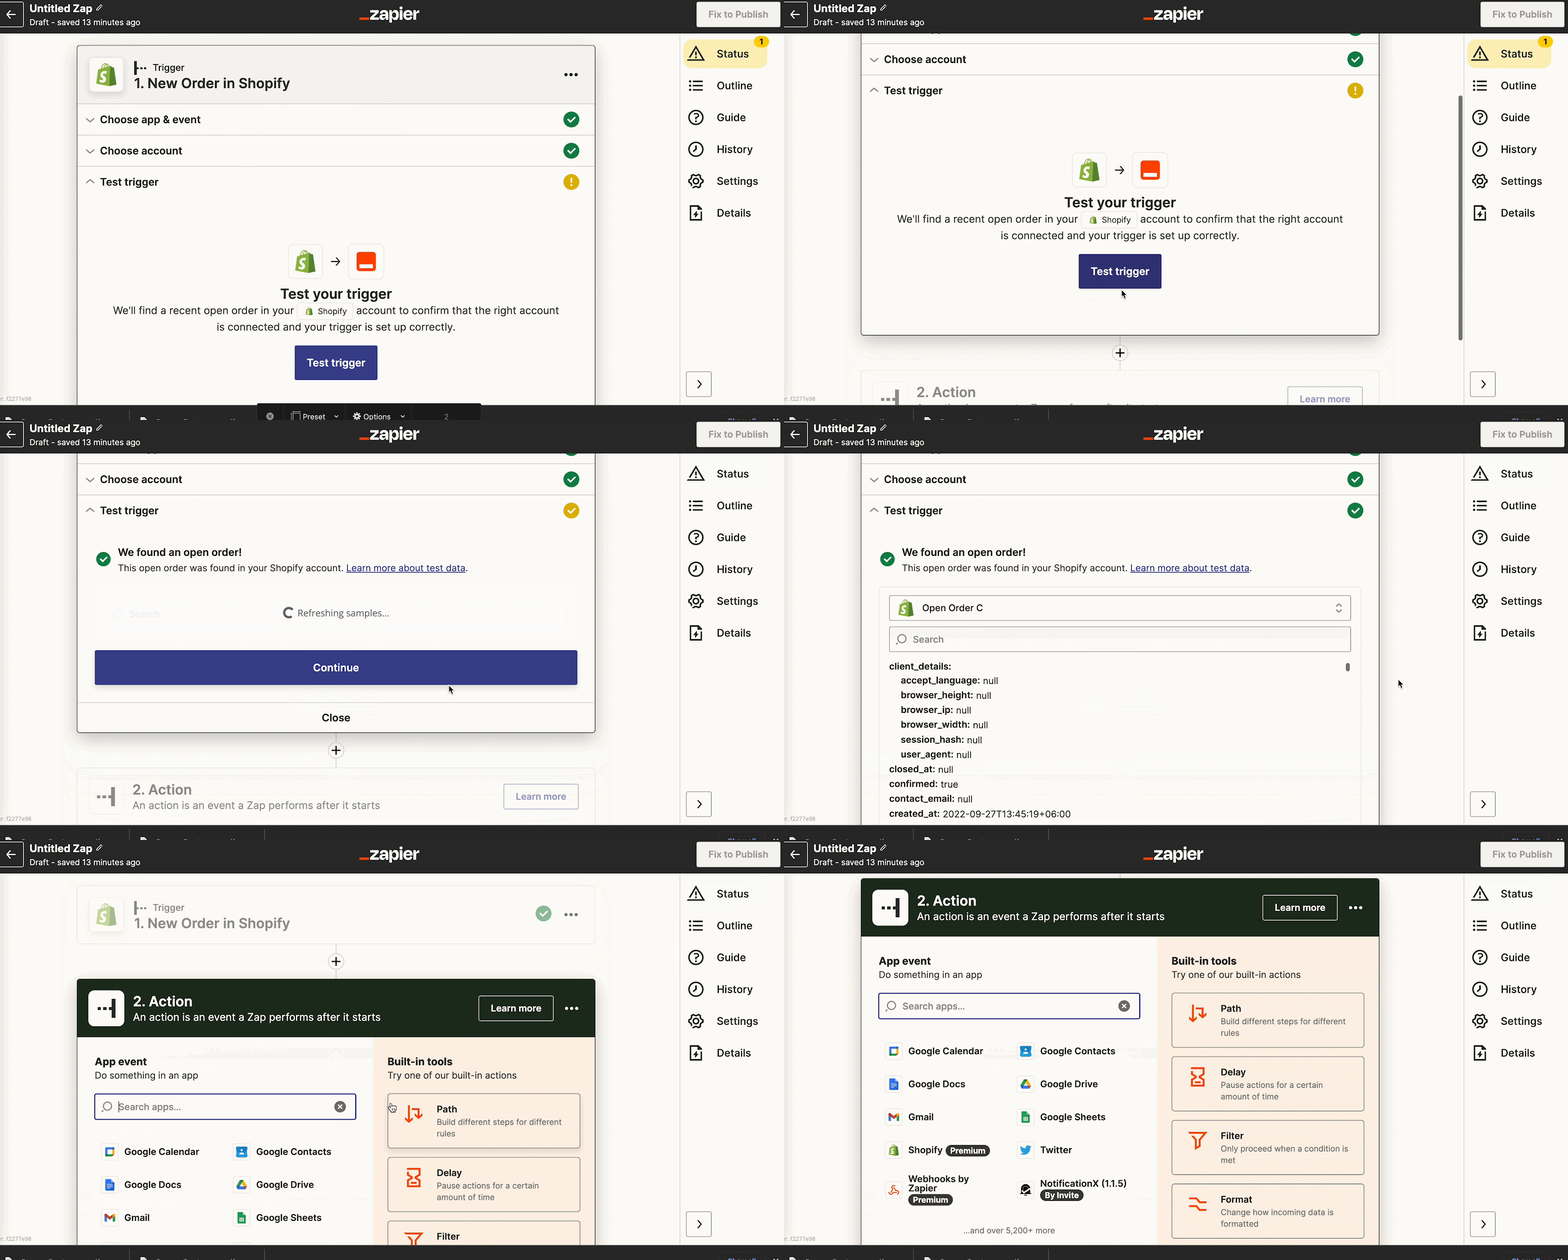
Next, you will search for NotificationX app from here. And choose ‘Create Notification’ from the event section.
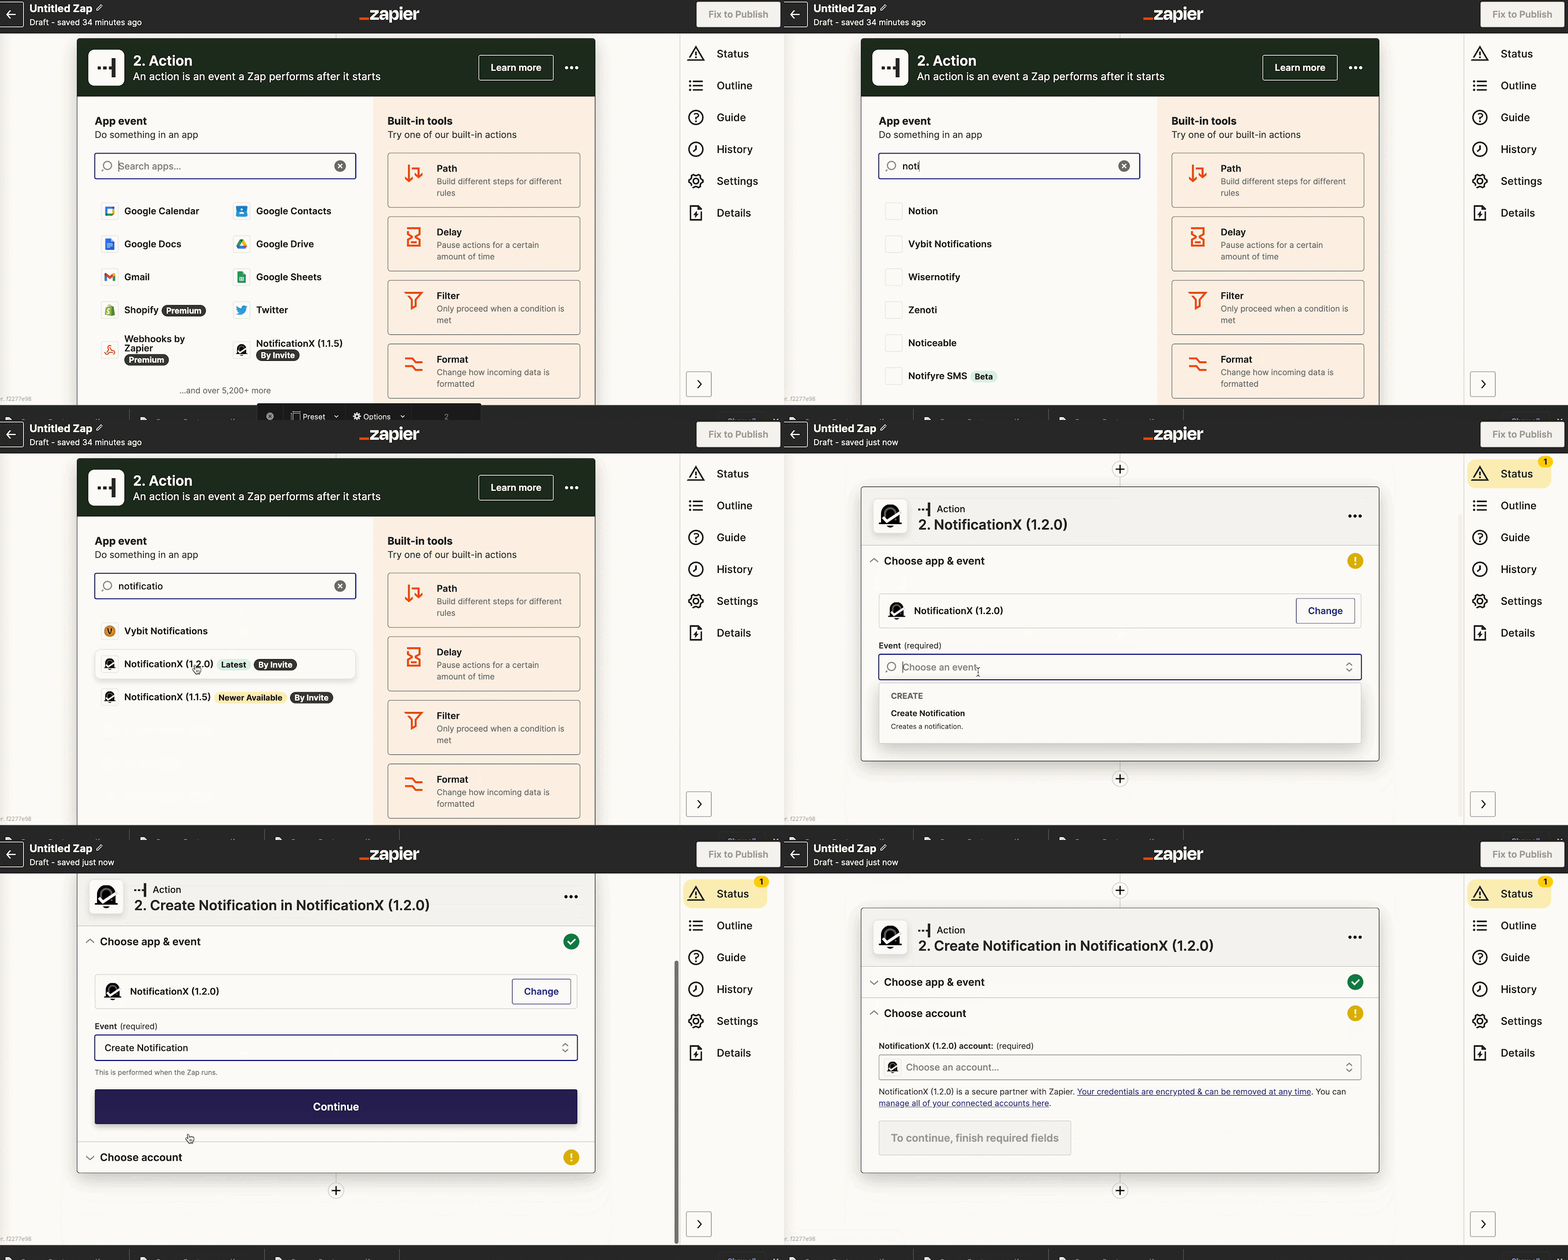
Now you can choose an account or connect to a new account.
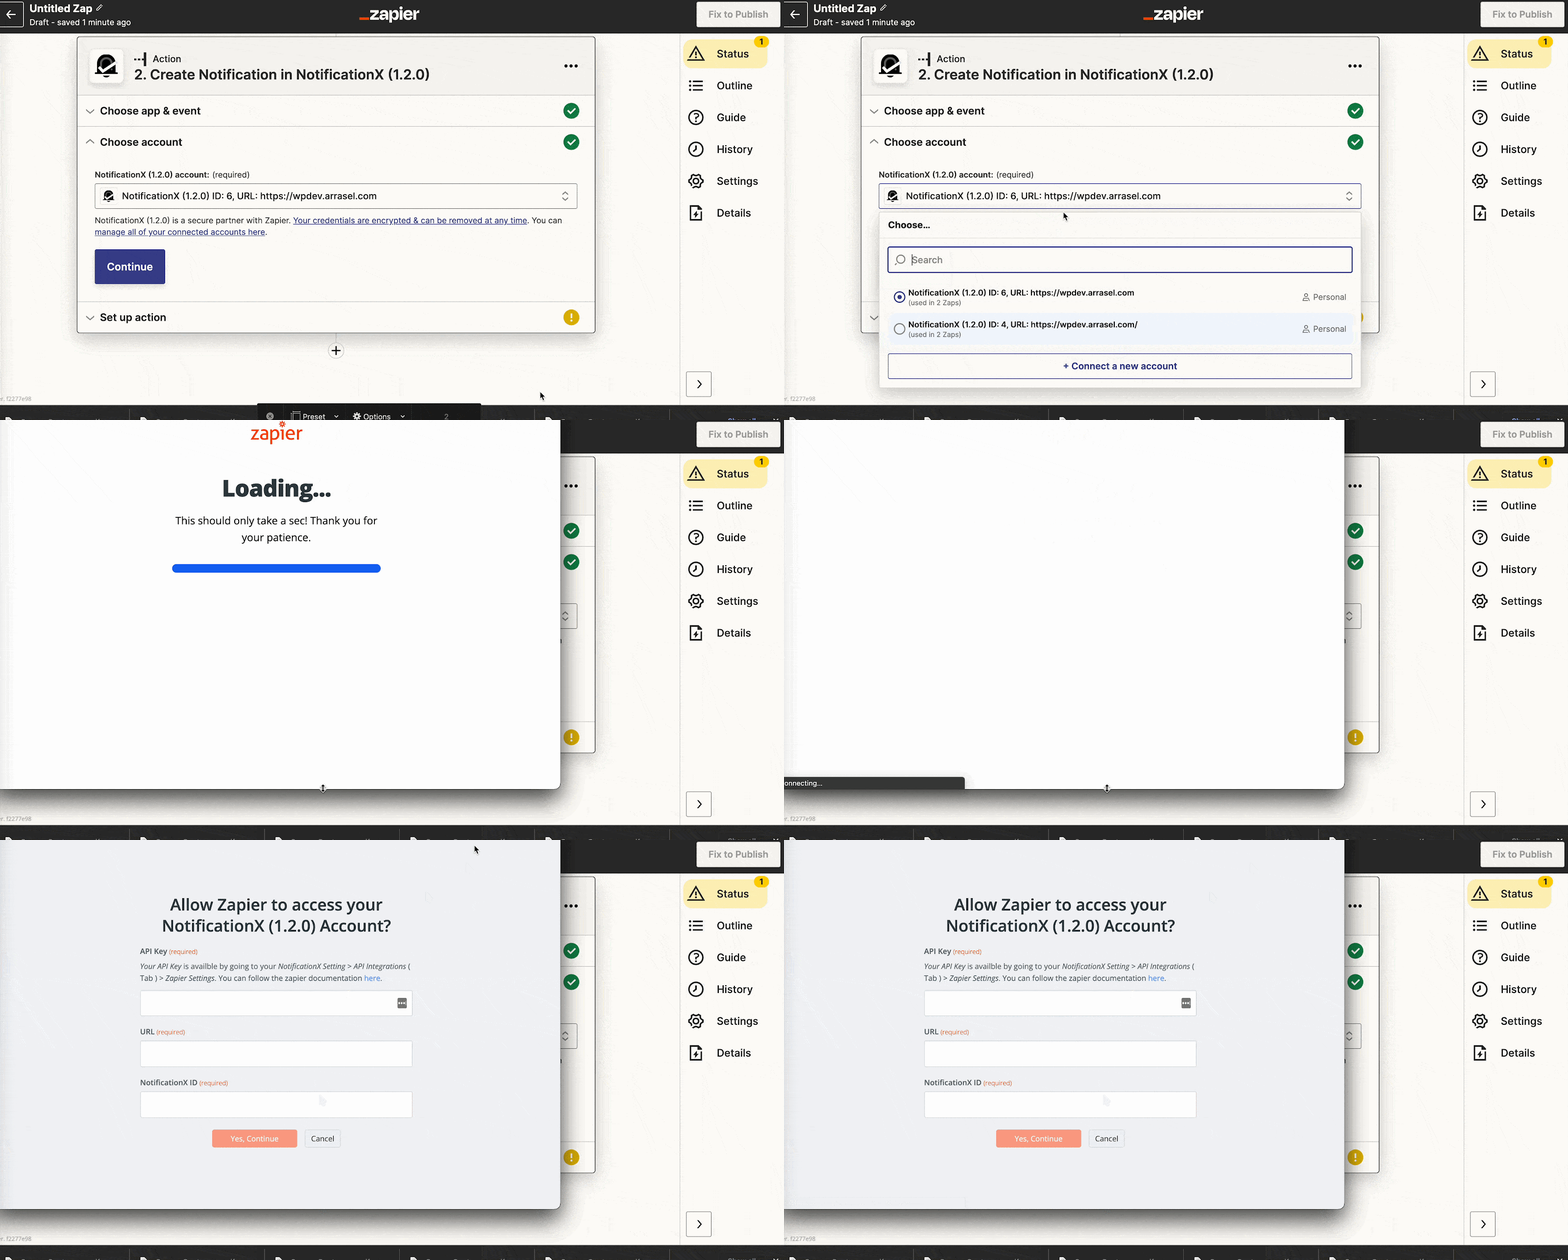
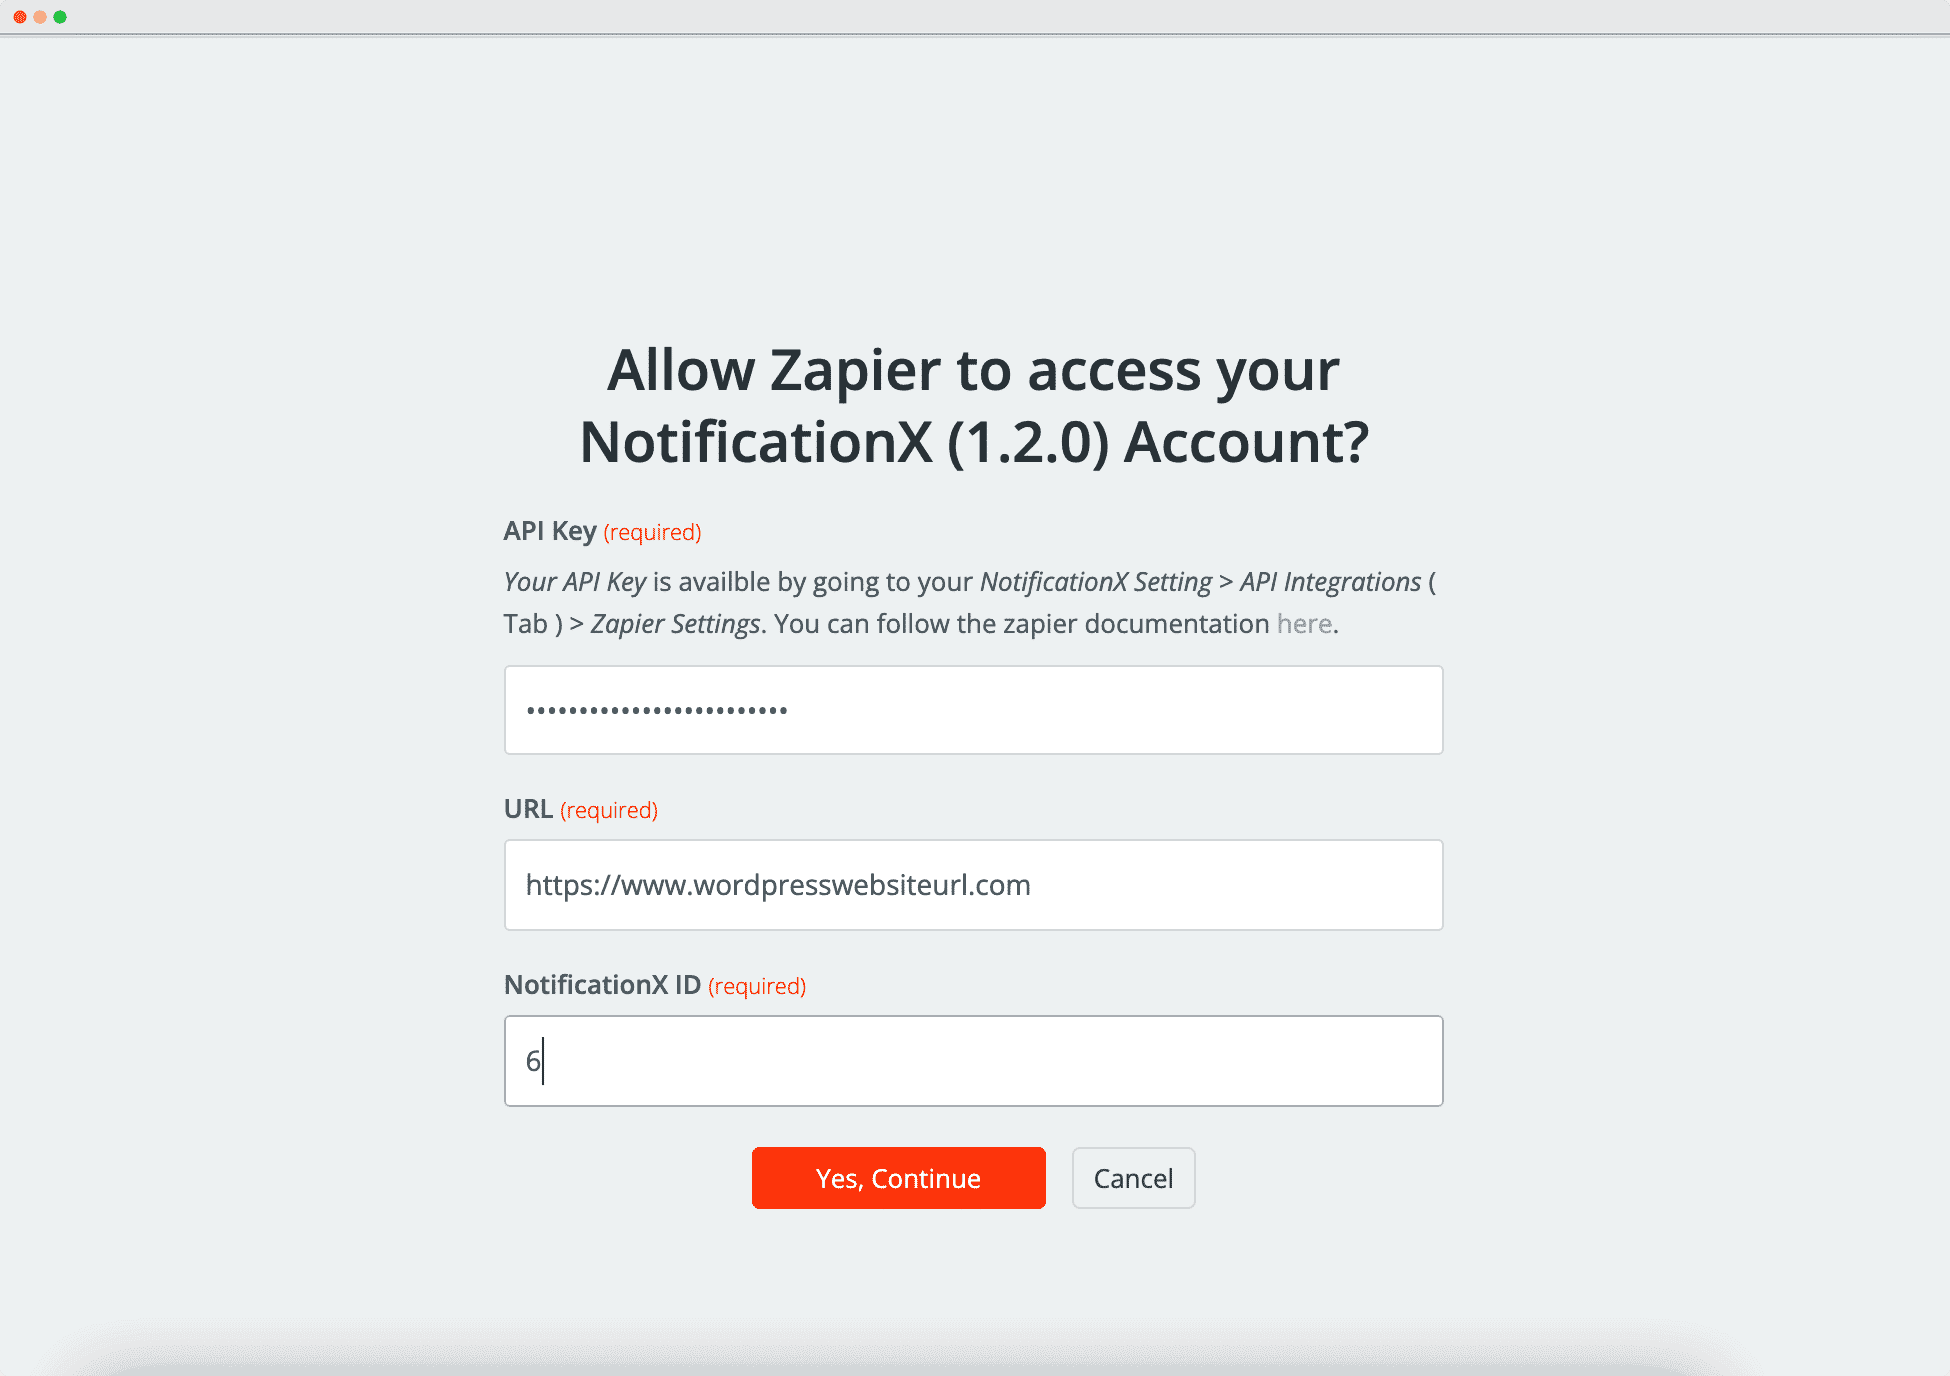
Retrieve the API key from your NotificationX plugin. You will get the API key option if you have NotificationX PRO installed and activated in your WordPress.
And fill out the pop-up form. For that, you must need NotificationX PRO installed and activated. Here you will need an API key from NotificationX, WordPress website URL, dan NotificationX alert ID.
Afterward, you will choose the action for this account. Click on the drop box and choose ‘Sales Notification’ from the options.
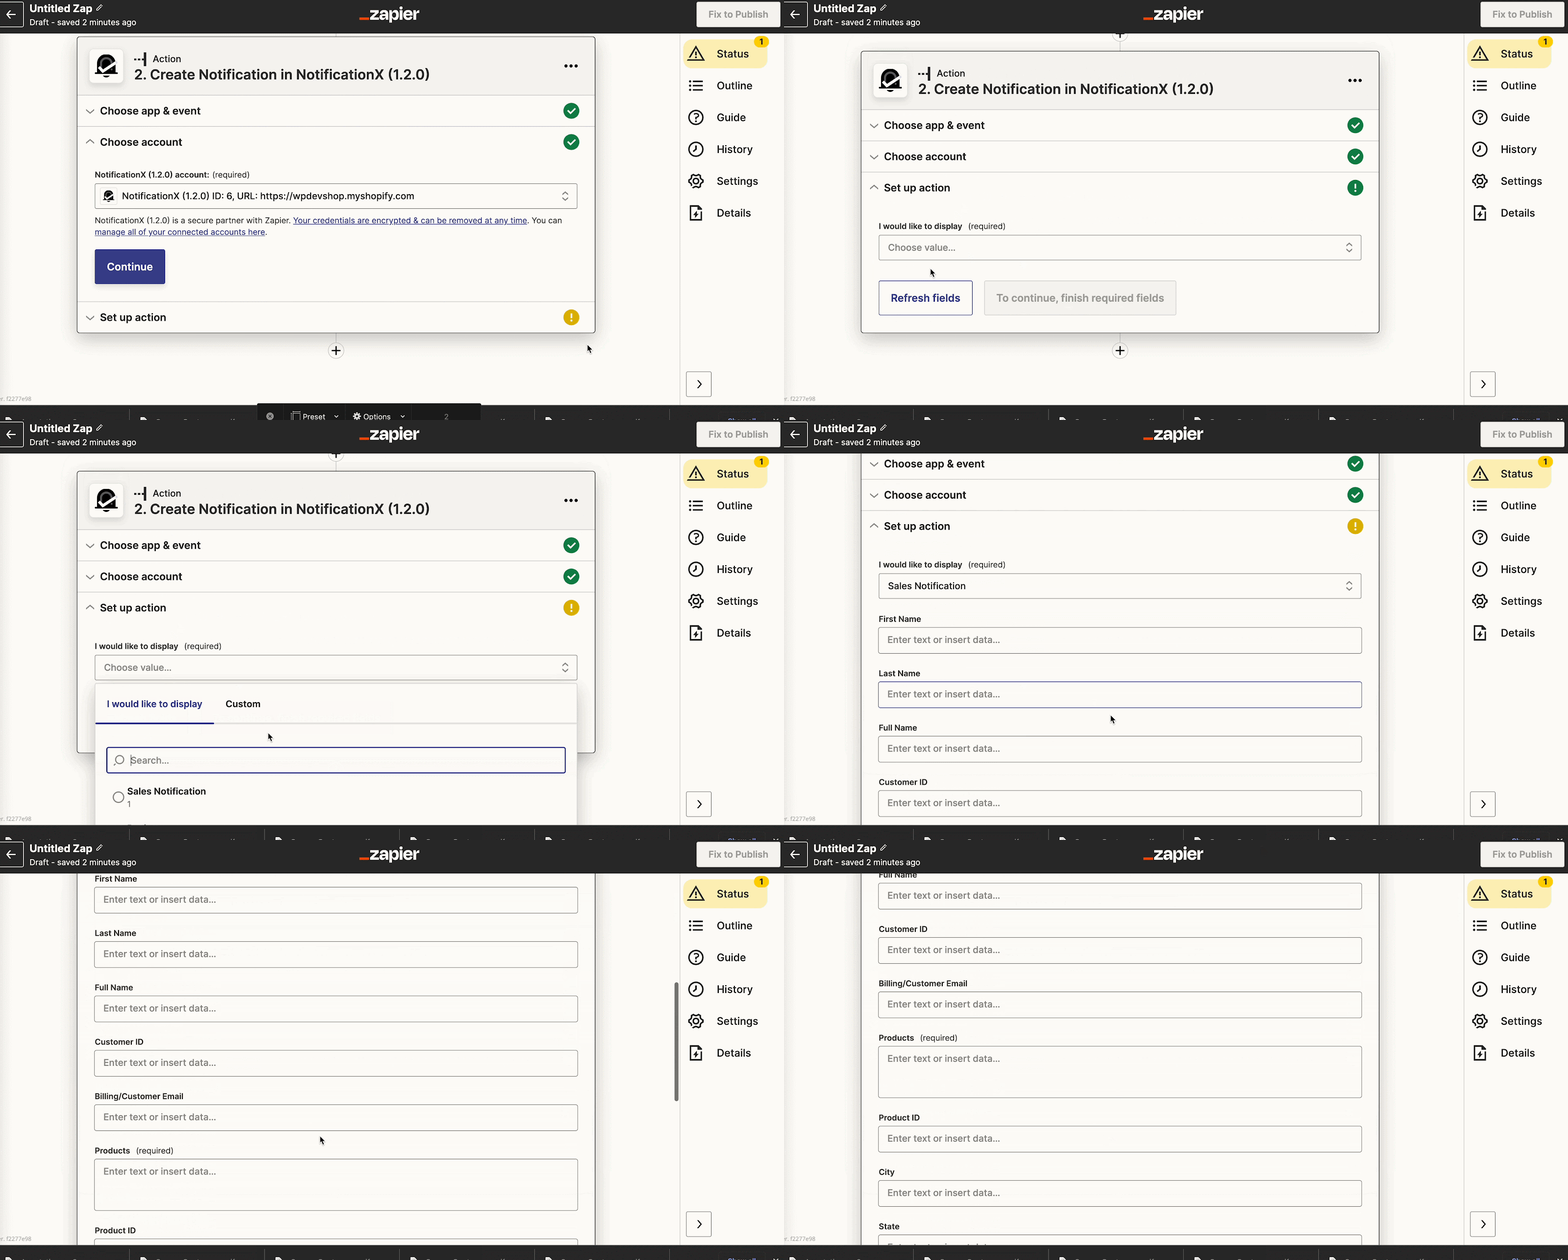
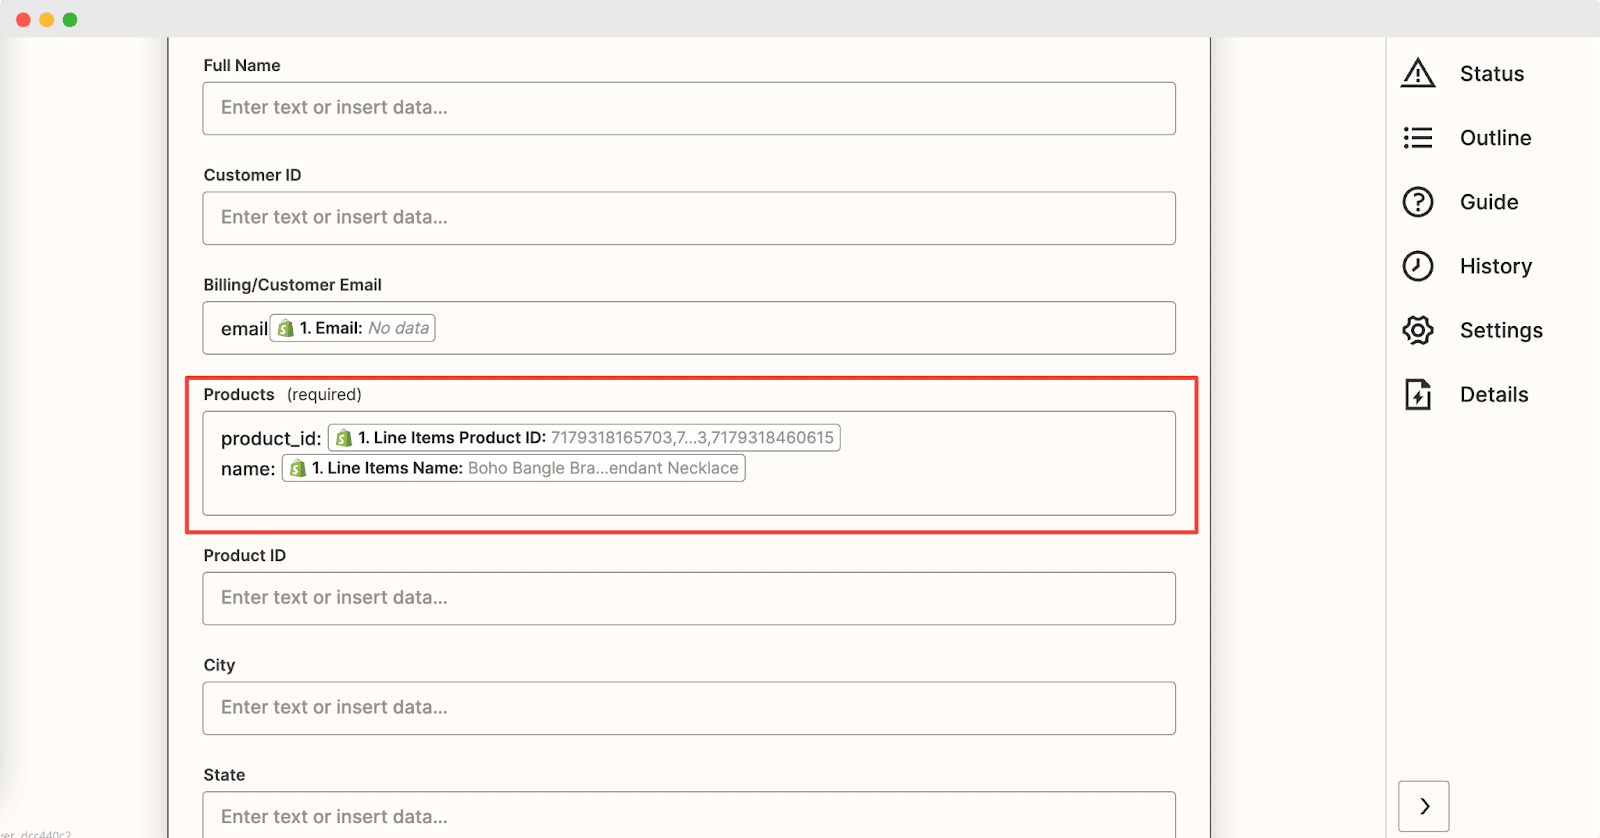
And configure the options from the field. Then click on the 'Melanjutkan' button. While configuring the form, you must add ‘product_id’ dan ‘name’ in the products section.
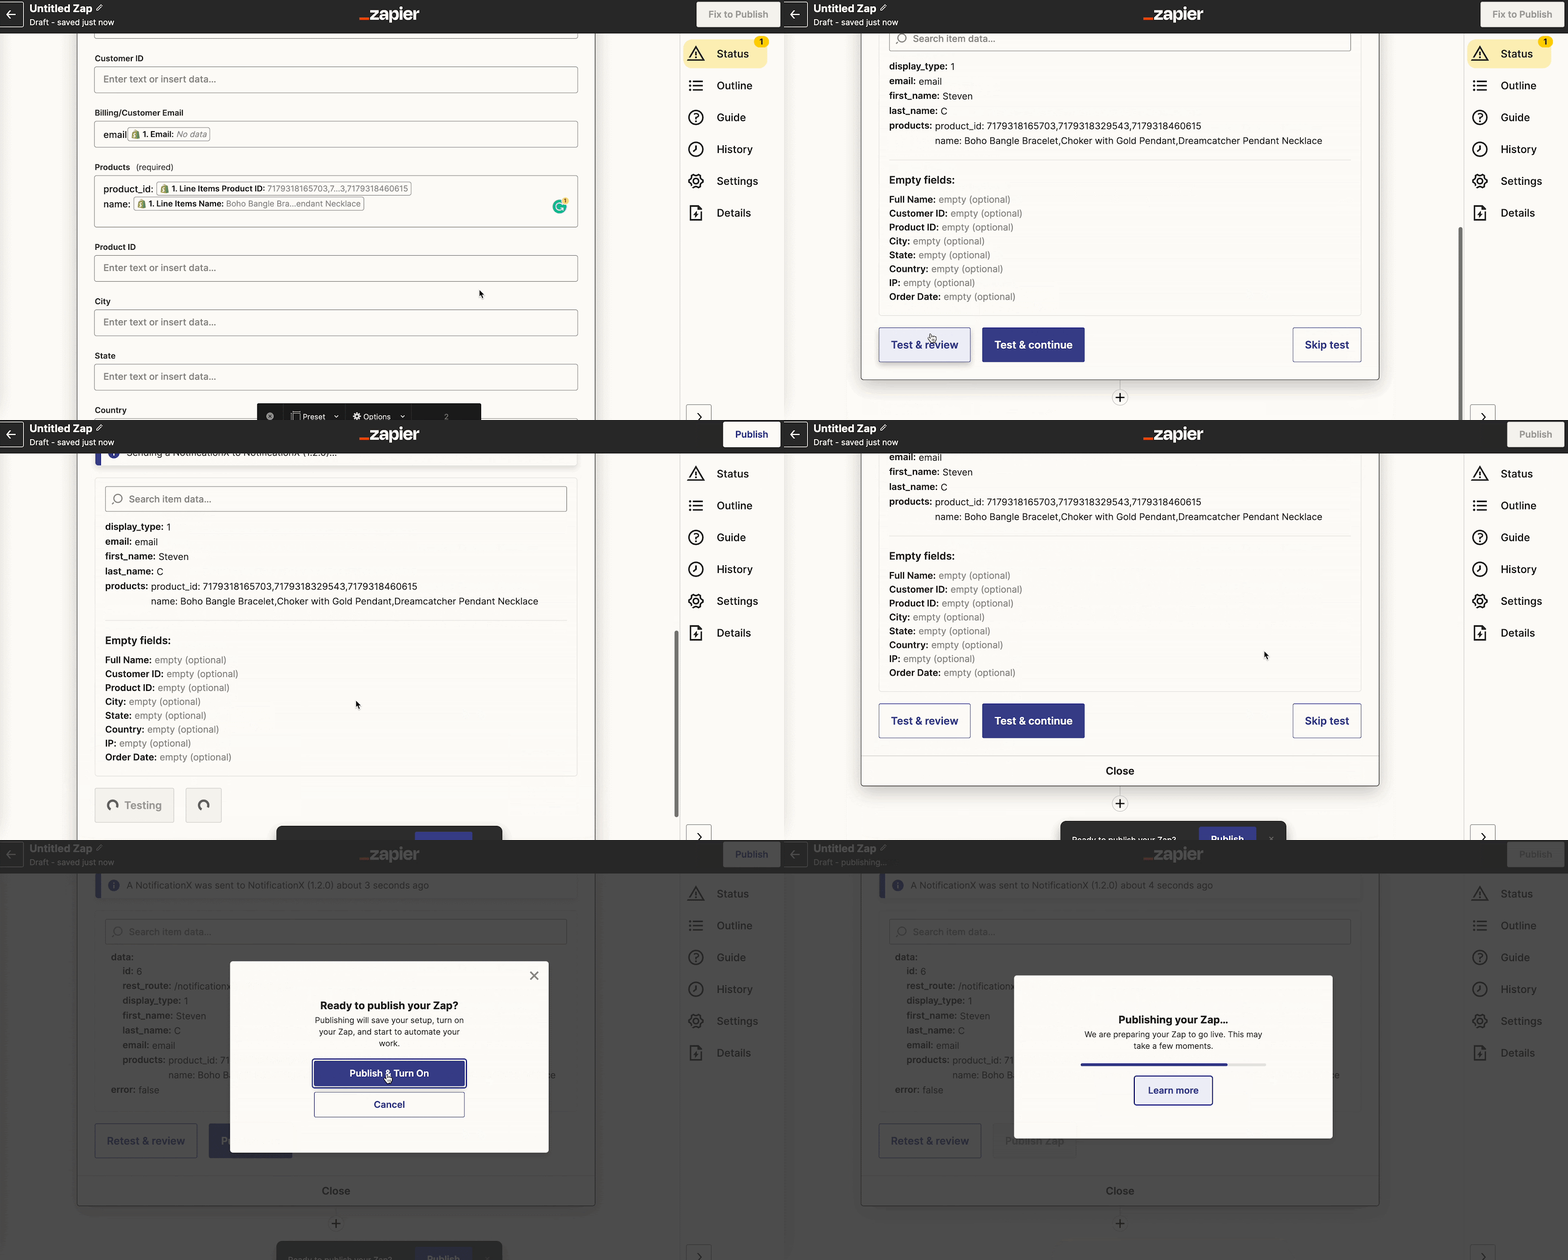
After hitting the 'Melanjutkan' button, you need to click on the ‘Test & Review’ button. Publish this zap by clicking on the ‘Publish Zap’ button. Now your zap has been successfully published.
Segment 3- Show Shopify Sales Notification Alert On WordPress #
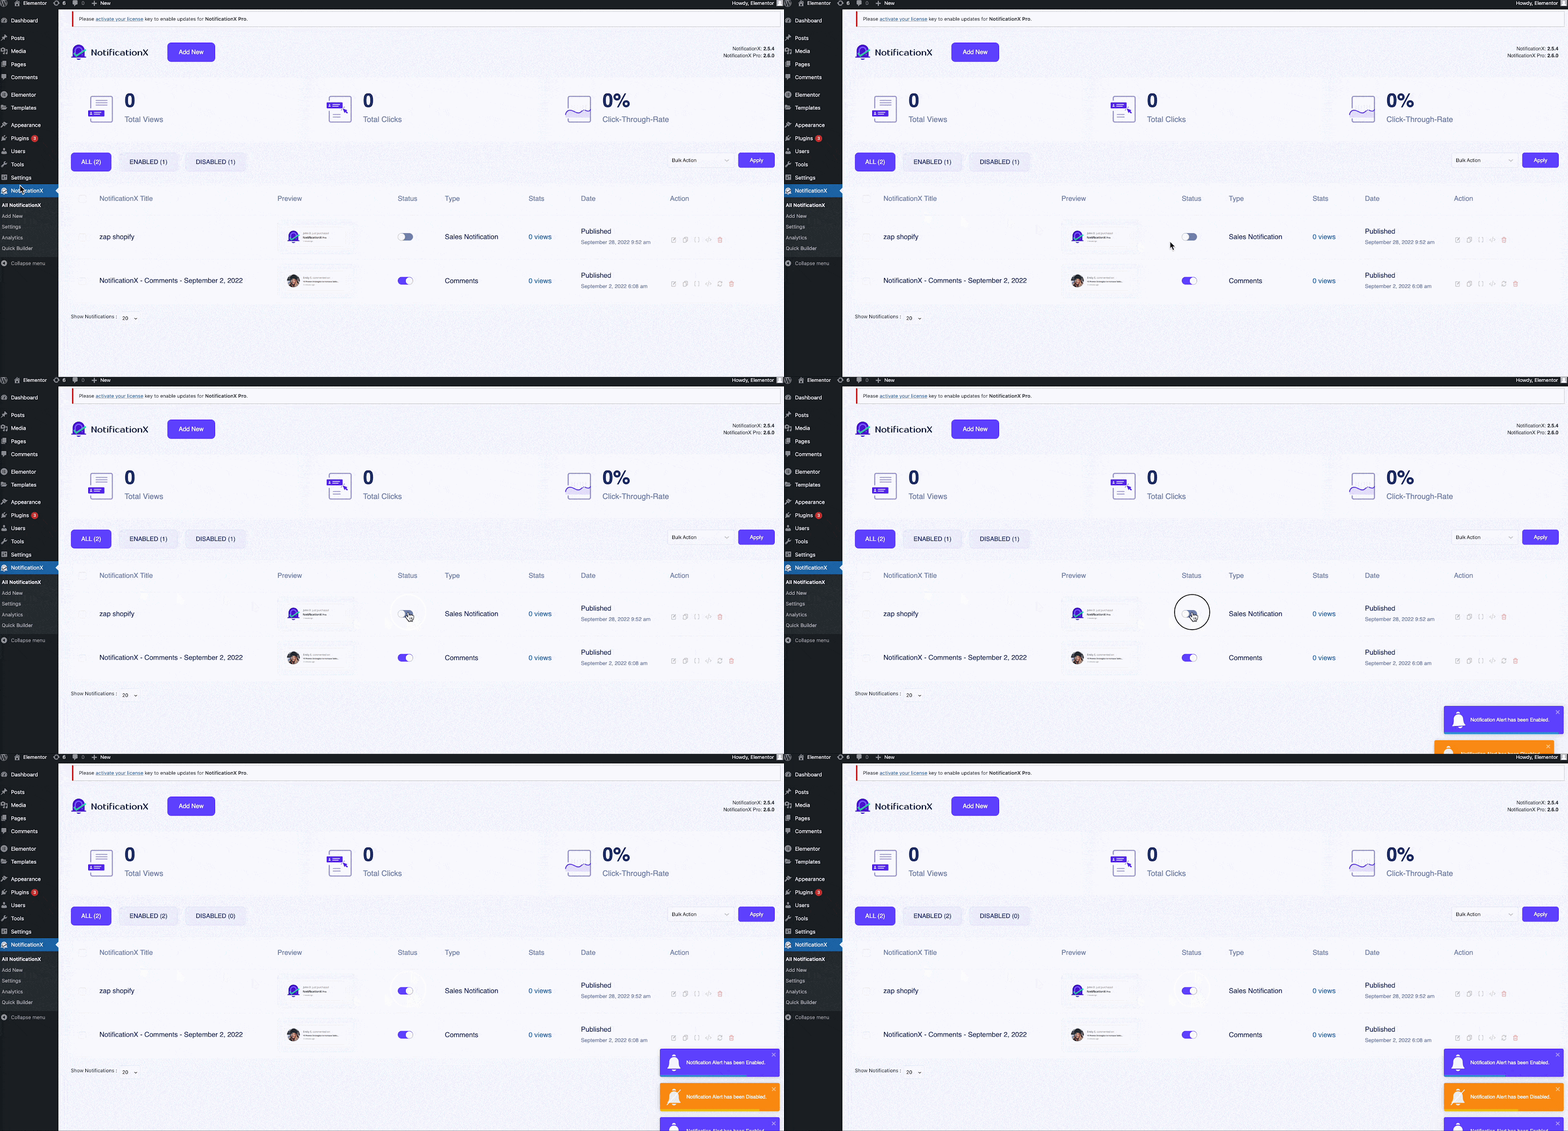
Go to your WordPress dashboard and head over to the ‘Semua NotificationX’ option. Toggle on the newly created sales notification. When a new order has been placed, you will be able to show the live sales notification.
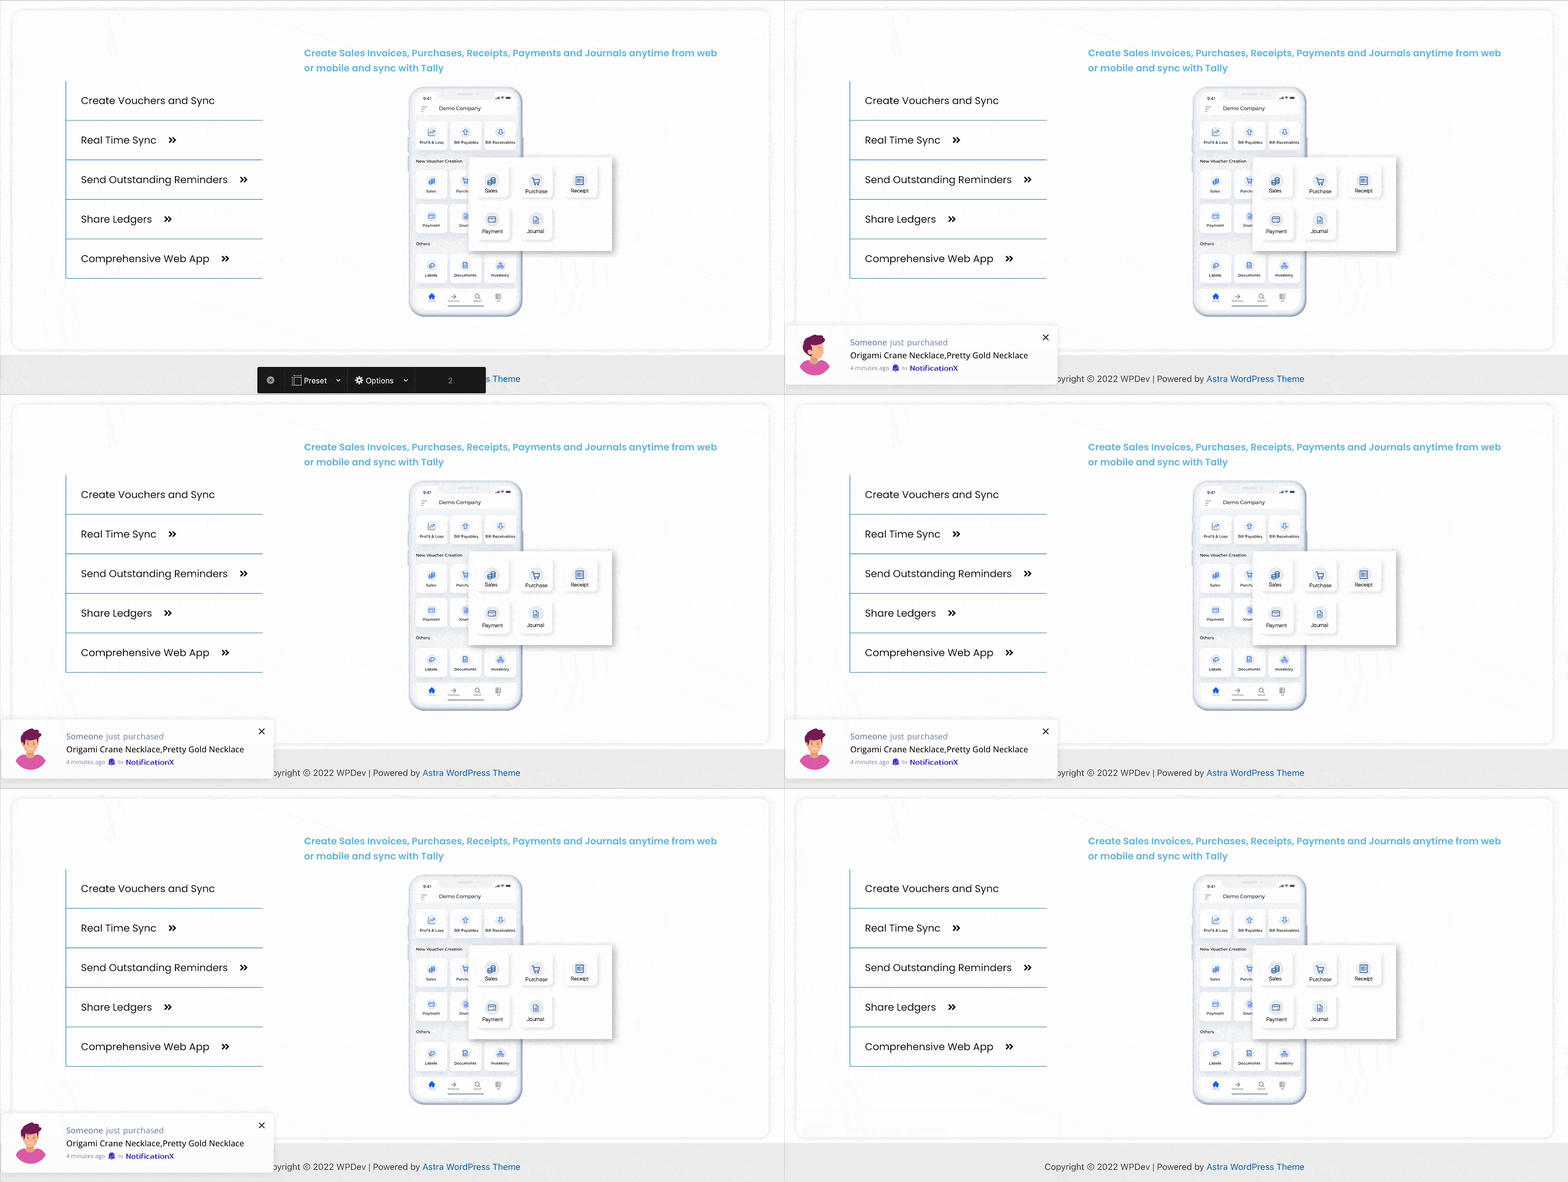
Now you can go to your WordPress live site and your Shopify sales popup will be displayed.
Segment 4- Show Sales Pemberitahuan In Shopify From WordPress #
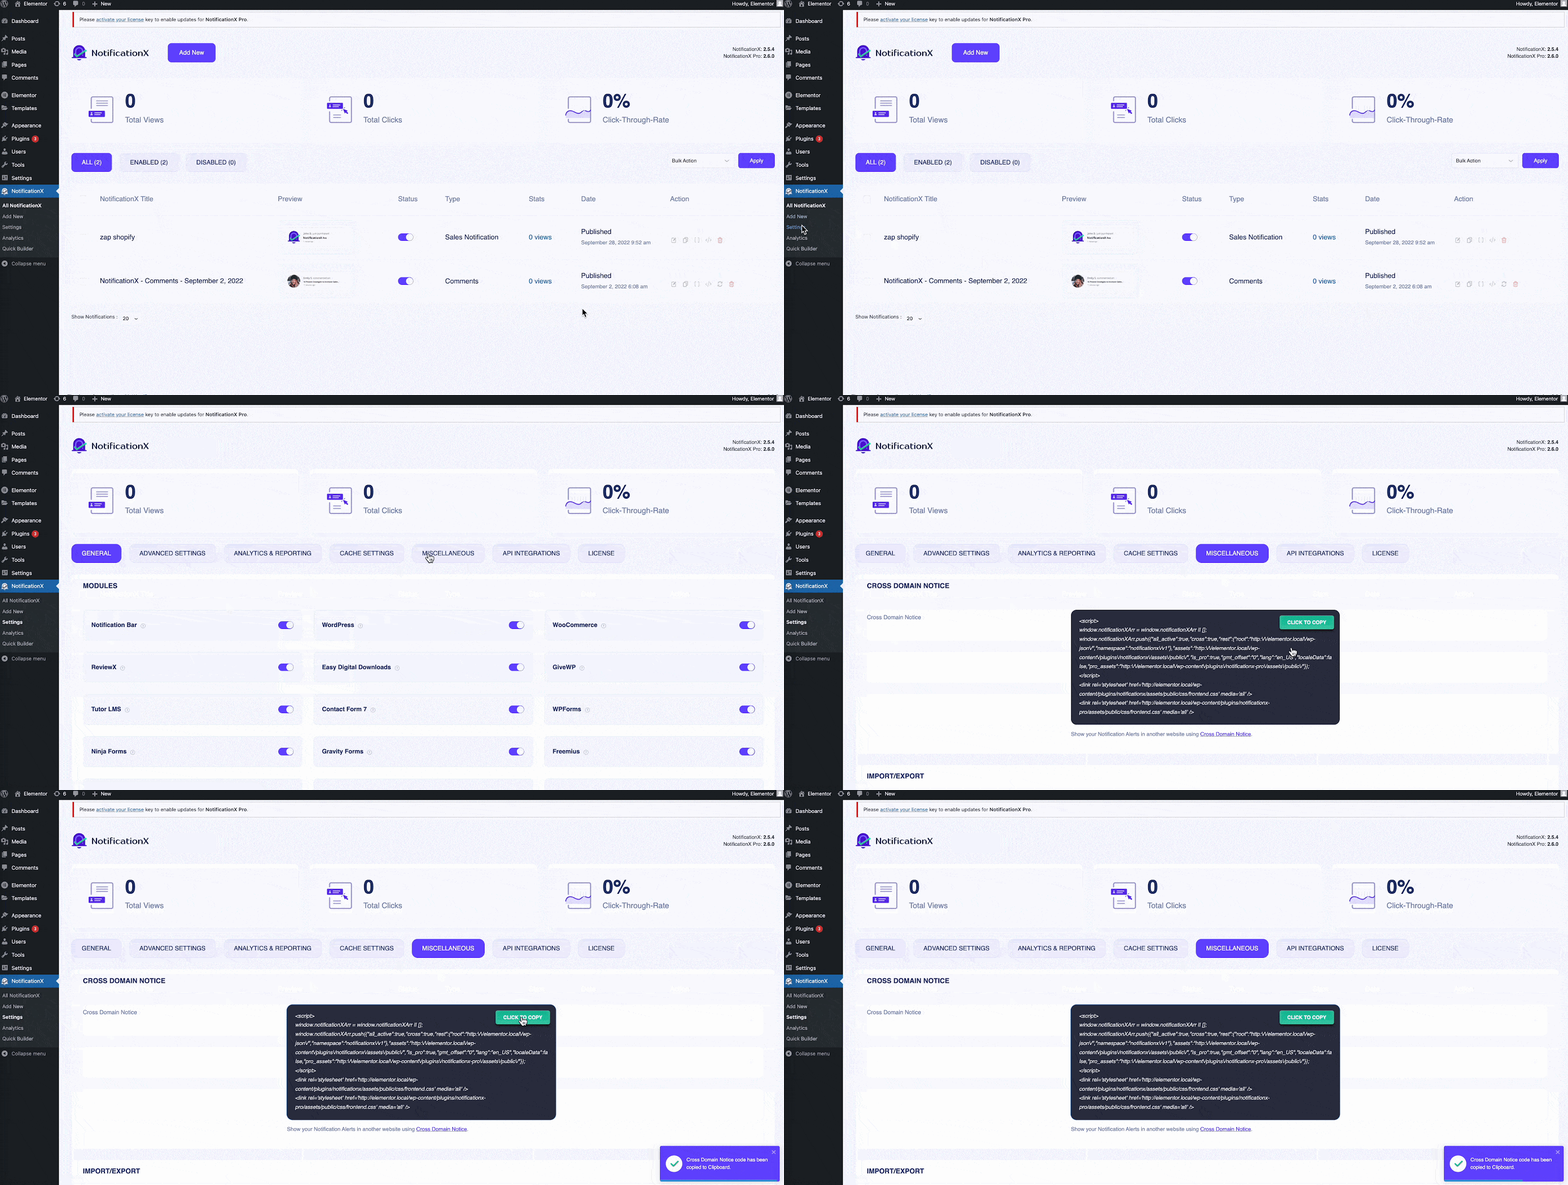
Show the sales popup in your Shopify store using cross-domain copy-paste feature by NotificationX. To do that, head over to your WordPress dashboard and NotificationX settings. Click on the 'Aneka ragam' tab and copy the code.
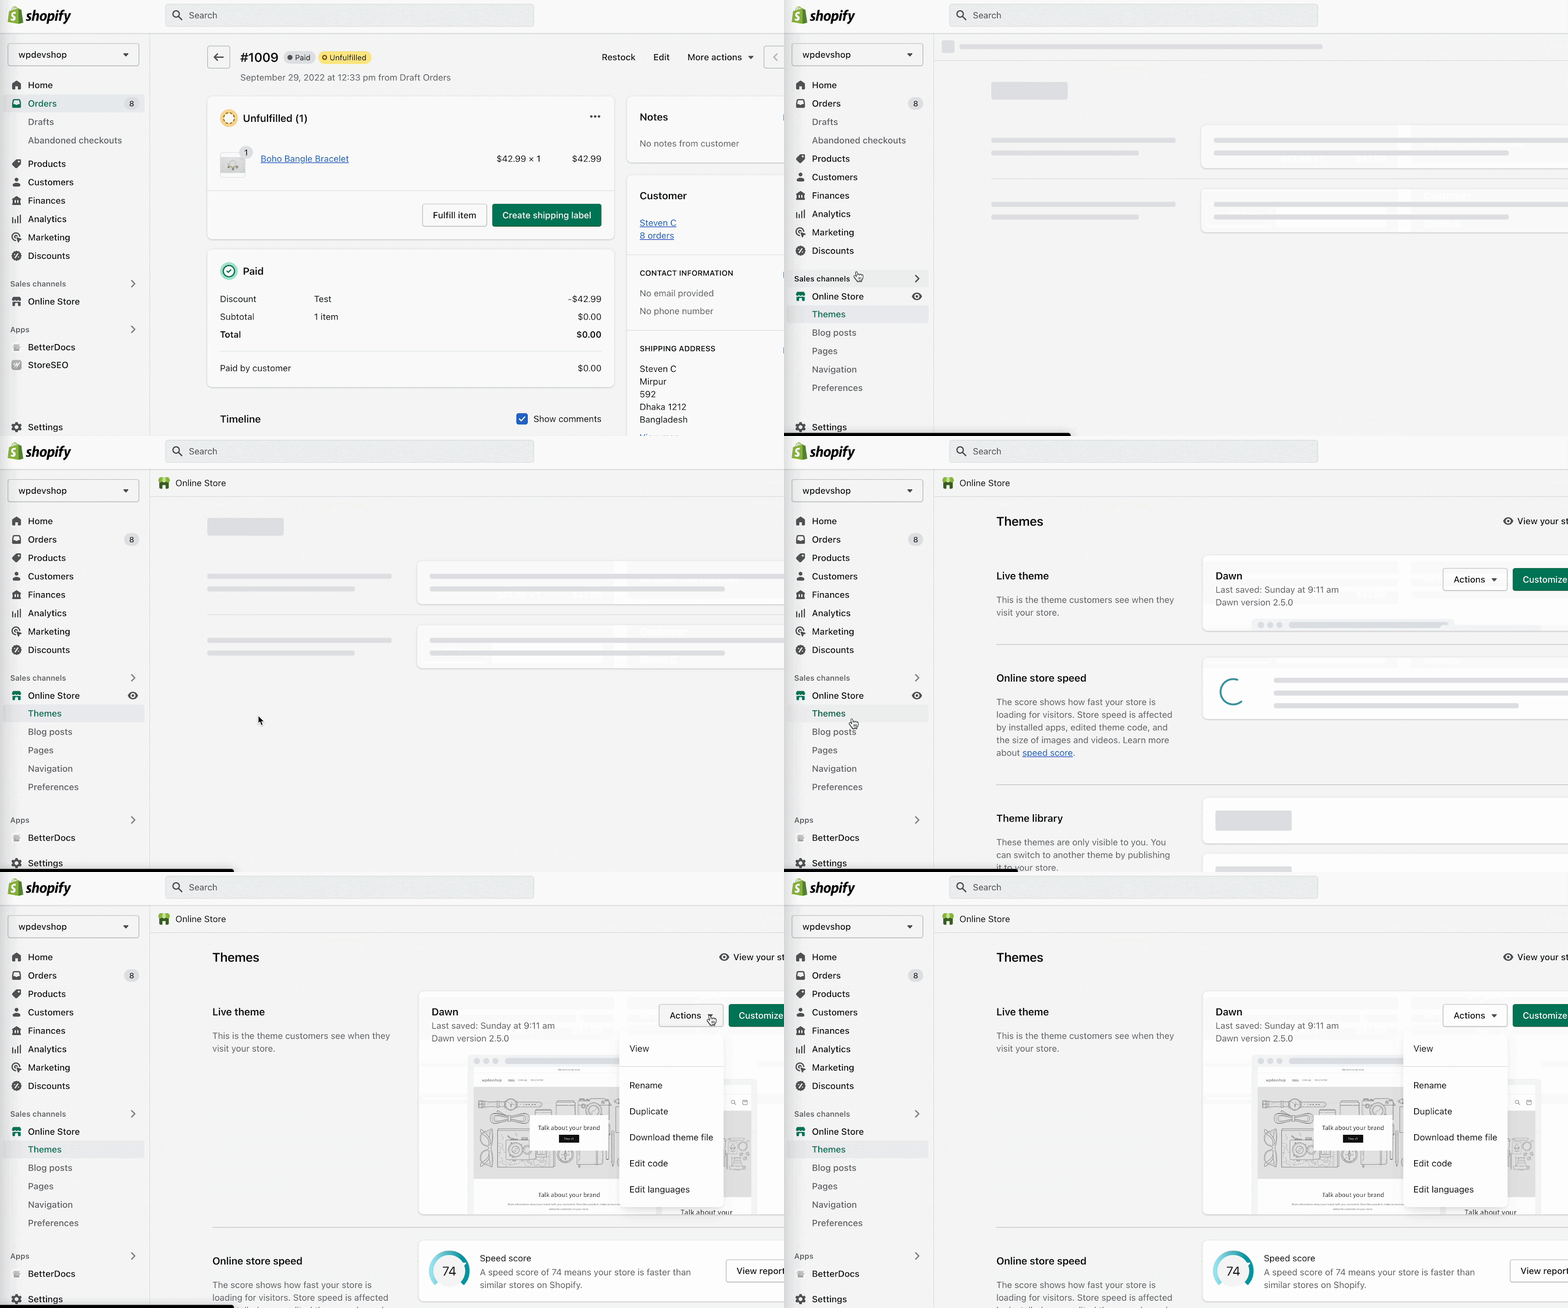
Now we will go to our Shopify store and from the ‘Toko online’ option, we will choose ‘Theme’. Next, you need to hit the ‘Actions’ dropdown.
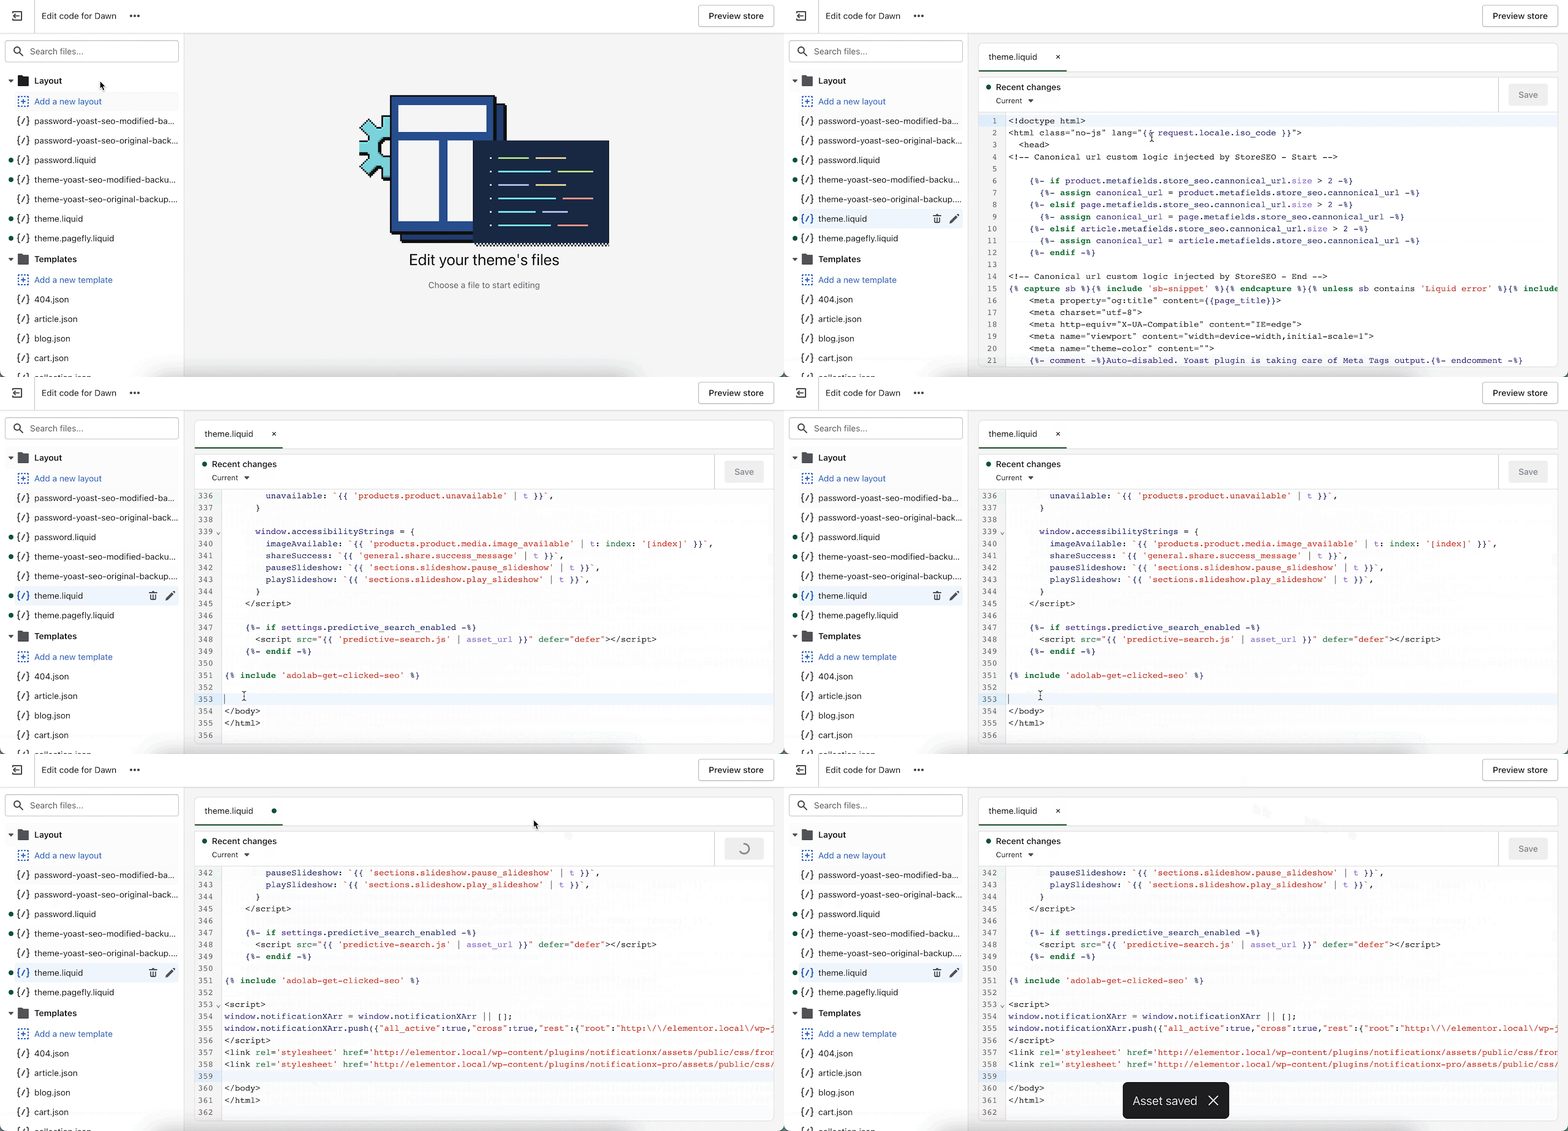
Dari ‘Actions’ dropdown, you need to select the ‘Edit Code’ option. When you enter the code page, from the left-hand side select ‘theme.liquid’ from the layout code options. Paste the copied code that we retrieved from NotificationX. After pasting the code, you need to hit the ‘Save’ button from above.
Head over to your Shopify store where you will see the new popup appear.
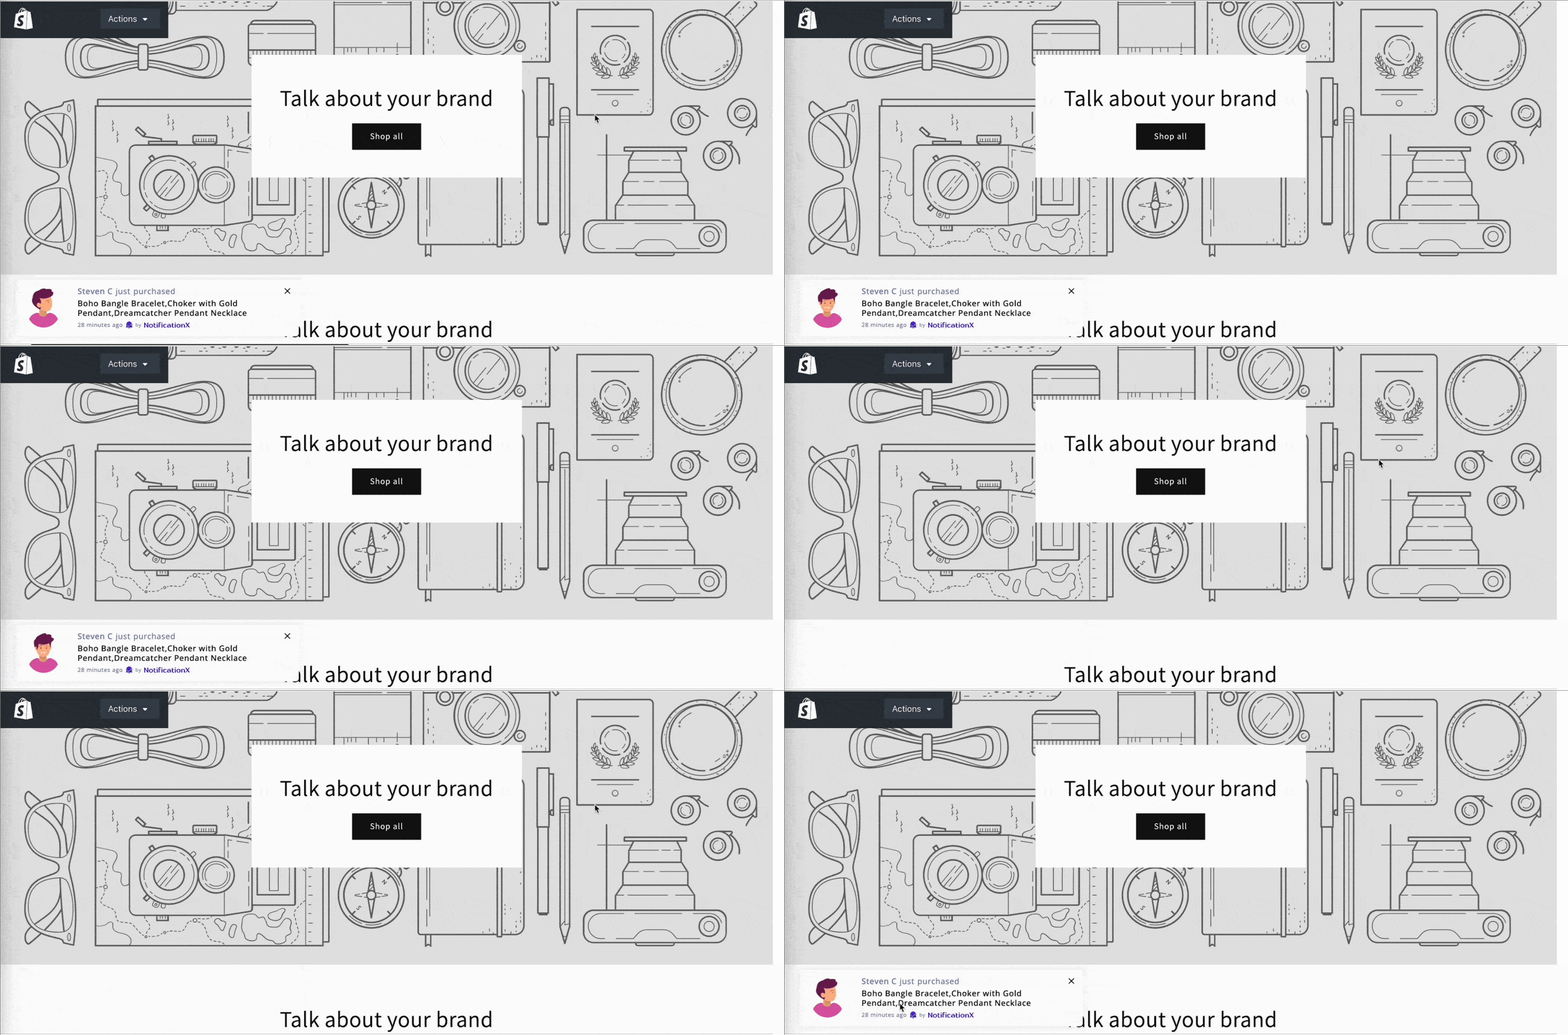
This is how you can easily show sales notification in Shopify stores using NotificationX, Zapier and WordPress live site.
Jika Anda menghadapi masalah apa pun, Anda dapat menghubungi Tim Dukungan kami sini.


