
Designing a popup used to mean fiddling with colors, layouts, headlines and buttons until everything looked right, and then testing whether it actually converted. It worked, but it took time. Now you can skip most of that. NotificationX has made its exit intent feature AI-powered, so instead of building from scratch, you can create an AI-powered exit intent popup by simply describing what you want in plain words and letting AI generate a complete, ready-to-use design in seconds.
If you already know the basics of exit intent popups and why they matter for recovering leaving visitors, this guide picks up where that leaves off and shows you how to put AI to work. (New to the concept? Start with our earlier walkthrough on the exit intent popup on WordPress and then come back here.)
What Makes an AI-Powered Exit Intent Popup Different?
A regular exit intent popup shows a well-timed message the moment a visitor looks like they are about to leave. That part has not changed. What is new is how you create it.
Instead of manually choosing a theme, adjusting the design, and writing the copy one field at a time, you type a short prompt describing the offer, tone and style you want. NotificationX then handles the whole exit intent popup design for you: the layout, colors, headline, subtitle and call-to-action button, all shown instantly in a live preview. You still get complete control to refine everything afterward, but the heavy lifting of the first draft is done for you.
In short, the strategy stays the same; the setup gets dramatically faster.
Why Create an Exit Intent Popup with AI?
Speed is the obvious win, but it is not the only one. Here is why letting AI handle the design makes sense for marketers and business owners.
1. Save Hours of Manual Design Work
Building a polished popup by hand means making dozens of small decisions about spacing, contrast, typography, and button styling. An AI exit intent popup collapses that into a single prompt and a few seconds of generation, freeing you to focus on the offer itself.
2. No Design or Coding Skills Required
You do not need to be a designer to get a professional-looking result. If you can describe what you want, such as a discount offer with a bold headline and a clear button, AI can turn that description into a finished exit intent popup design that is ready to publish.
3. Get Copy and Layout Together
One of the trickier parts of any popup is pairing the right message with the right visual treatment. Because AI generates the headline, subtitle, and button alongside the layout, everything is built to work as a unit instead of being stitched together afterward.
4. Test and Iterate Faster
If the first result is not quite right, you simply refine your prompt and generate again. That makes it easy to try different angles, offers, and tones without starting over each time, which is exactly what you want when you are experimenting to find your best-converting message.
5. You Still Stay in Control
AI gives you a strong starting point, not a locked one. After it generates the design, you can switch on Conception avancée to fine-tune colors, width, typography, and button styling by hand. The result feels on-brand because you get the final say.
How to Create an Exit Intent Popup with AI Using NotificationX
Here is the full process, step by step. It is a freemium feature, so make sure you have NotificationX installé et activé on your WordPress website before you begin.
Step 1: Add a New Notification
From your WordPress dashboard, go to wp-admin → NotificationX and click Ajouter un nouveau at the top. This is where every popup starts.
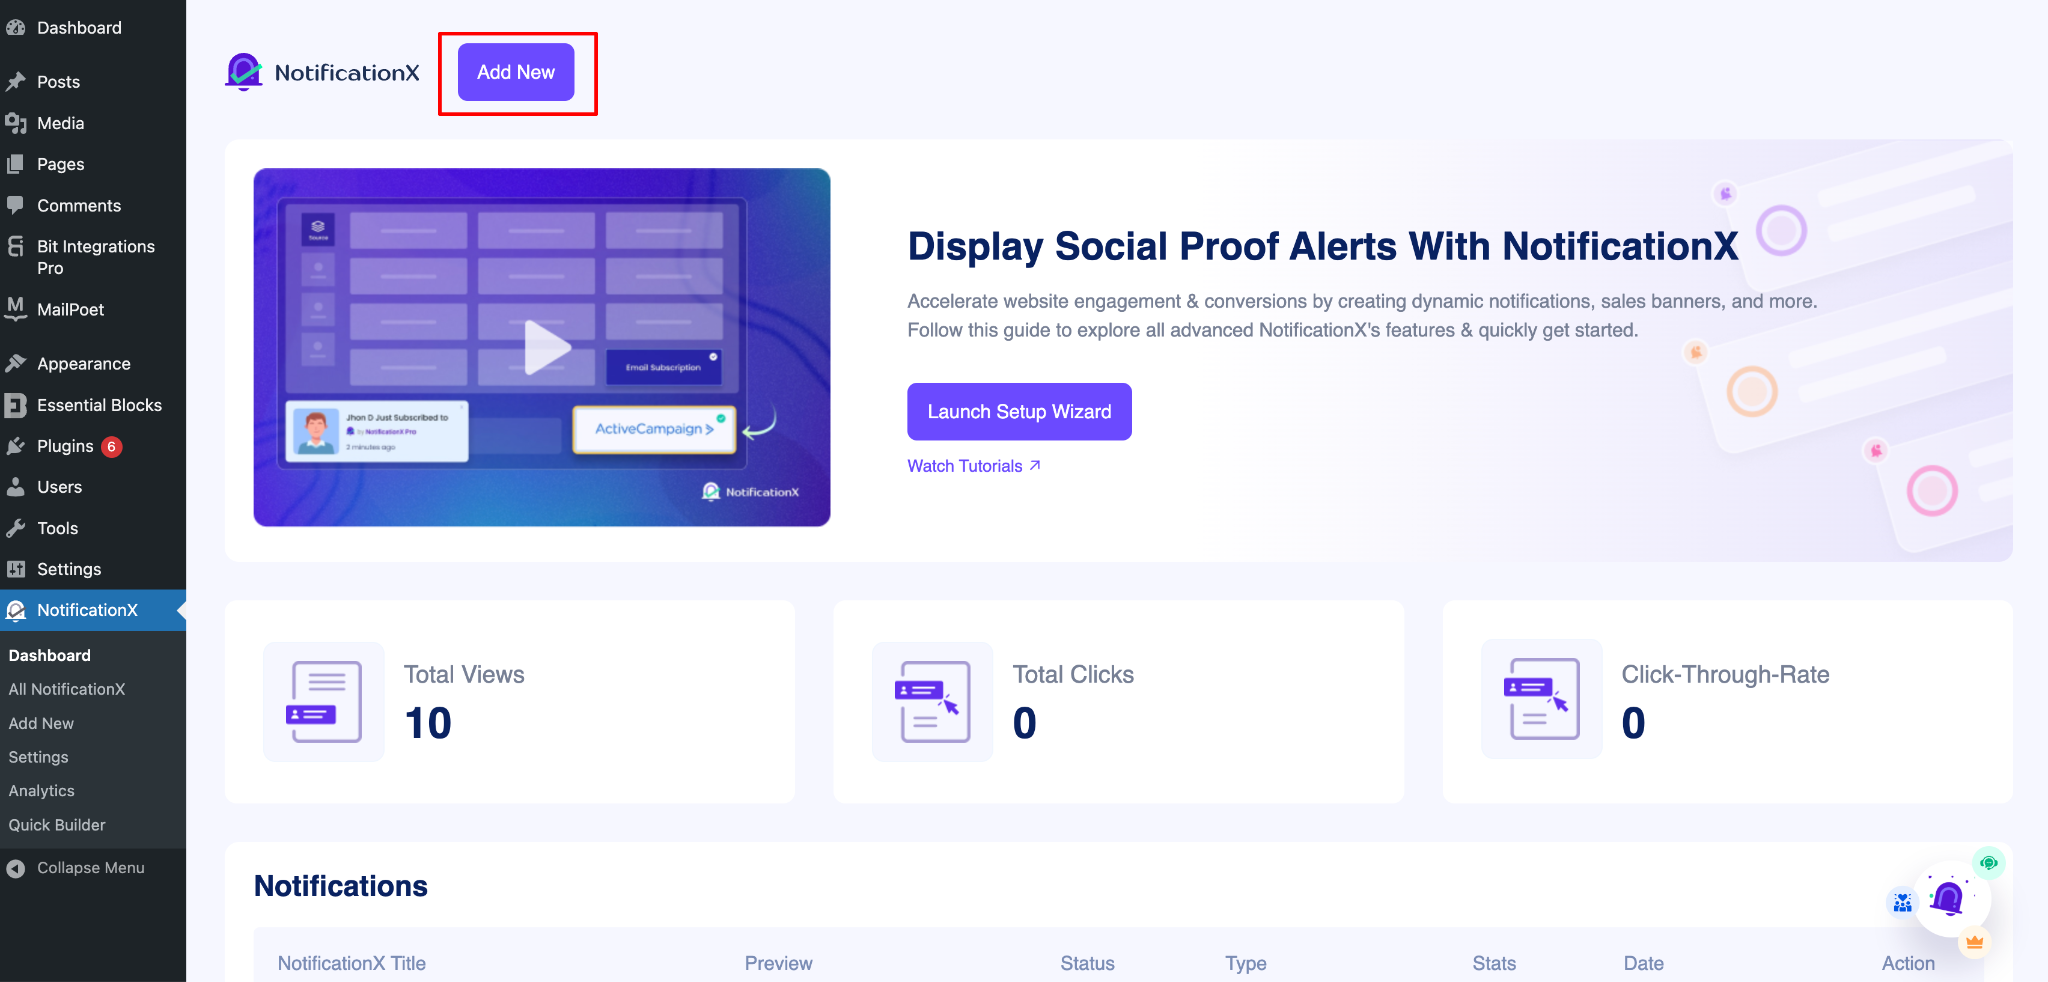
Step 2: Select Exit Intent Popup as Your Source
You will land on the La source tab. Give your notification a title if you like, then choose Exit Intent Popup as the source type.
Step 3: Describe Your Popup And Let AI Build It
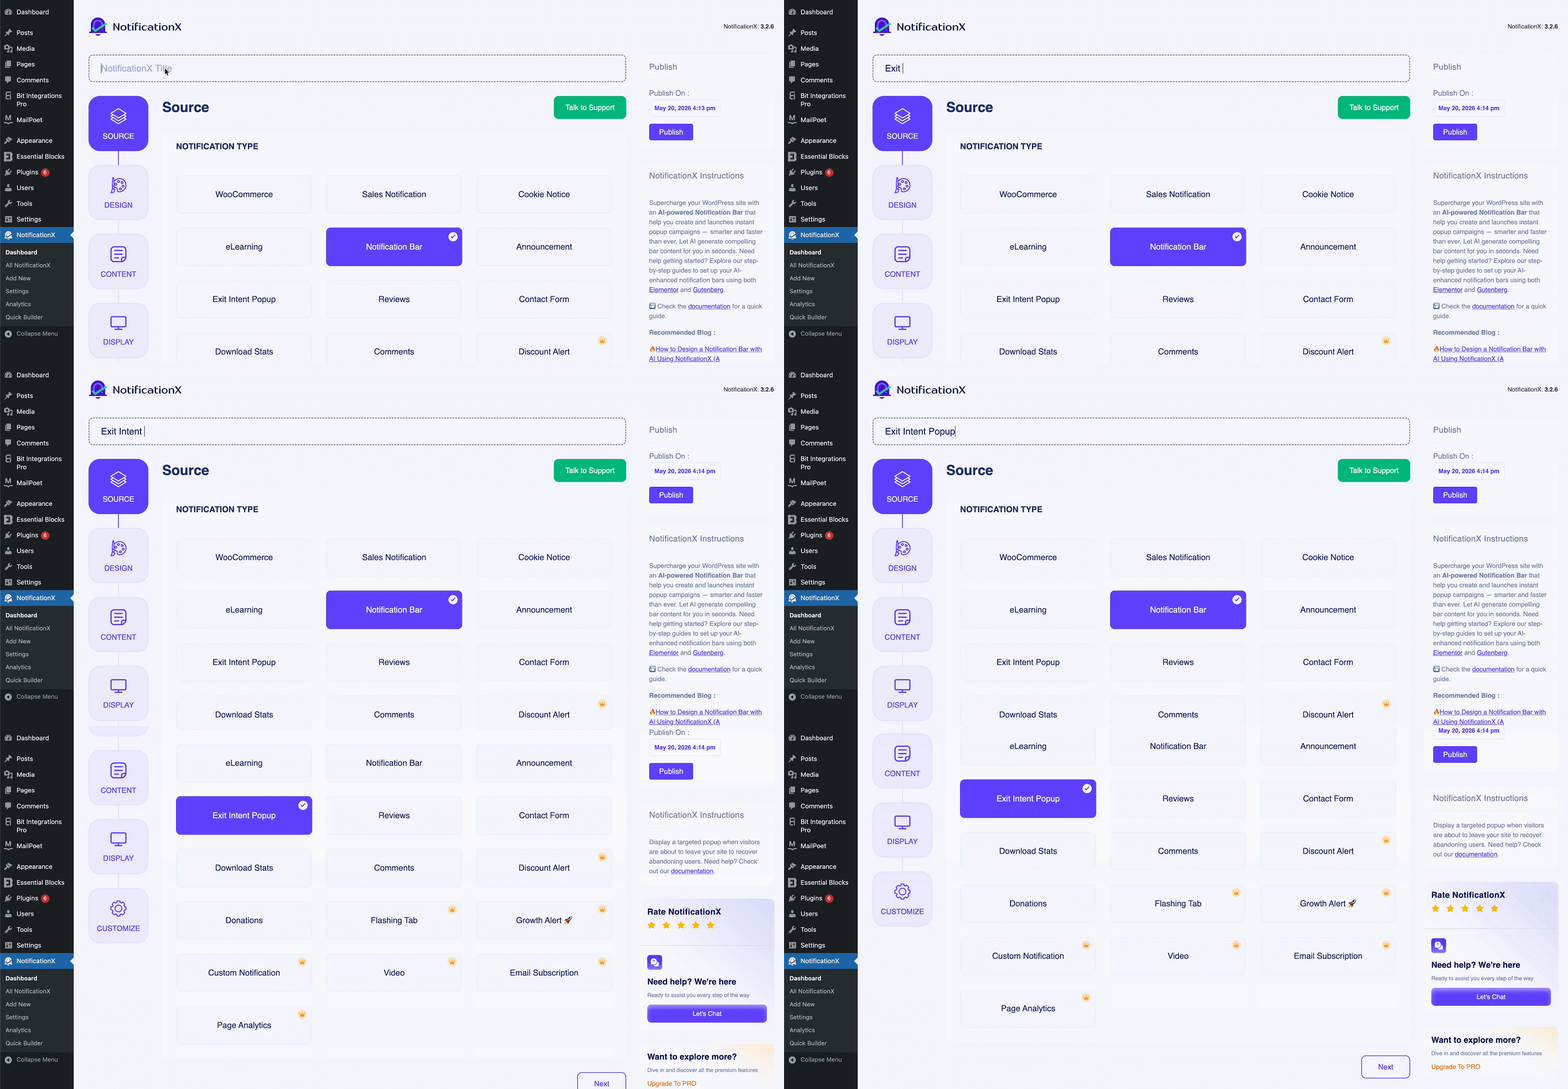
This is where AI does the work. Head to the Concevoir tab and find the Build with AI option. Type a prompt describing the popup you want, or pick one of the default prompts on the dashboard to get started.
Be specific about the offer, the tone, and the style. For example:
“Create a discount popup offering 20% off with a bold headline and a call-to-action button.”
Click the Generate icon, and within a few seconds AI produces a complete design, including the layout, colors, headline, subtitle, and button, all visible in the live preview. If it is not exactly what you pictured, adjust your prompt and generate again until you are happy.
Once you have a design you like, you can enable Conception avancée to fine-tune it manually. That includes the background color, overlay background color, popup width, and close button color, plus typography, font size and weight, message color, and full button styling such as color, radius, padding, and width.
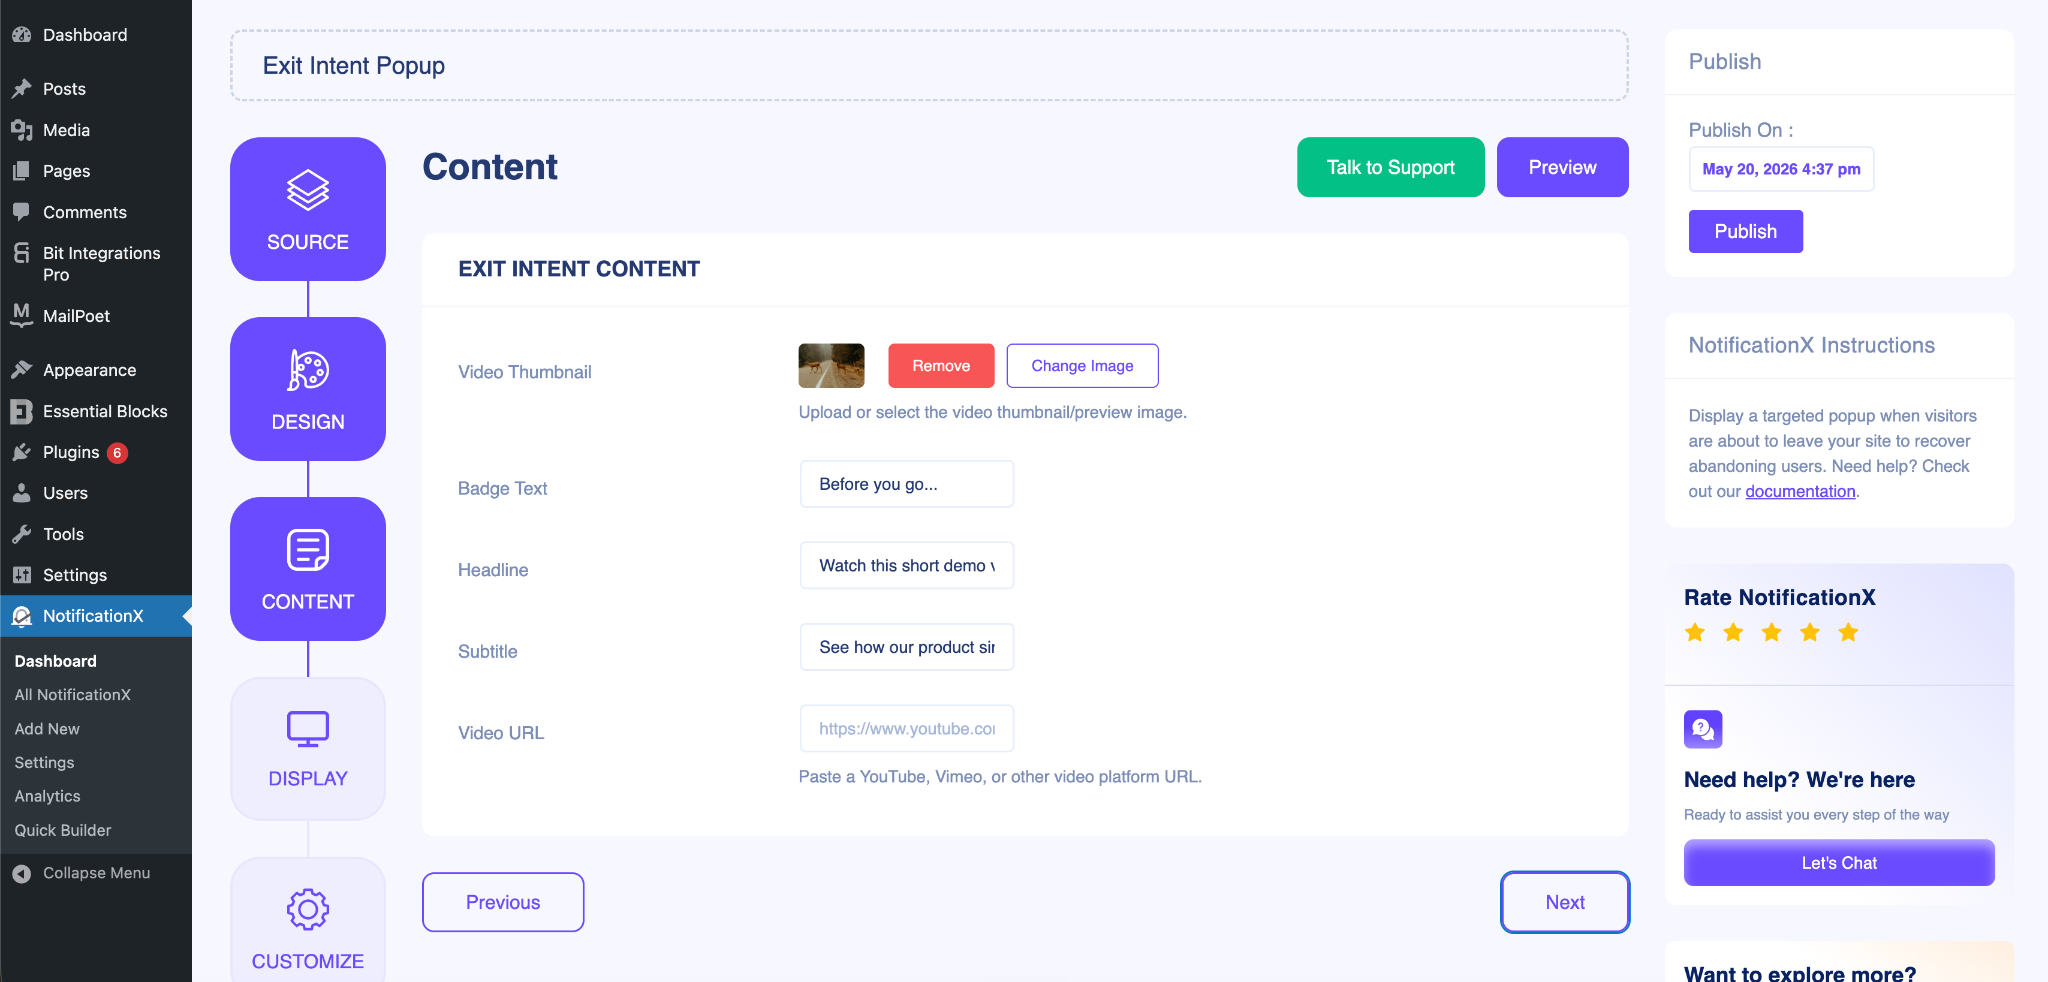
Step 4: Fine-Tune the Content
Click Prochain to reach the Contenu tab. Here you can review and edit the popup content, including the video thumbnail, badge text, headline, subtitle, and video URL. This is your chance to make sure the wording matches your campaign exactly.
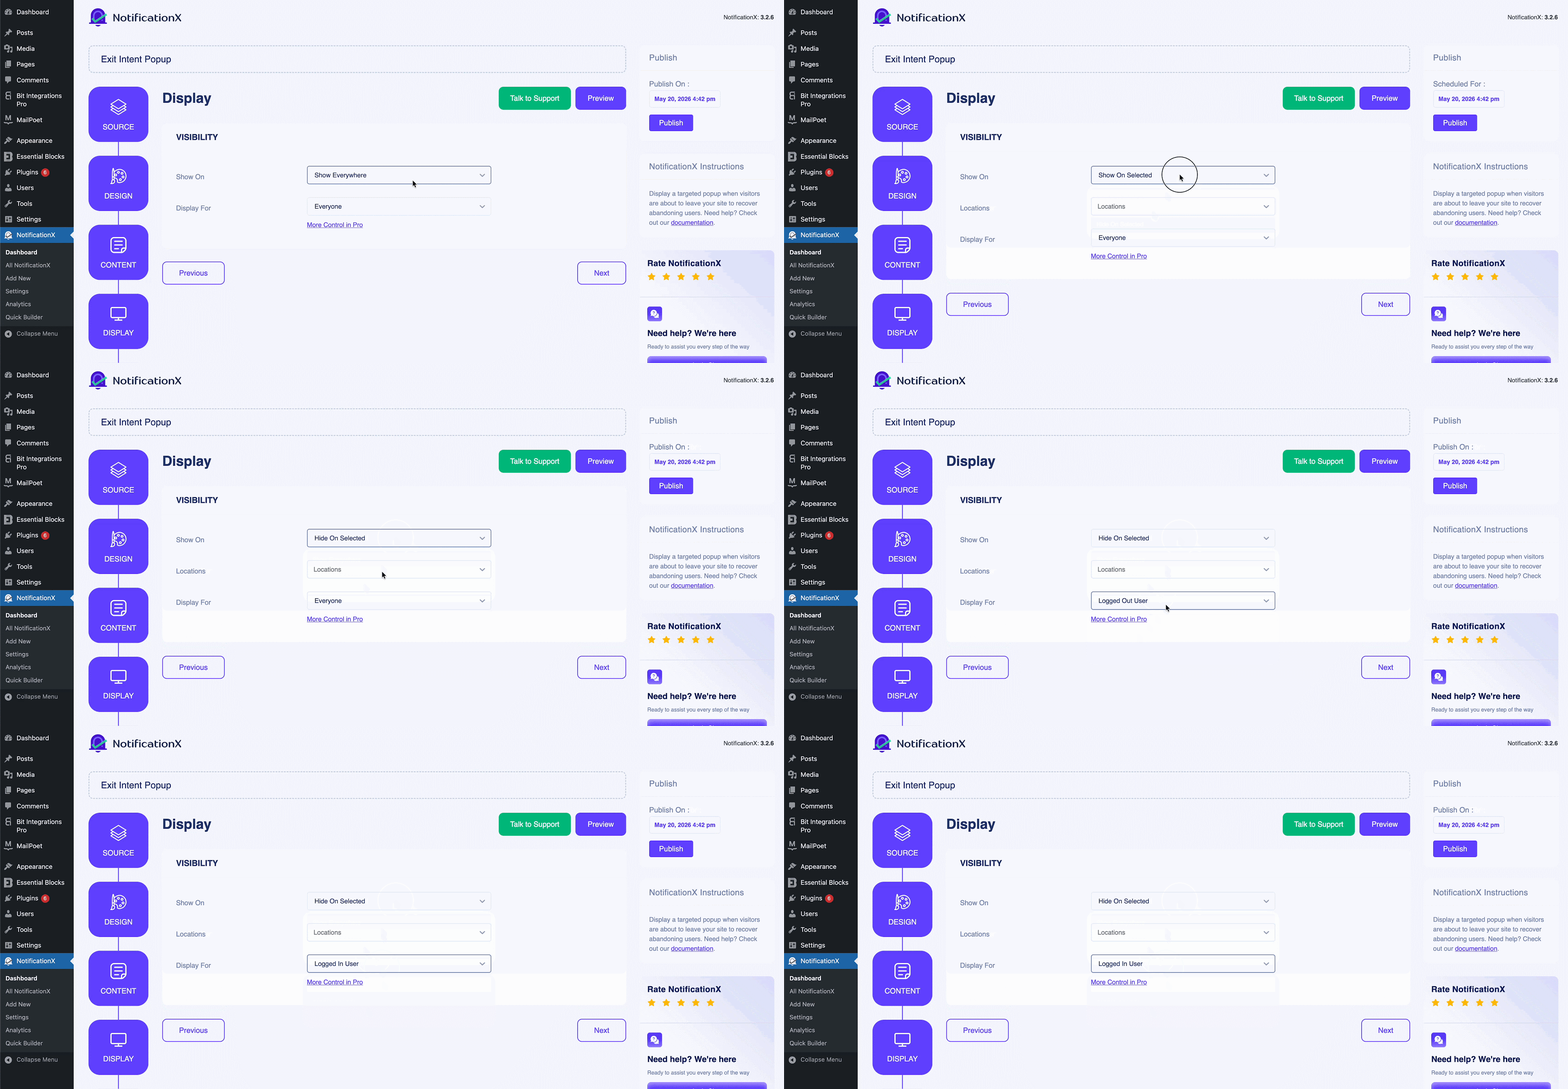
Step 5: Control the Visibility
On the Afficher tab, choose where you want to show or hide the popup across your website, and define which audience should see it. Targeting the right pages and visitors keeps your message relevant instead of generic.
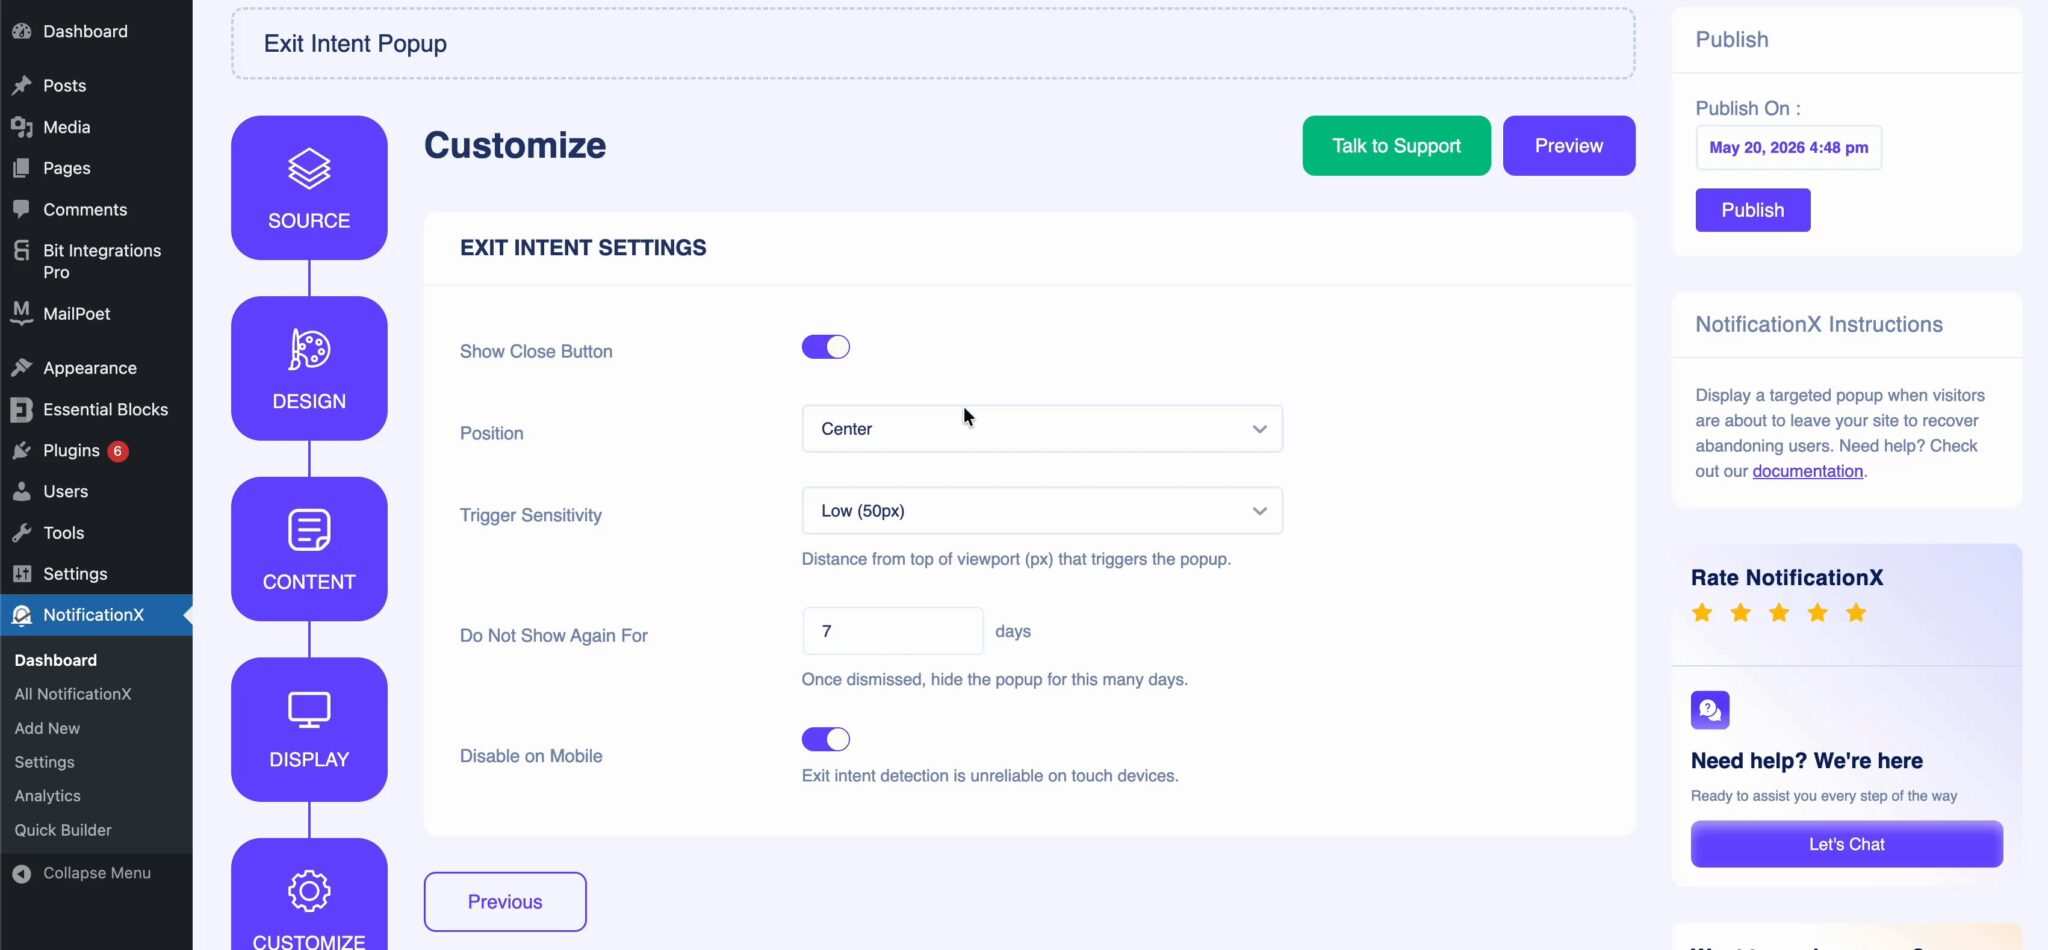
Step 6: Configure Appearance, Triggers, And Timing
Finally, open the Personnaliser tab. Here you can set the popup’s position on your site, adjust trigger sensitivity, control mobile visibility, and set a timing delay before the popup first appears. When everything looks right, click Publier to make it live.
For a more detailed walkthrough, check the full documentation on how to create an exit intent popup with AI.
How to Write AI Prompts That Generate Better Popups
The quality of your popup depends a lot on the quality of your prompt. A vague prompt gives you a generic result, while a specific one gives you something close to publish-ready. Keep these pointers in mind.
- Lead with the offer. State exactly what the visitor gets, such as “20% off the first order” or “a free SEO checklist,” so the headline and button reflect a real incentive.
- Set the tone. Words like bold, friendly, urgent, ou minimal steer the style. A flash-sale popup and a newsletter signup should not feel the same.
- Mention the key elements. If you want a bold headline, a short subtitle, and a single strong call-to-action, say so. AI builds what you ask for.
- Match it to the page. A cart-abandonment popup and a blog-exit popup need different messages, so hint at the context in your prompt.
- Iterate on purpose. If the first draft is close but not perfect, change one thing at a time in your prompt, such as the tone or the CTA wording, and regenerate to compare.
Best Use Cases for an AI Exit Intent Popup
Because AI makes creation so fast, it is easy to spin up a tailored popup for each situation instead of reusing one generic design everywhere. A few high-impact moments to target:
- Cart or checkout abandonment — Generate a discount or free-shipping offer to win back hesitant shoppers before they leave.
- Pricing page exits — Prompt a popup that offers a demo, consultation, or walkthrough for visitors who are seriously evaluating.
- Blog readers leaving — Create a lead-magnet popup offering a downloadable resource or newsletter signup that fits the article.
- Campaign and launch pushes — Quickly build a popup that spotlights a limited-time promotion, webinar, or product launch.
- Landing page drop-off — Recommend the next step, such as a related case study or product demo, before a visitor bounces.
Because each of these takes only a prompt and a few clicks, you can build purpose-fit popups for every stage of the funnel without the usual design overhead.
Turn Leaving Visitors Into Conversions, Faster
An exit intent popup has always been about meeting visitors at the last possible moment with something relevant and useful. With an AI-powered exit intent popup in NotificationX, you can now create those popups in seconds, describe your offer, let AI design it, refine it to match your brand, and publish, all without touching a line of code.
Start with one strong use case, write a clear prompt, and let AI handle the rest. Then test your message and watch more exits turn into opportunities.
Was this guide helpful? Do not forget to abonnez-vous à notre blog for more growth tips. And if you want to talk marketing with people who love this stuff, join our Communauté Facebook today.




 English
  Arabic
  Indonesian
  Spanish
  Portuguese
  German
  Dutch
Dutch  Russian
  Hindi
Hindi  French
  Japanese
  Chinese
  Vietnamese
  Malay
Malay