If you want to boost conversions, one of the easiest ways to do this is by using different social proof popup alerts on your site. But, to do that, you need to be able to control their timing. With the centralized queue management feature in NotificationX, this is very easy to do. In today’s post, we will show you how to use this powerful feature in three easy steps.
Table of Contents
How Does A Centralized Queue Help You Manage Social Proof Popups?
A centralized queue system lets you control the timing of your social proof popup alerts. This feature automatically checks for the latest notification alerts. This way, it makes sure that all of your social proof popup alerts are displayed in sequence.
For example, suppose one customer has purchased a product. Two minutes later, another customer leaves a review for your product. Now, you can display both of these notifications as social proof popup on the same section of your site. You can manually set the time for each social proof popup so that they do not overlap. But it will take too much time and effort. Or, you can do it using centralized queue management. This powerful feature is available in NotificationX, and is called ‘Global Queue Management’.
With this feature, you only need to configure the timing in one place . It will then display your social proof popup alerts in sequential order on your website. This way, you will not have to worry about displaying the most recent social proof popup alerts by yourself. The centralized queue management system in NotificationX will take care of it.
How To Manage Social Proof Popups With Centralized Queue In NotificationX?
If you do not want to waste time configuring each social proof popup on your website, then you are in the right place. Read on below to find out how you can use NotificationX to manage centralized social proof popups queue.
To get started, you must have NotificationX installed and activated on your website. Since the ‘Global Queue Management’ option is a premium feature, you will need to install NotificationX Pro on your site. Once that’s done, follow these step-by-step guidelines given below.
Step 1: Configure Settings For Global Queue Management In NotificationX
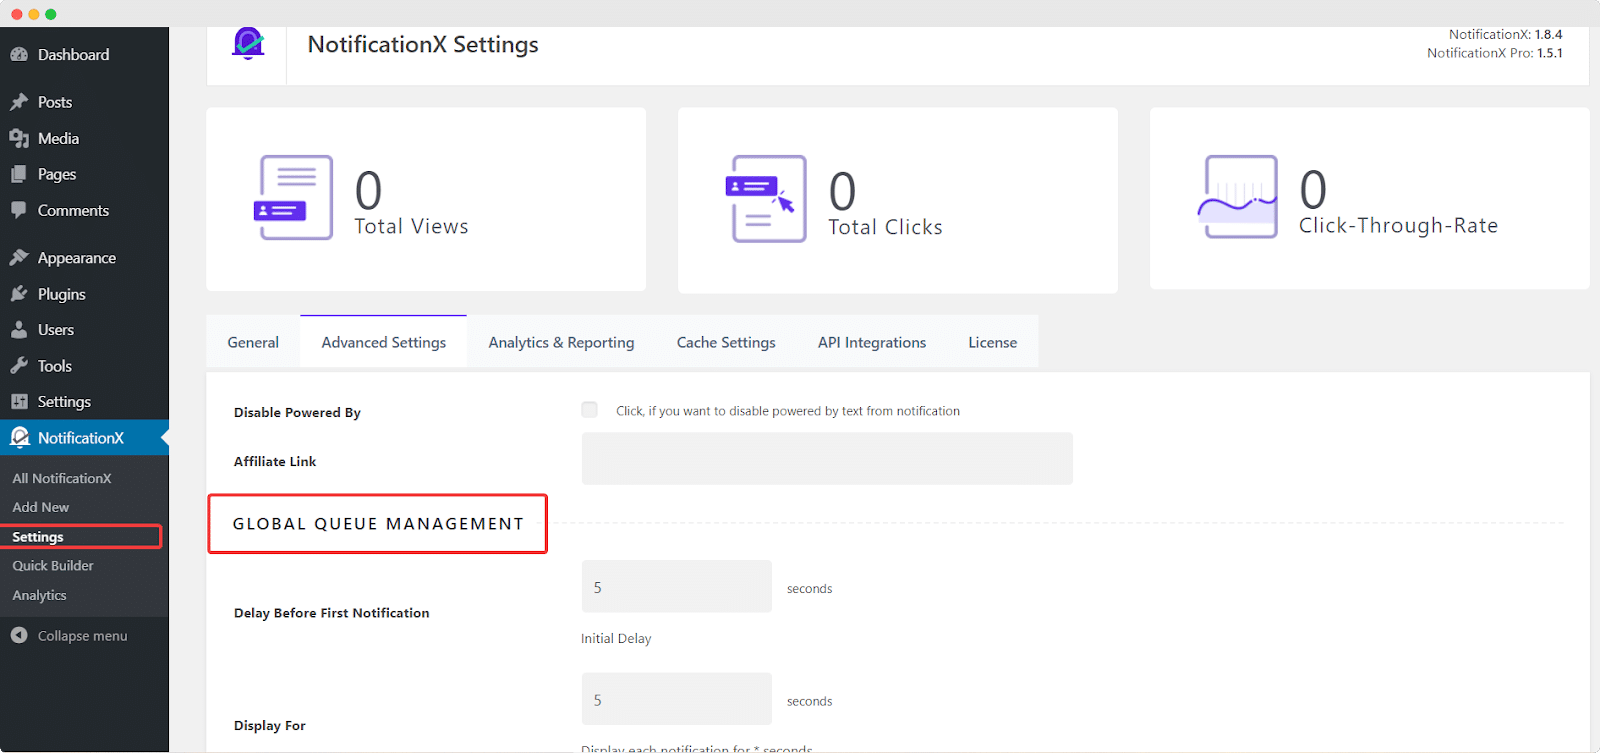
To configure the settings for the centralized queue, head over to your WordPress dashboard. Next, you will need to navigate to NotificationX→ Advanced Settings→ Global Queue Management. You will see there are several options here as shown below. We will go over what these options can do for you in the next step.
Step 2: Set The Timing For Global Queue Management
You can set the timing for your social proof popups from the options under ‘Global Queue Management’ section. Here, you can set the number of seconds to delay before the first notification alert on your site. You can also control how long your social proof popups should be displayed. For different notification alerts, you can control the time delay between each popup.
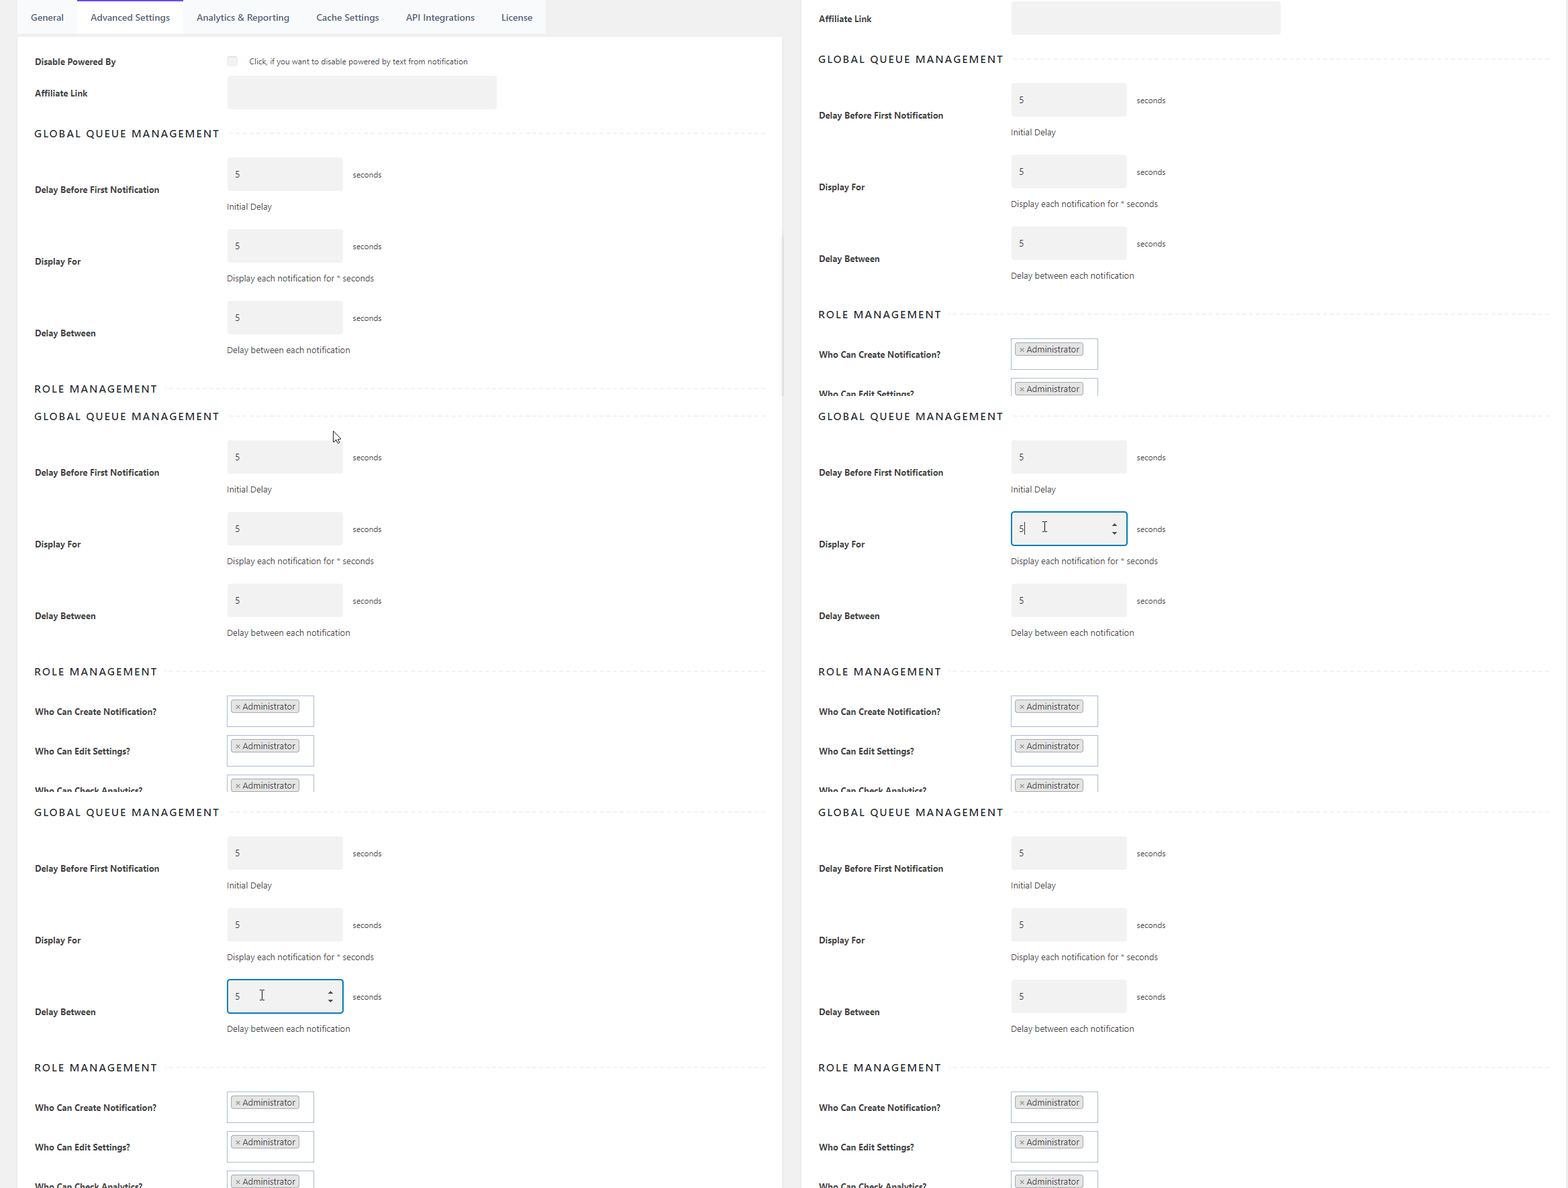
Change these settings to suit your personal preference. If you are done, then give yourself a pat on the back. You have successfully set the timing for global queue management. Now all that’s left to do is enable the global queue for each social proof popup on your website. Move on to the next step to find out how that’s done.
Step 3: Enable Global Queue In NotificationX
To manage the centralized social proof popup queue you need to enable the option for each popup. You can do this with a single click of your mouse. When you are creating a new notification alert in NotificationX, you can enable the global queue from the ‘Customize’ tab as shown below. All you have to do is check the ‘Enable Global Queue’ option.
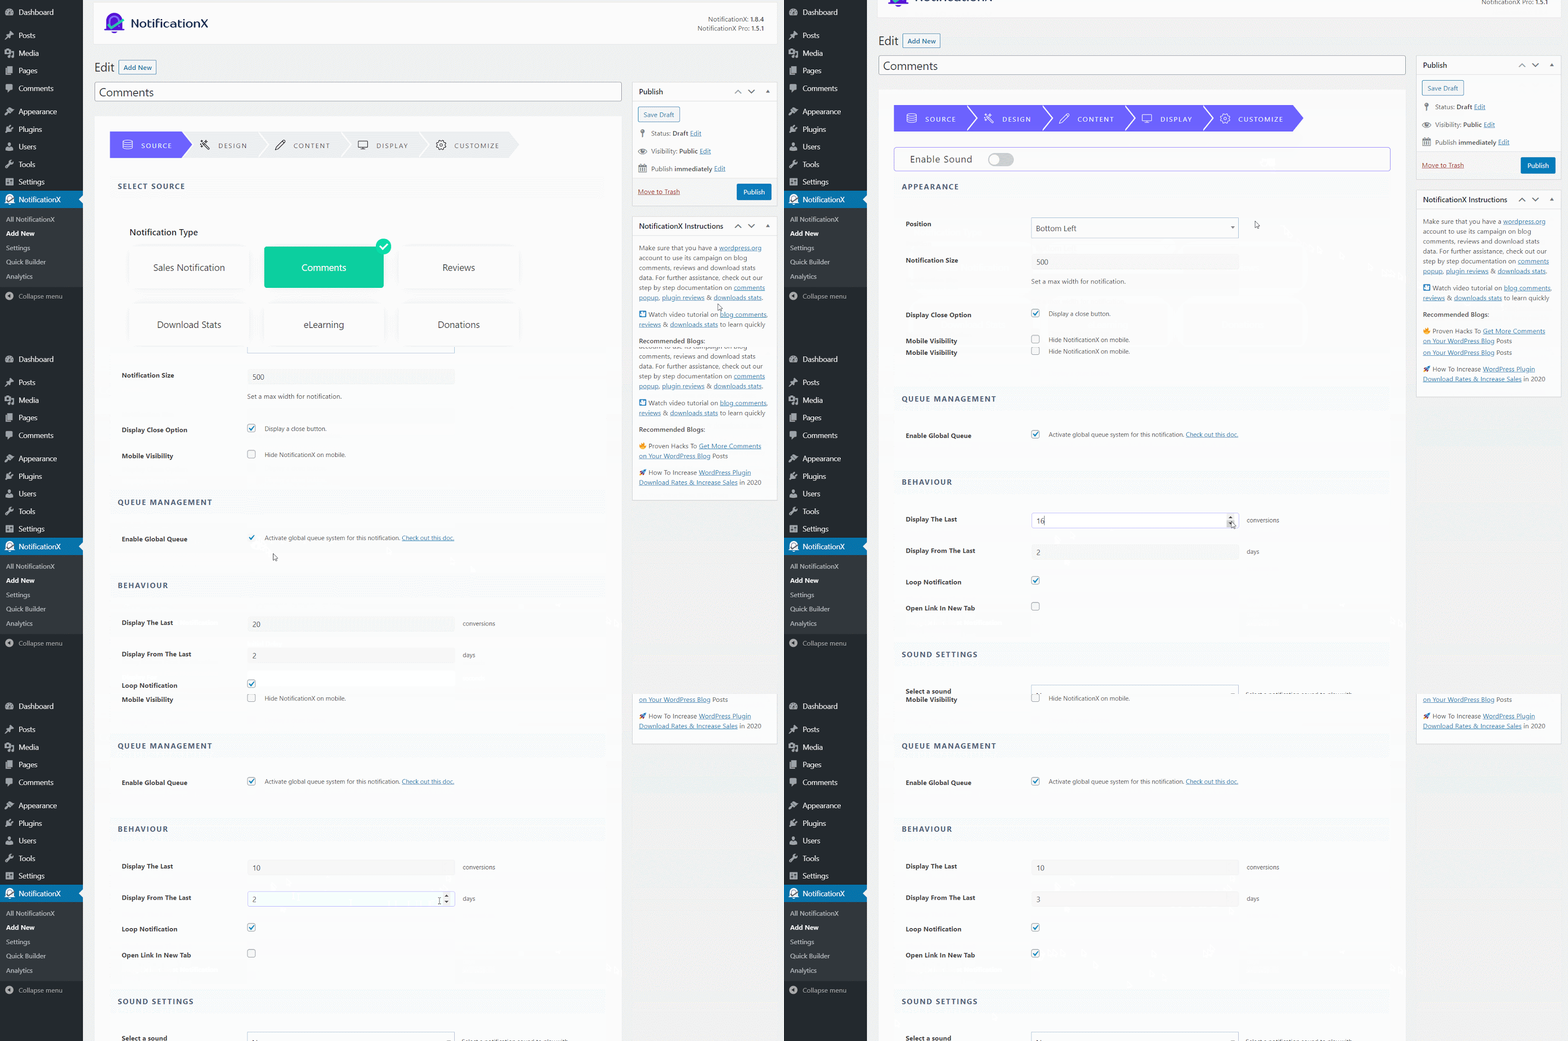
Afterwards, you can configure the behavior of your social proof popup. You can choose the number of most recent conversions. If you want, you can also control the number of days to display alerts from.
When you are happy with your settings, publish or update or your notification alert. NotificationX will automatically display your social proof popups in sequential order as per your settings.
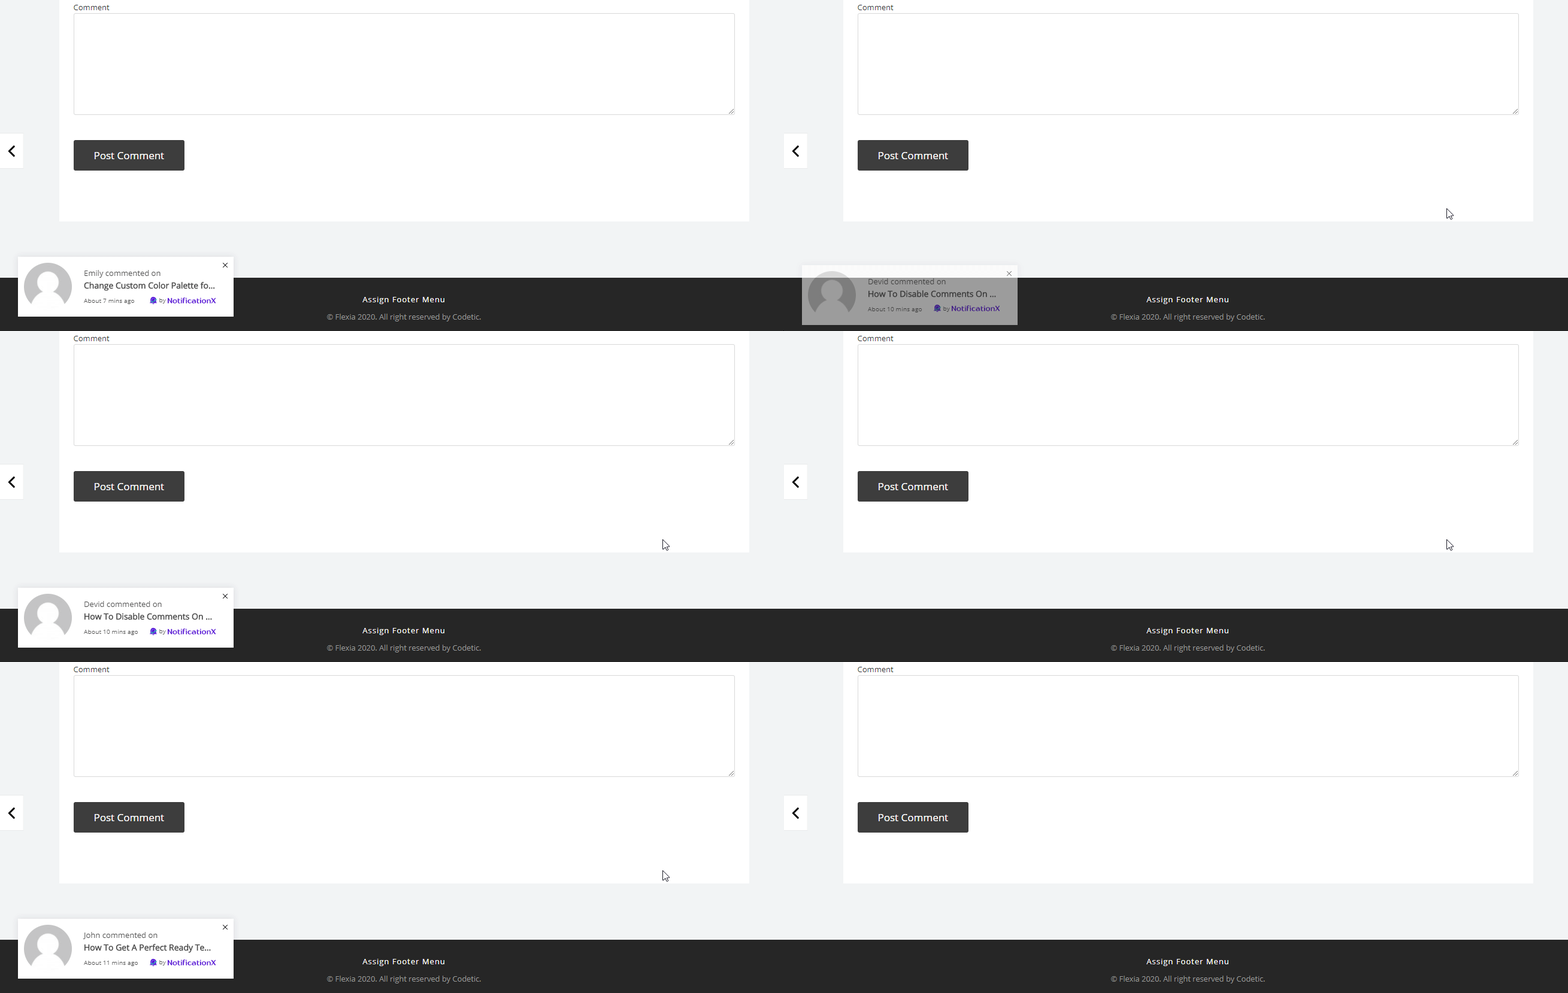
Just like that, you have managed a centralized social proof popup queue in NotificationX in less than 5 minutes. Amazing, isn’t it? Now you can sit back and relax, because NotificationX will display all of your alerts in sequential order.
Enjoyed this post? Try out this amazing centralized social proof popup queue management with NotificationX Pro. See it in action for yourself, and share your experience with us in the comments below. Feel free to contact our support team, or join our Facebook Community if you need any assistance.


